Authentication & SSO
This section gives an overview of the authentication methods in NocoDB.
Email and password based
This is the default authentication method in NocoDB. It uses a form. Users sign up with an email and a password. Then they log in with the same credentials.
Two-Factor Authentication (2FA)
Two-factor authentication adds a second layer of security to your account. In addition to your password, you must enter a time-based verification code from an authenticator app. After you enable it, you need your password and a 6-digit code to sign in.
To set up 2FA, refer to Two-Factor Authentication.
Single Sign On (SSO)
SSO is a session and user authentication service. With SSO, a user uses one set of login credentials to access multiple applications. The service authenticates the user for all the applications that the user has rights to. When the user changes applications in the same session, SSO does not ask for credentials again.
SSO works through a connection to an identity provider (IdP). The IdP stores and manages the digital identities of users in the digital or cloud-based ecosystem. SSO uses protocols like the Security Assertion Markup Language (SAML 2.0), as NocoDB does. With these protocols, SSO exchanges authentication data securely between the identity provider and the service providers.
Google OAuth
OAuth is short for Open Authorization. Google OAuth is a widely used, standard protocol for secure authentication and authorization, especially for web and mobile applications. Google developed it. With OAuth, users give third-party applications limited access to their resources, and do not show their credentials. This authorization framework uses token-based authentication. Users log in with their Google credentials, and developers get an access token to use Google APIs for the user.
To integrate with Google OAuth, refer to Google OAuth.
Security Assertion Markup Language (SAML)
The Security Assertion Markup Language (SAML) is an important protocol for secure authentication and authorization. It was developed to enable Single Sign-On (SSO). SAML exchanges authentication and authorization data between an identity provider (IdP) and a service provider (SP). This XML-based protocol transfers user identity information securely. Thus users can access multiple applications and services with one set of credentials. SAML uses a trust model: the identity provider asserts the identity of the user to the service provider. The service provider then gives or refuses access based on these assertions.
To integrate with popular SAML providers, refer to these pages.
OpenID Connect (OIDC)
The OpenID Connect (OIDC) protocol is a modern authentication layer on top of the OAuth 2.0 framework. It solves user authentication and authorization problems in web and mobile applications. OIDC gives applications a standard and secure way to verify the identity of users. OIDC uses JSON Web Tokens (JWTs) to exchange user identity information between the identity provider (IdP) and the Service provider. The Service provider is usually a web application.
To integrate with popular OIDC providers, refer to these pages.
Accessing the SSO Configuration Menu
The location of the SSO configuration menu depends on your plan.
| Plan | Location |
|---|---|
| Business plan | The workspace Settings section |
| Enterprise plan | The Admin Panel |
To find and configure SSO, do the steps for your plan.
Business Plan
- Click Settings in the workspace sidebar.
- Open the Single Sign-On (SSO) tab.
Here, you can manage your SSO settings. You can add new identity providers and configure the current ones.
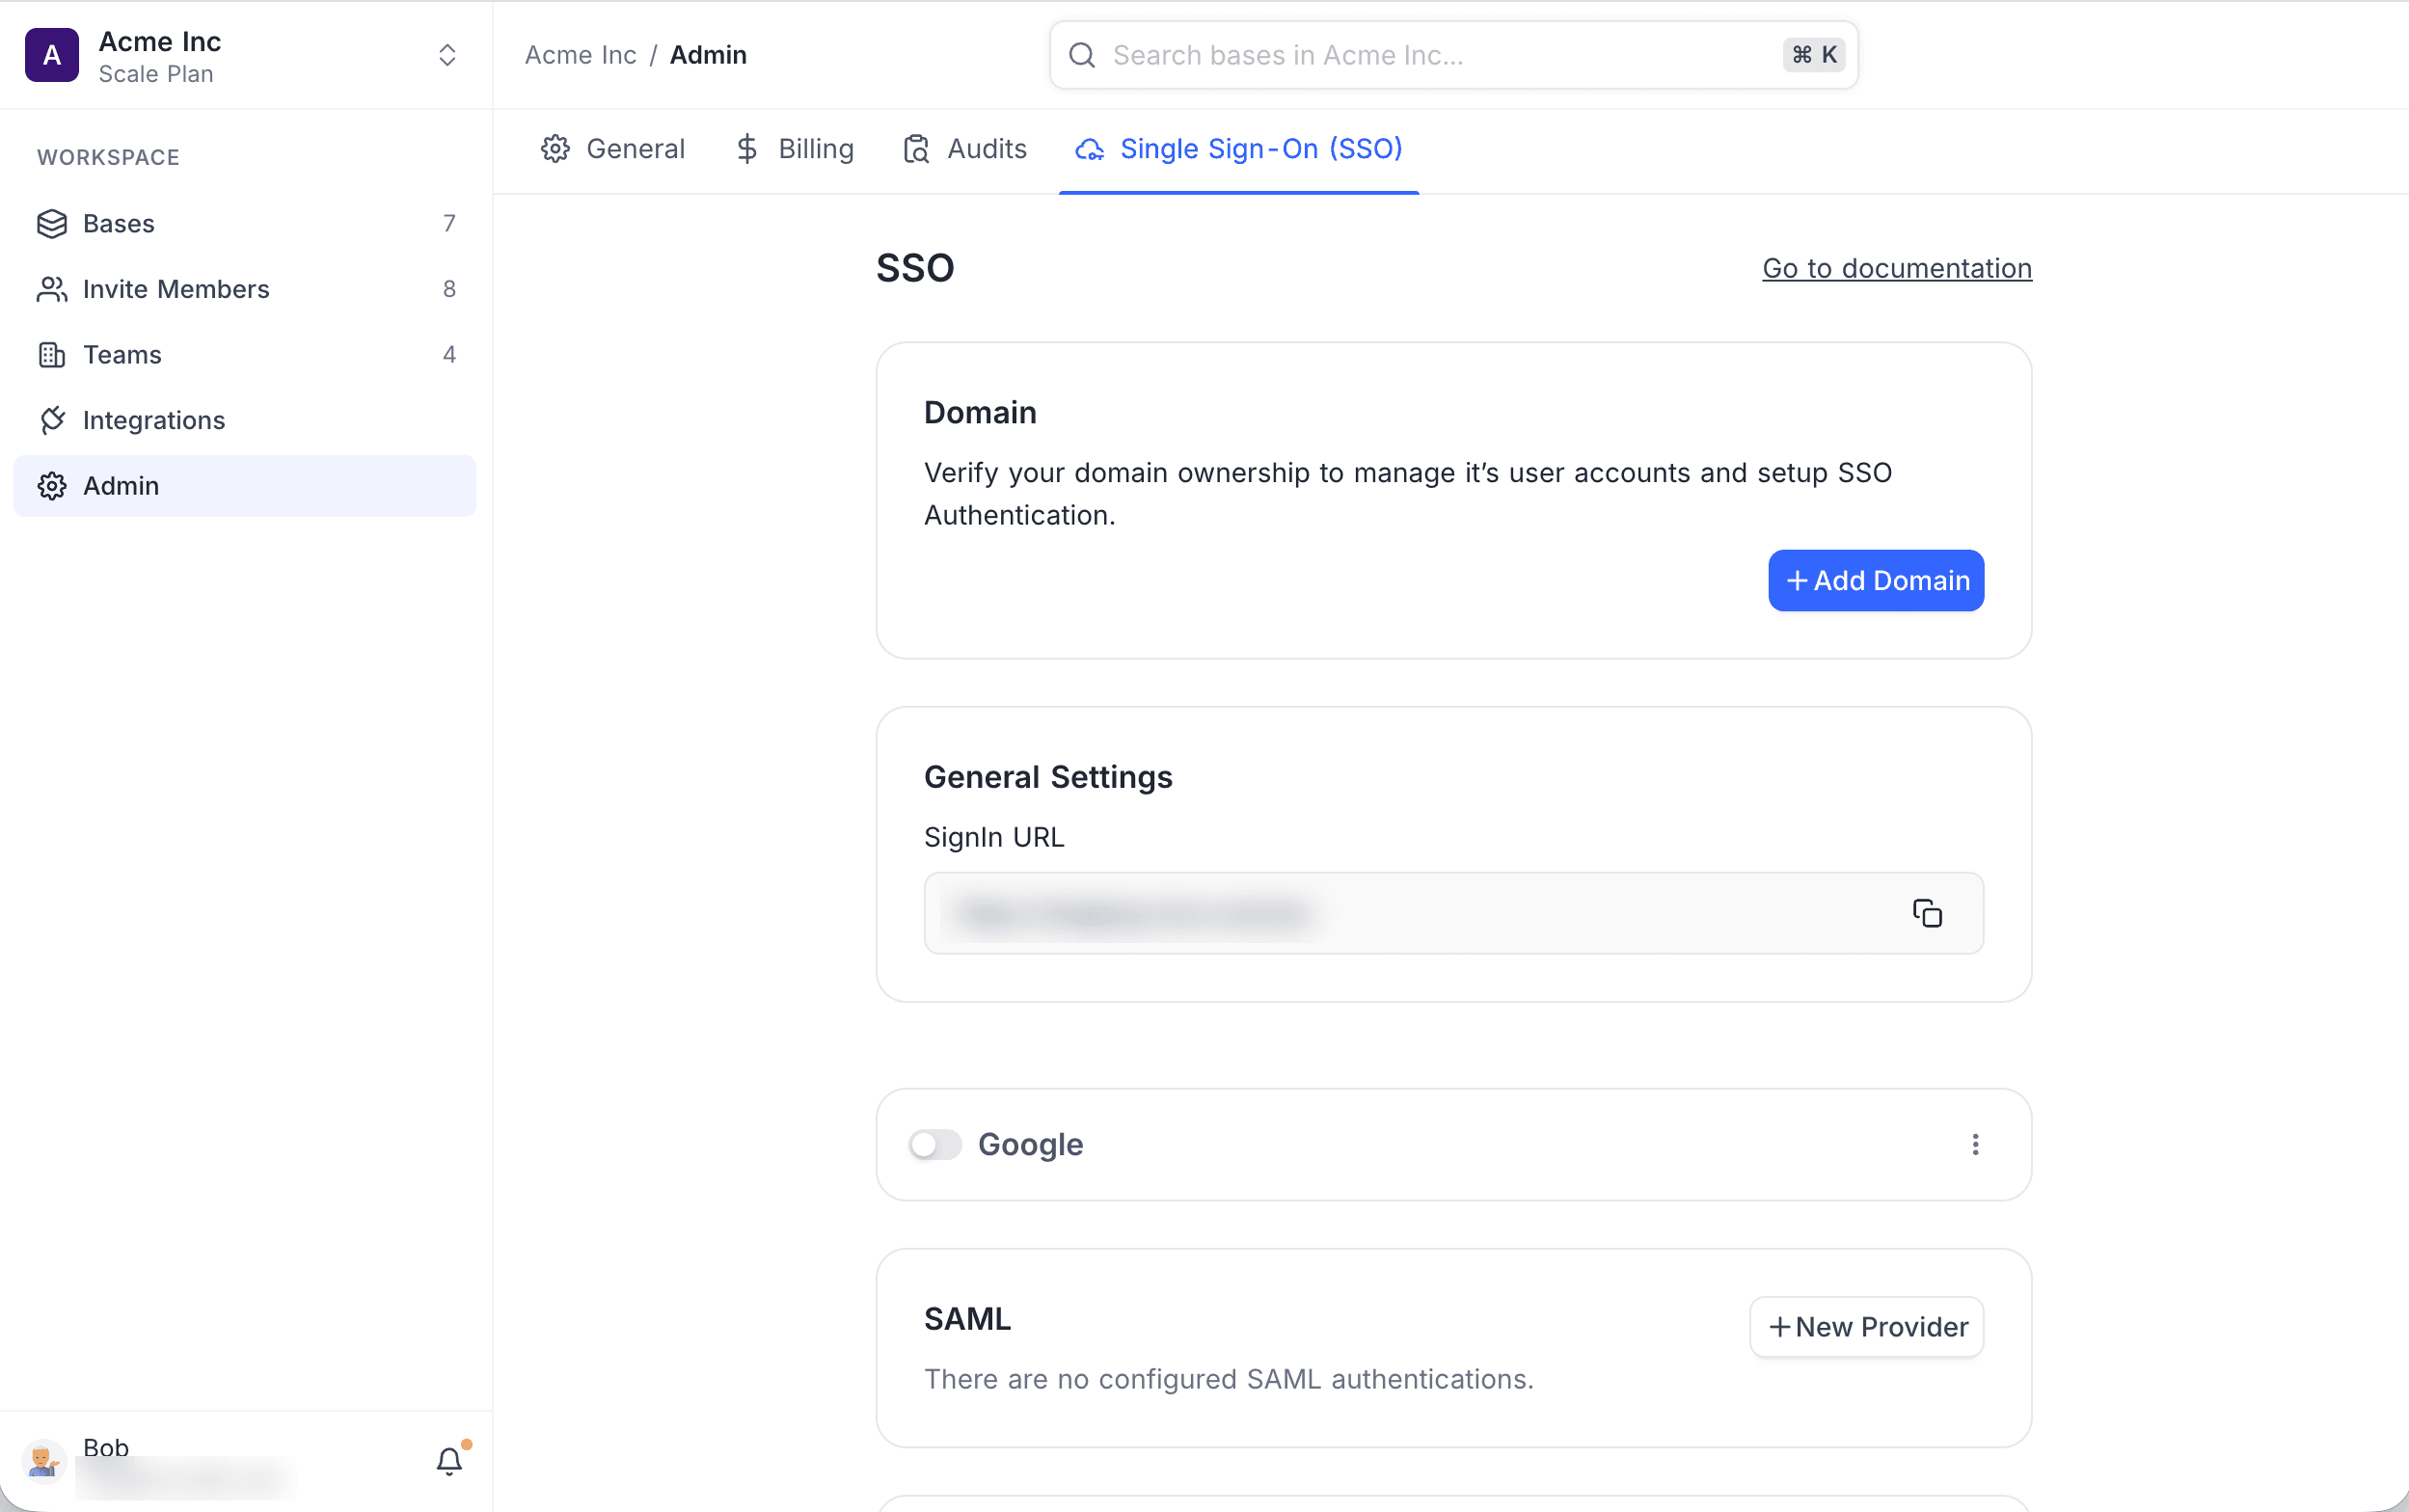
Alternatively, open the SSO configuration screen directly with this URL:
https://app.nocodb.com/{workspaceId}/sso
Enterprise Plan
For users on the Enterprise plan, the SSO configuration menu is in Account Settings. Here you get more advanced SSO configuration and management options for the full organization.
- In the bottom left corner of the NocoDB interface, click the user icon.
- From the menu, select Account Settings.
- Go to the Single Sign-on (SSO) tab.
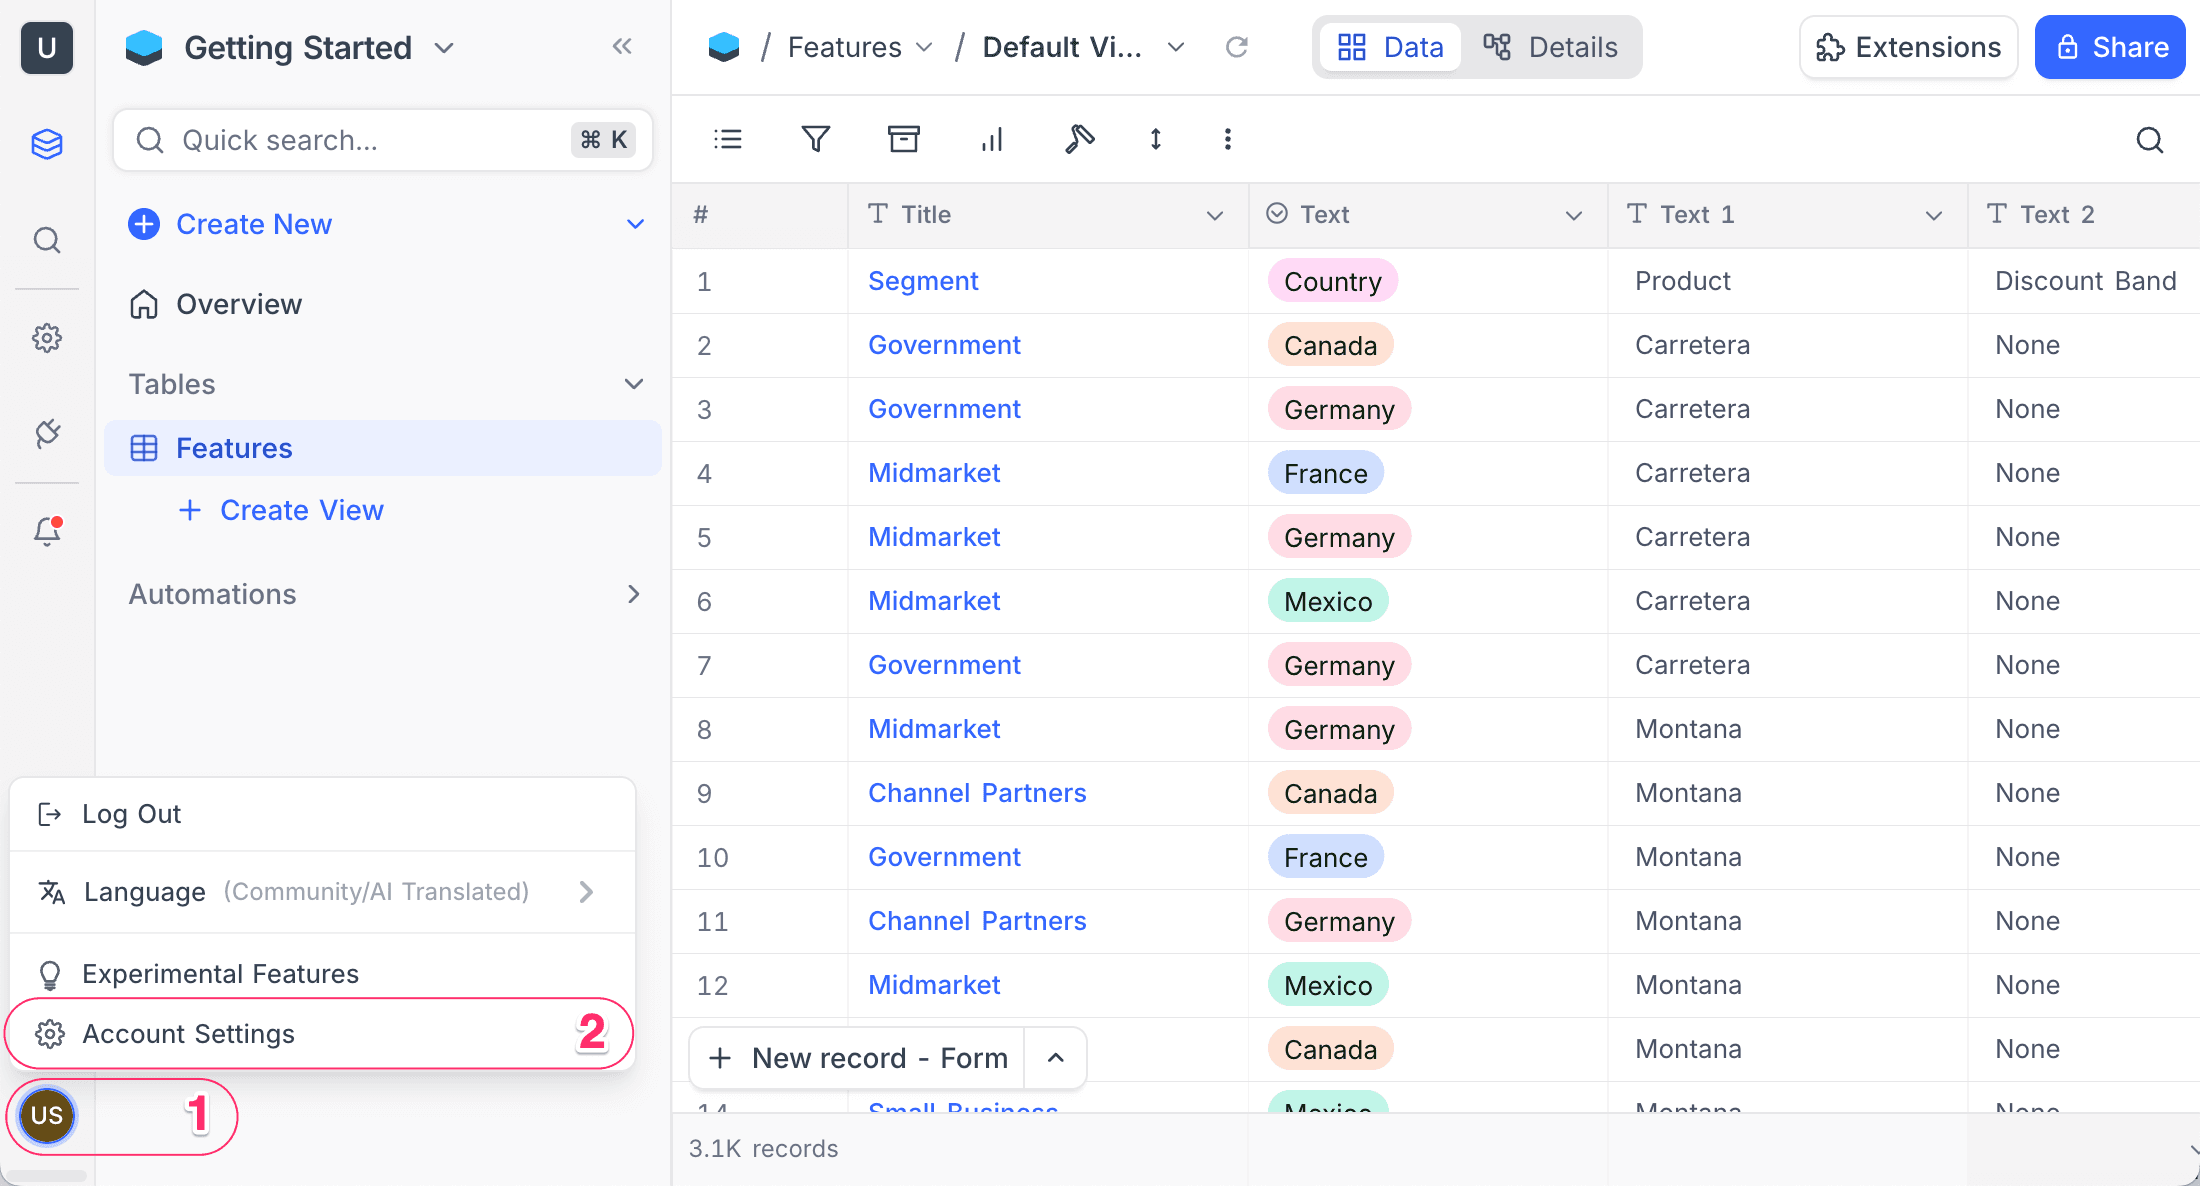
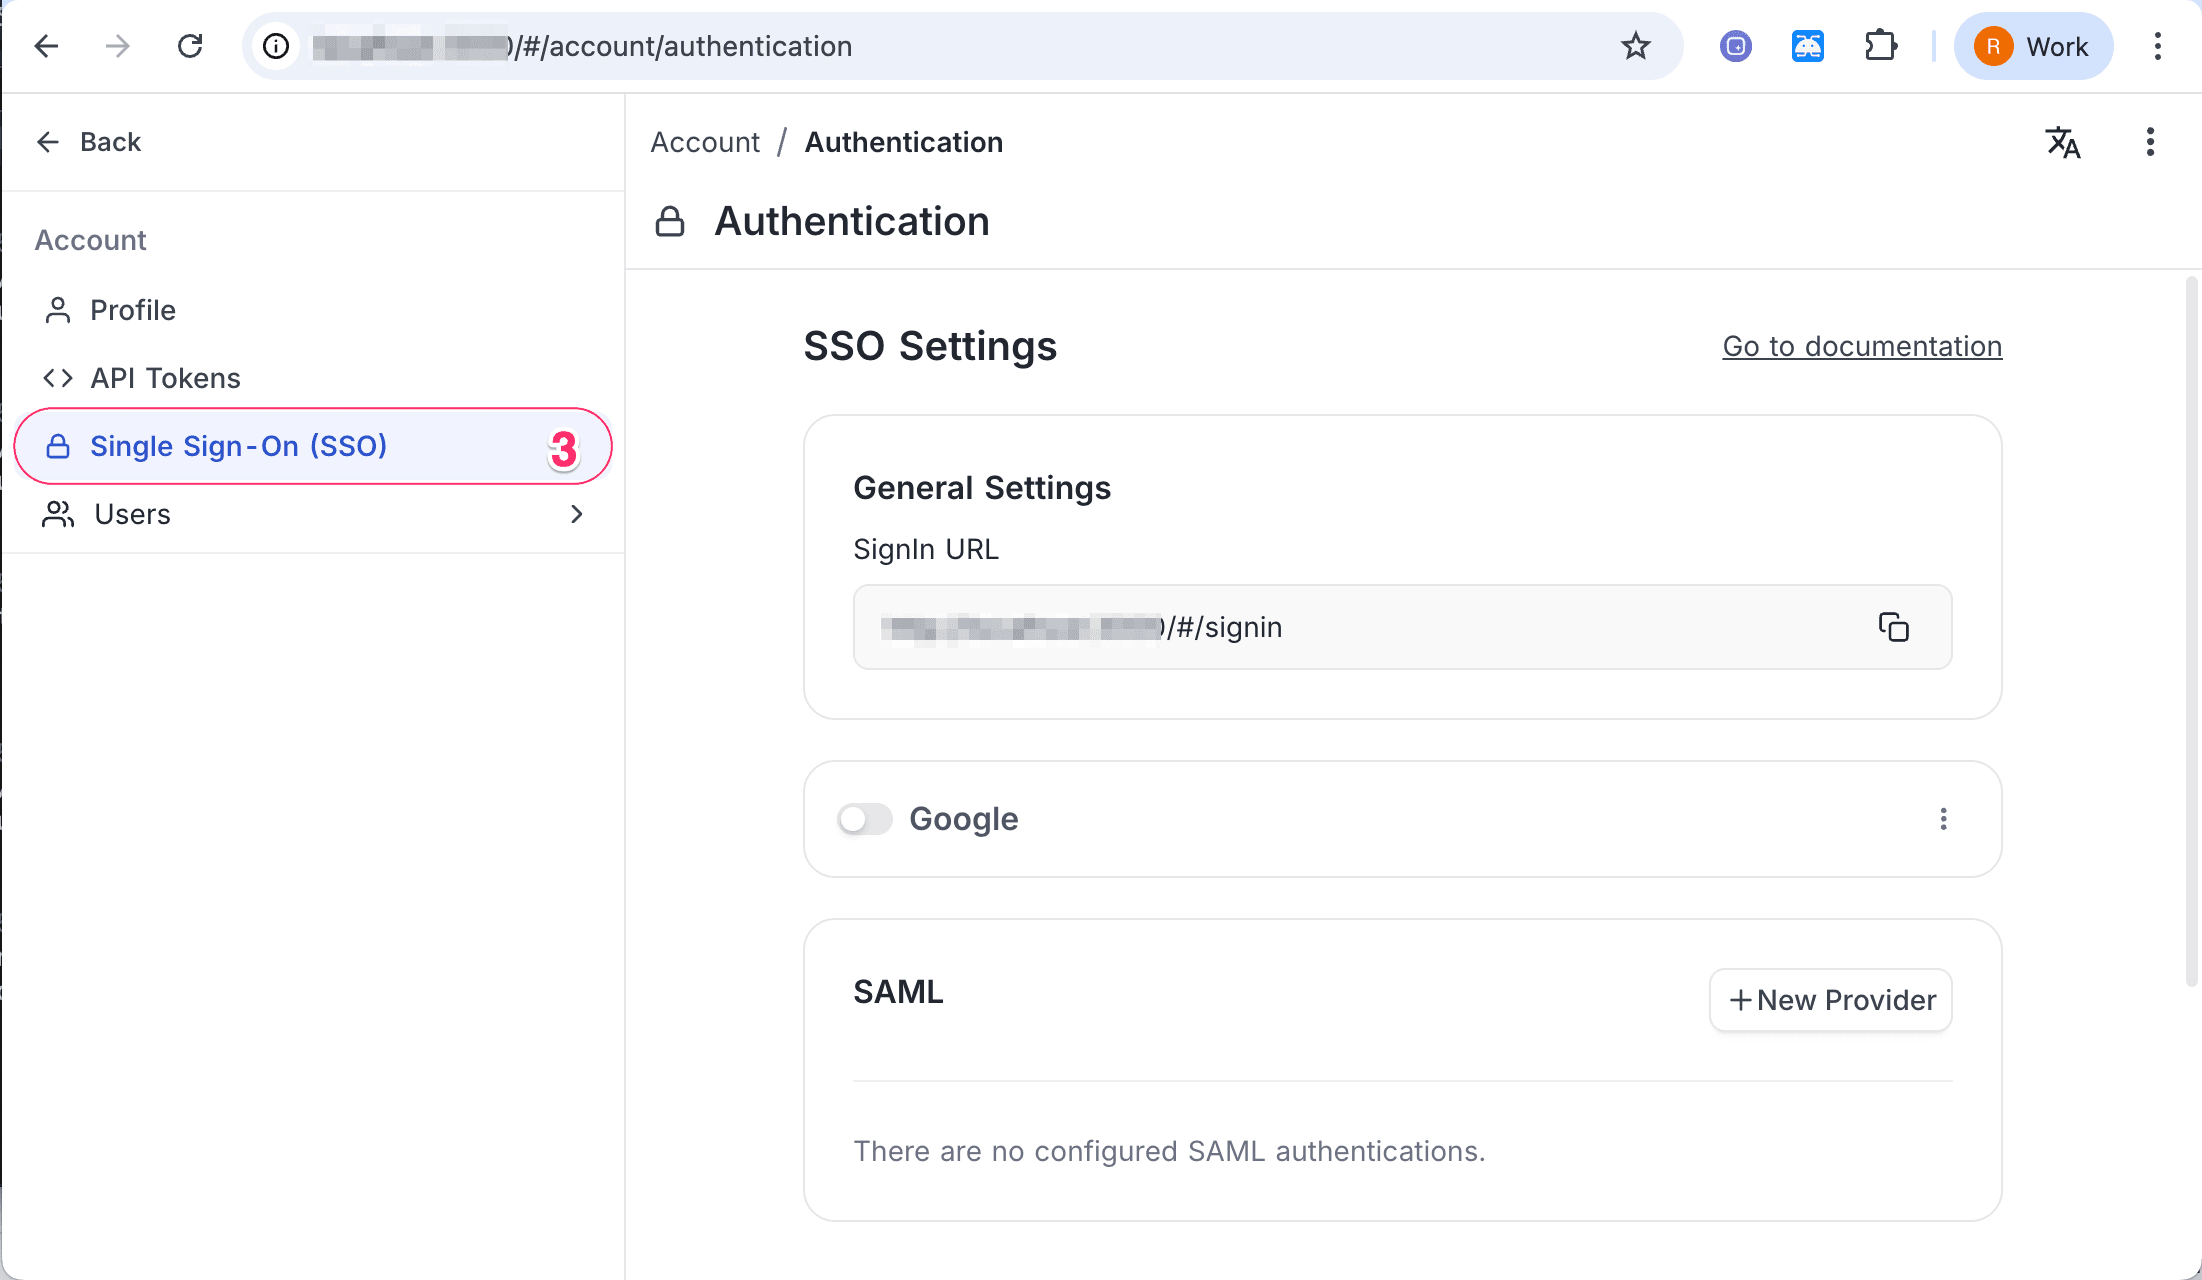
Alternatively, open the SSO configuration screen directly with this URL:
https://your-domain/#/account/authentication
Domain Verification
For NocoDB Cloud users (both Business and Enterprise plans), domain verification is necessary before you configure SSO providers. Thus only users with email addresses from your verified domain can access the workspace through SSO.
Domain Verification Process:
- Open the domain verification section:
- Business Plan: In the workspace sidebar, go to Settings > Single Sign-On (SSO). Use the Domain section.
- Enterprise Plan: Go to Account Settings > Authentication > Domain Verification.
- Enter your domain (for example,
example.com). - Copy the TXT record that NocoDB gives.
- Add the TXT record to the DNS of your domain, through your registrar or DNS provider.
- Wait for DNS propagation. This can take from a few minutes to several hours.
- Click the Verify button in NocoDB. NocoDB confirms that you own the domain.
After verification, only users with email addresses in your verified domain(s) can sign in through SSO. For example, if you verified example.com, only users with emails like user@example.com can sign in through the SSO page.
Allow email & password sign-in alongside SSO
By default, after you configure SSO, the sign-in page hides the email and password sign-in form. This enforces SSO. The Allow email & password sign-in alongside SSO setting (default off) controls this behavior:
| Setting | Result |
|---|---|
| Off (default) | When you configure SSO, the email and password form is hidden. Users must sign in through the configured identity provider. |
| On | The sign-in page shows the email and password sign-in form together with the SSO option. |
Manage this setting in Account Settings > Authentication, below General Settings.
SCIM Provisioning
SCIM (System for Cross-domain Identity Management) v2.0 provisions users and groups automatically from your identity provider to NocoDB. When you configure SCIM together with SSO, SCIM automates the full identity lifecycle without manual work. This lifecycle goes from onboarding (to create organization members) to offboarding (to deactivate access).
The Org Admin configures SCIM from the Admin Panel. NocoDB supports SCIM provisioning with Okta and Azure AD (Entra ID). For a full overview of SCIM features and configuration, refer to the SCIM Provisioning guide.
Good to know
- After SSO is enabled for a workspace, only some tokens have API access. These are the tokens generated after sign-in through the configured identity provider (IdP). Tokens created before SSO was enabled do not work for that workspace. Generate them again in an SSO-authenticated session. Know more.
Availability
- For SSO access, reach out to sales team.
Last updated on