SCIM
Overview
SCIM (System for Cross-domain Identity Management) is an open standard protocol (v2.0). It sends user and group identity information from your identity provider (IdP) to NocoDB automatically. You do not add and remove users from your organization manually. Your IdP does this for you.
When SCIM provisioning is enabled, your identity provider can do these actions:
| Action | What it does |
|---|---|
| Create users | Adds users to your NocoDB organization automatically when you assign them in the IdP. |
| Update users | Syncs profile changes (display name, email, and others) from the IdP to NocoDB. |
| Deactivate users | Soft-deletes organization members when you unassign or deactivate them in the IdP. |
| Manage groups | Creates, updates, and deletes org-level teams in NocoDB that mirror your IdP group structure. |
Enabling SCIM in NocoDB
Prerequisites
- An Enterprise NocoDB plan (self-hosted or NocoDB Cloud)
- Org Admin access in NocoDB
- Admin access to your identity provider (Okta, Azure AD / Entra ID, and others)
- SSO configured with the same IdP (recommended, not required)
Step 1: Navigate to SCIM settings
- In the bottom-left corner of NocoDB, open the user menu. Select Admin Panel.
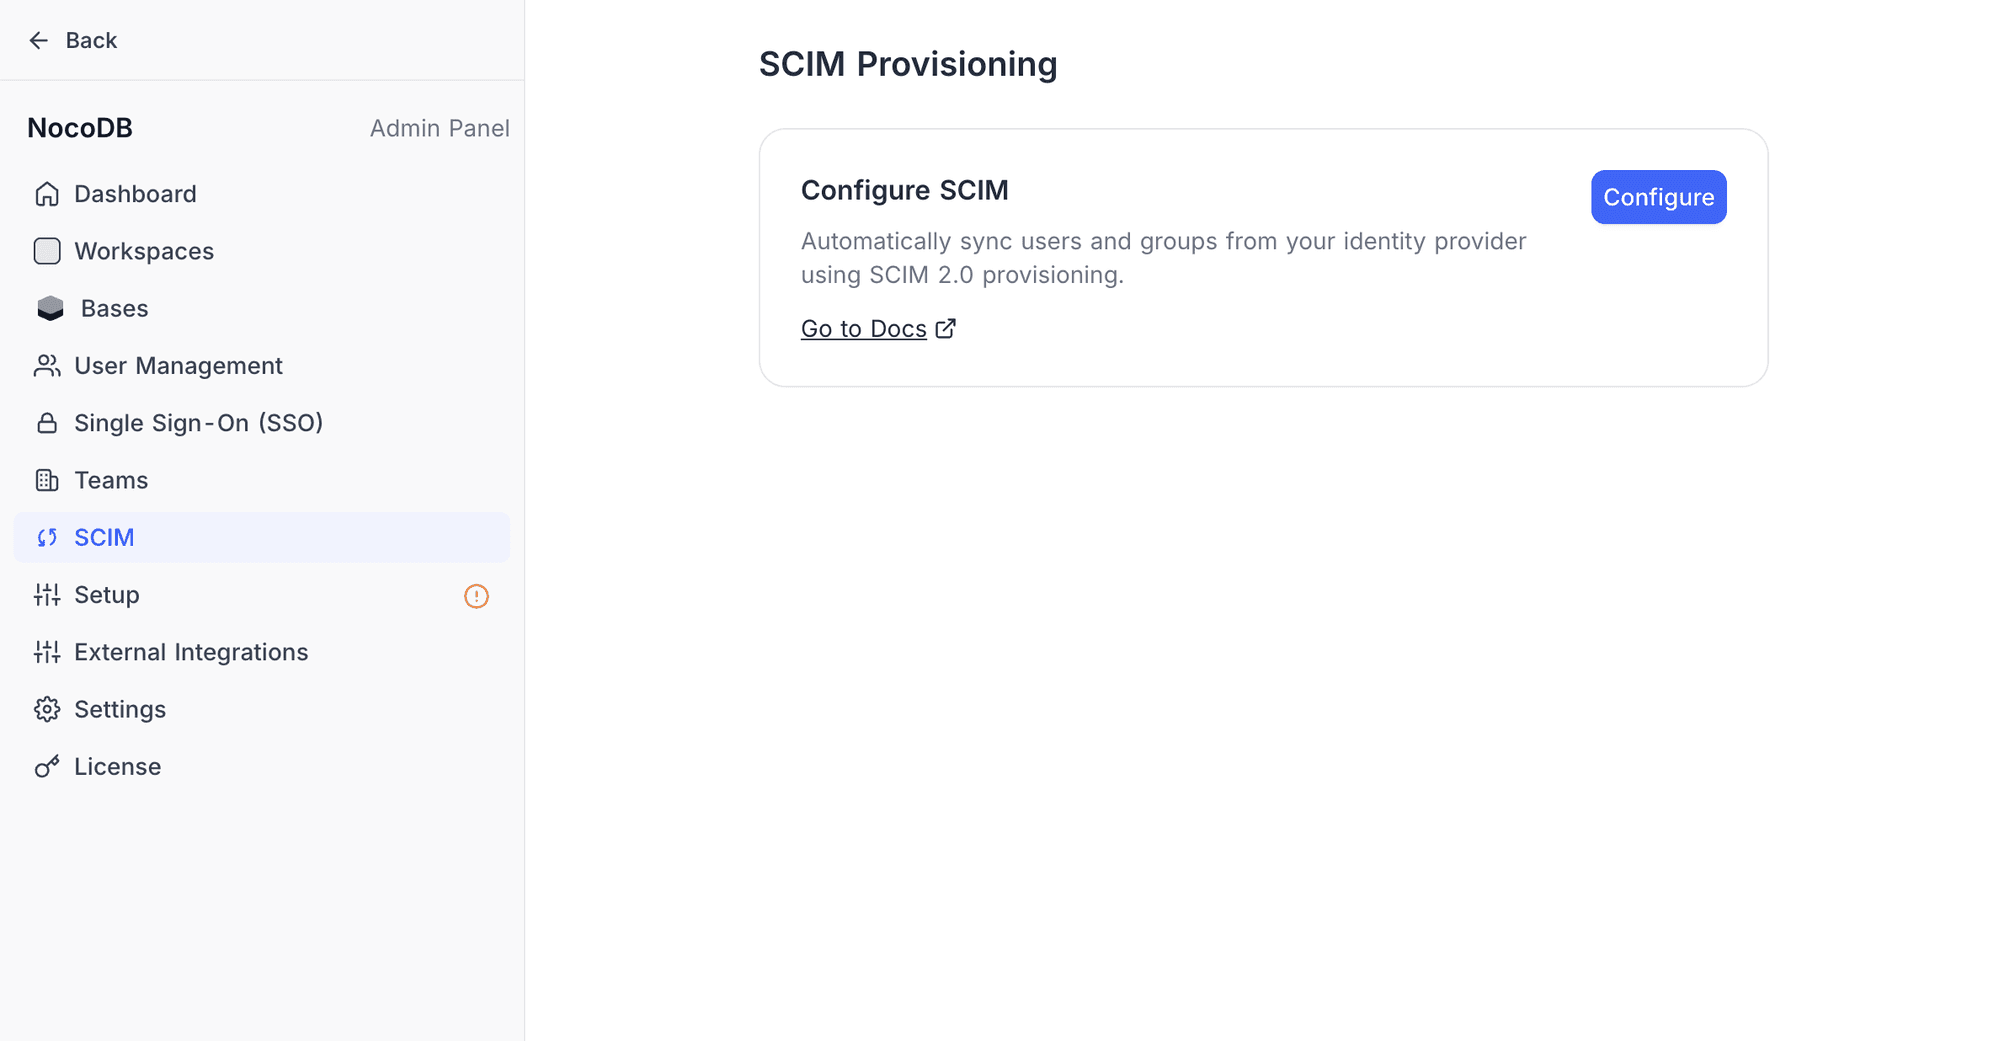
- In the sidebar menu, select SCIM.
Step 2: Enable SCIM provisioning
In the SCIM Provisioning section, click the Configure button. NocoDB generates the SCIM endpoint URL and a provisioning token. NocoDB also enables provisioning automatically.
Step 3: Copy the SCIM endpoint and token
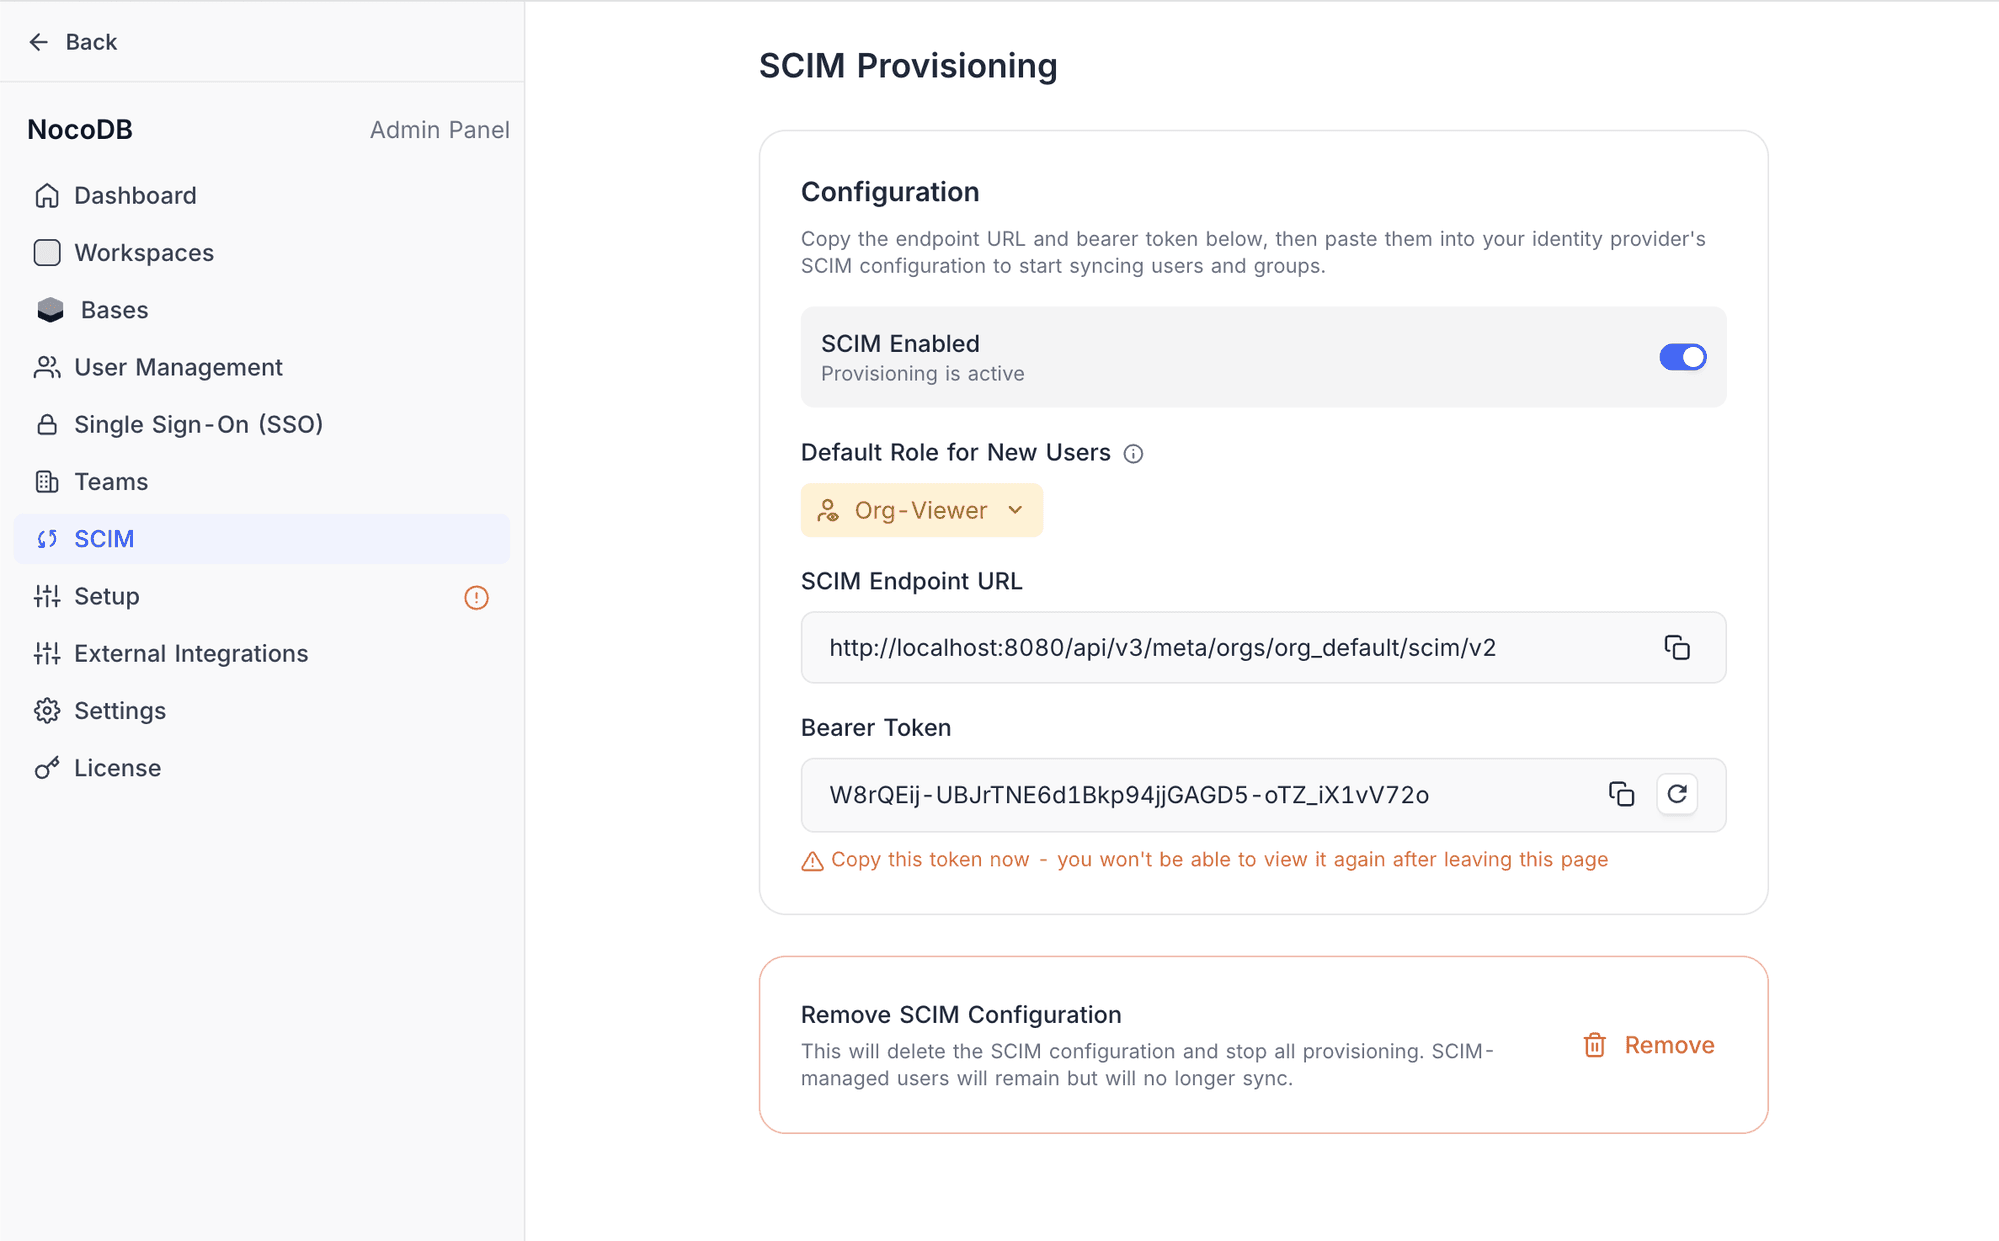
When SCIM is configured, the page shows these details:
| Detail | What it is |
|---|---|
| SCIM Endpoint URL | The base URL for all SCIM API calls. For example: https://app.nocodb.com/api/v3/meta/orgs/{orgId}/scim/v2 |
| Bearer Token | A bearer token that authenticates SCIM requests. |
Step 4: Configure your identity provider
Use the SCIM Endpoint URL and the Provisioning Token to configure SCIM in your IdP. NocoDB supports SCIM provisioning with Okta and Azure AD (Entra ID). For the steps to configure a SCIM application, refer to the documentation of your identity provider.
Step 5: Assign users and groups
In your IdP, assign users, groups, or both to the NocoDB SCIM application. The IdP then sends these assignments to NocoDB through the SCIM API.
How it works
User provisioning
When you assign a user to the NocoDB application in your IdP, the IdP sends a SCIM POST /Users request. NocoDB creates an organization member with the configured default role. The default is Org-Viewer. After provisioning, you can do these actions with an org member:
- Invite the member into org-level teams
- Assign roles to the member at the workspace or base level
- Add the member to workspace teams
Org Admins can change the org role in NocoDB at any time.
If you unassign or deactivate a user in the IdP, NocoDB soft-deletes the organization member. NocoDB keeps the data and contributions of the user. The user loses access to the organization and all its workspaces.
If you re-assign a deactivated user in the IdP, NocoDB reactivates the organization membership. The user gets the current default role, not the previous role. NocoDB does not restore the workspace, base, or team memberships that the user had before deactivation. To give access again, invite the user to each workspace and base again.
Group provisioning
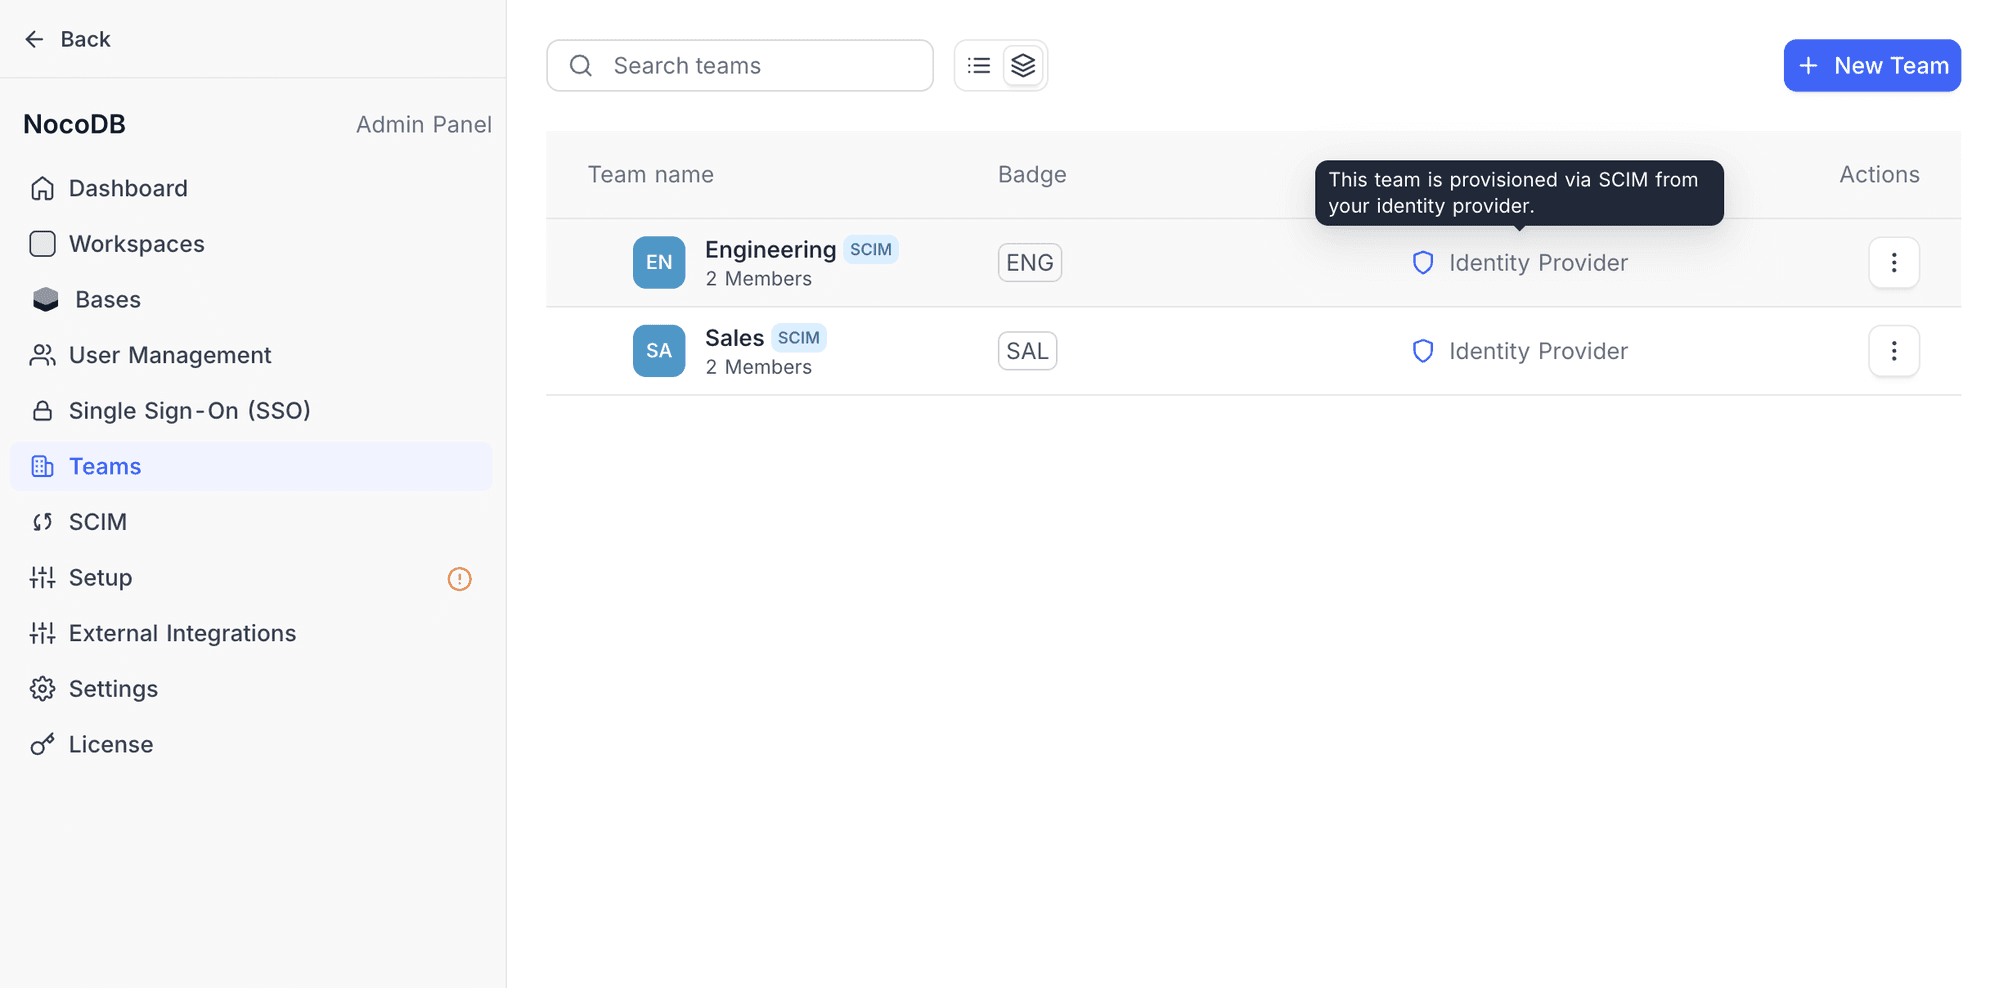
SCIM groups map to org-level Teams in NocoDB. When the IdP sends a group, NocoDB creates a matching organization team. The team has a SCIM badge and shows "Identity Provider" as the creator. NocoDB adds the members of the IdP group to the NocoDB team automatically.
When you add or remove members of a group in the IdP, NocoDB syncs the change in real time through SCIM PATCH operations.
SCIM-managed vs. manually-created users
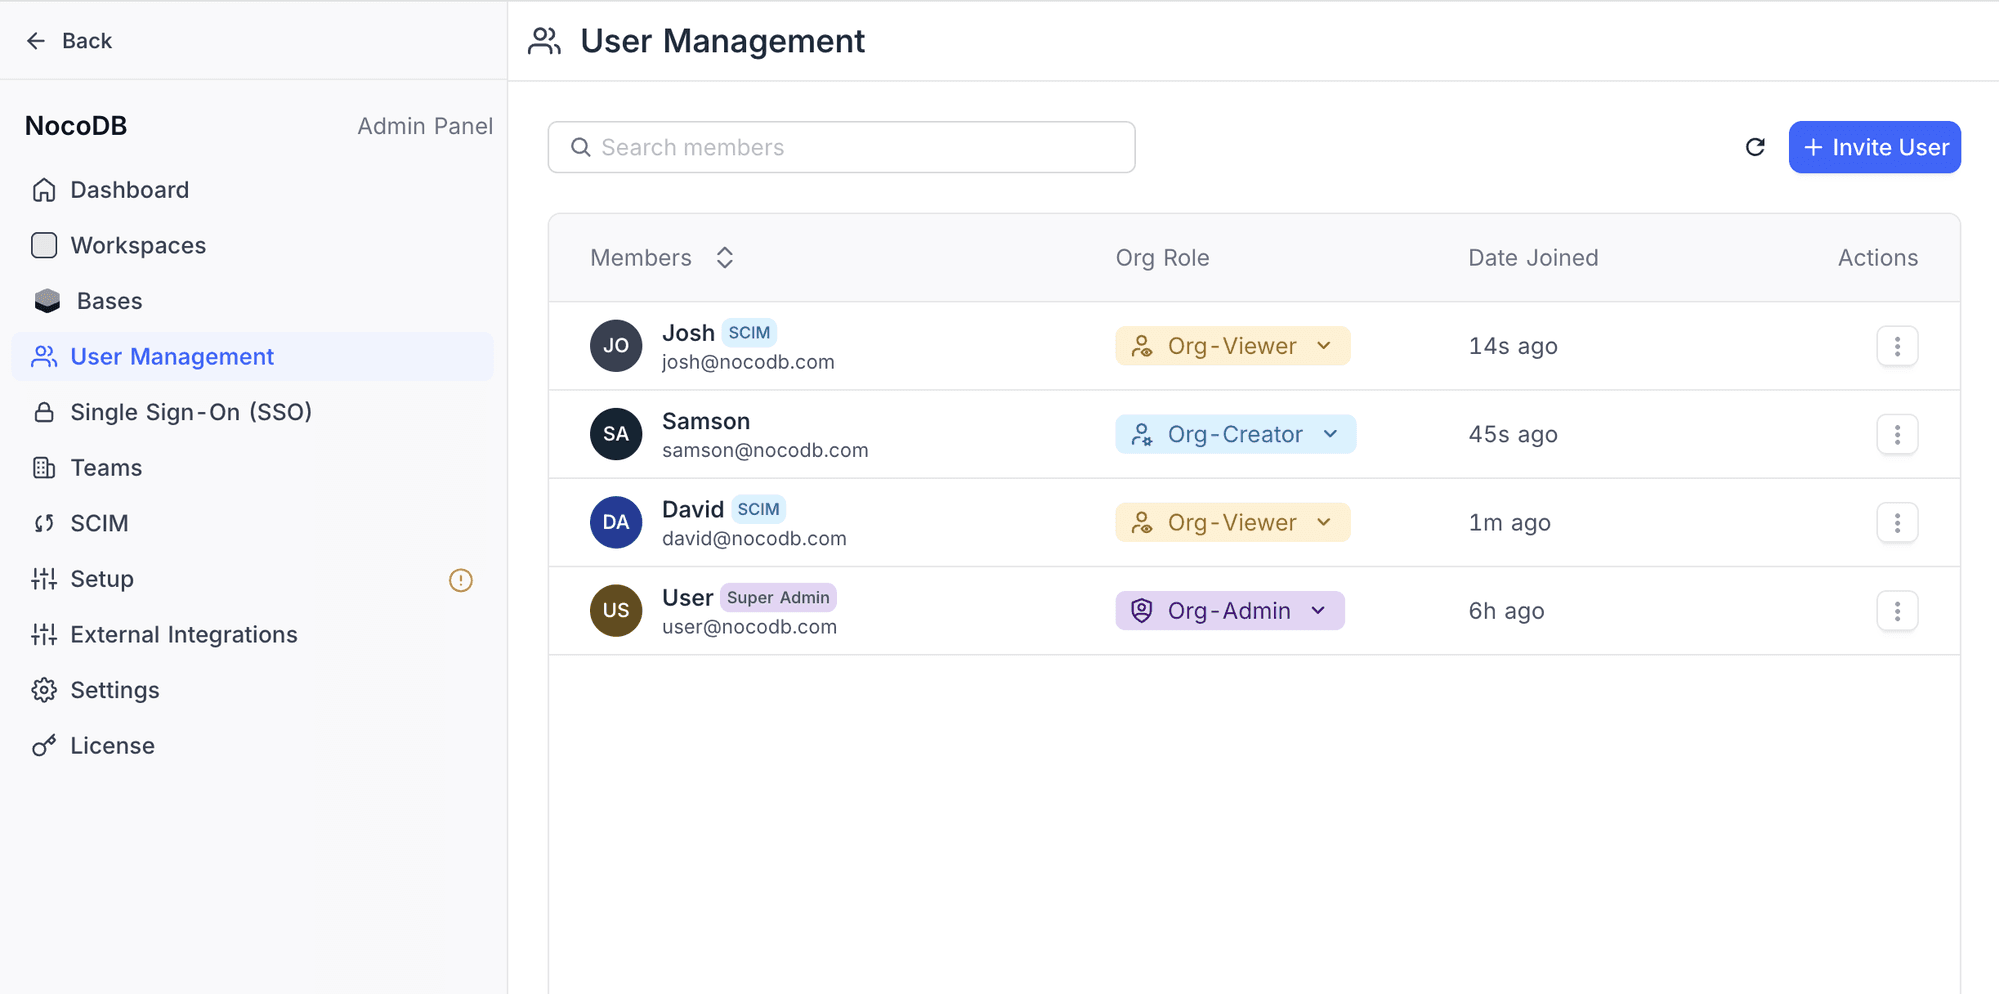
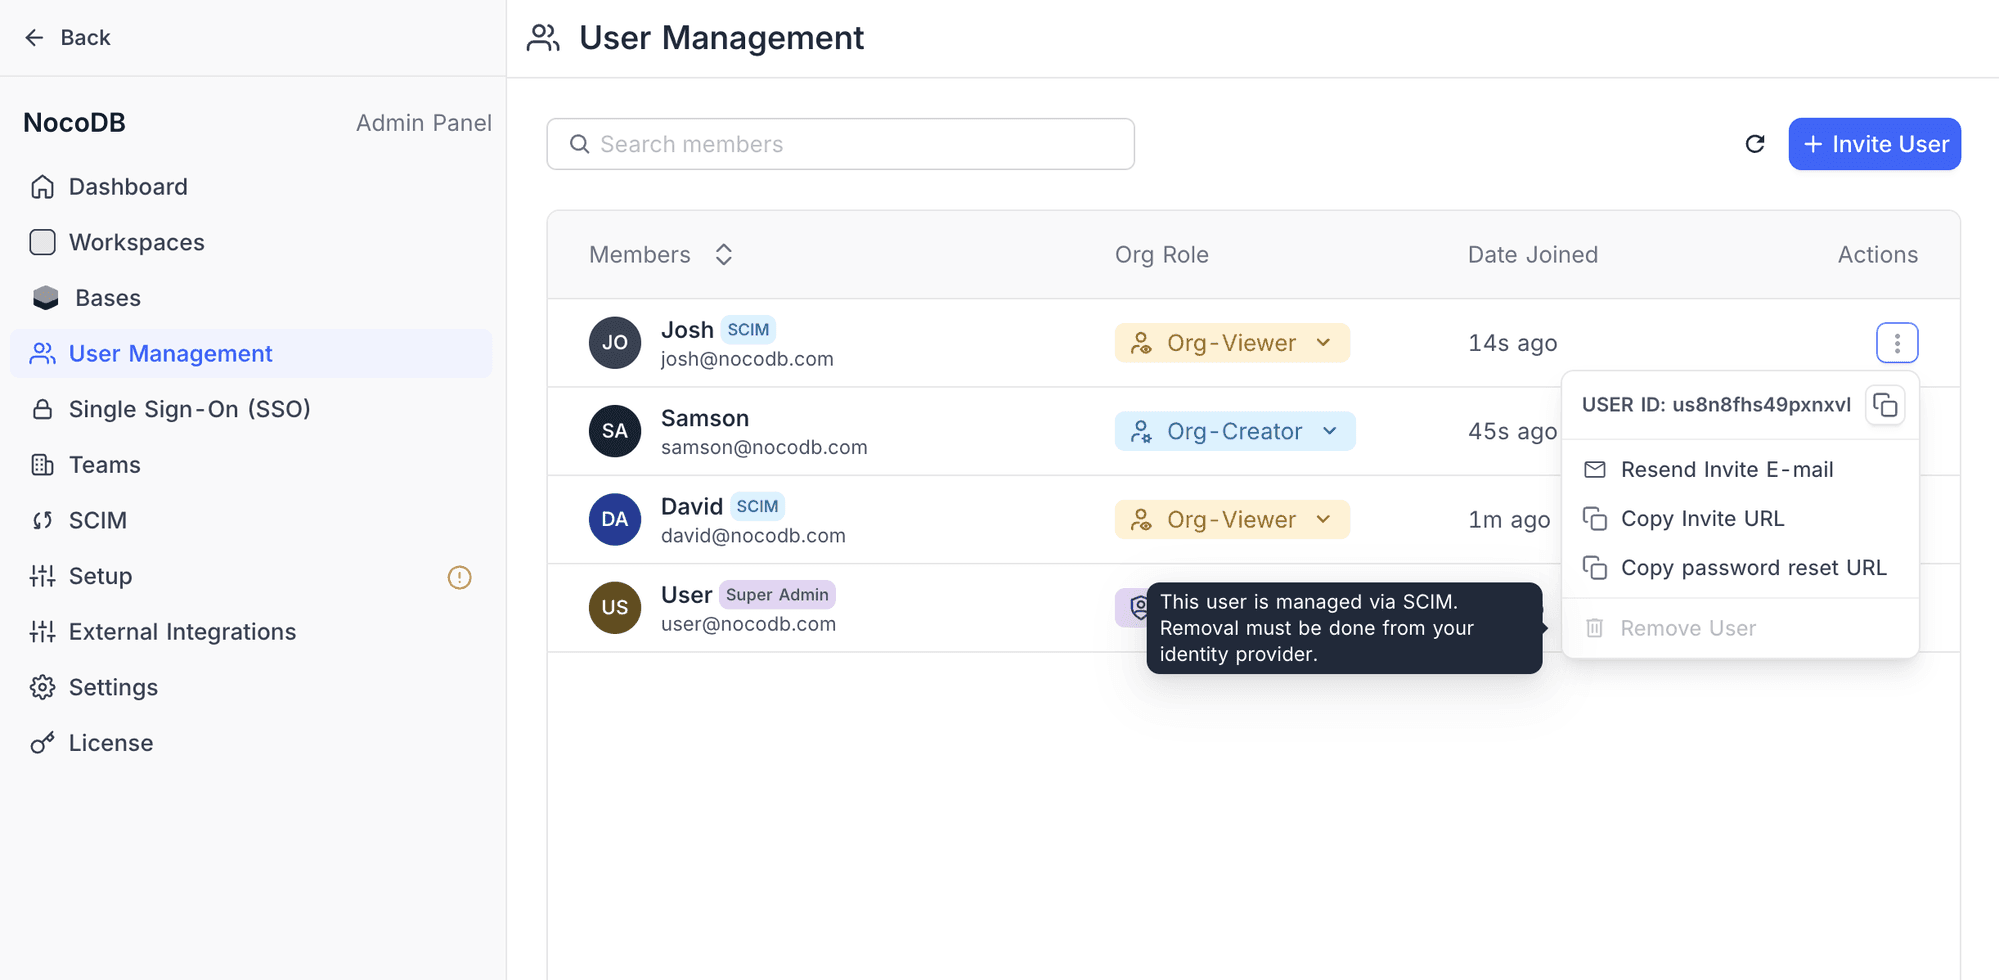
NocoDB marks users from SCIM as SCIM-managed. These users have a blue SCIM badge in the User Management list. The differences are:
- The IdP controls the lifecycle (activation and deactivation) of SCIM-managed users.
- The Org Admin can still change their org roles in NocoDB.
- SCIM operations do not change manually created users.
- You cannot remove SCIM-managed users directly in NocoDB. Remove them in your identity provider.
Managing SCIM
Toggling provisioning
To pause SCIM provisioning and keep the configuration, turn off the SCIM switch in Admin Panel > SCIM settings. While provisioning is paused, NocoDB rejects all incoming SCIM requests. To start provisioning again, turn on the switch.
Default role for new users
The default role is the org-level role that SCIM-provisioned users get. To set it, use the Default Role for New Users dropdown on the SCIM settings page. The options are:
| Role | Description |
|---|---|
| Org-Viewer | Can access workspaces and bases they are invited to; cannot create new workspaces (default) |
| Org-Creator | Same as Org-Viewer, plus can create new workspaces within the organization |
Regenerating the token
If the provisioning token is compromised or lost:
- Go to Admin Panel > SCIM.
- Next to the provisioning token, click the Regenerate button.
- Copy the new token.
- Update the token in your IdP configuration.
Disabling SCIM
To remove SCIM provisioning completely:
- Go to Admin Panel > SCIM.
- In the danger zone section, click Remove.
- Confirm the deletion.
Availability
- SCIM provisioning is available on the Enterprise plan, both self-hosted and on NocoDB Cloud. For access, reach out to sales team.
Last updated on