Expanded Record
Copy a prompt, paste it into NocoAI in any base, and replace the words in [brackets] with your own.
- Summarise this record
- What looks incomplete or inconsistent in this record?
- Show me the records linked to this one
- Update [Status] on this record to [In Review]
Overview
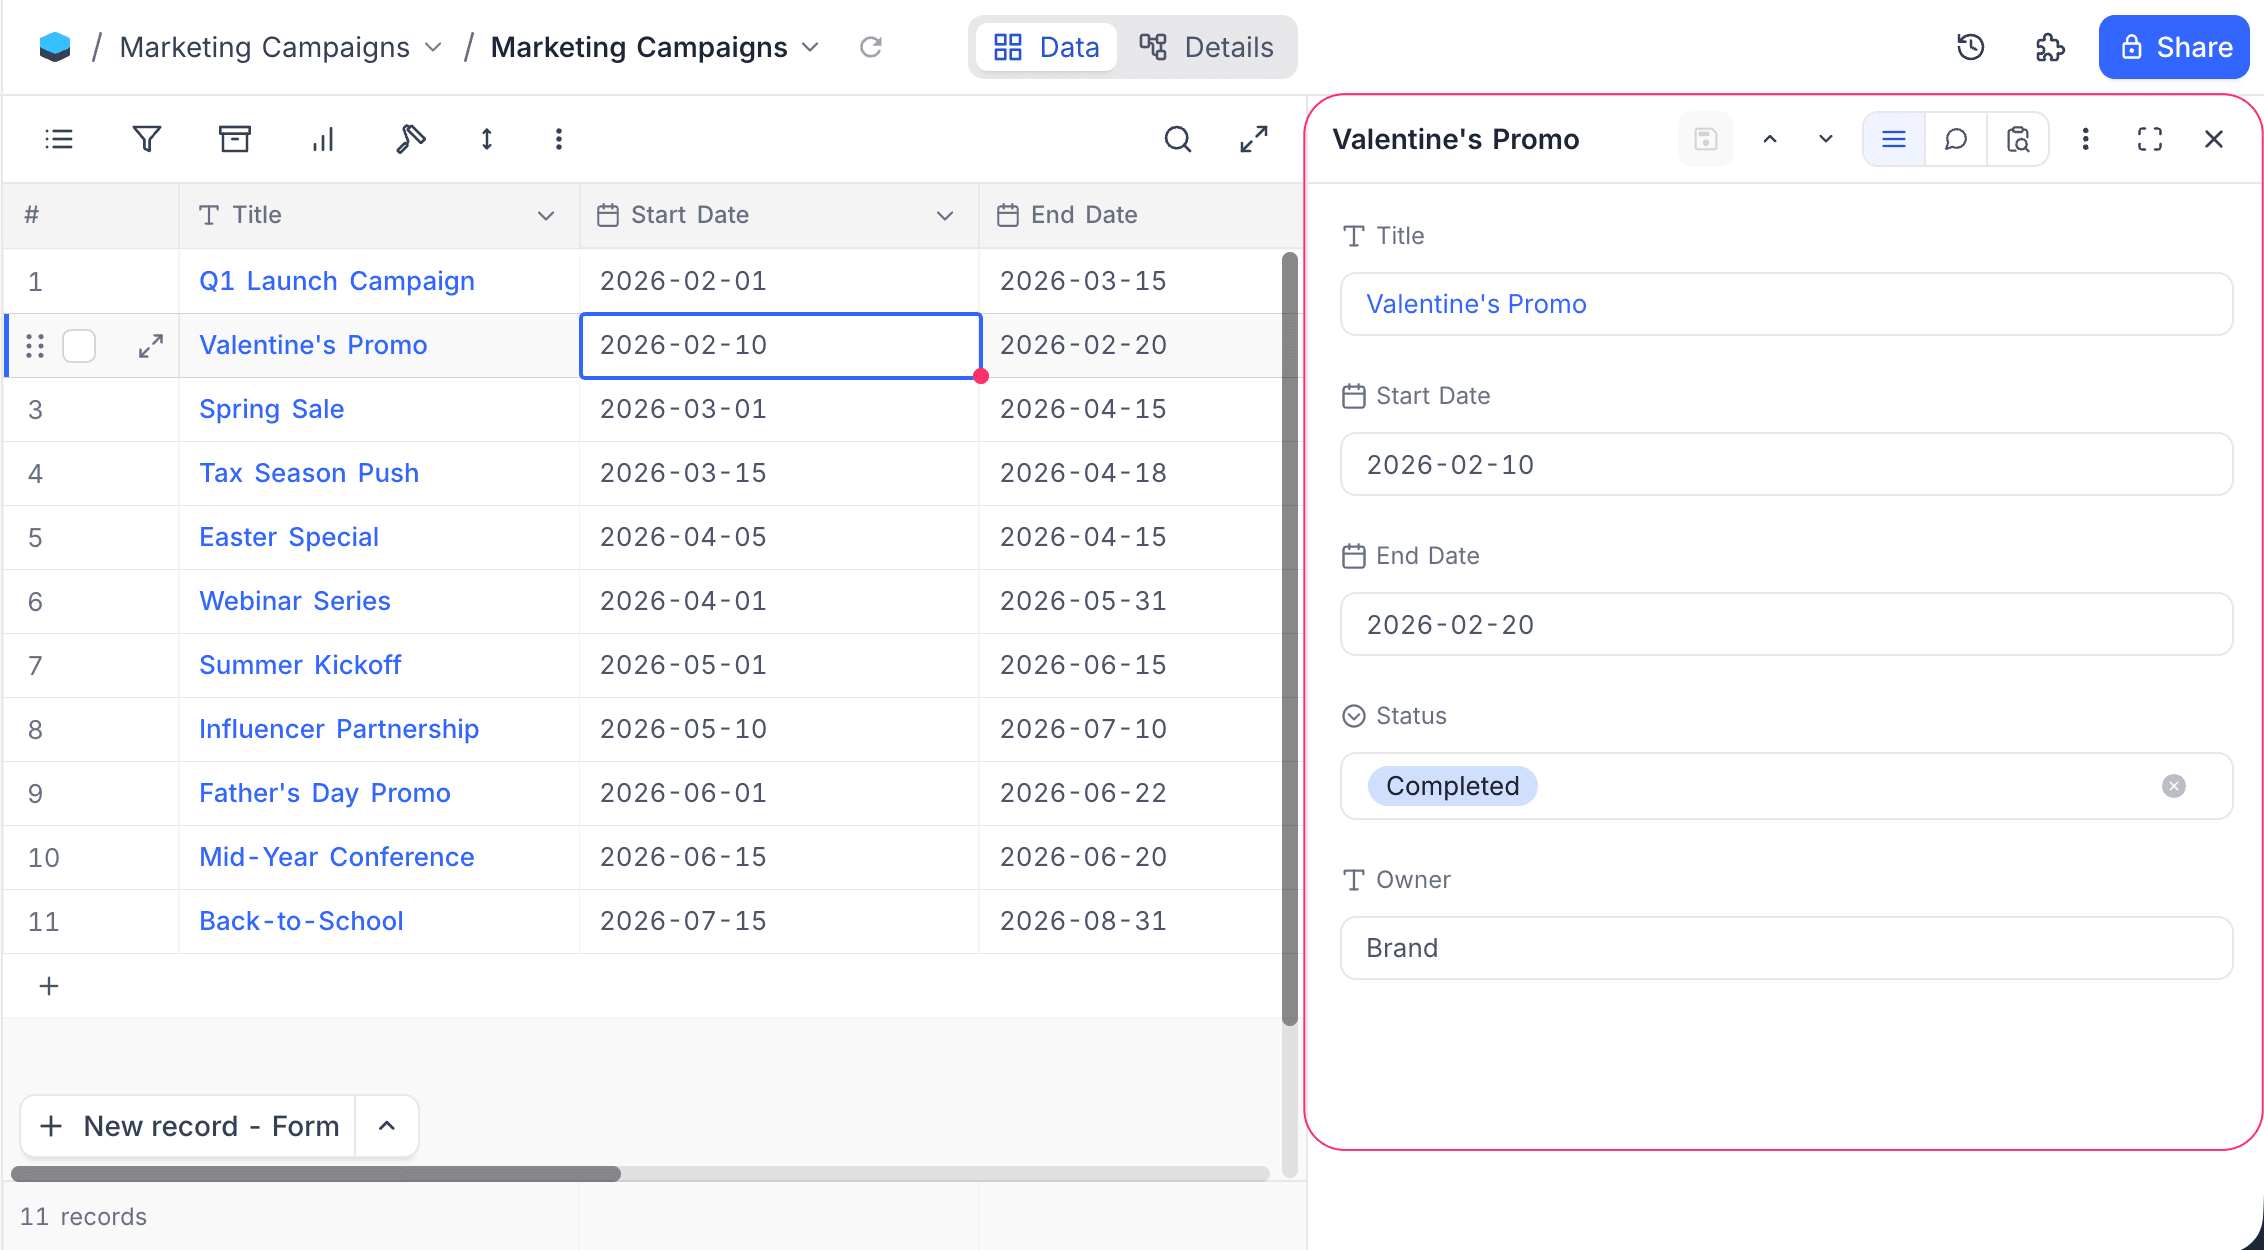
By default, the expanded record opens as a side panel to the right of the grid. You can see the grid data while you edit a record, read comments, or look at the revision history.
When you need the full editing area, open fullscreen mode from the side panel. Fullscreen mode also has the file preview and discussion modes.
Expanding a Record
To expand a record in a grid view, hover over the index column (the first column) and click the expand icon.
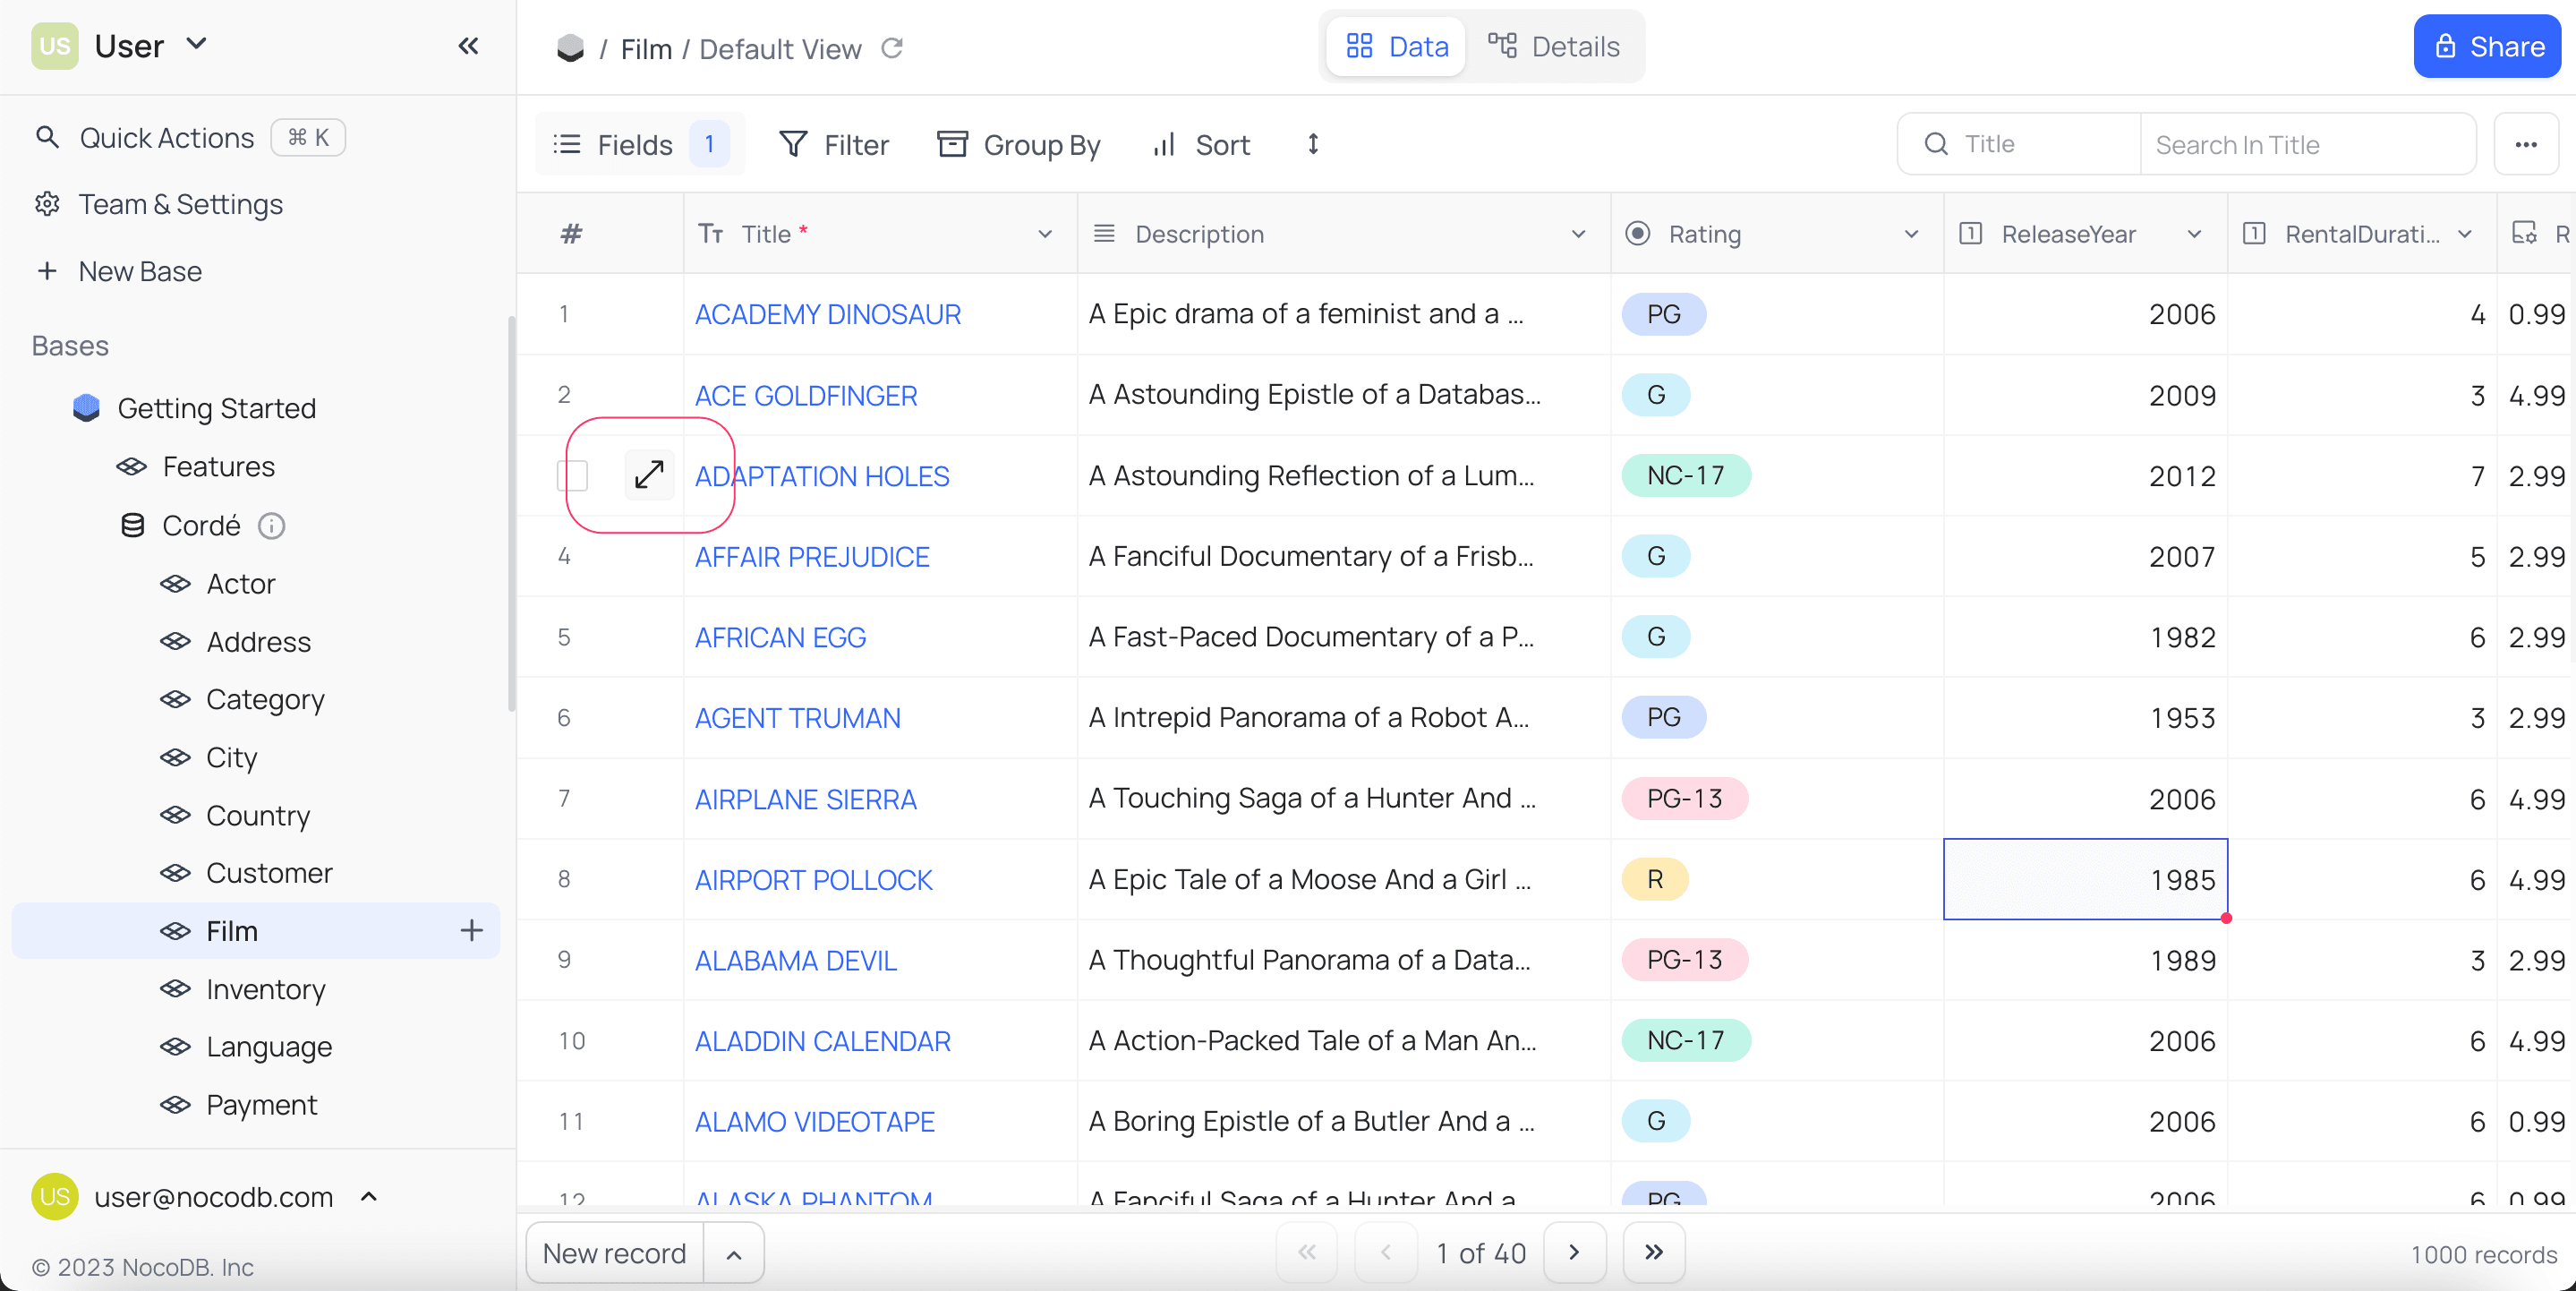
Space to expand its record.The panel opens from the right. To resize it, drag the handle on its left edge. NocoDB keeps the width across sessions.
Edit record
The Fields tab shows all fields of the record in one column. Each field has a label and the editor for its type.
- Click a field to edit it. When you have unsaved changes, the Save button in the header becomes active.
- Hidden fields go into a Show hidden fields toggle at the bottom of the list. This helps when most fields are hidden in the grid.
- To move through records without closing the panel, use the Previous / Next buttons in the header.
- NocoDB keeps edits to links (link / unlink) and to Smart Text fields with your field-value edits. It saves them all together when you click Save. Nothing is saved before you save the record. If you close the panel with unsaved edits, NocoDB asks you to save or discard them. (When you edit links inline in the grid, the change still applies immediately.)
Side Panel Header
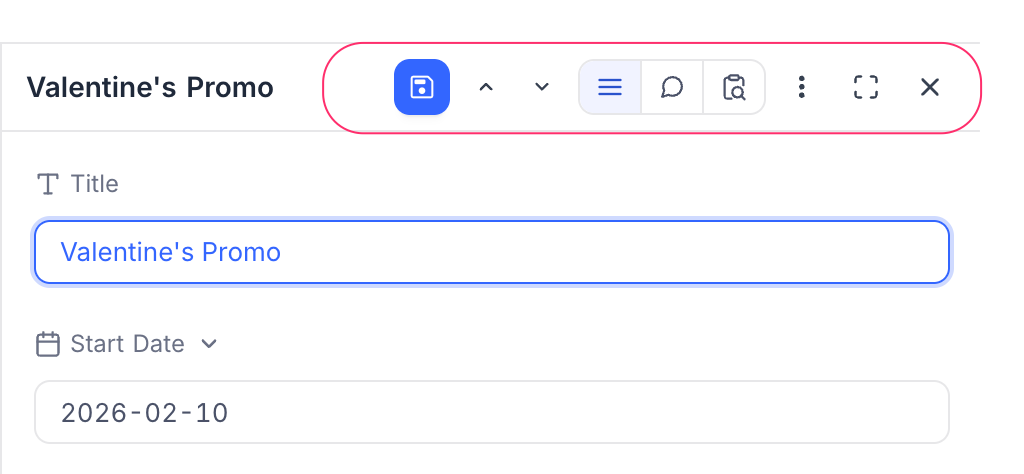
The header at the top of the side panel has all record-level controls:
| Control | Behavior |
|---|---|
| Record title | Shows the display value of the open record. Shows New Record when you create a new record. |
| Save | Saves edits. In new-record mode, creates the record. |
| Previous / Next | Goes to the previous or next record in the current view. Uses the filters, sorts, and grouping of the view. |
| Fields / Comments / Revision history | Changes the panel body between the field list, the comments thread, and the revision history. The comments entries also filter the thread: All comments, Record comments, Comments on attachments, and Comments with attachments. A toggle shows or hides resolved comments. |
| Comment notifications bell | Sets if you get a notification for every comment on this record or only for @mentions. Refer to Comment Notifications. |
More options (...) | Per-record actions: Copy Record URL, Send Record ☁, Duplicate record, Delete record. Refer to Record Actions. |
| Enter / Exit fullscreen | Turns the fullscreen layout on or off. Refer to Record view modes. |
| Close | Closes the panel. |
Record Audit
The Revision History tab shows every change to the record. It shows who made each change and when.
- In the header switch, click the Revision History icon. The audit trail opens in the panel body, newest first.
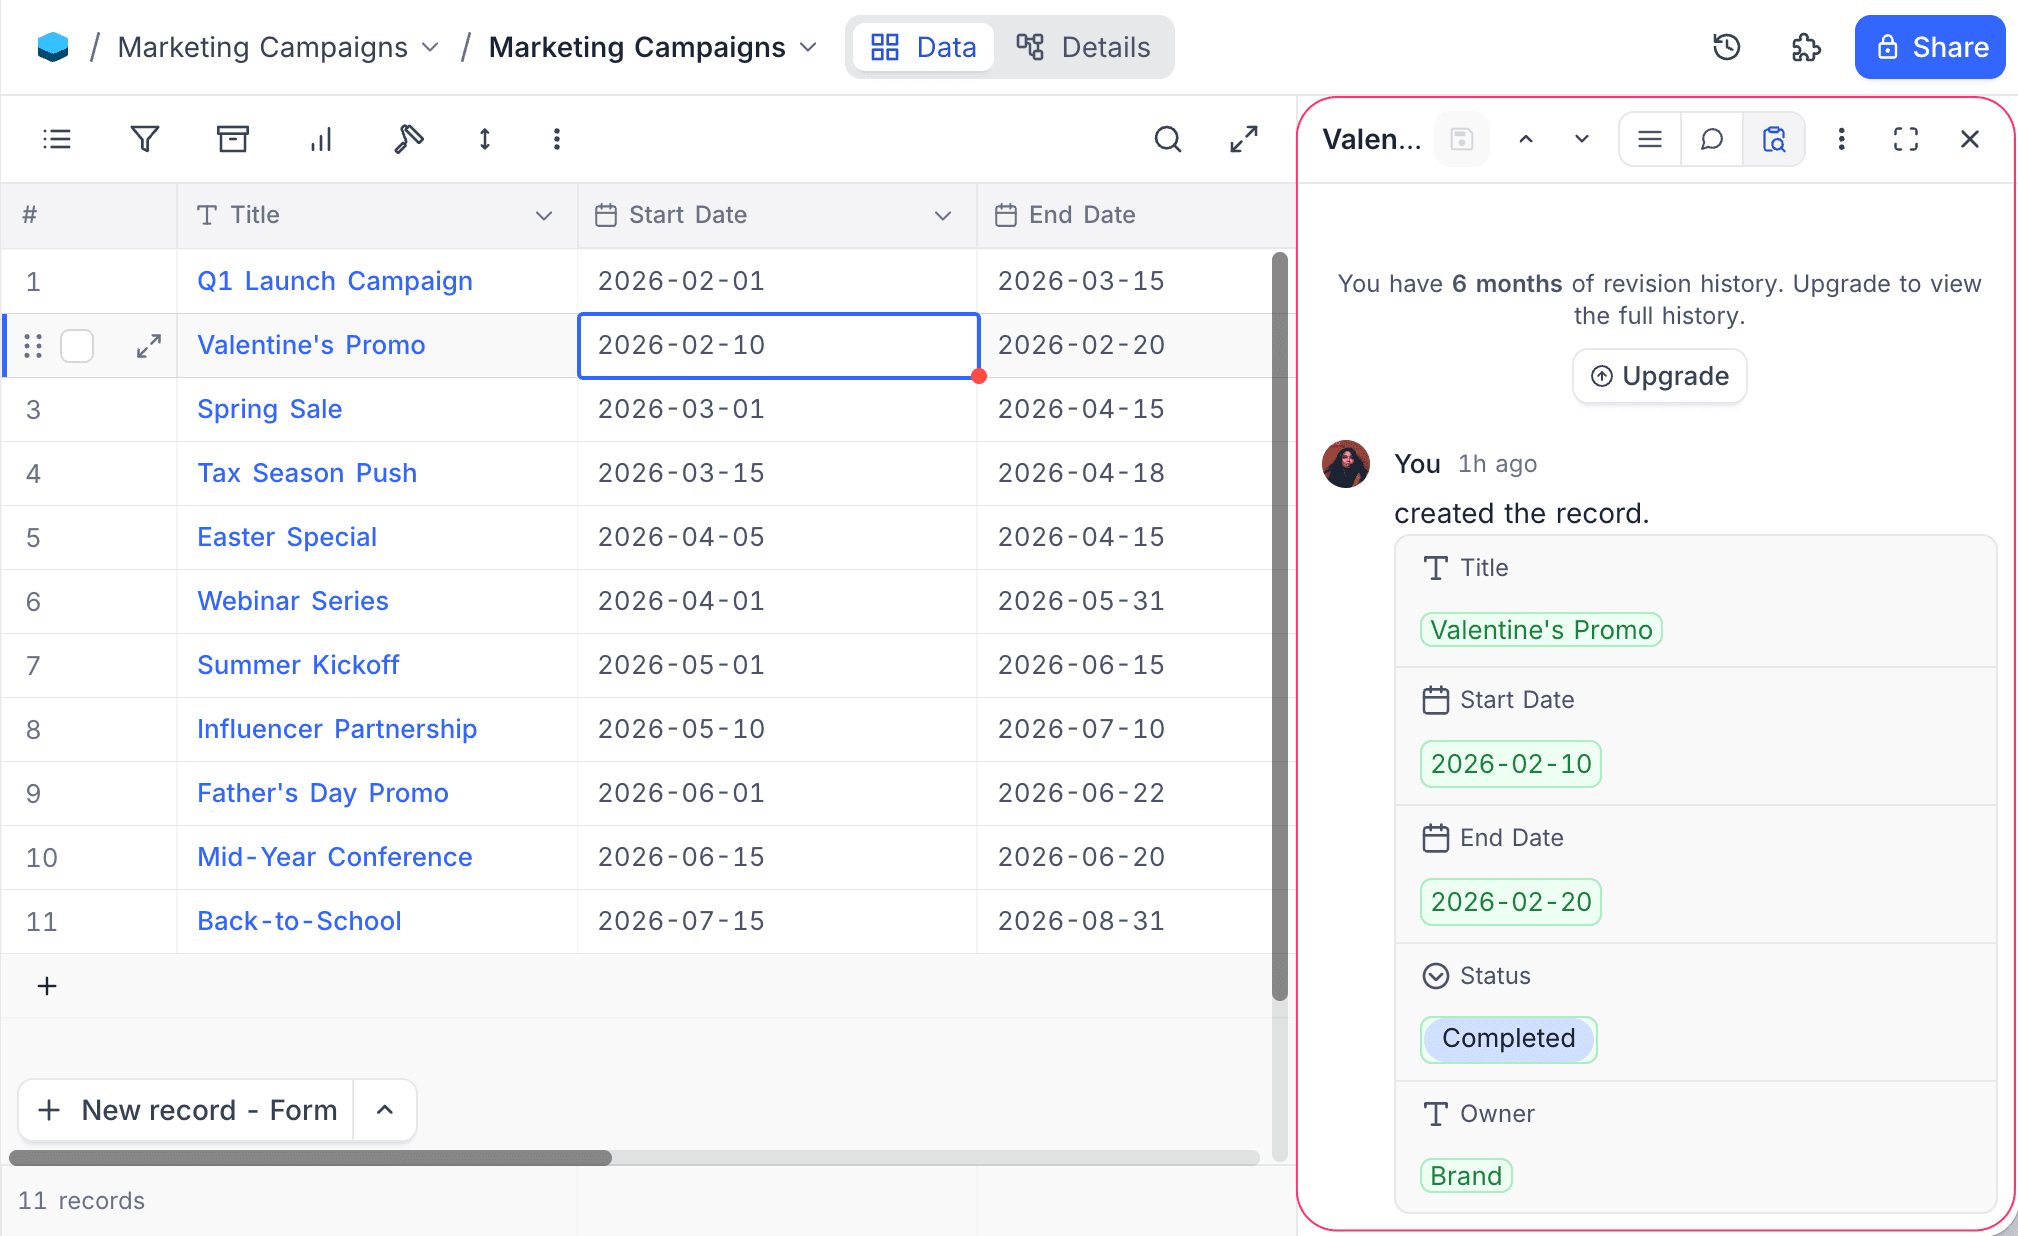
- Revision history is read-only. You cannot edit or delete entries.
- Your workspace plan sets how much history NocoDB keeps.
Record Comment
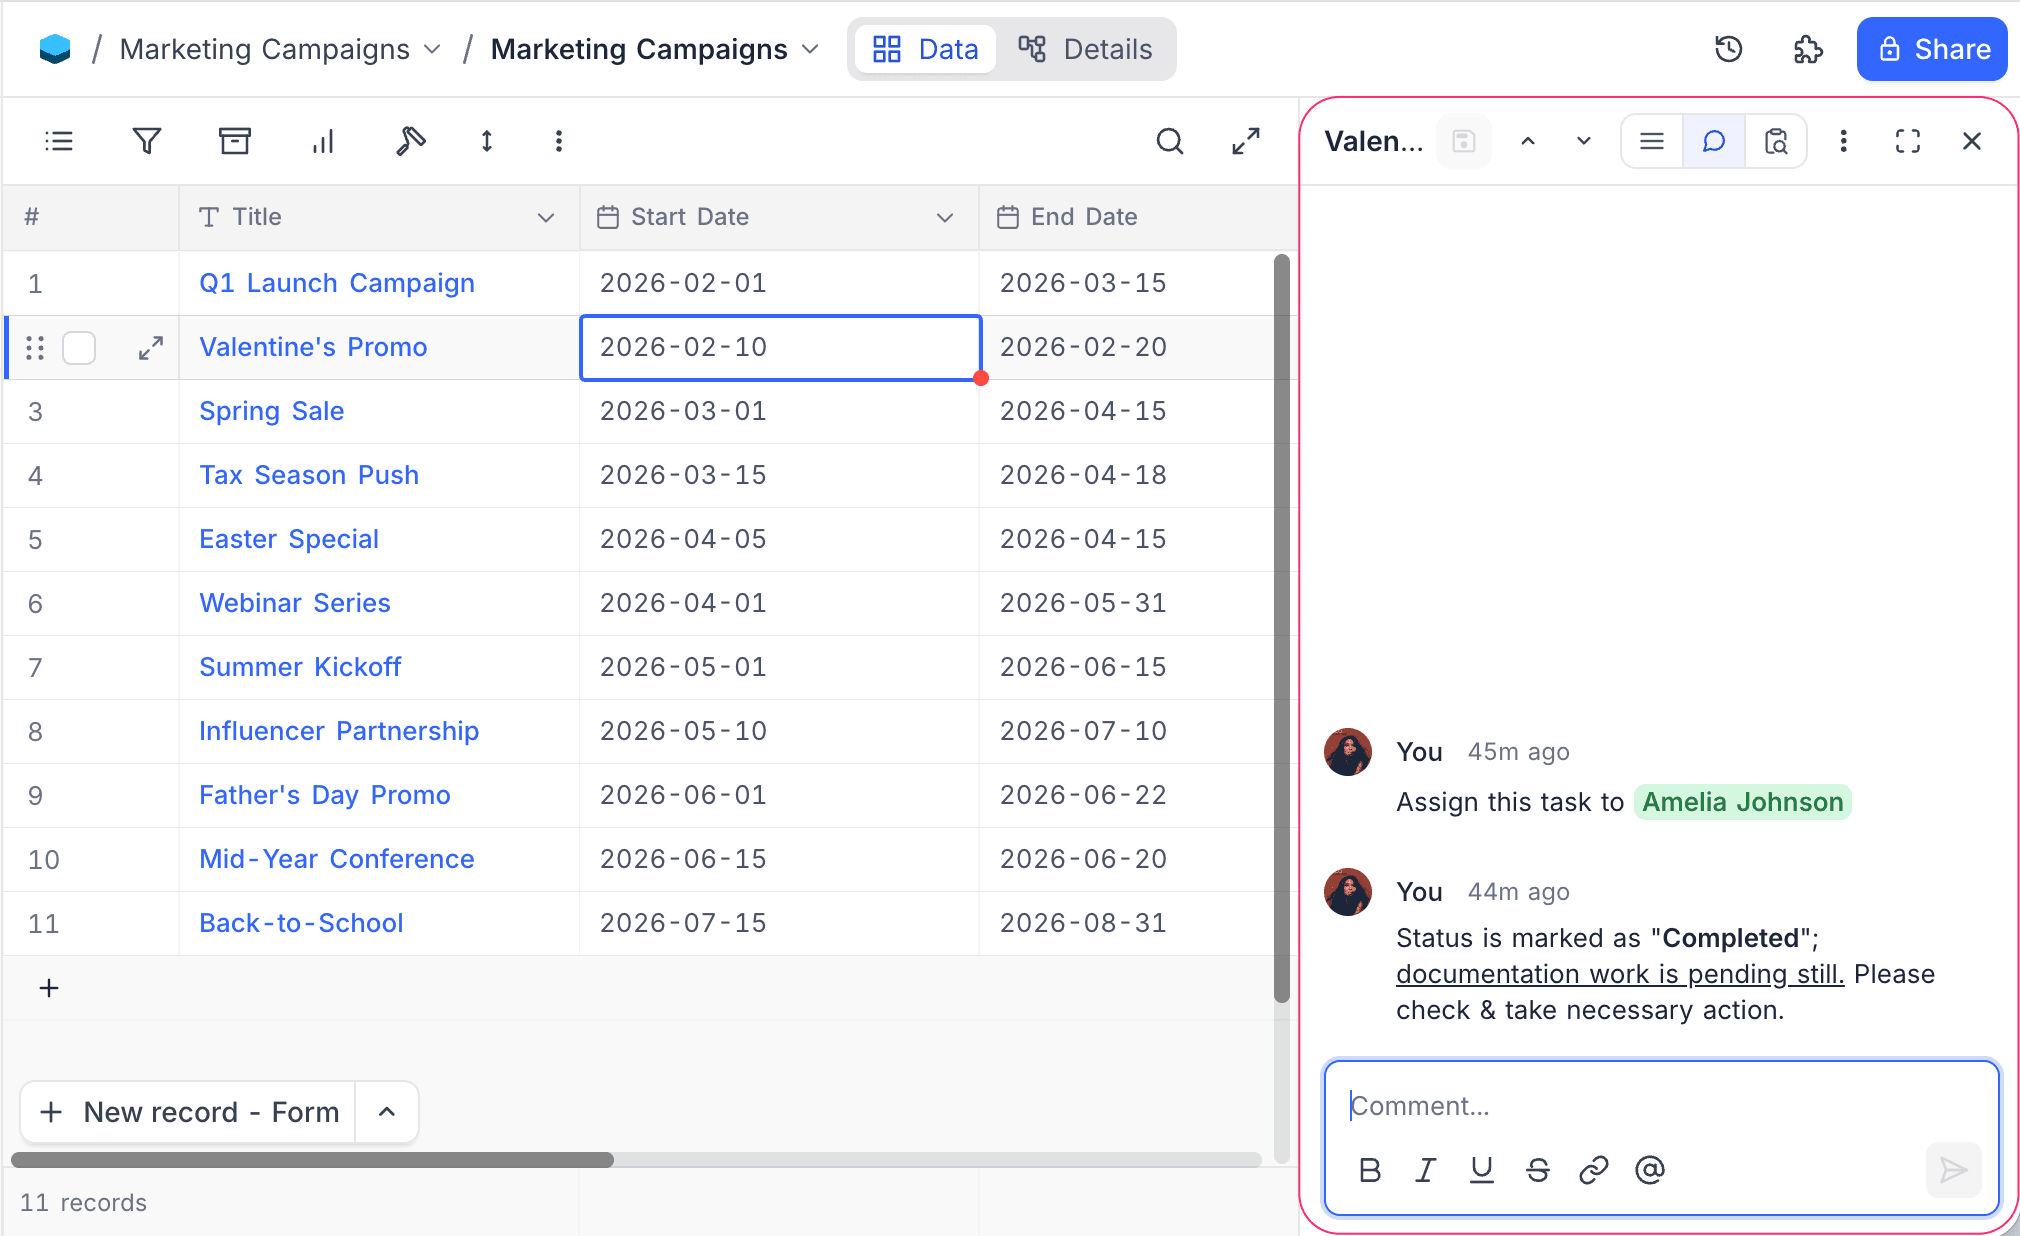
The Comments tab shows the comments thread of the record in the panel. You can discuss the record and still see the grid. You can also get notifications for updates, so everyone knows about changes in real time.
Add Comment
- In the header switch, click the Comments icon. The thread opens in the panel body. The composer is at the bottom.
- Type a comment.
- Press
Enter. NocoDB posts the comment.
Edit Comment
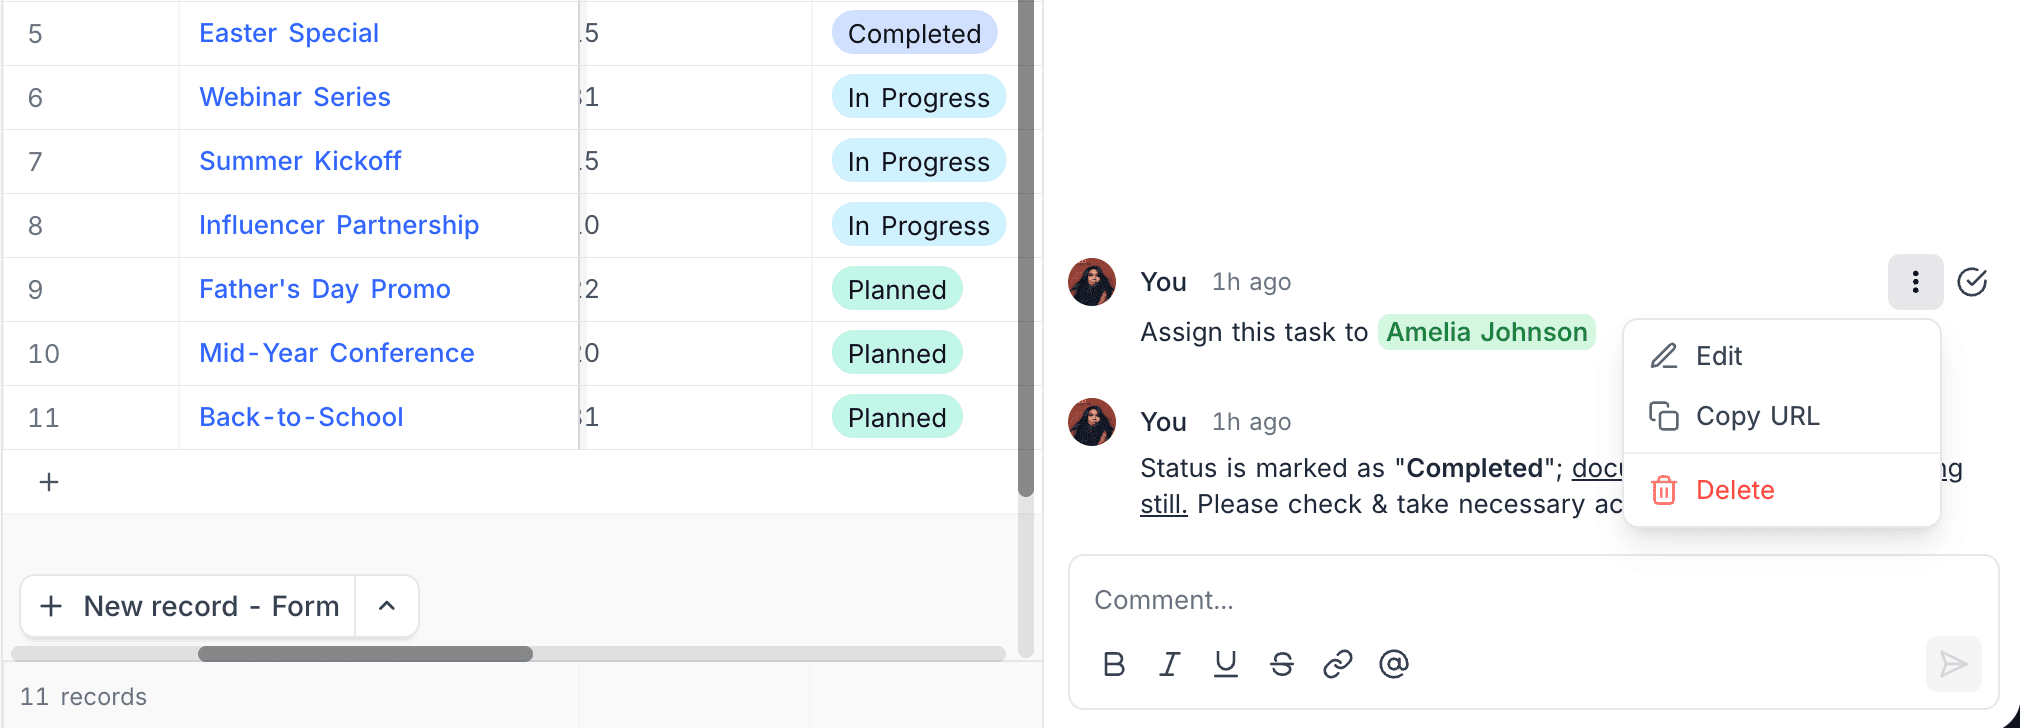
Hover over a comment that you posted. The ... options menu shows on the right. It has Edit, Copy URL, and Delete.
To edit:
- Click Edit from the menu.
- Update the text.
- Click Save, or press
Enter. NocoDB saves the change.
Copy URL copies a direct link to the comment. The link opens the record and scrolls the thread to this comment. Delete removes the comment after you confirm.
Resolve Comment ☁
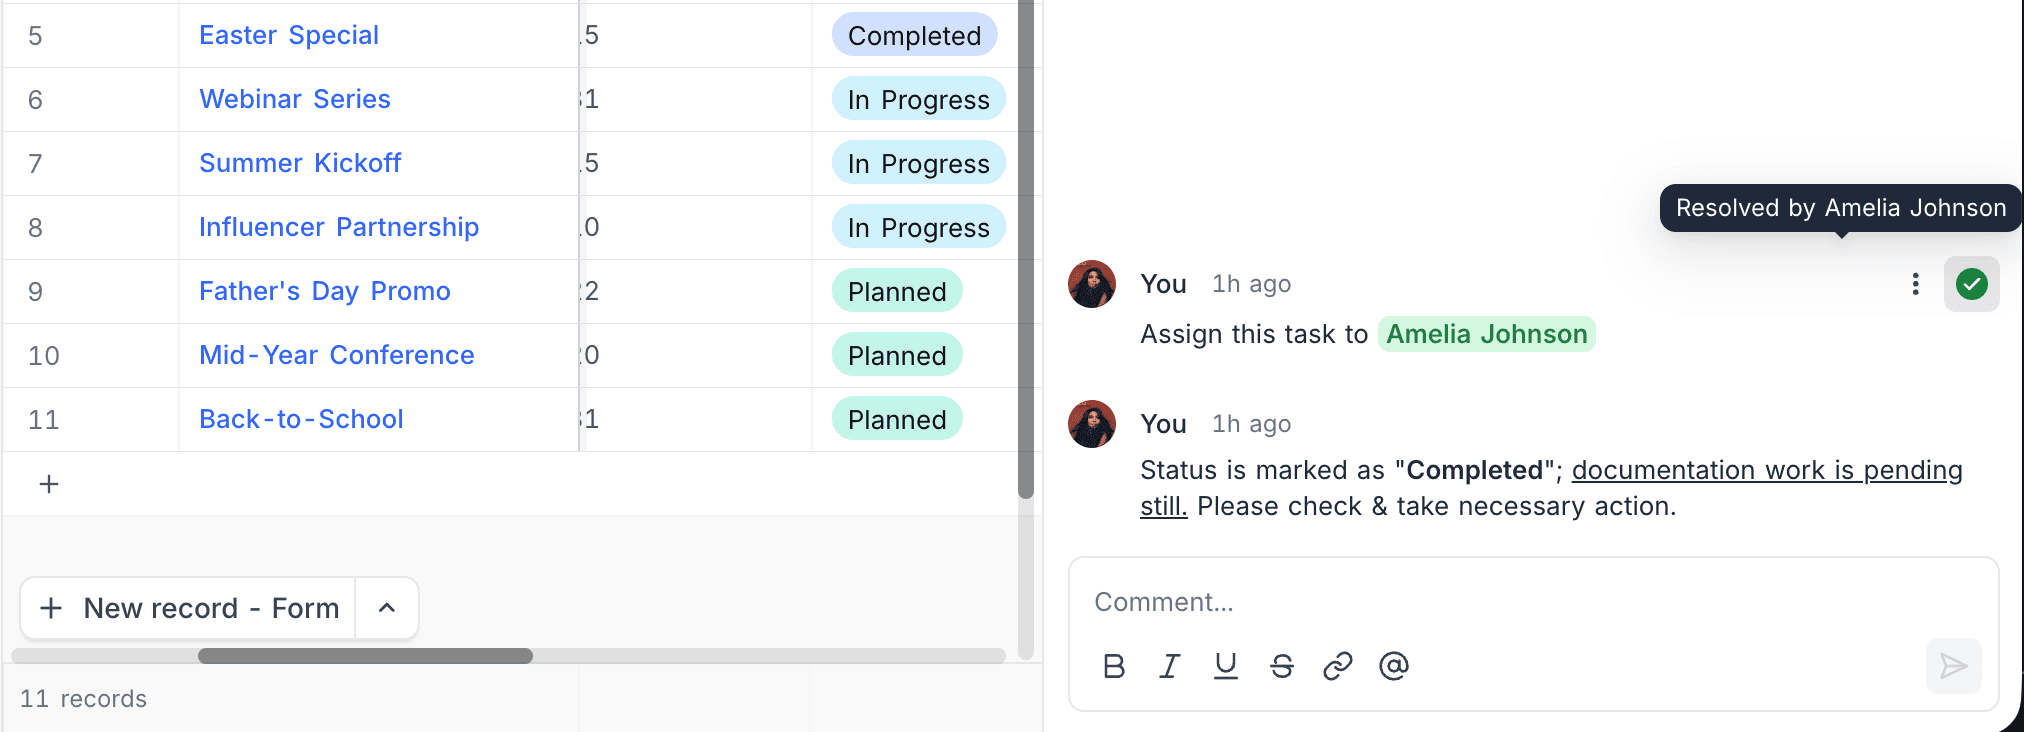
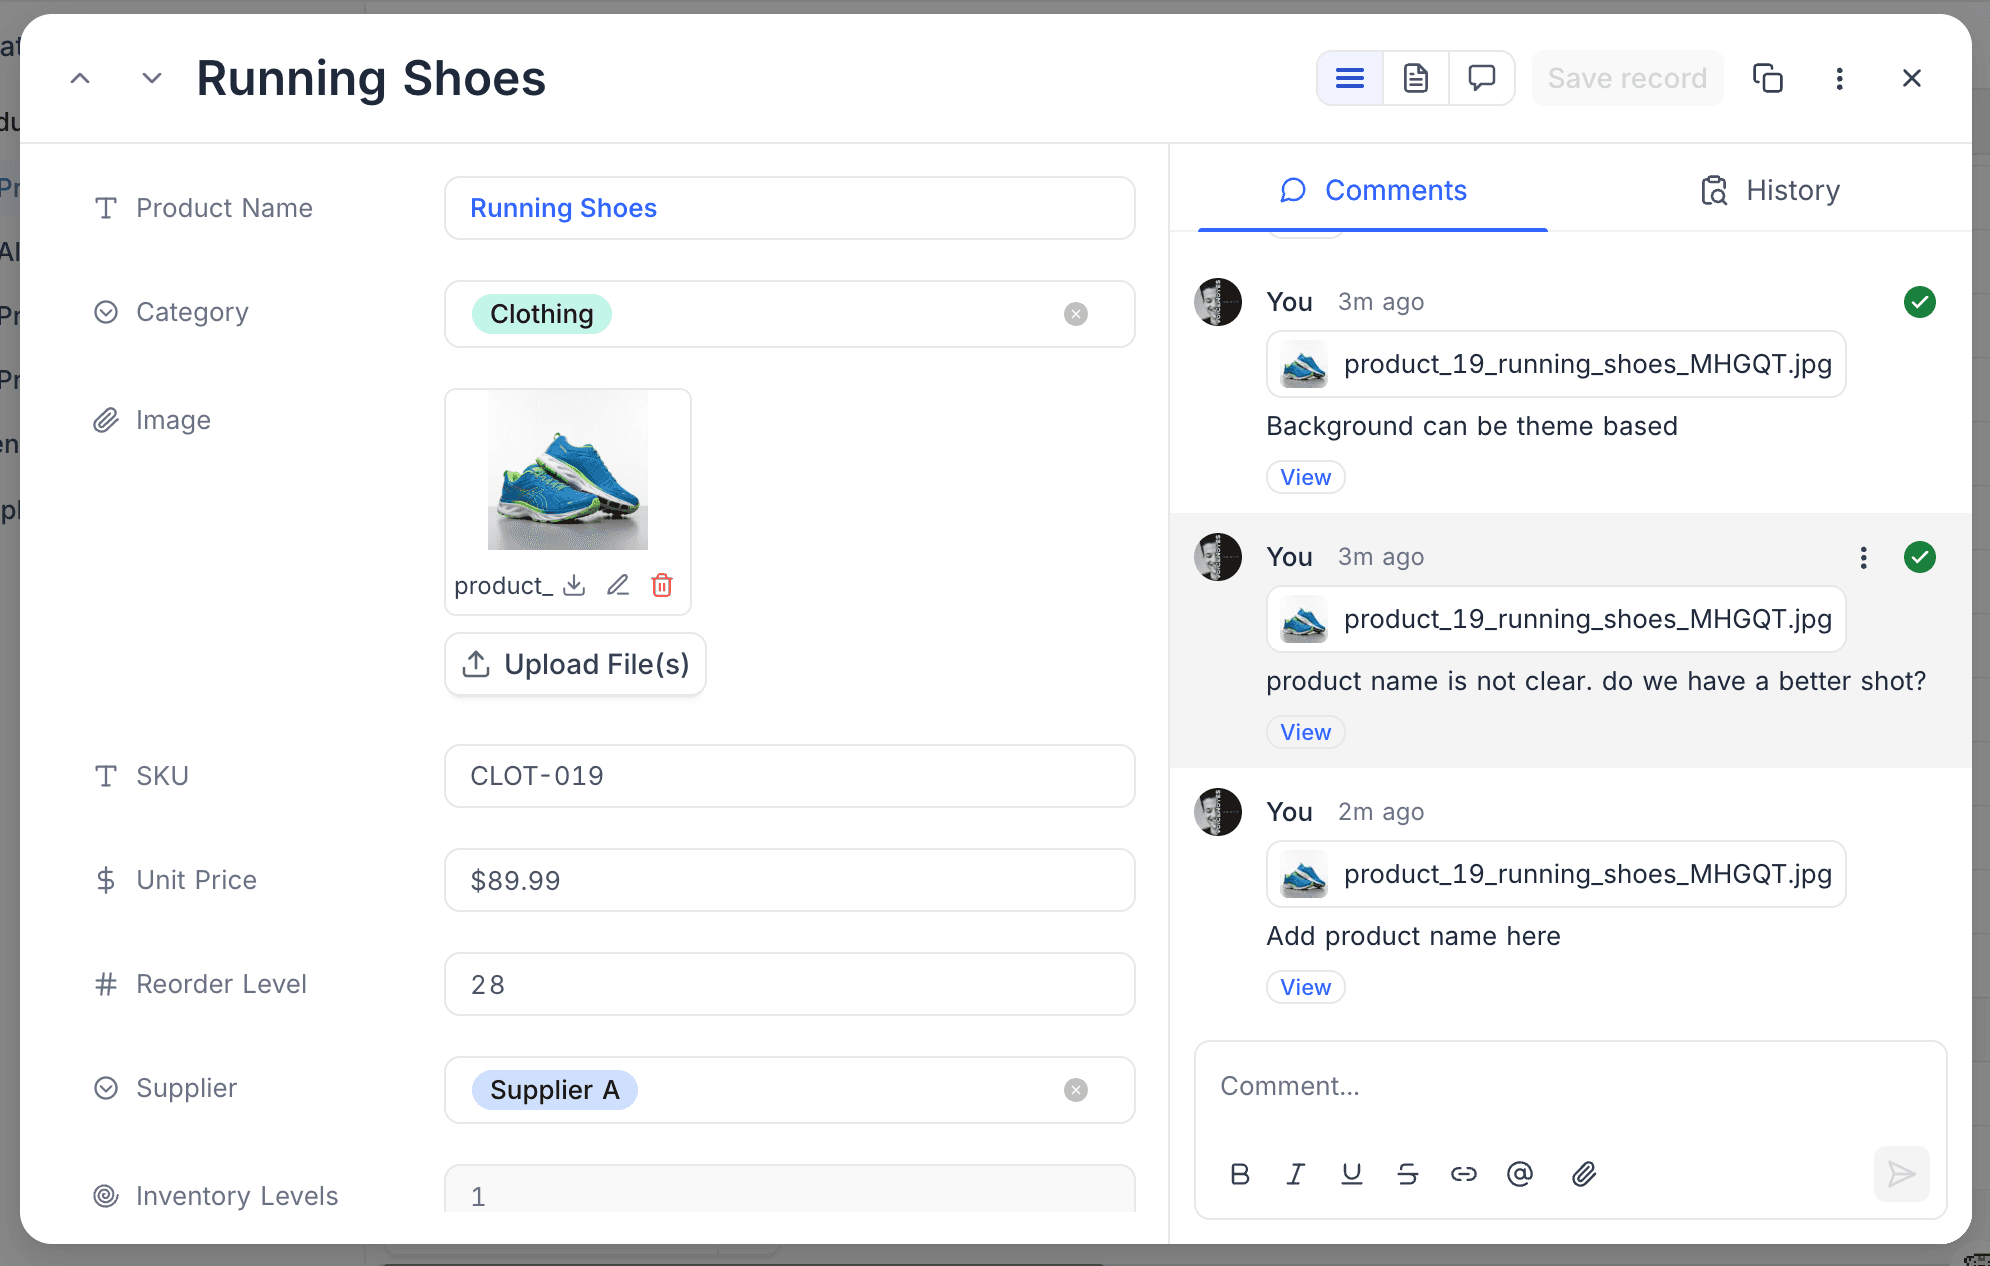
To mark a thread as resolved, hover over a comment and click the green tick icon. A resolved comment shows a tooltip with the user who resolved it (for example, Resolved by Amelia Johnson). To unresolve the thread, click the tick again.
Attach Files to a Comment ☁
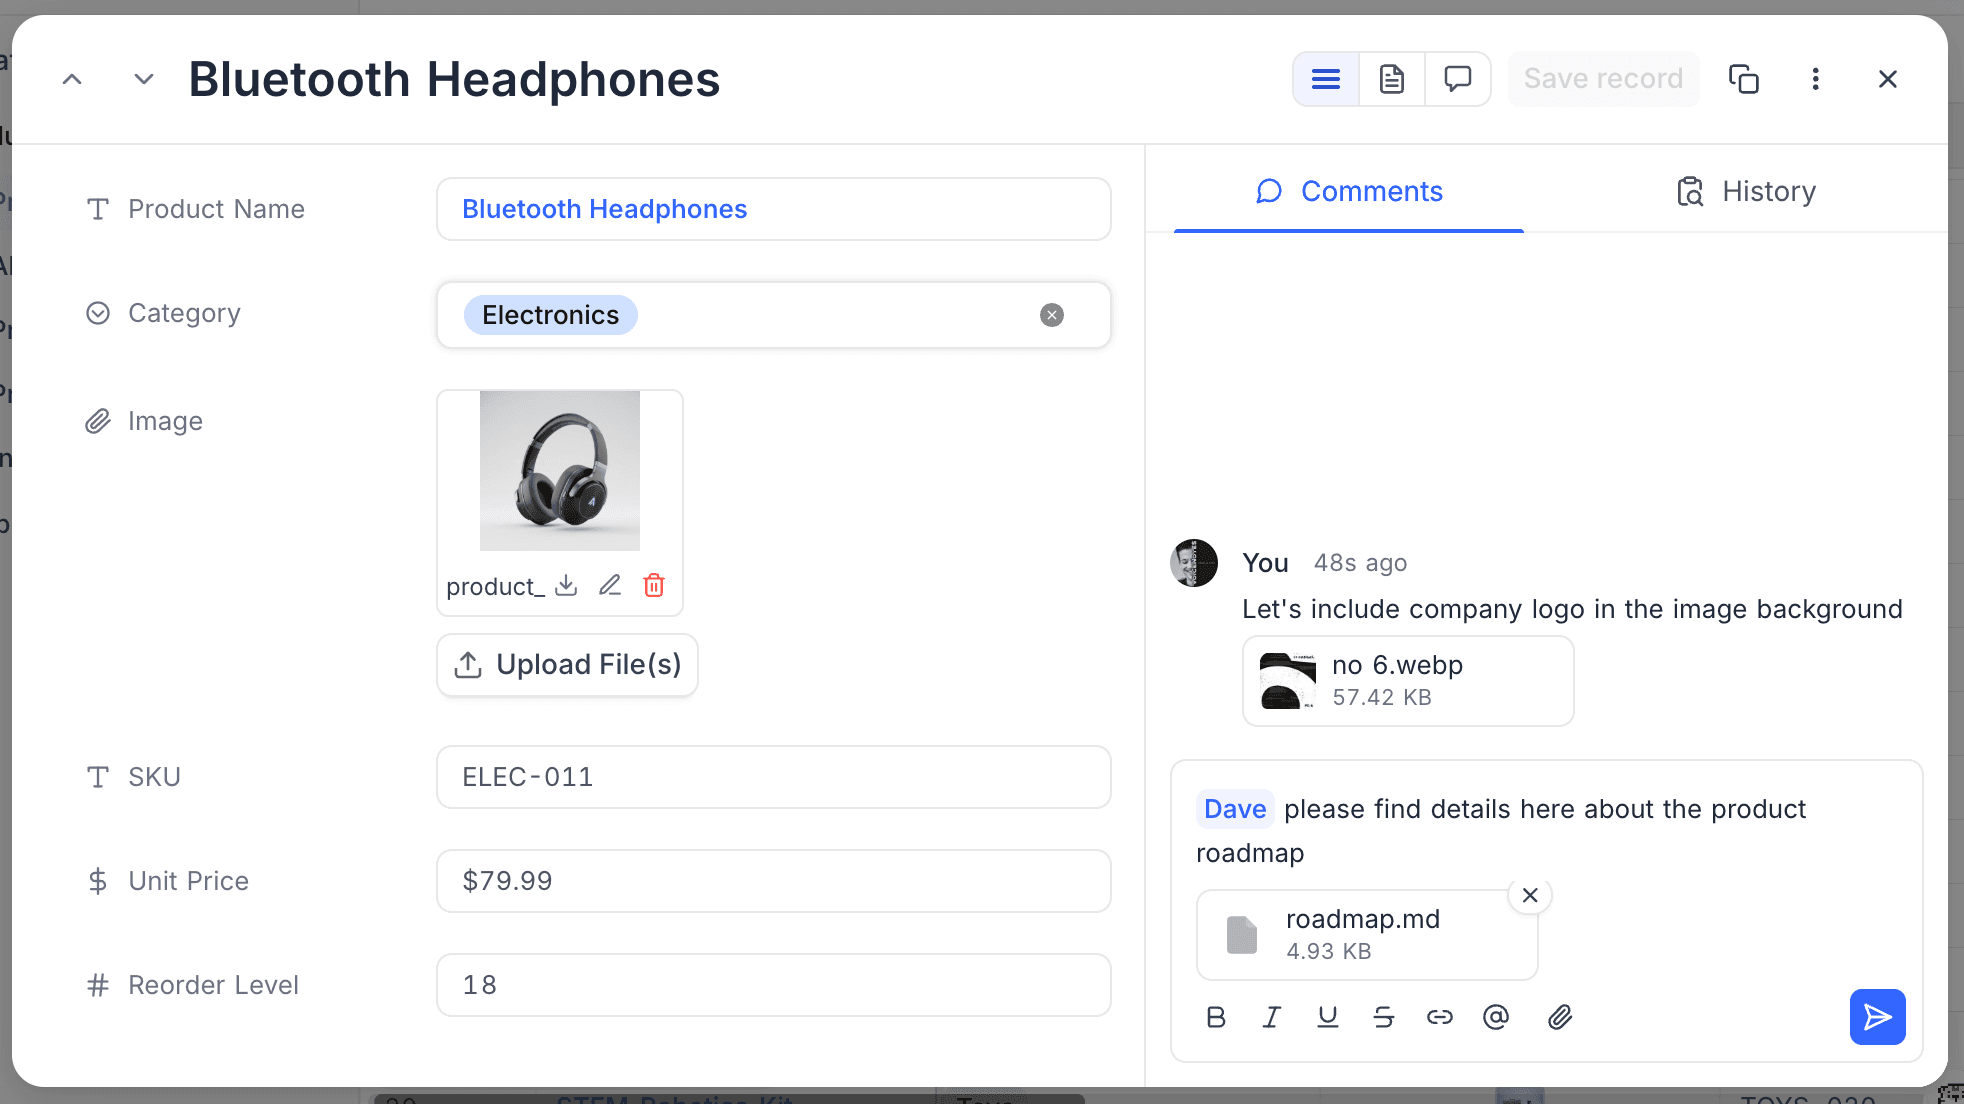
You can attach files to a comment, such as screenshots, documents, or other context for your message.
- In the comment composer, click the Attach File (paperclip) icon and select files. You can also paste an image from your clipboard, or drag files onto the composer. The files show in a strip above the composer. Each file shows a thumbnail or file-type icon and its size.
- To remove a file before you send, click the remove icon on the file.
- Post the comment. NocoDB uploads and attaches the files.
NocoDB serves comment attachments through an authenticated link. Only members who can read the comments of the record can see them.
Annotate an Image ☁
Use image annotations to attach a comment to an exact point or region on an image attachment. Your feedback then points to exactly what you mean.
To add an annotation:
- Open an image attachment in the full-screen carousel.
- Click one time to put a pin on a point, or drag to draw a rectangle around a region. A comment box opens.
- Type your comment in the box.
- Post the comment.
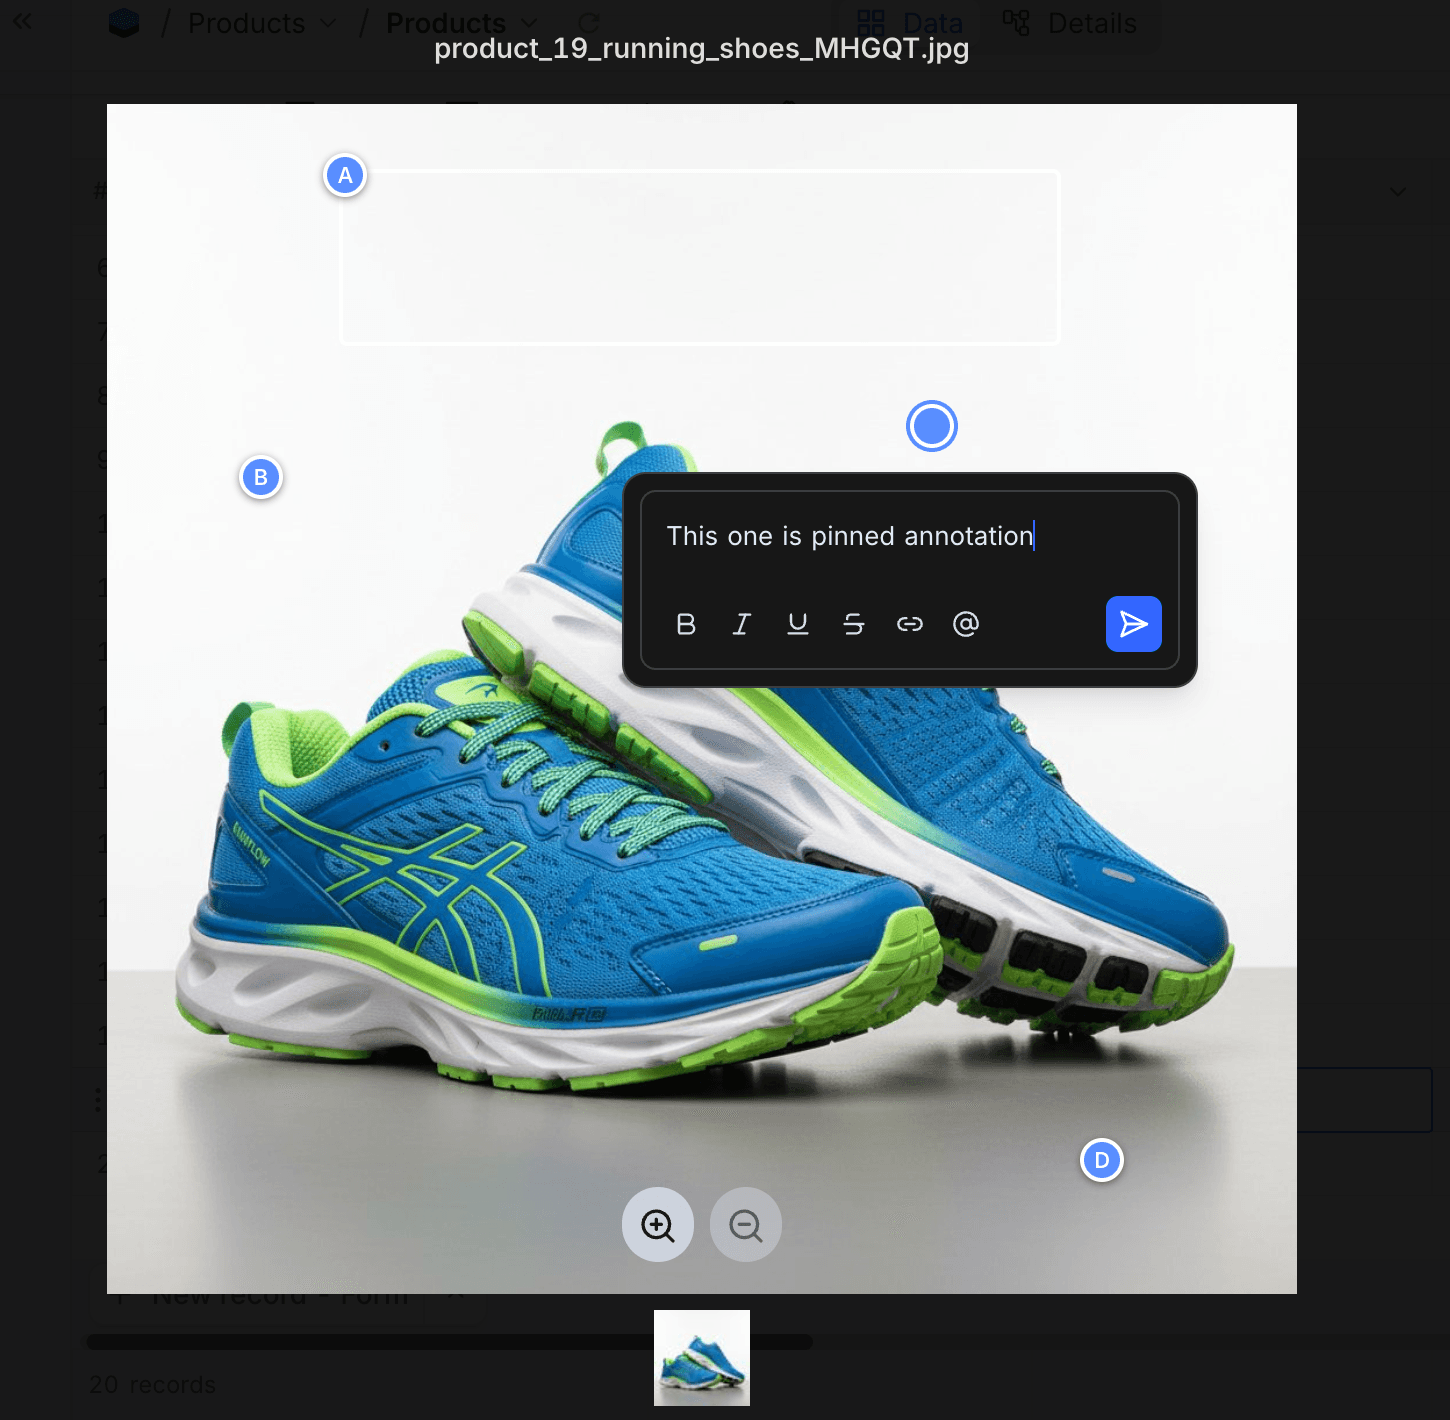
Each annotation has a letter (A, B, C, ...) in the order that you created it on that image. The pin or rectangle stays on the same spot at all zoom levels. Your replies stay in a thread under the original annotation.
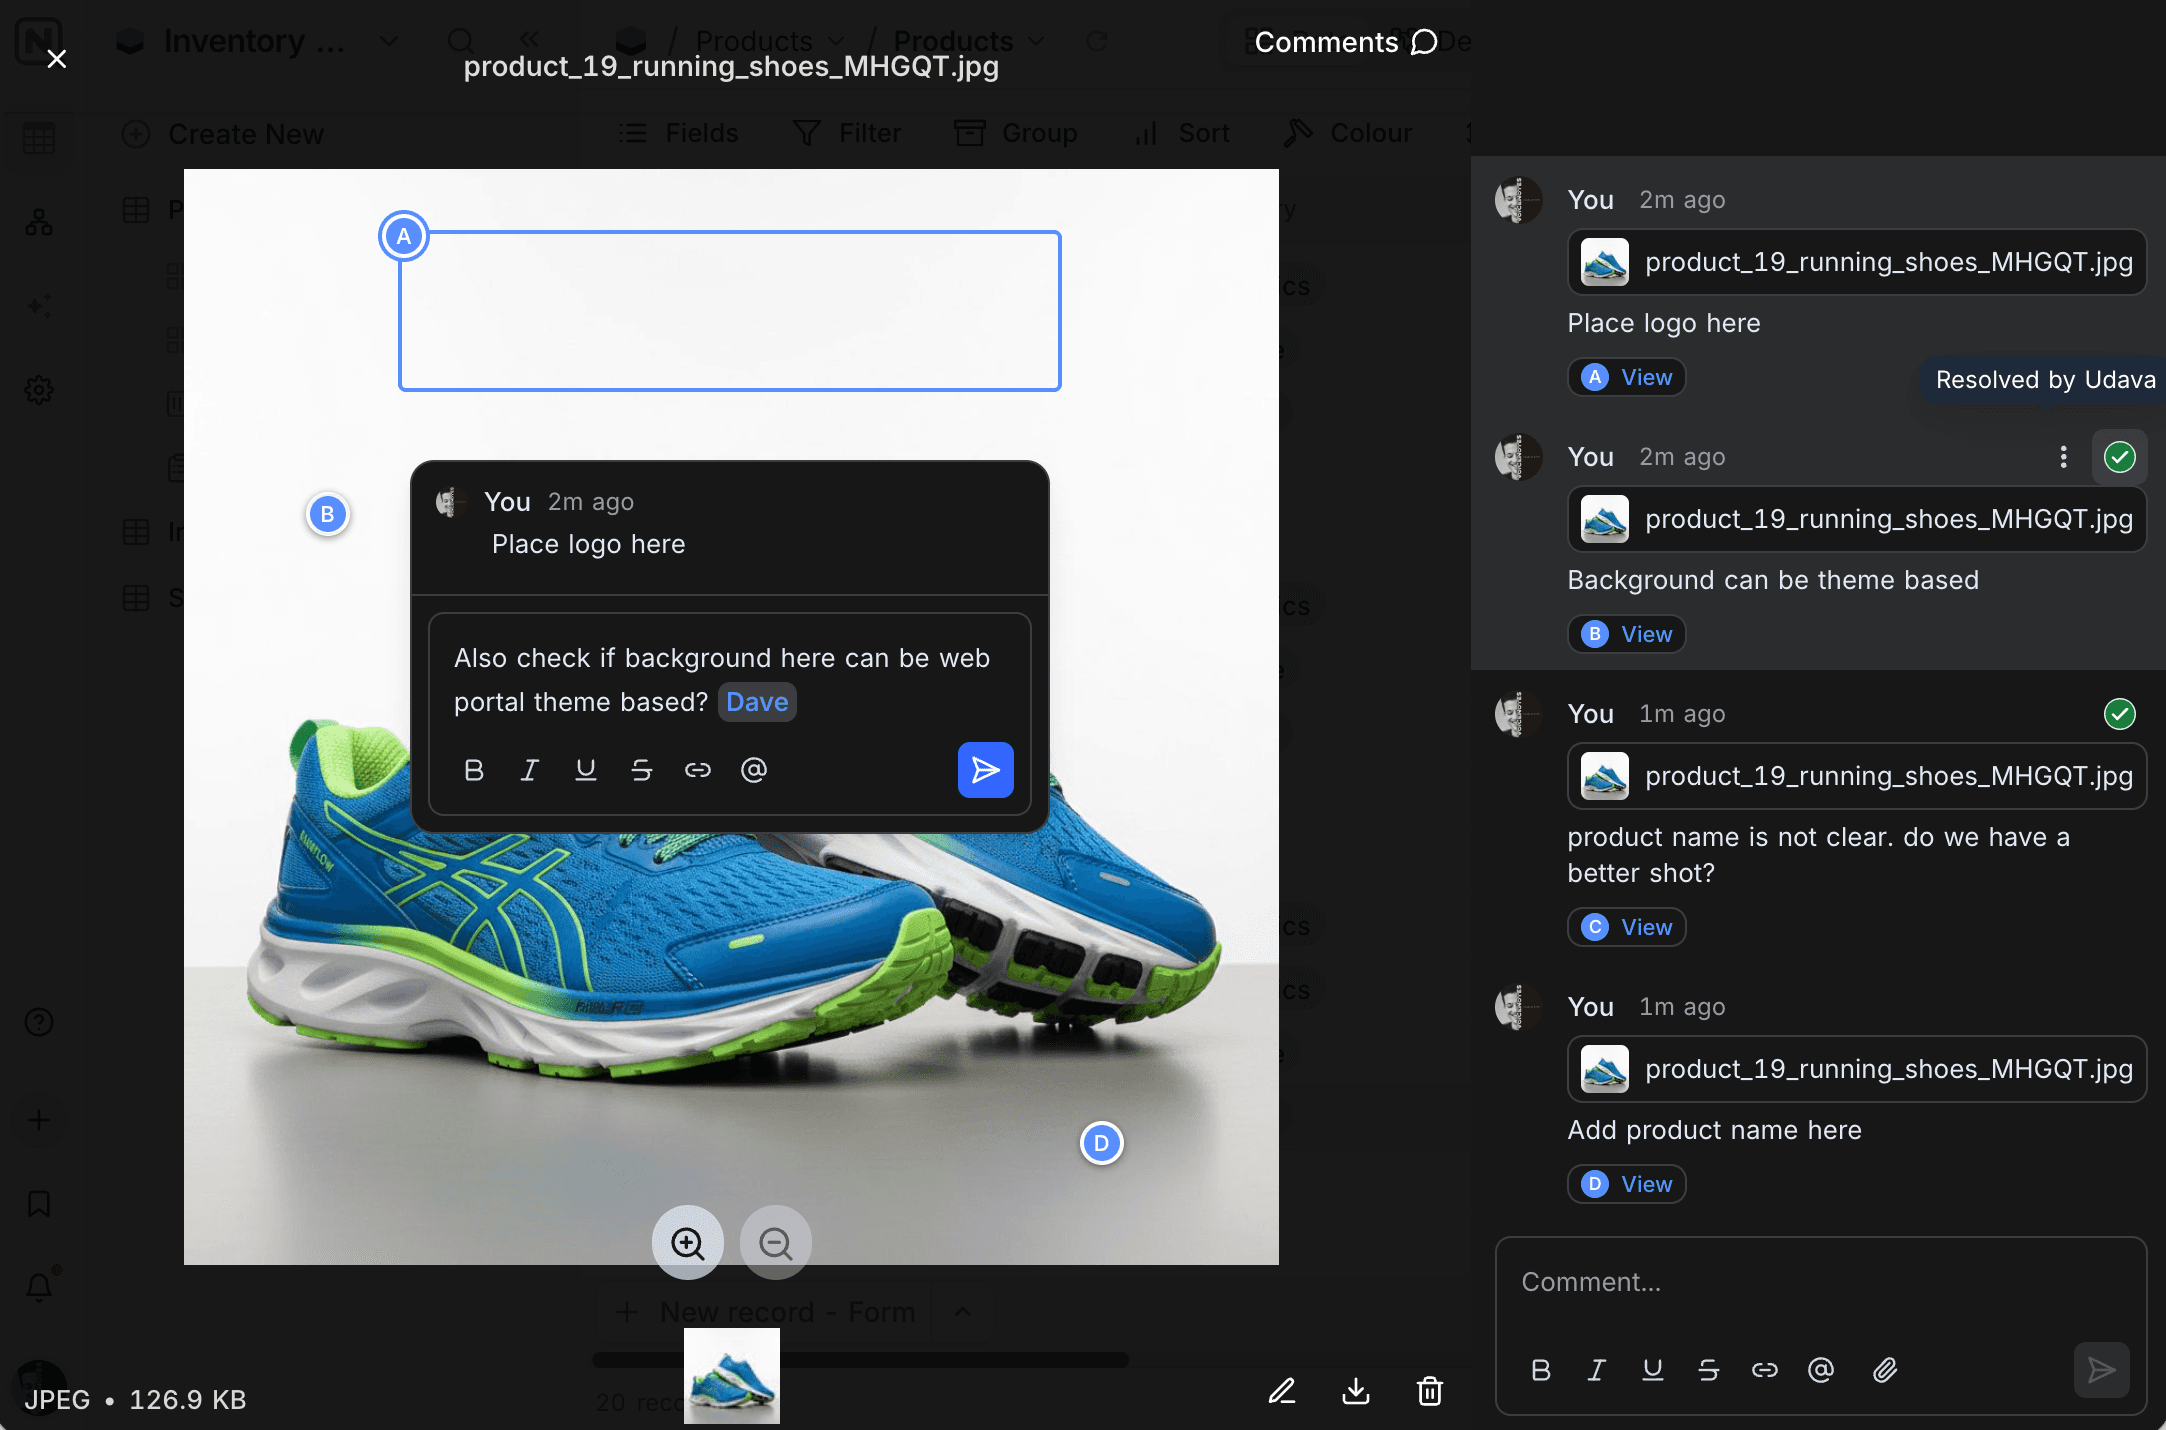
Annotations are ordinary comments. They also show in the Comments tab of the record, with a thumbnail and the file name. To open the carousel again at that region, click View on an annotation comment.
You can edit or delete an annotation comment like any other comment. You set the region when you create the annotation. You cannot move or resize the region after that.
Annotations apply to image attachments only.
Comment Notifications
Use the bell in the side panel header to select when you get notifications about comments on the record:
| Option | You get a notification |
|---|---|
| Notify me only for @mentions (default) | Only when someone mentions you in a comment. |
| Notify me about all comments | For every new comment on this record, as an in-app notification. |
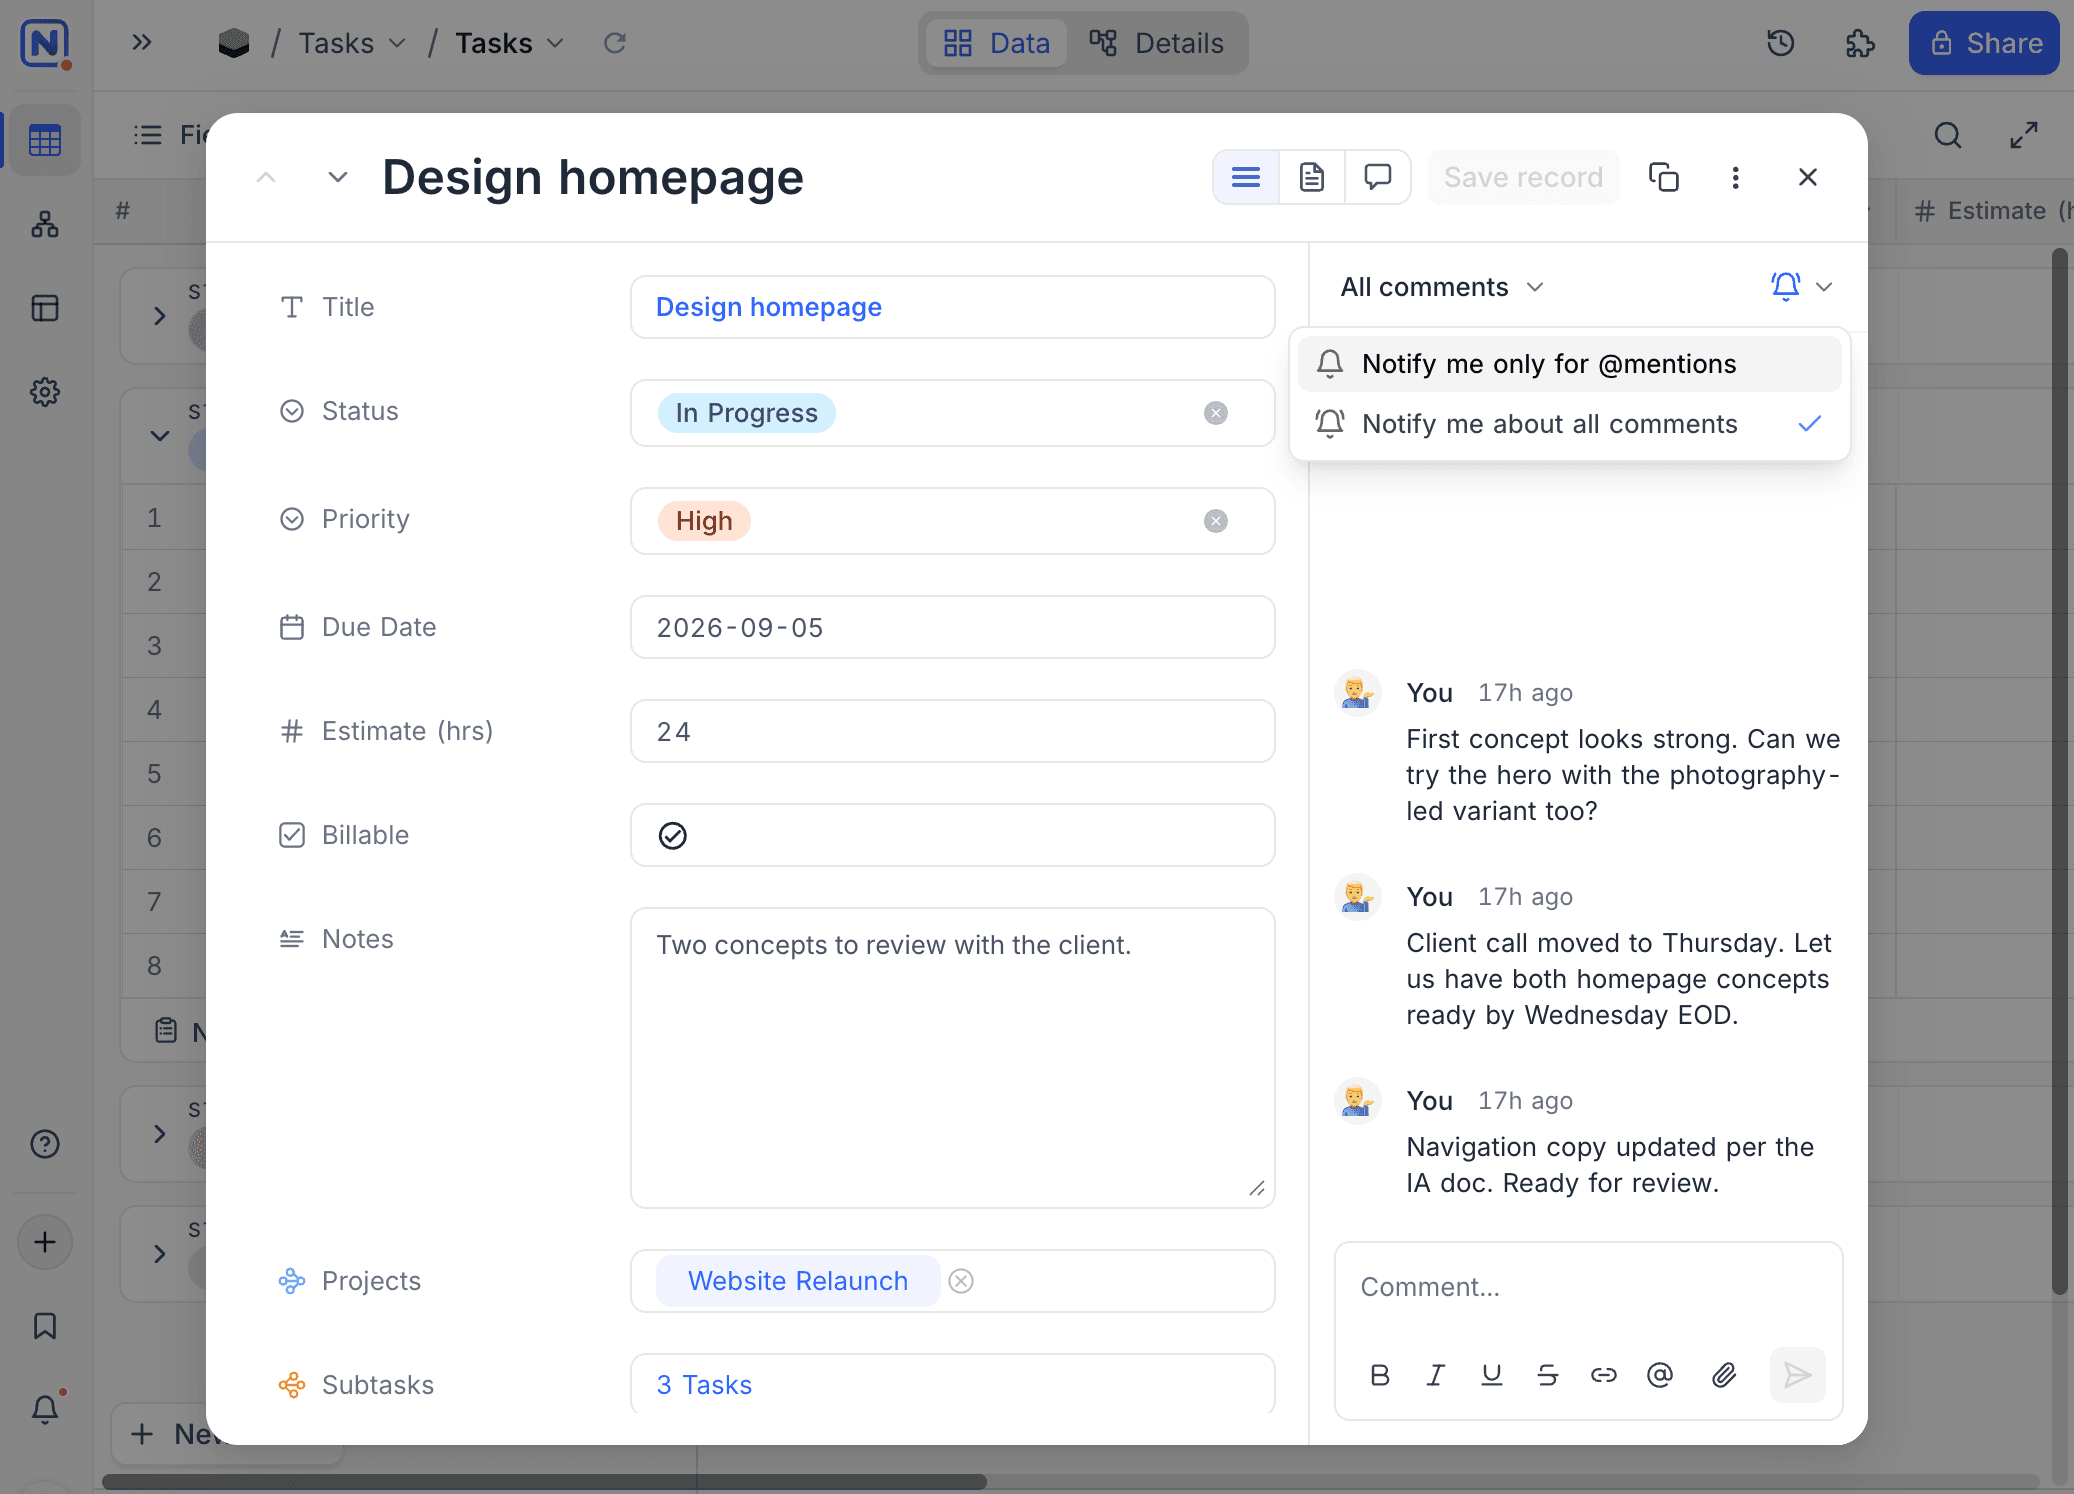
When you post a comment, NocoDB subscribes you to all comments on that record. This does not happen if you selected mentions-only. The setting is per record.
Record Actions
To use per-record actions, open the More options (...) menu in the header.
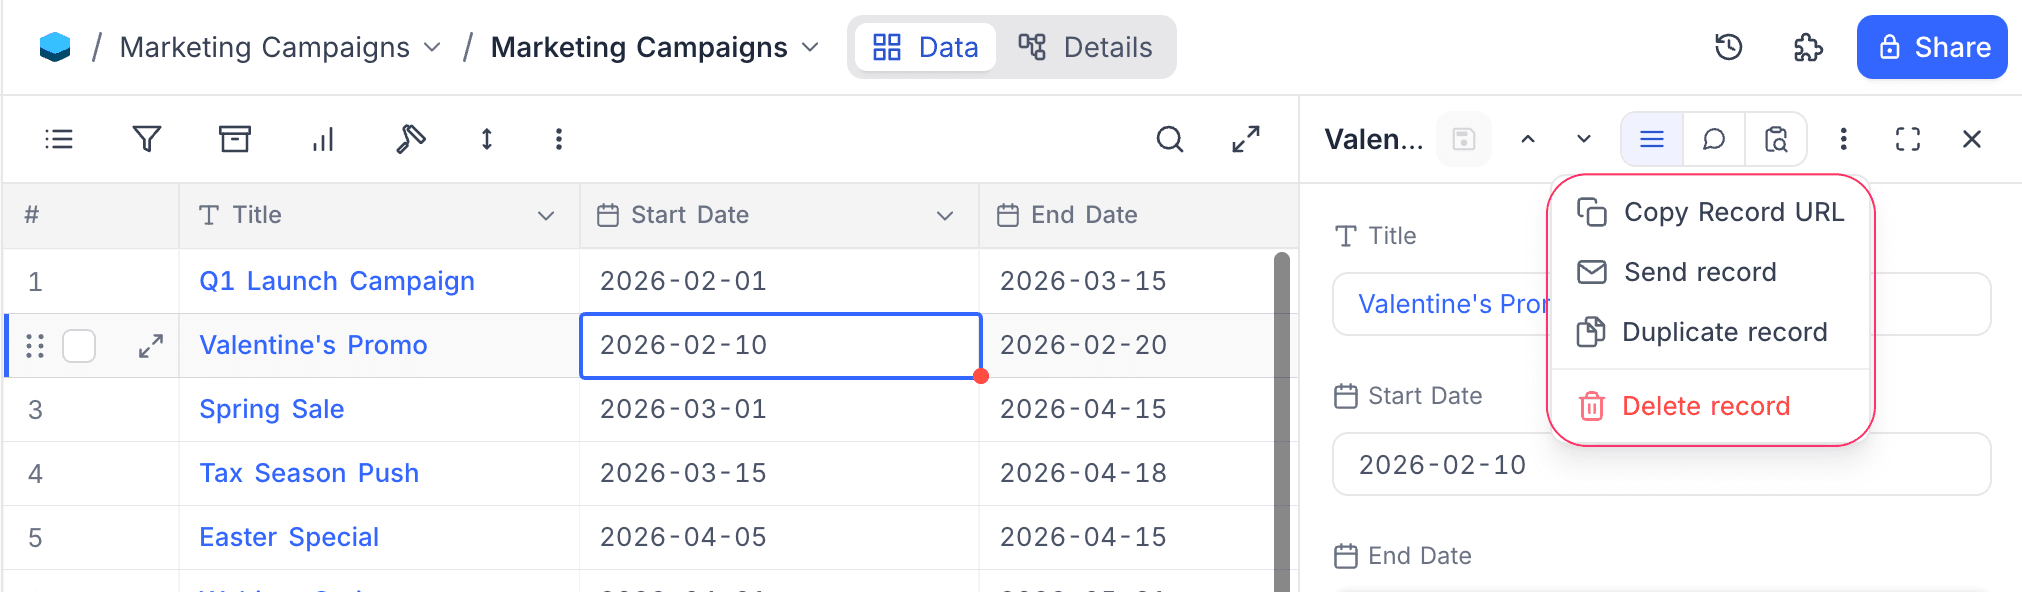
Copy Record URL
Select Copy Record URL to copy a direct link to this record. The link takes other authorized users directly to the same record, with the panel open.
Send Record ☁
Select Send record to email the record to one or more workspace members. You can:
- Select the recipients.
- Change the subject and the message (optional).
- Send a copy to yourself (optional).
Duplicate record
Select Duplicate record to make a copy of the current record. The copy opens in the panel as an unsaved new record. Edit the fields and click Save to save it.
Delete record
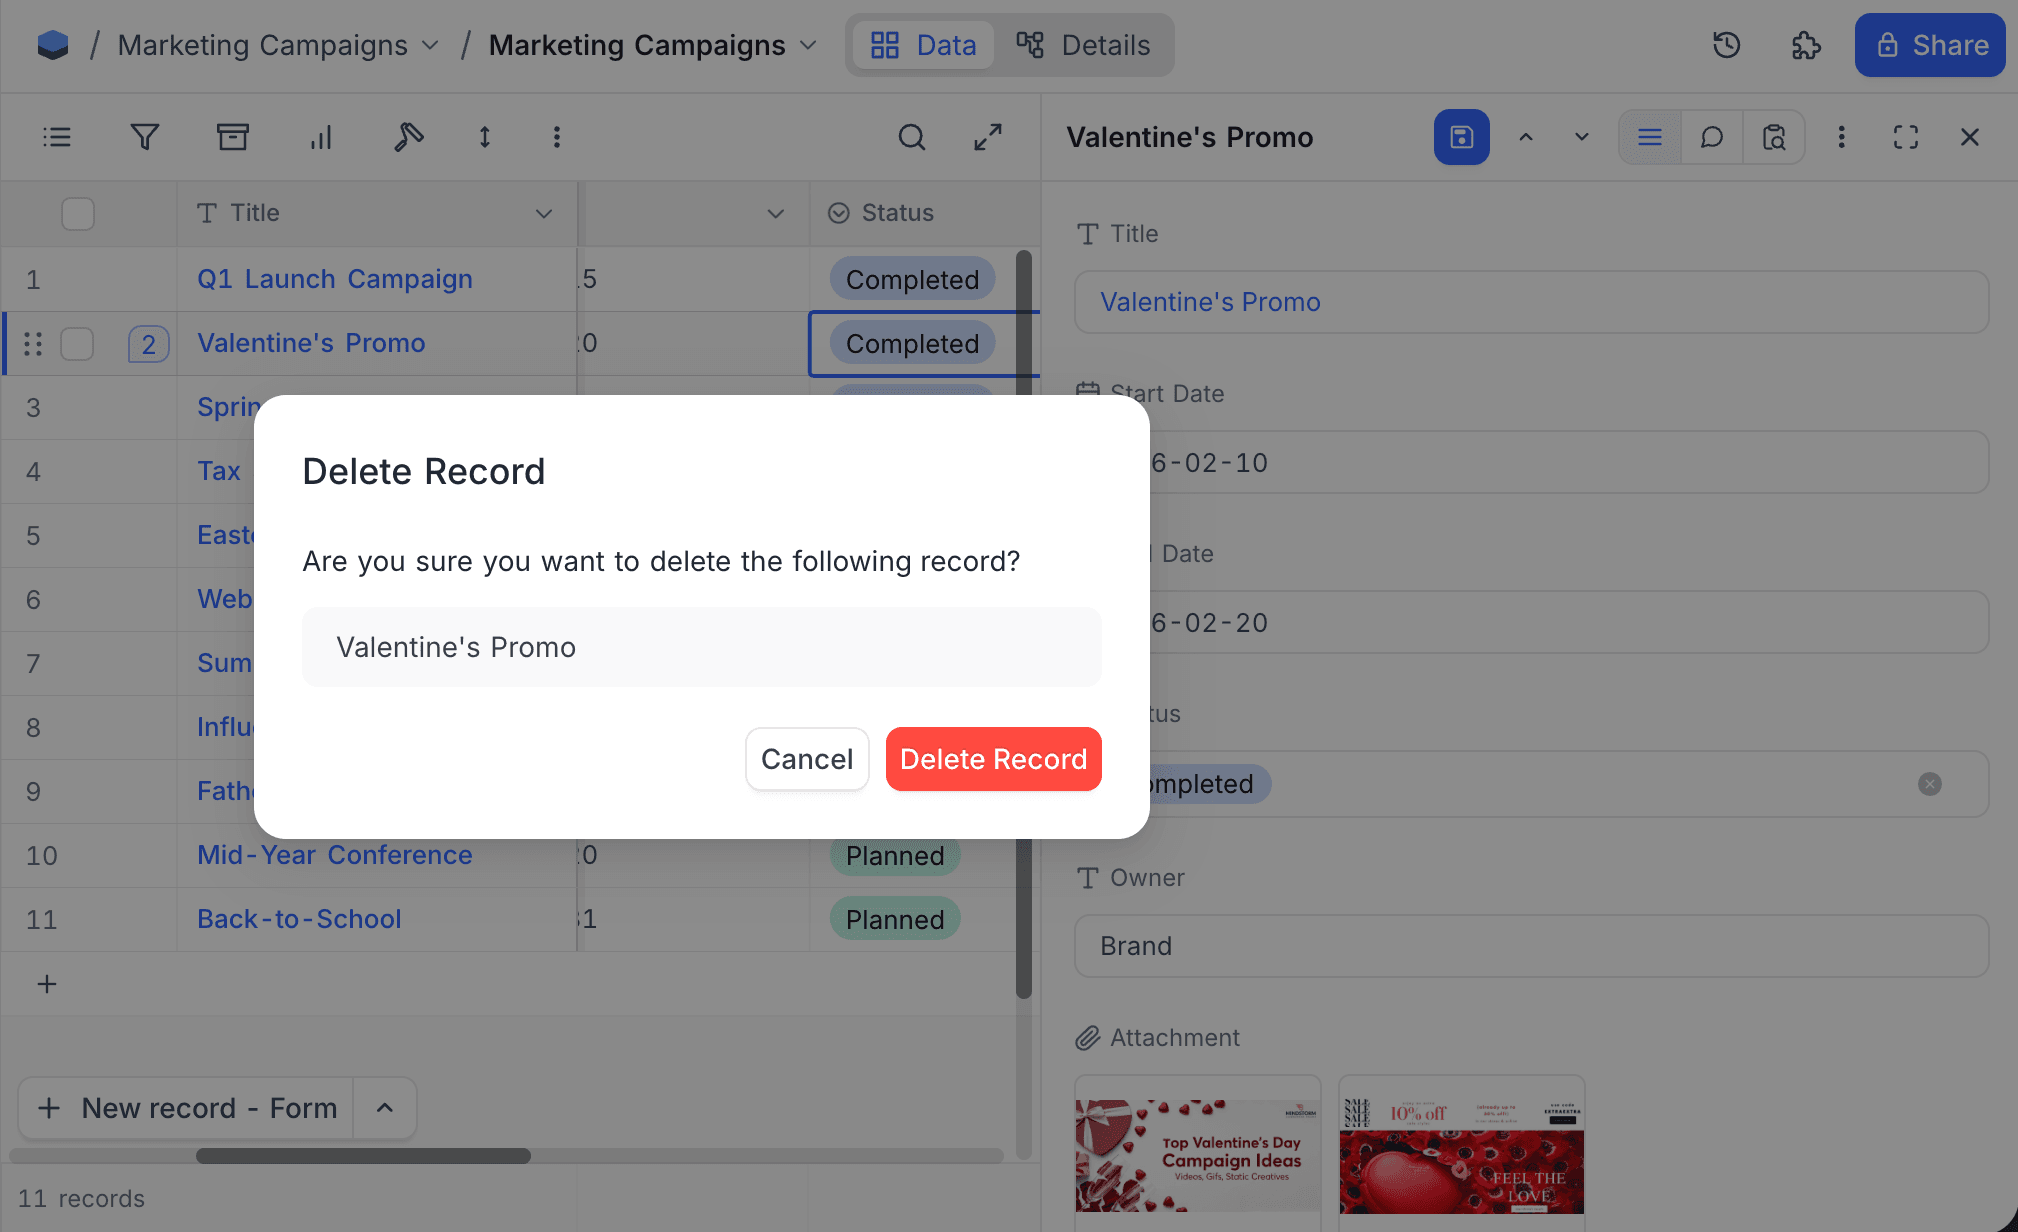
Select Delete record, and then confirm. NocoDB deletes the record.
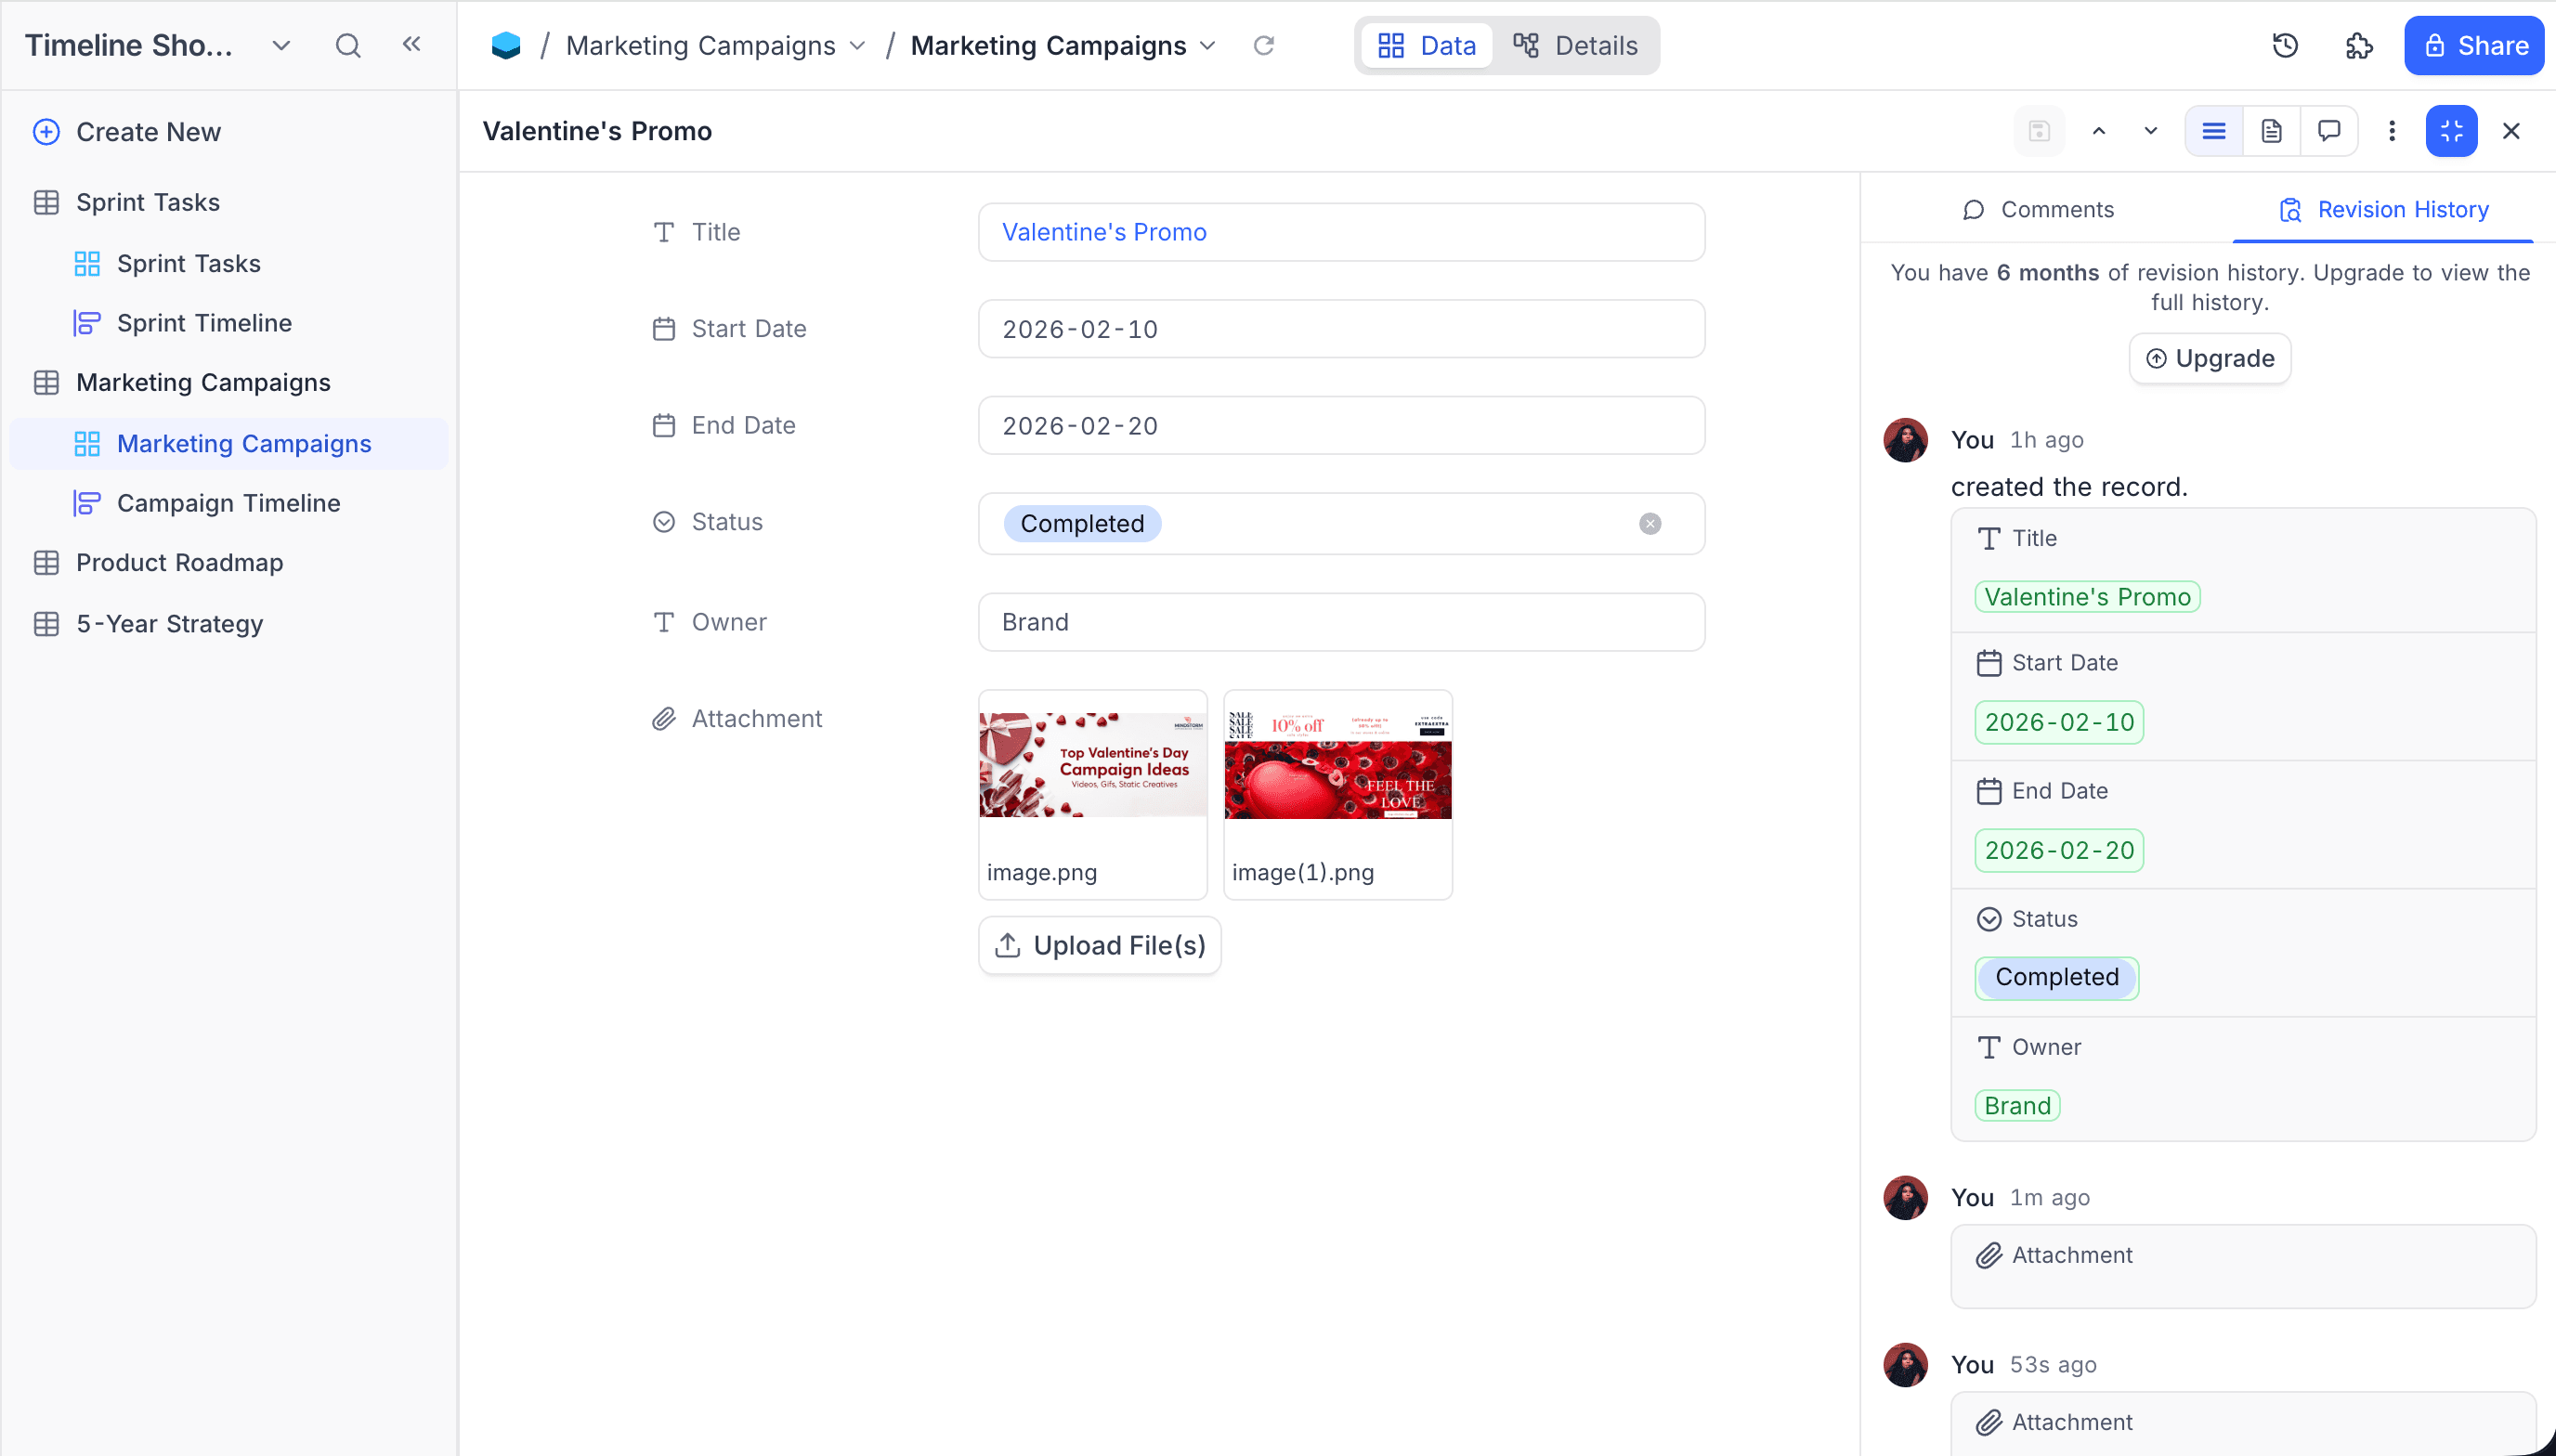
Record view modes
When you open a record in fullscreen, the view mode selector replaces the segmented switch of the side panel. It has three layouts for different tasks:
| Mode | Use it for |
|---|---|
| Field Mode | Structured data entry and editing |
| File Preview Mode | Looking at attachments |
| Discussion Mode | Collaboration and conversations with context |
Each mode helps you focus on one task.
Field Mode
Field Mode is the default fullscreen layout. The main area shows all fields of the record, each with its label and editor. The drawer on the right has the Comments and Revision History tabs, so you can see activity while you edit.
File Preview Mode ☁
File Preview Mode shows attachments in the center of the screen. Use it for records with many images or documents.
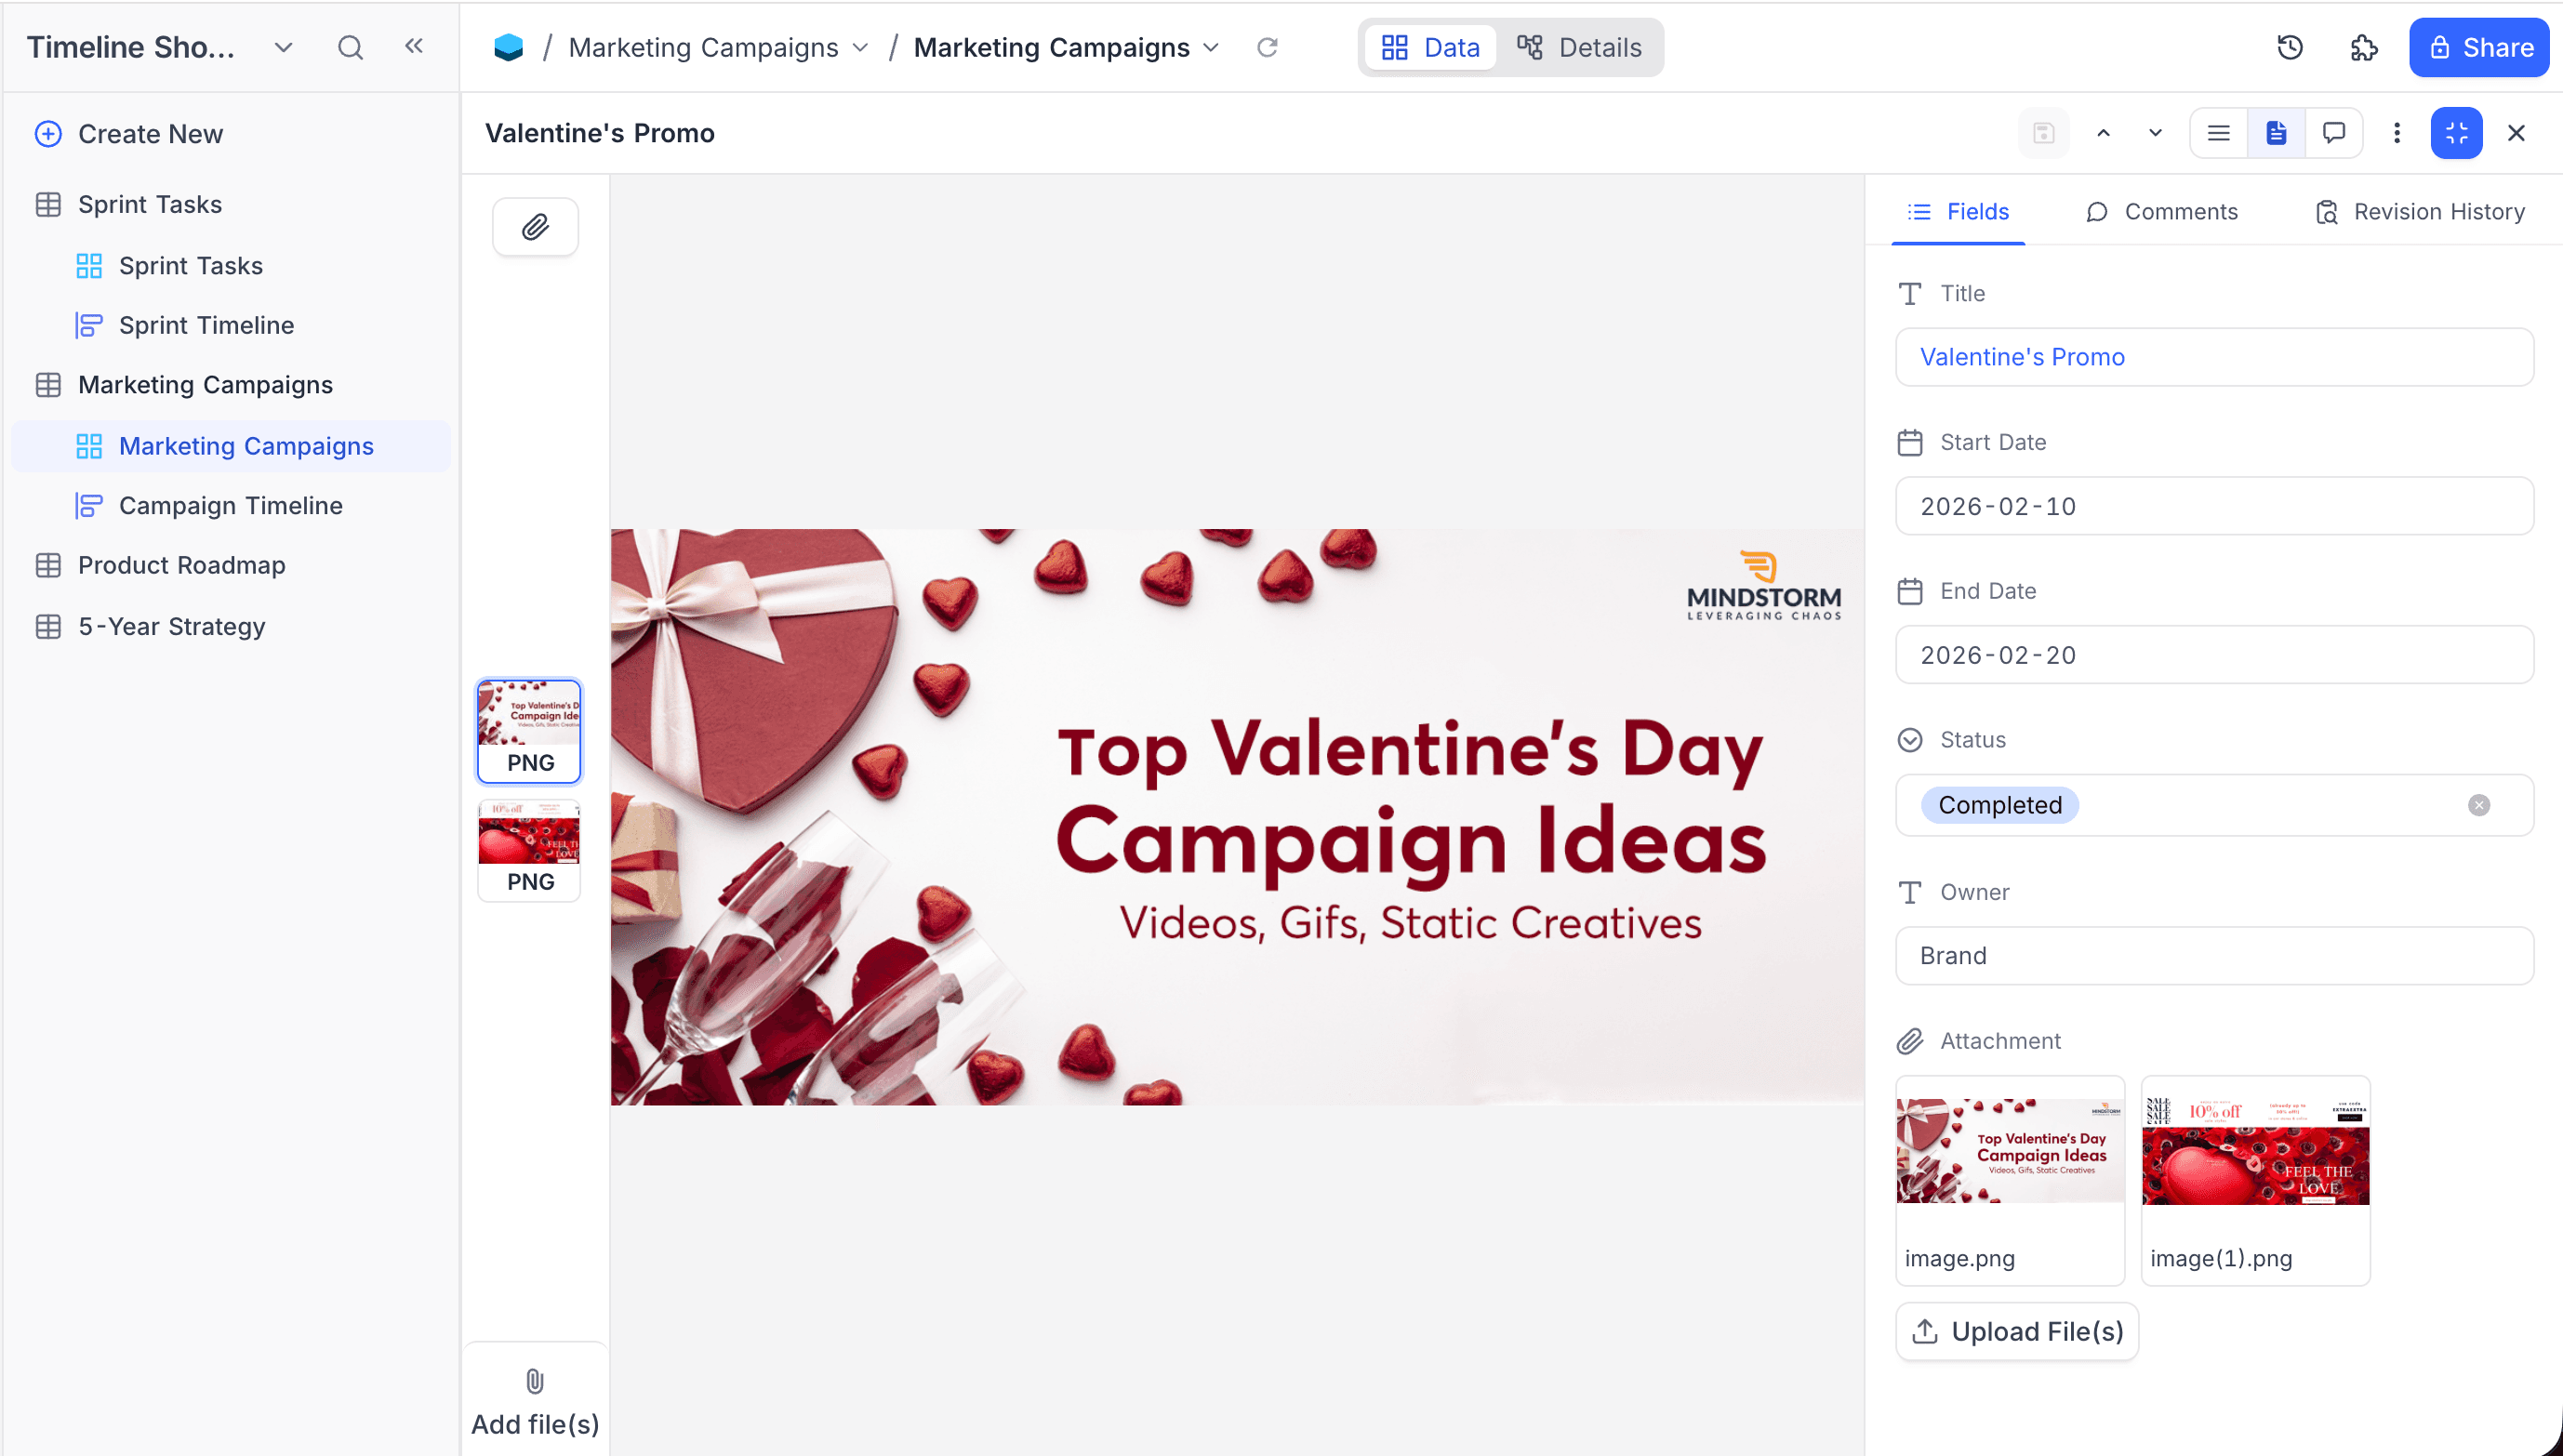
- Configure attachment field: by default, the first attachment field shows. If the record has more than one attachment field, select the field in the dropdown at the top left of the preview panel.
- Navigate through files: by default, the first attachment shows. The thumbnails on the left show every file of the record. Click a thumbnail to open the file.
- Add files: to upload new attachments from the preview, click Add file(s) at the bottom of the thumbnail list.
Supported files
File Preview Mode supports these media types:
Image Files
.jpeg, .jpg, .png, .gif, .svg, .bmp, .ico, .webp, .avif, .heif, .heifs, .heic, .heic-sequenceAudio Files
.mp3, .flac, .wav, .m4aVideo Files
.webm, .mpg, .mp2, .mpeg, .ogg, .mp4, .m4v, .avi, .wmv, .mov, .qt, .flv, .mkv, .3gp, .3g2, .vob, .ts, .mp4aDiscussion mode ☁
Discussion Mode puts the conversation in the center of the screen. The full comment thread and the revision history fill the main area. A short, read-only summary of the field values is on the right, so you can see the context while you discuss.
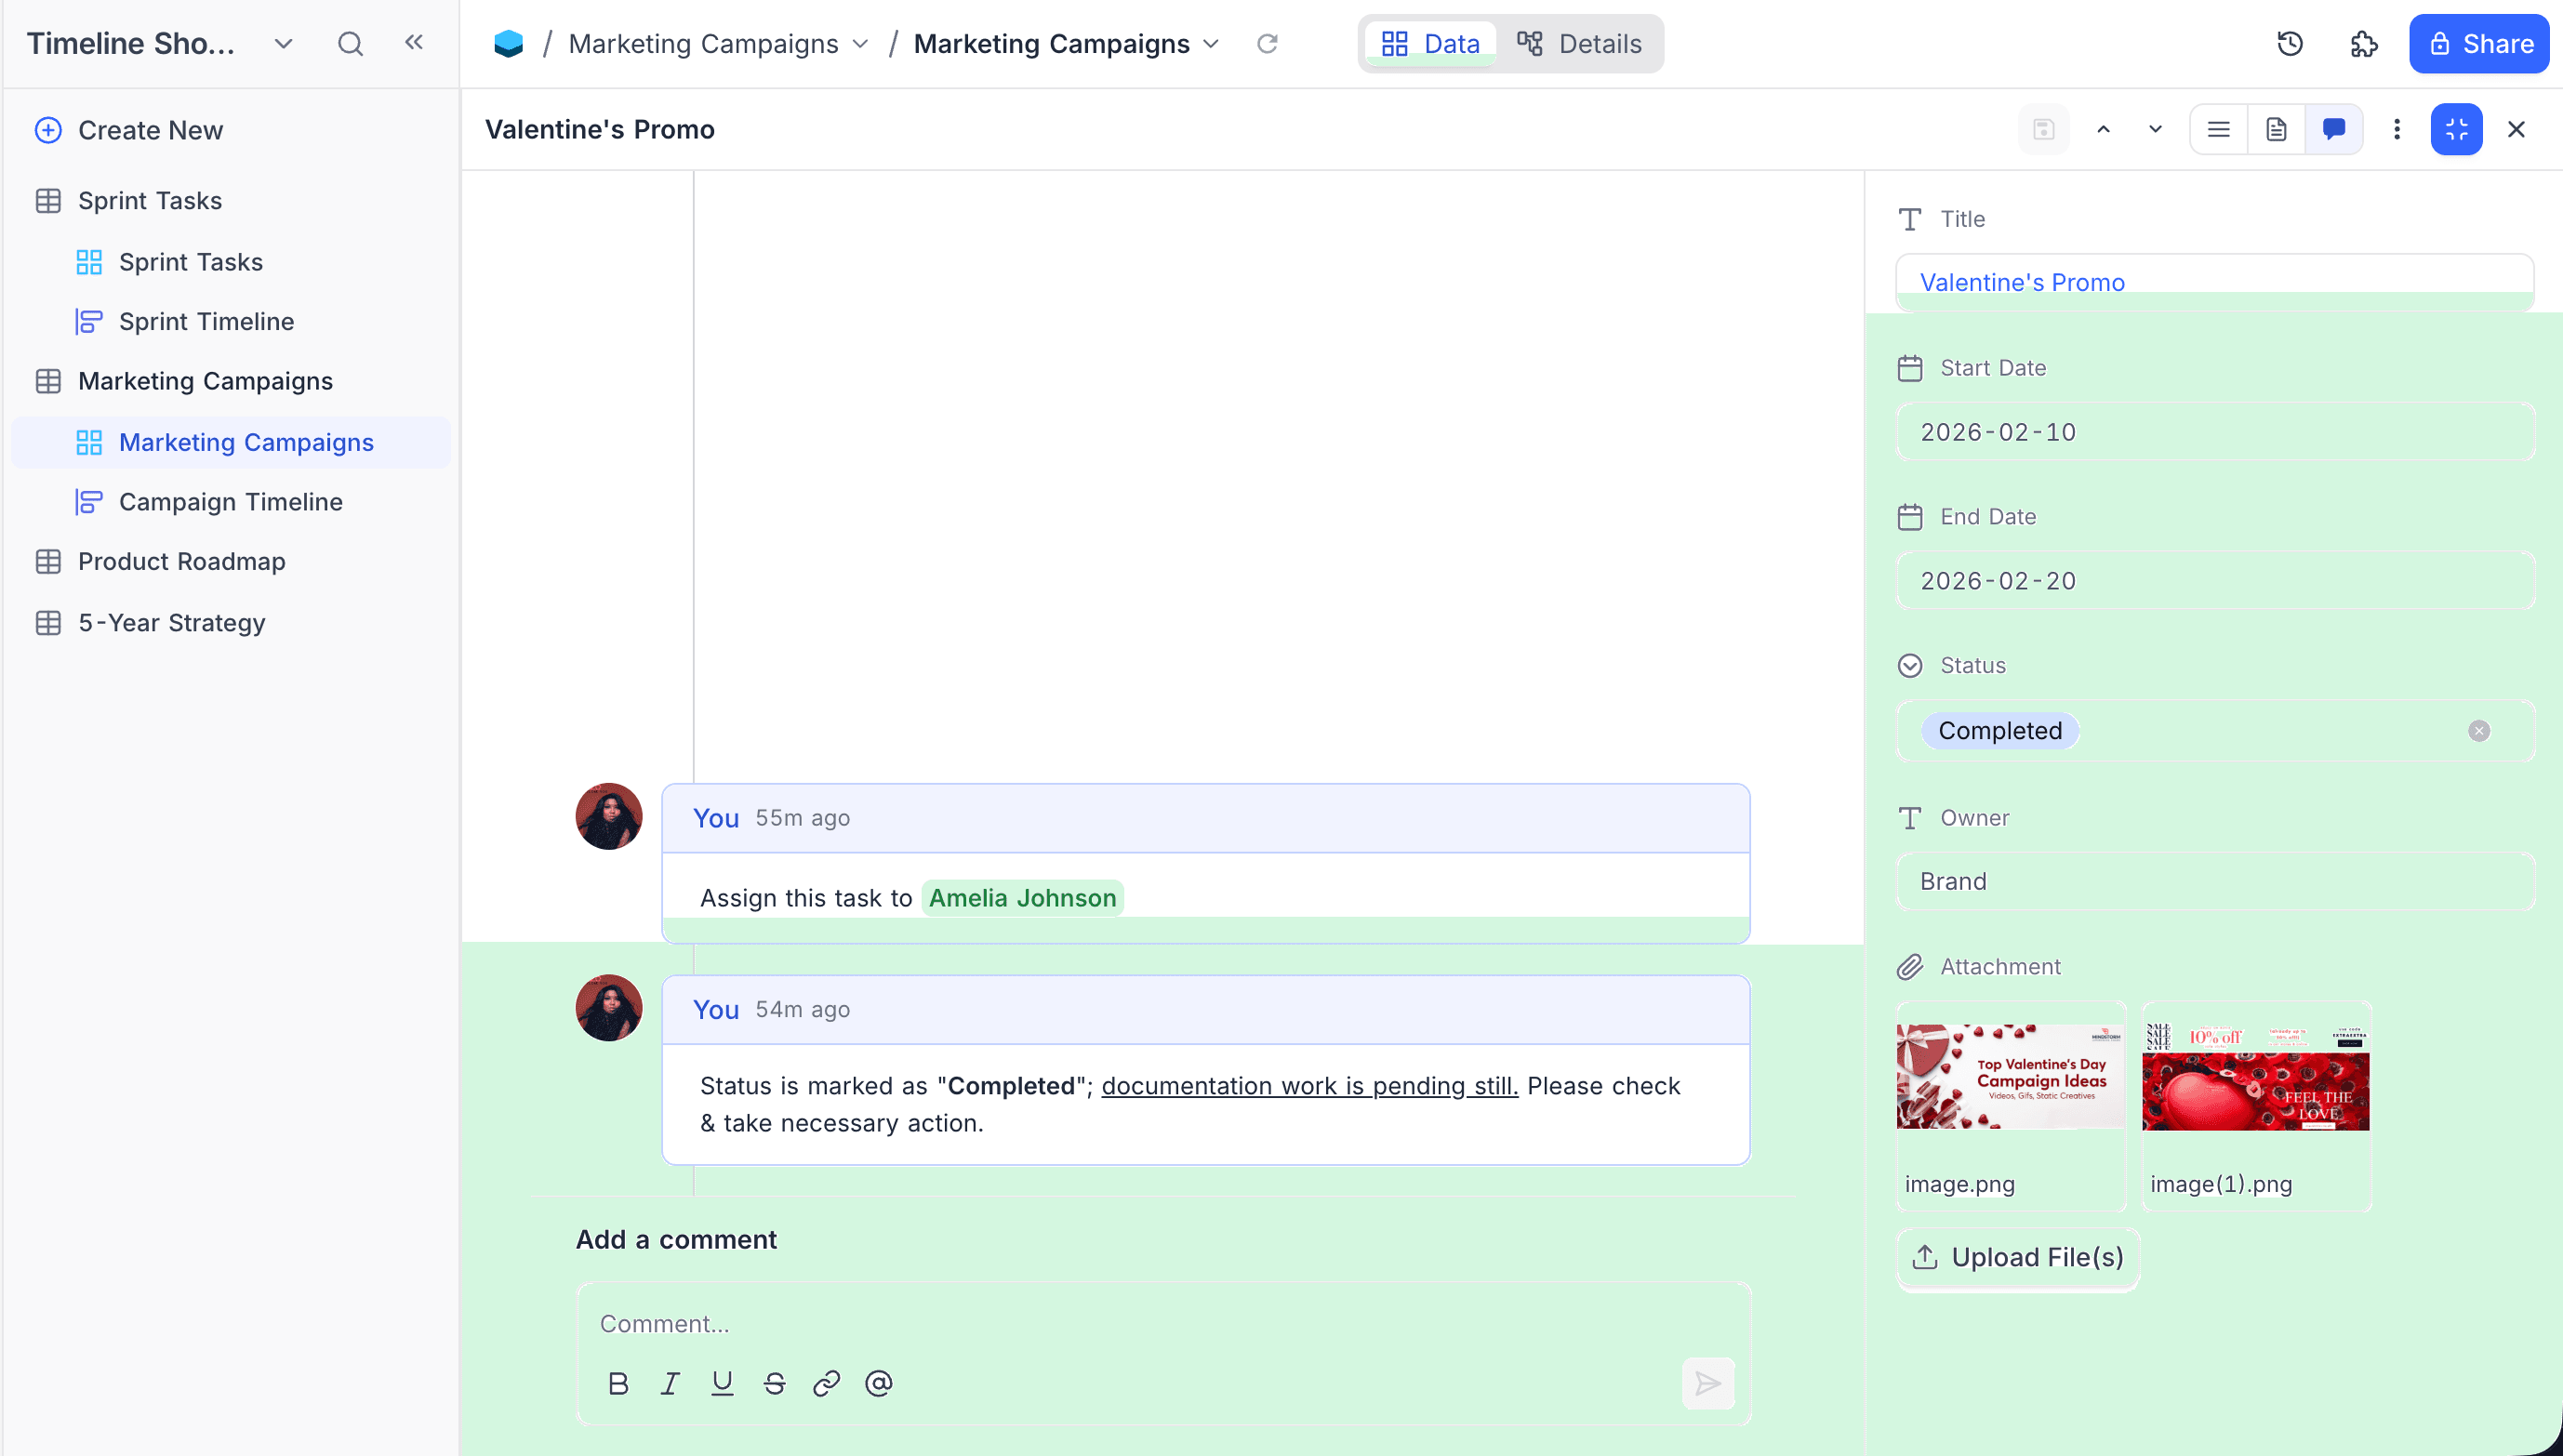
Switching between modes
- Open a record.
- In the side panel header, click Enter fullscreen. The view mode selector shows.
- Click the icons to change between the Field, File Preview, and Discussion layouts.
- Click Exit fullscreen to go back to the side panel. You stay on the same record.
If you close the record in fullscreen, you go back to the grid.
Preferences
The Expanded record side panel experimental feature turns on the side panel by default. To use the legacy centered modal, turn off this feature in Account settings → Experimental features. This change applies only to your account. Your teammates keep the layout that they have turned on.
Last updated on