Actions on View
Copy a prompt, paste it into NocoAI in any base, and replace the words in [brackets] with your own.
- Rename this view to [new name]
- Delete the [view name] view
- Create a view like this one that shows only records where [Status] is [Open]
View context menu
The view context menu has tools to work with the view. To open it, click the ellipsis symbol (...) next to the view in the left sidebar.
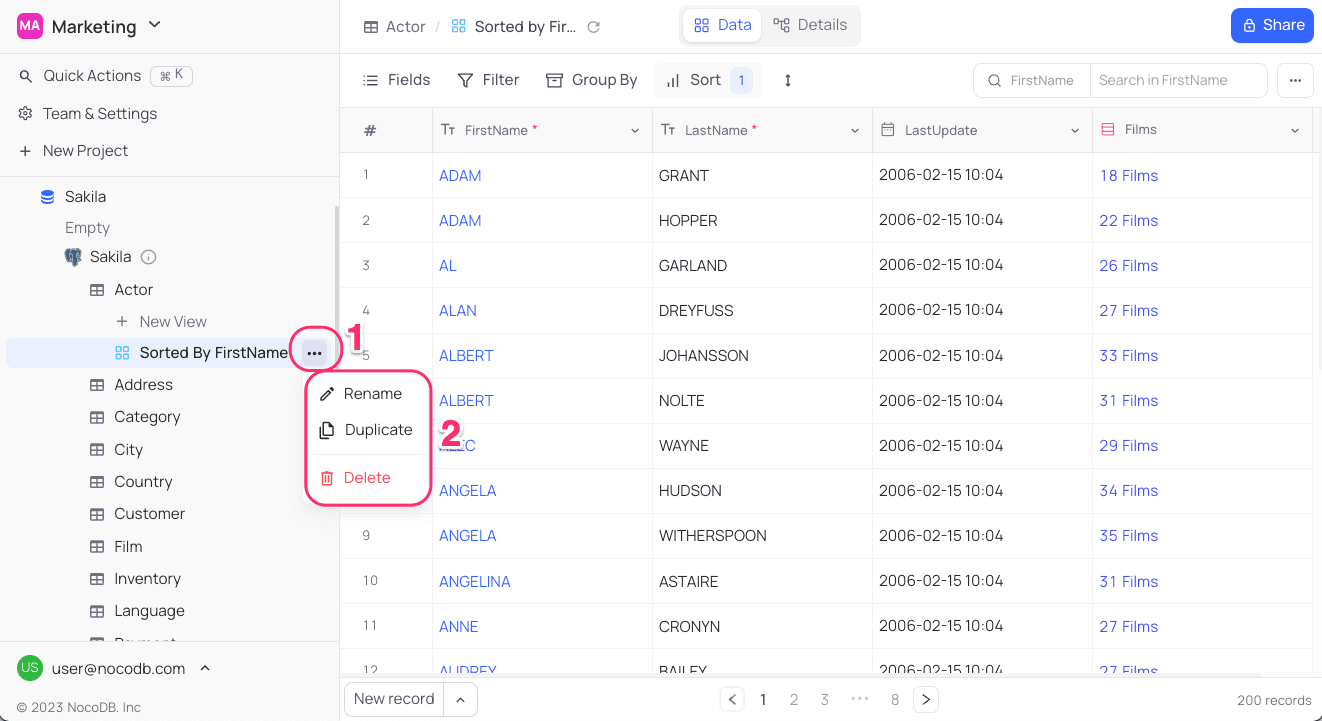
Rename view
- In the left sidebar, click the ellipsis symbol (
...) next to the view name. - In the view context menu, click
Rename. - In the field, enter the new view name.
- Press the
Enterkey.
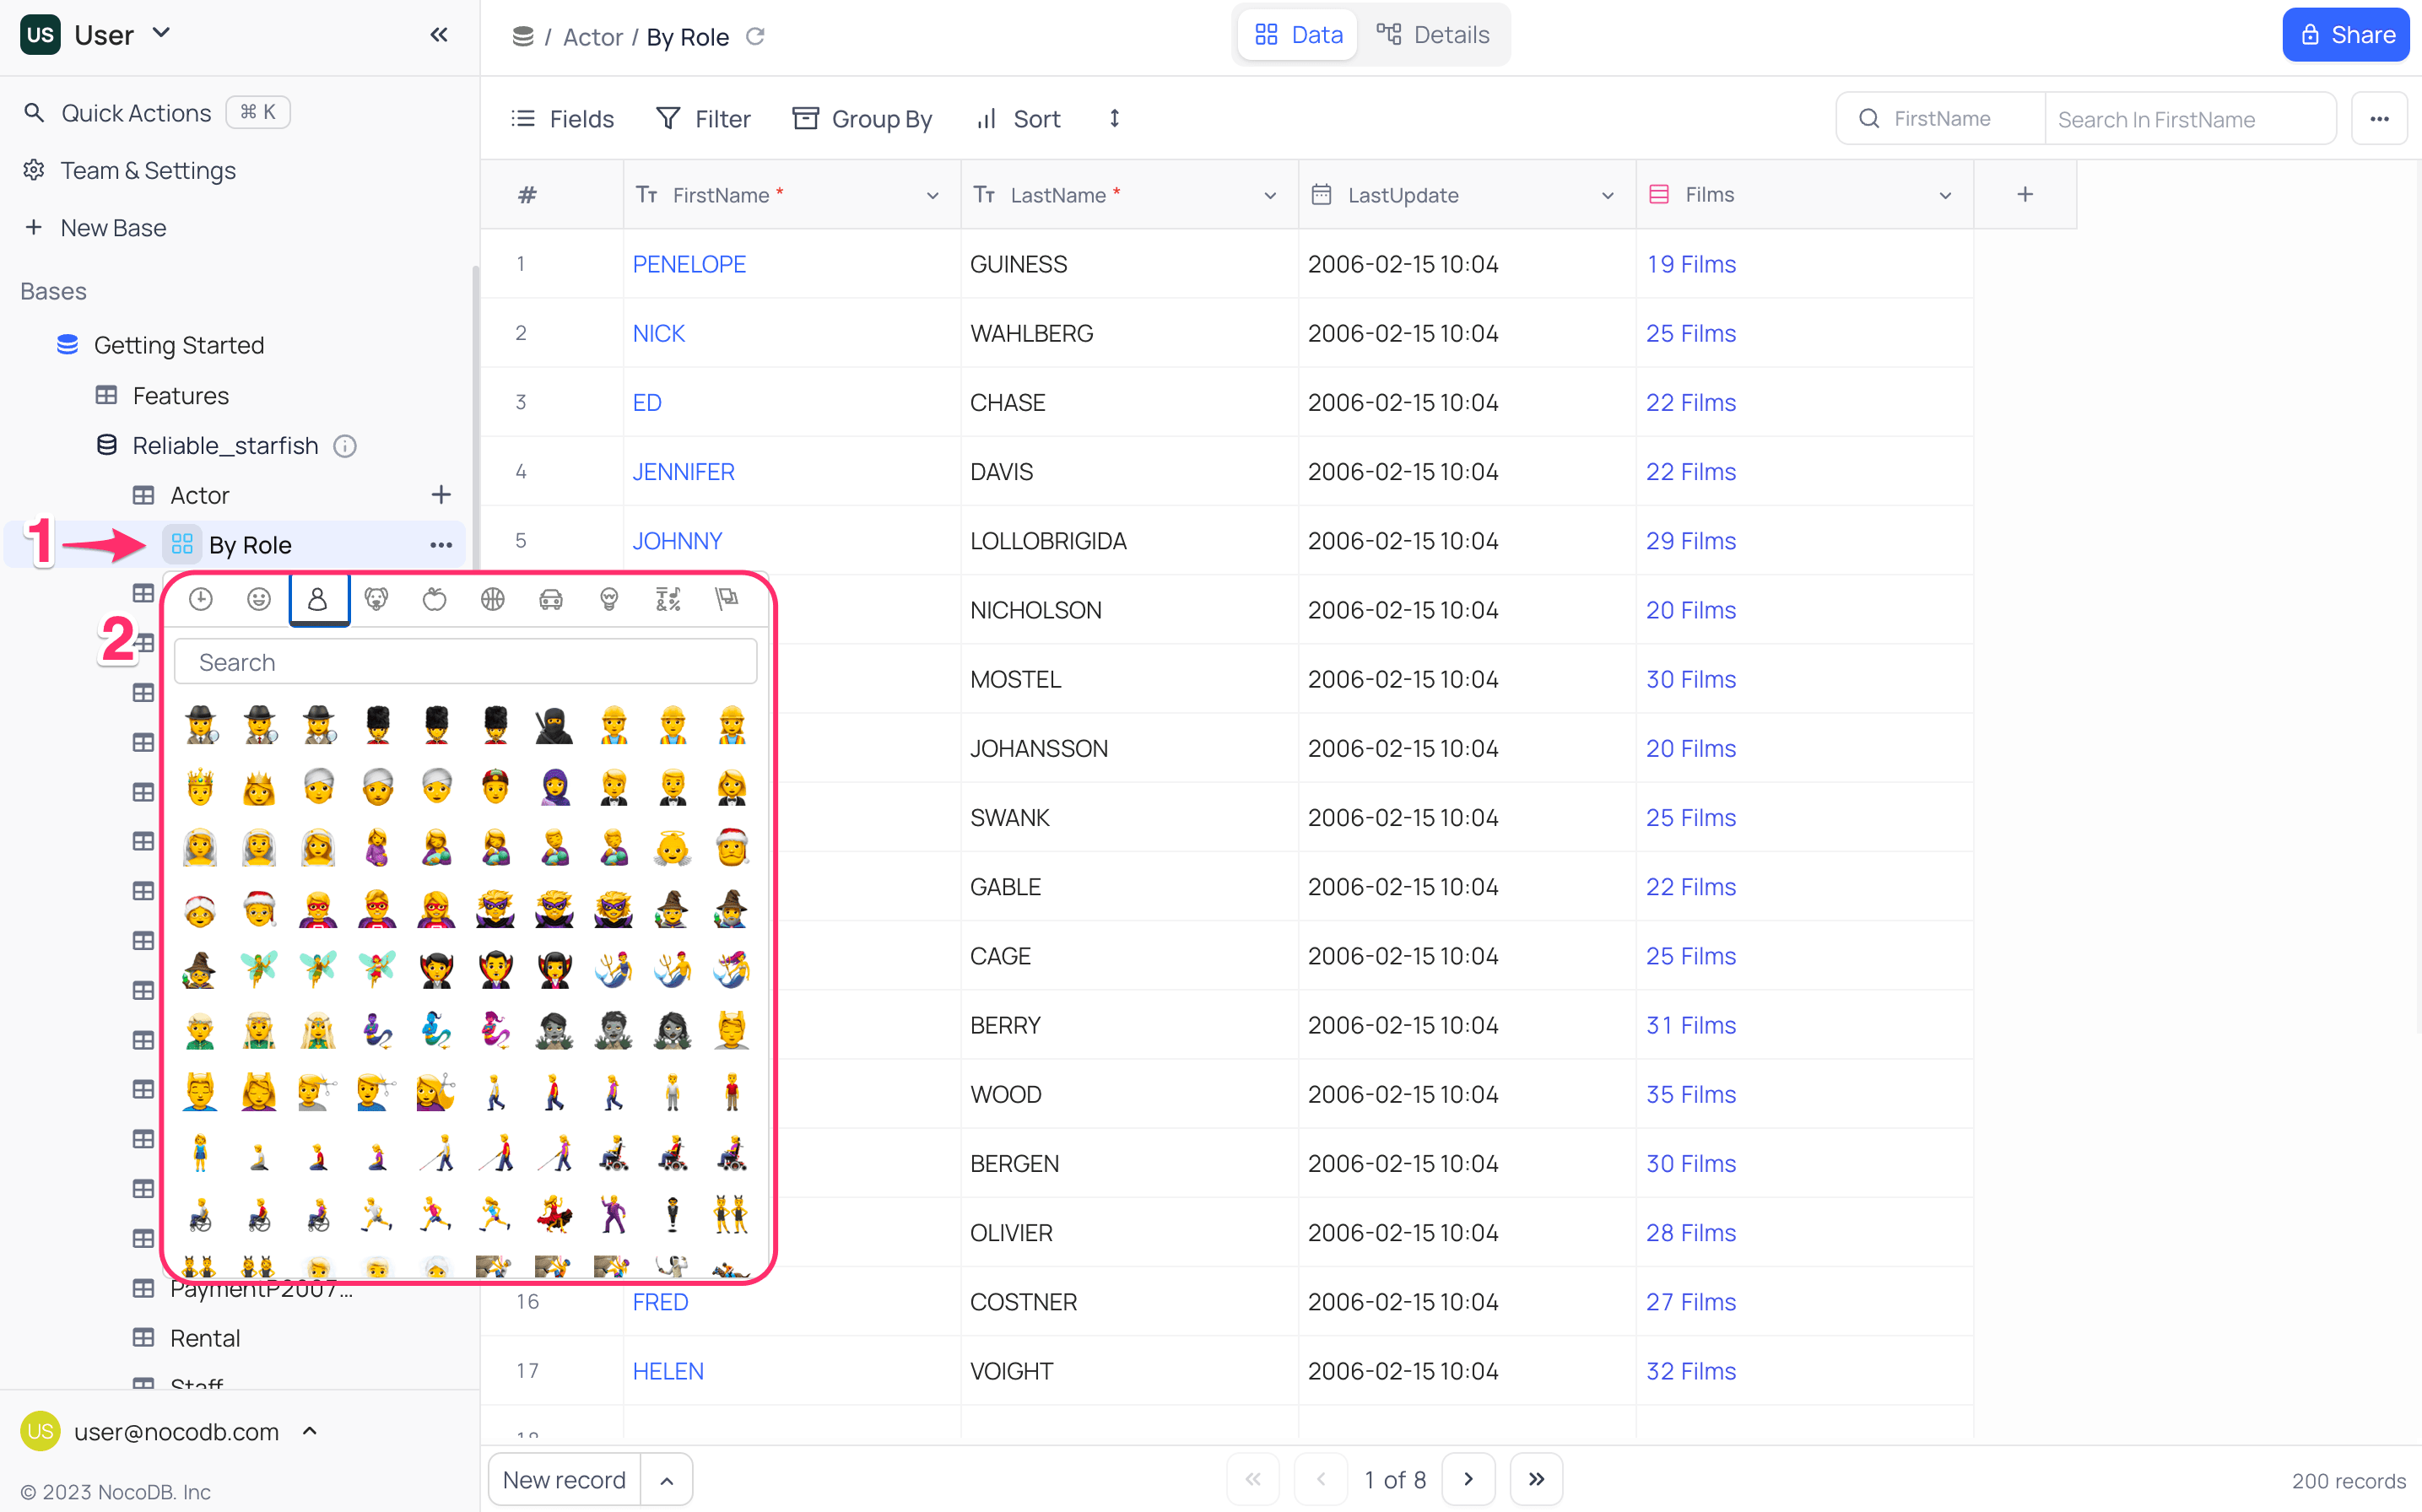
Change view icon
- In the left sidebar, click the current view icon to the left of the view name.
- In the list, select the new icon.
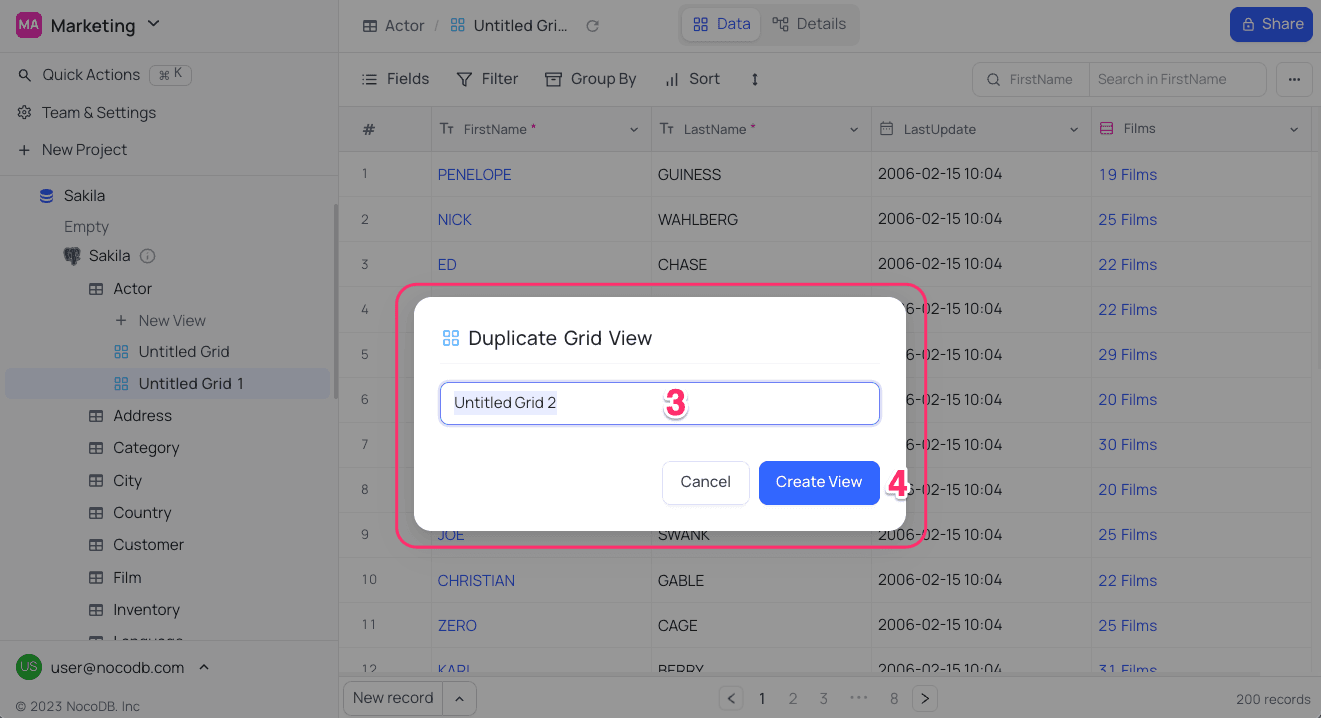
Duplicate view
- In the left sidebar, click the ellipsis symbol (
...) next to the view name. - In the view context menu, click
Duplicate. - In the field, enter the new view name.
- In the confirmation dialog, click
Duplicate View.
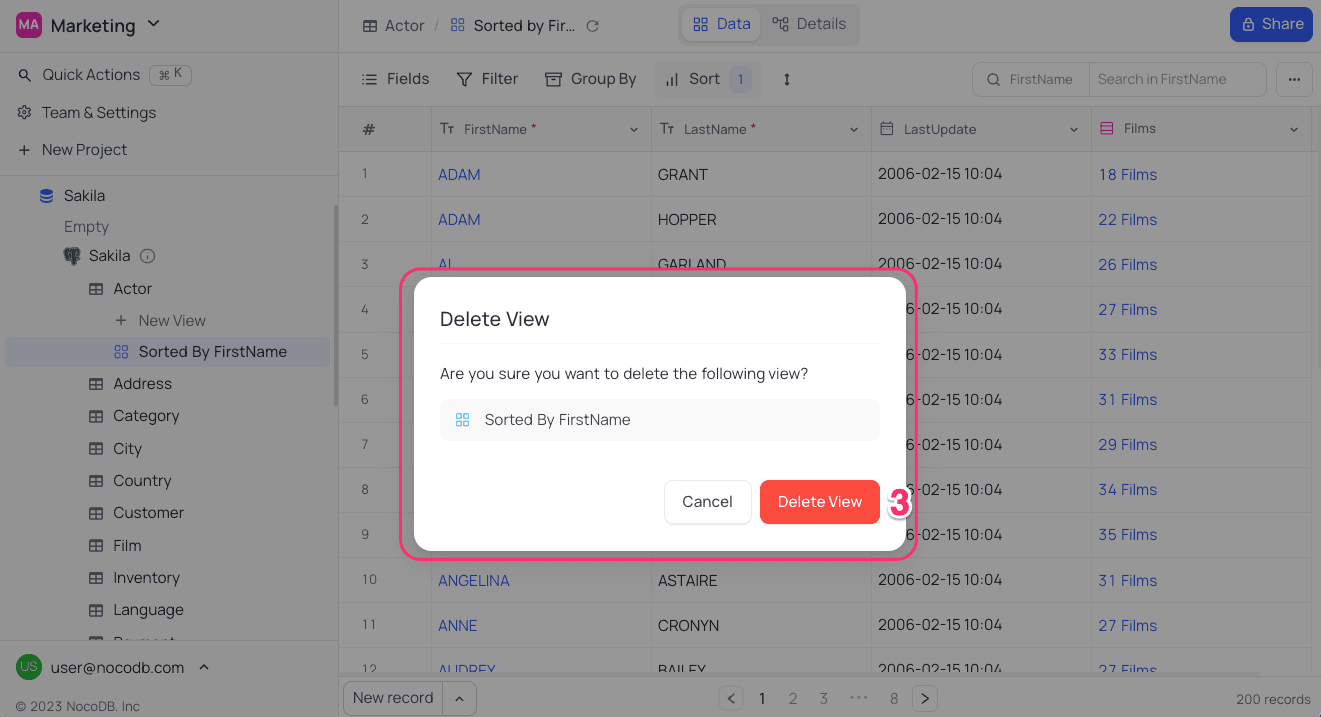
Delete view
- In the left sidebar, click the ellipsis symbol (
...) next to the view name. - In the view context menu, click
Delete. - In the confirmation dialog, click
Delete View.
Lock / Unlock view
In a locked view, members cannot change the view configurations. To lock a view, change the permission type to Locked in the view context menu. To unlock a view, change the permission type back to Collaborative.
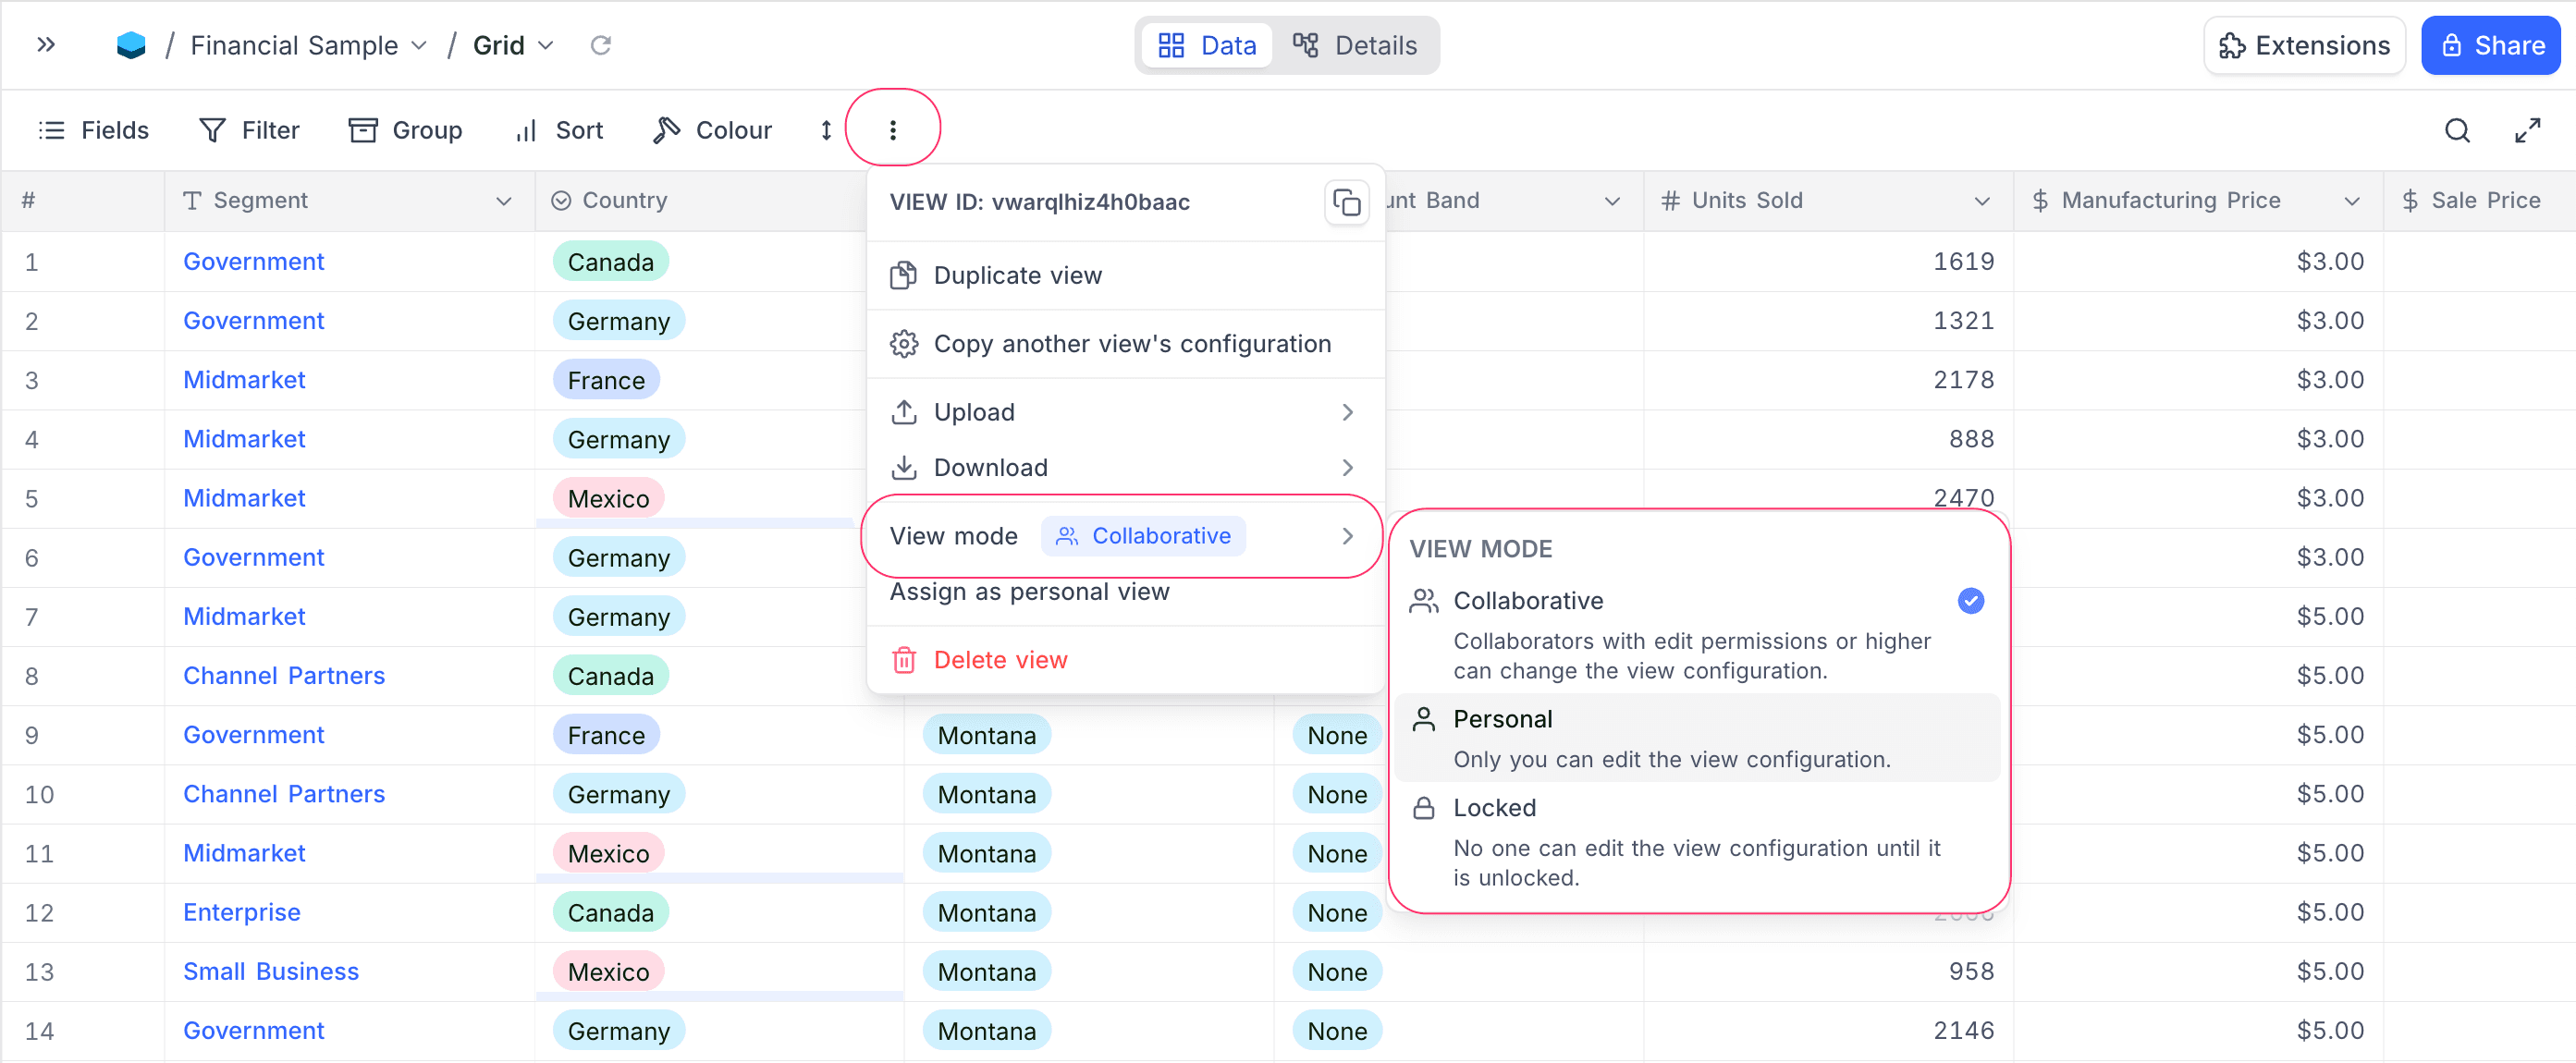
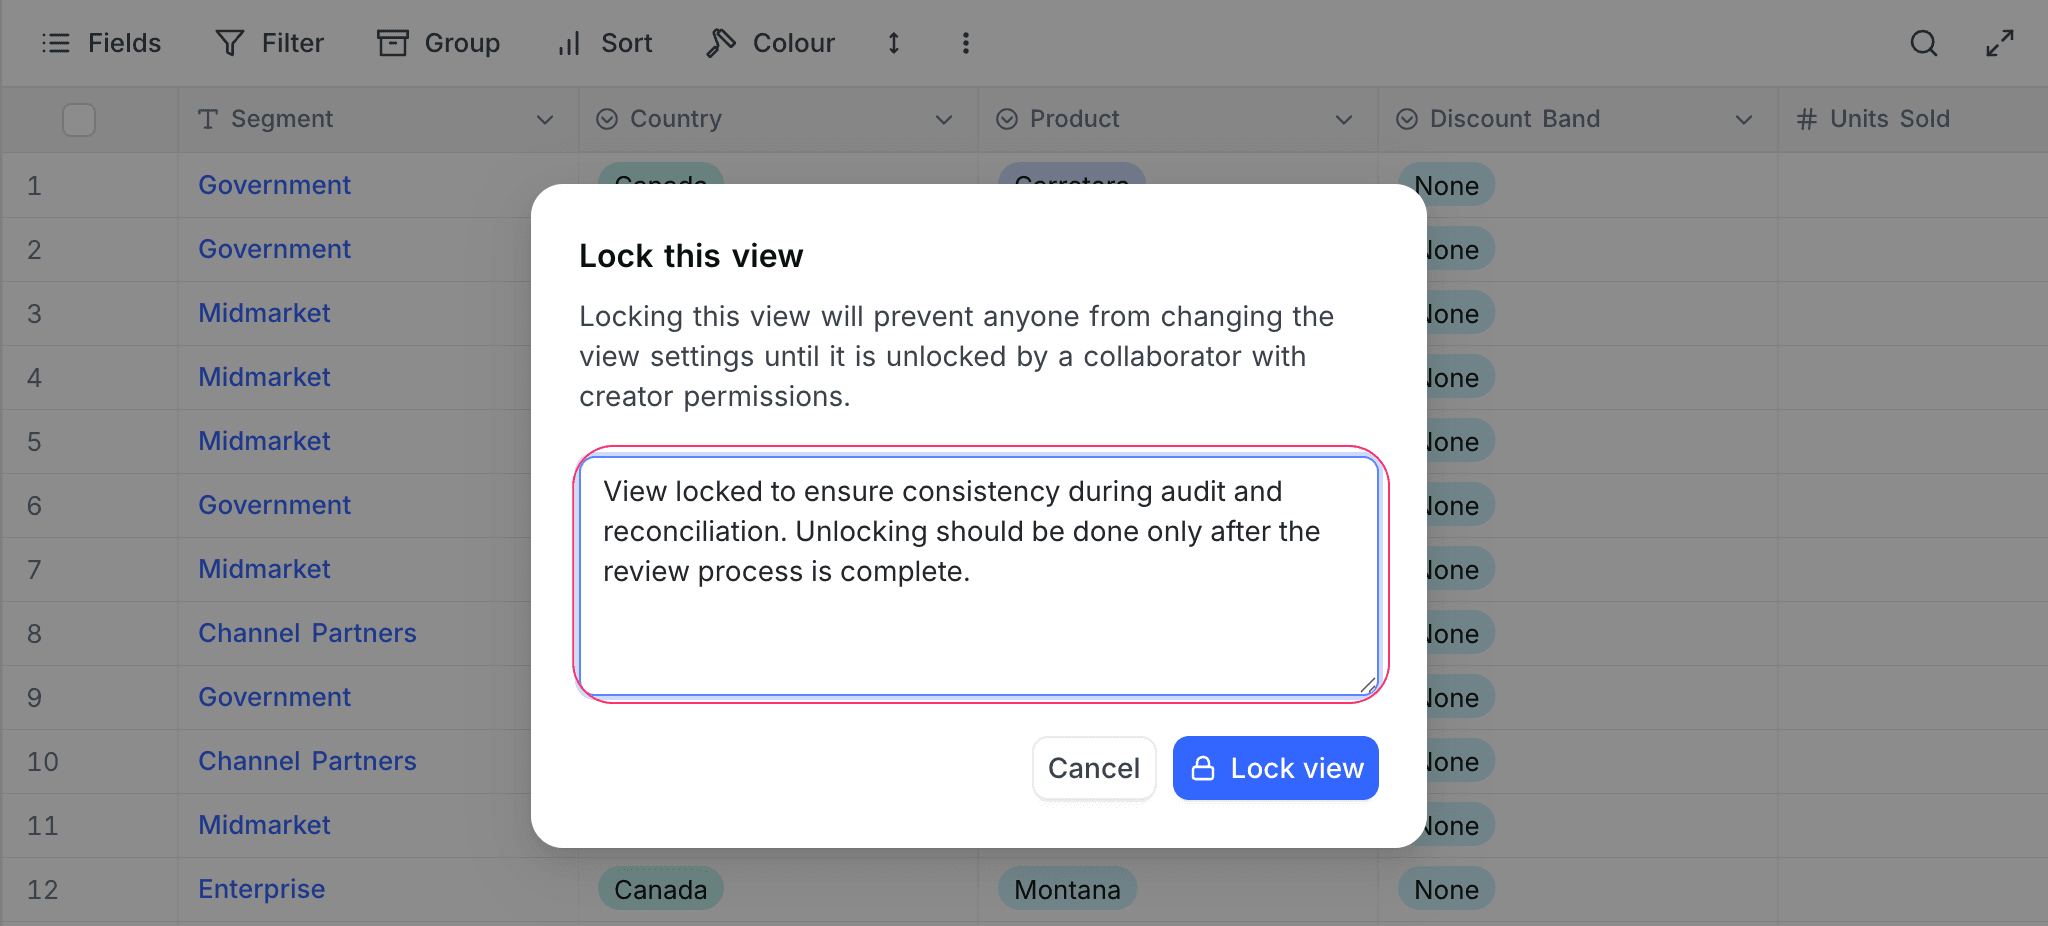
You can also add a custom message that tells members why the view is locked. All members see this message when they try to unlock the view.
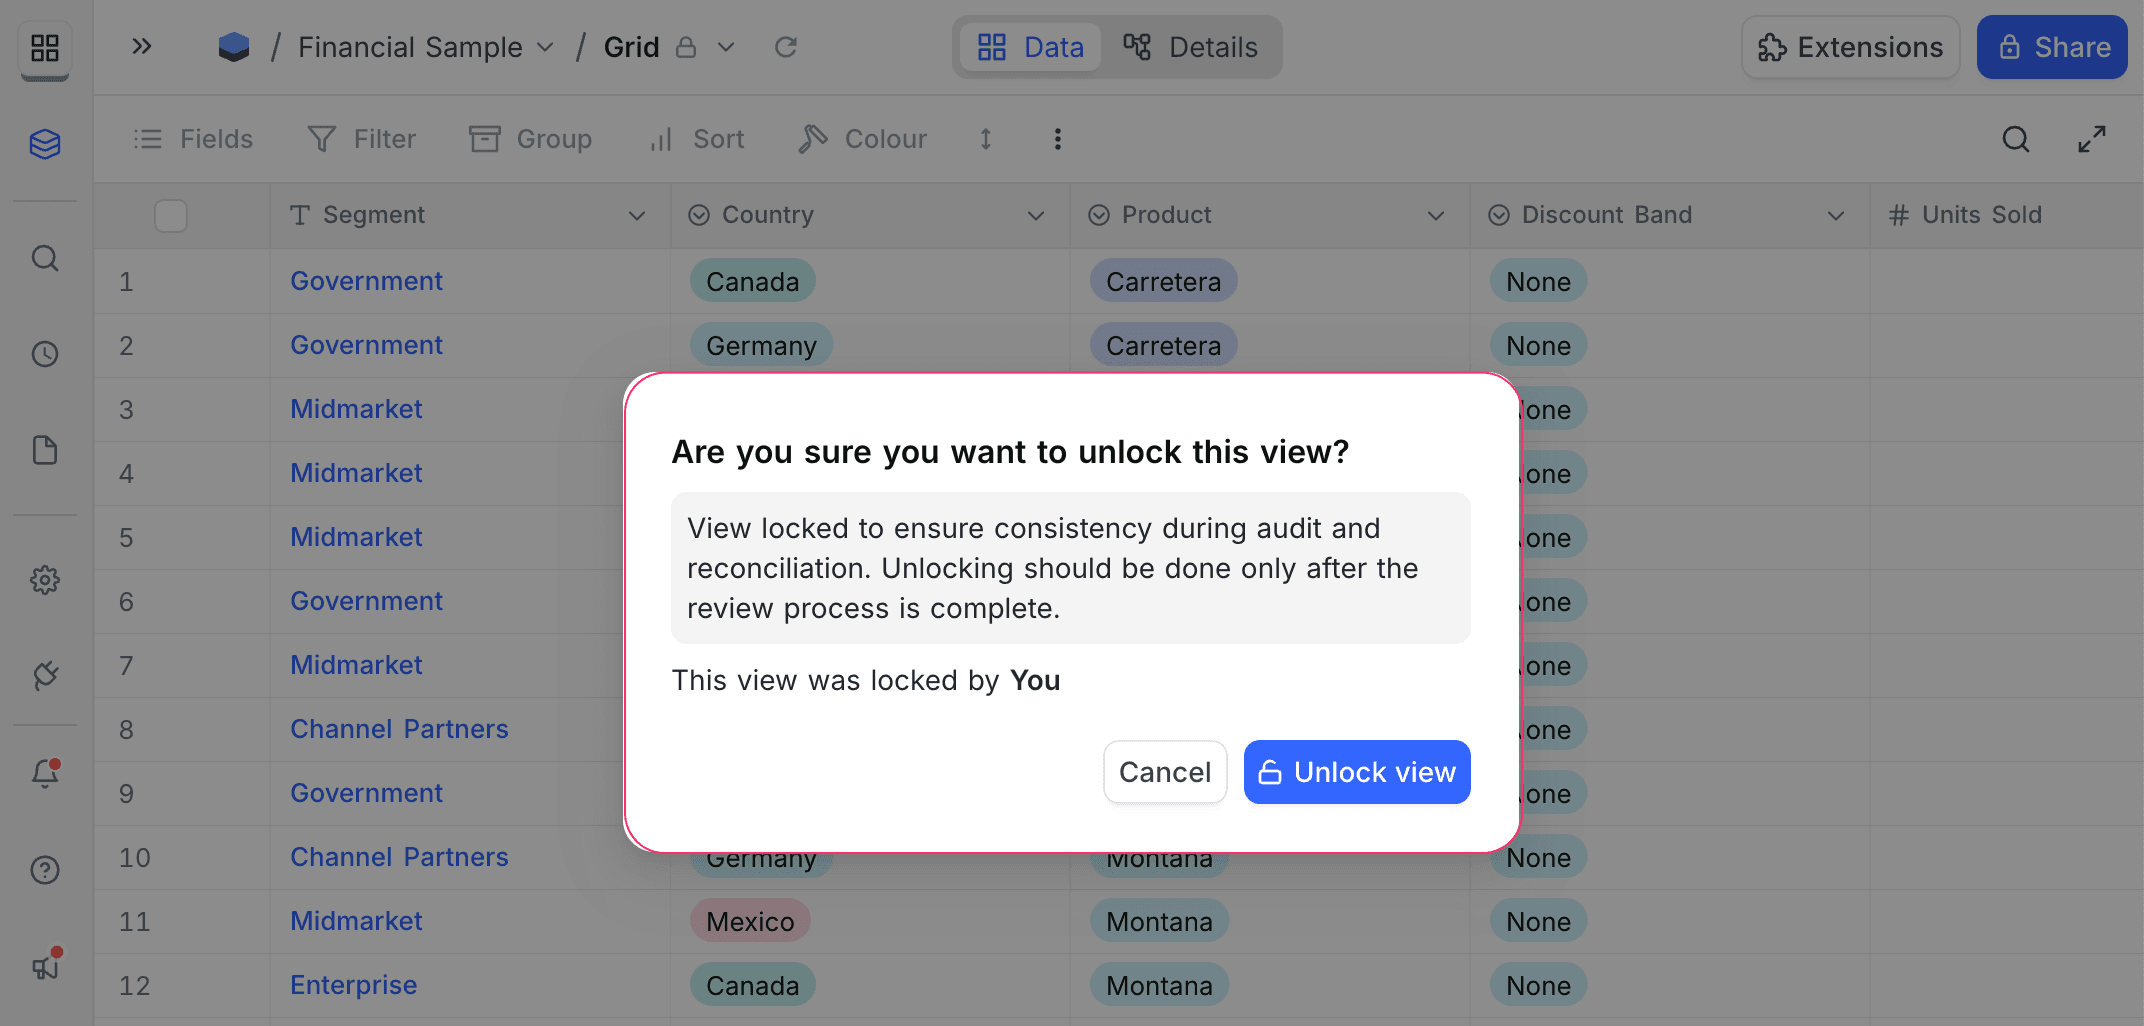
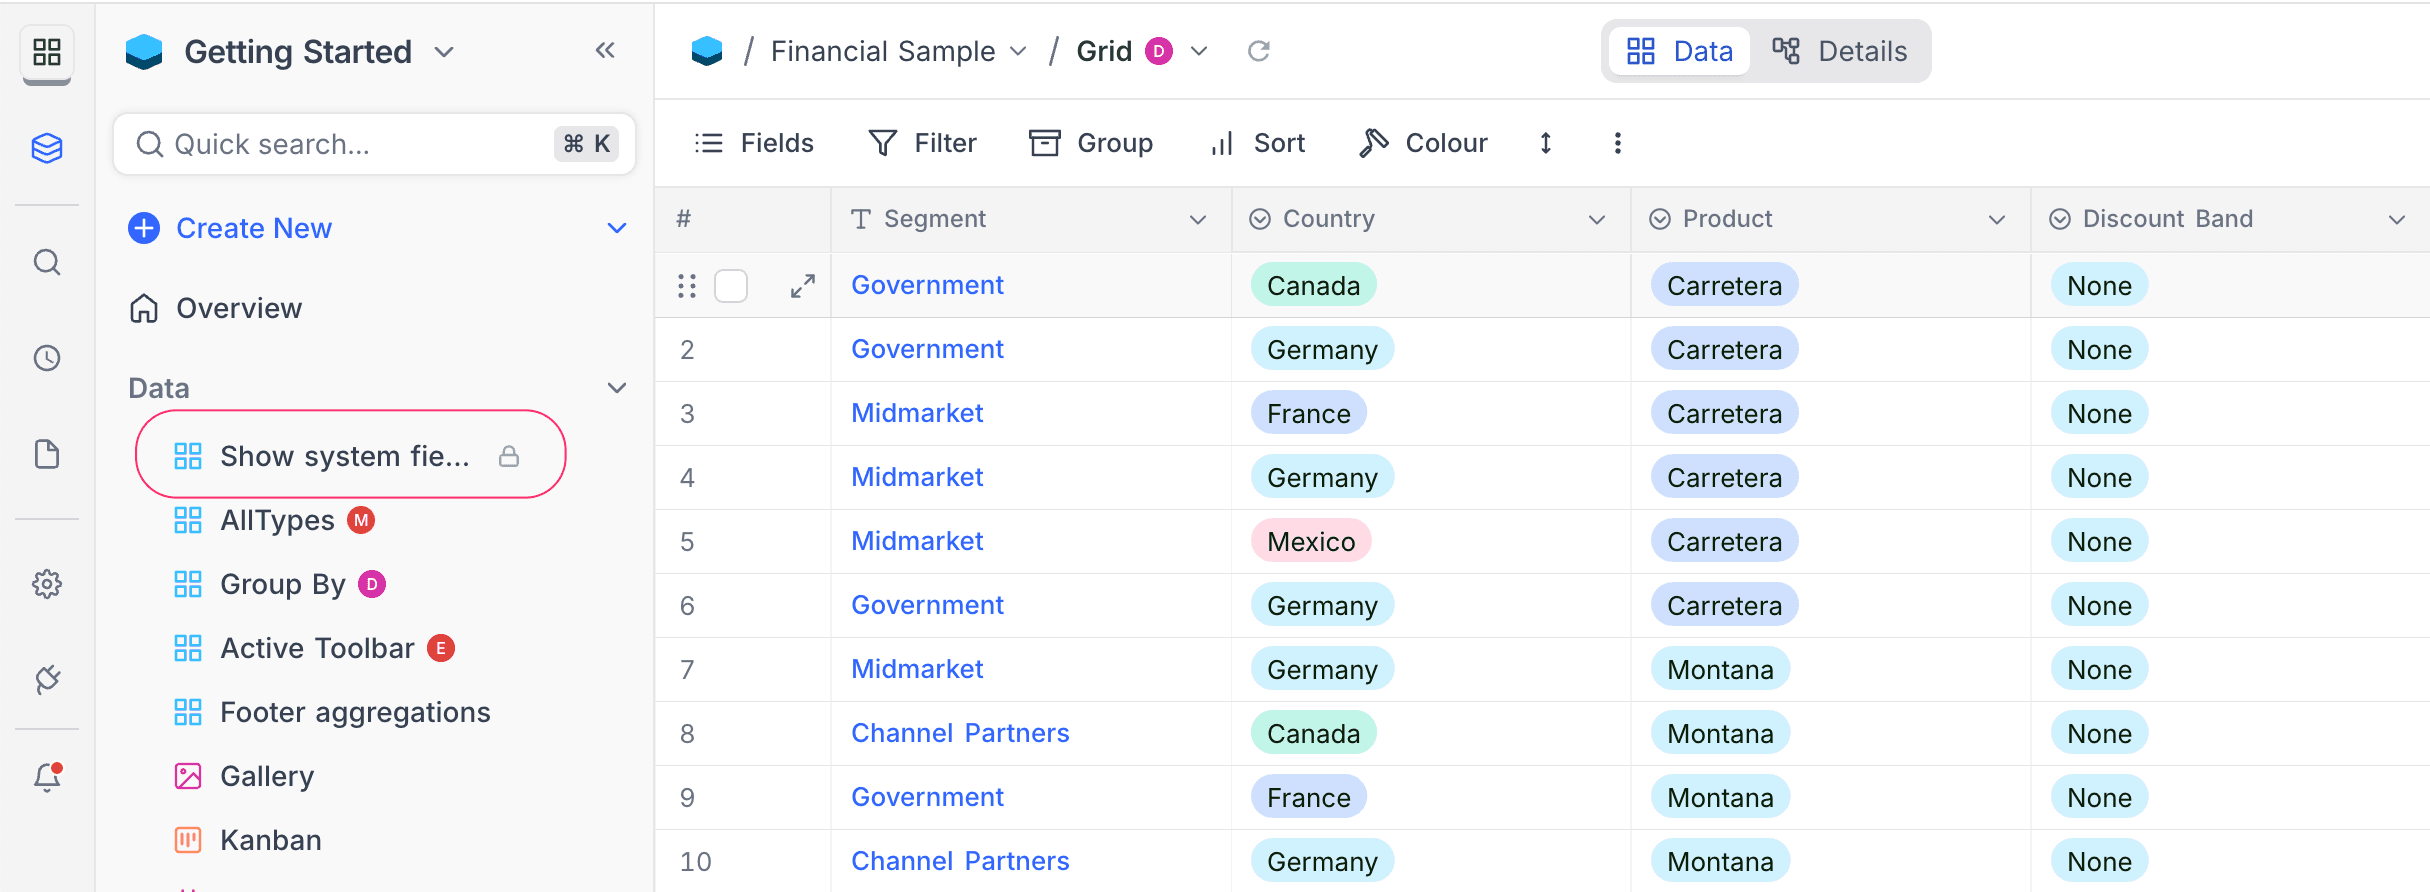
In the sidebar, a locked view shows a lock icon next to the view name.
When a locked view has a custom lock message, an info icon (ⓘ) shows next to the "This view is locked" banner. The banner is at the bottom of the toolbar menus (Fields, Filter, Sort, Group By and others). To read the message of the creator, hover over the icon.
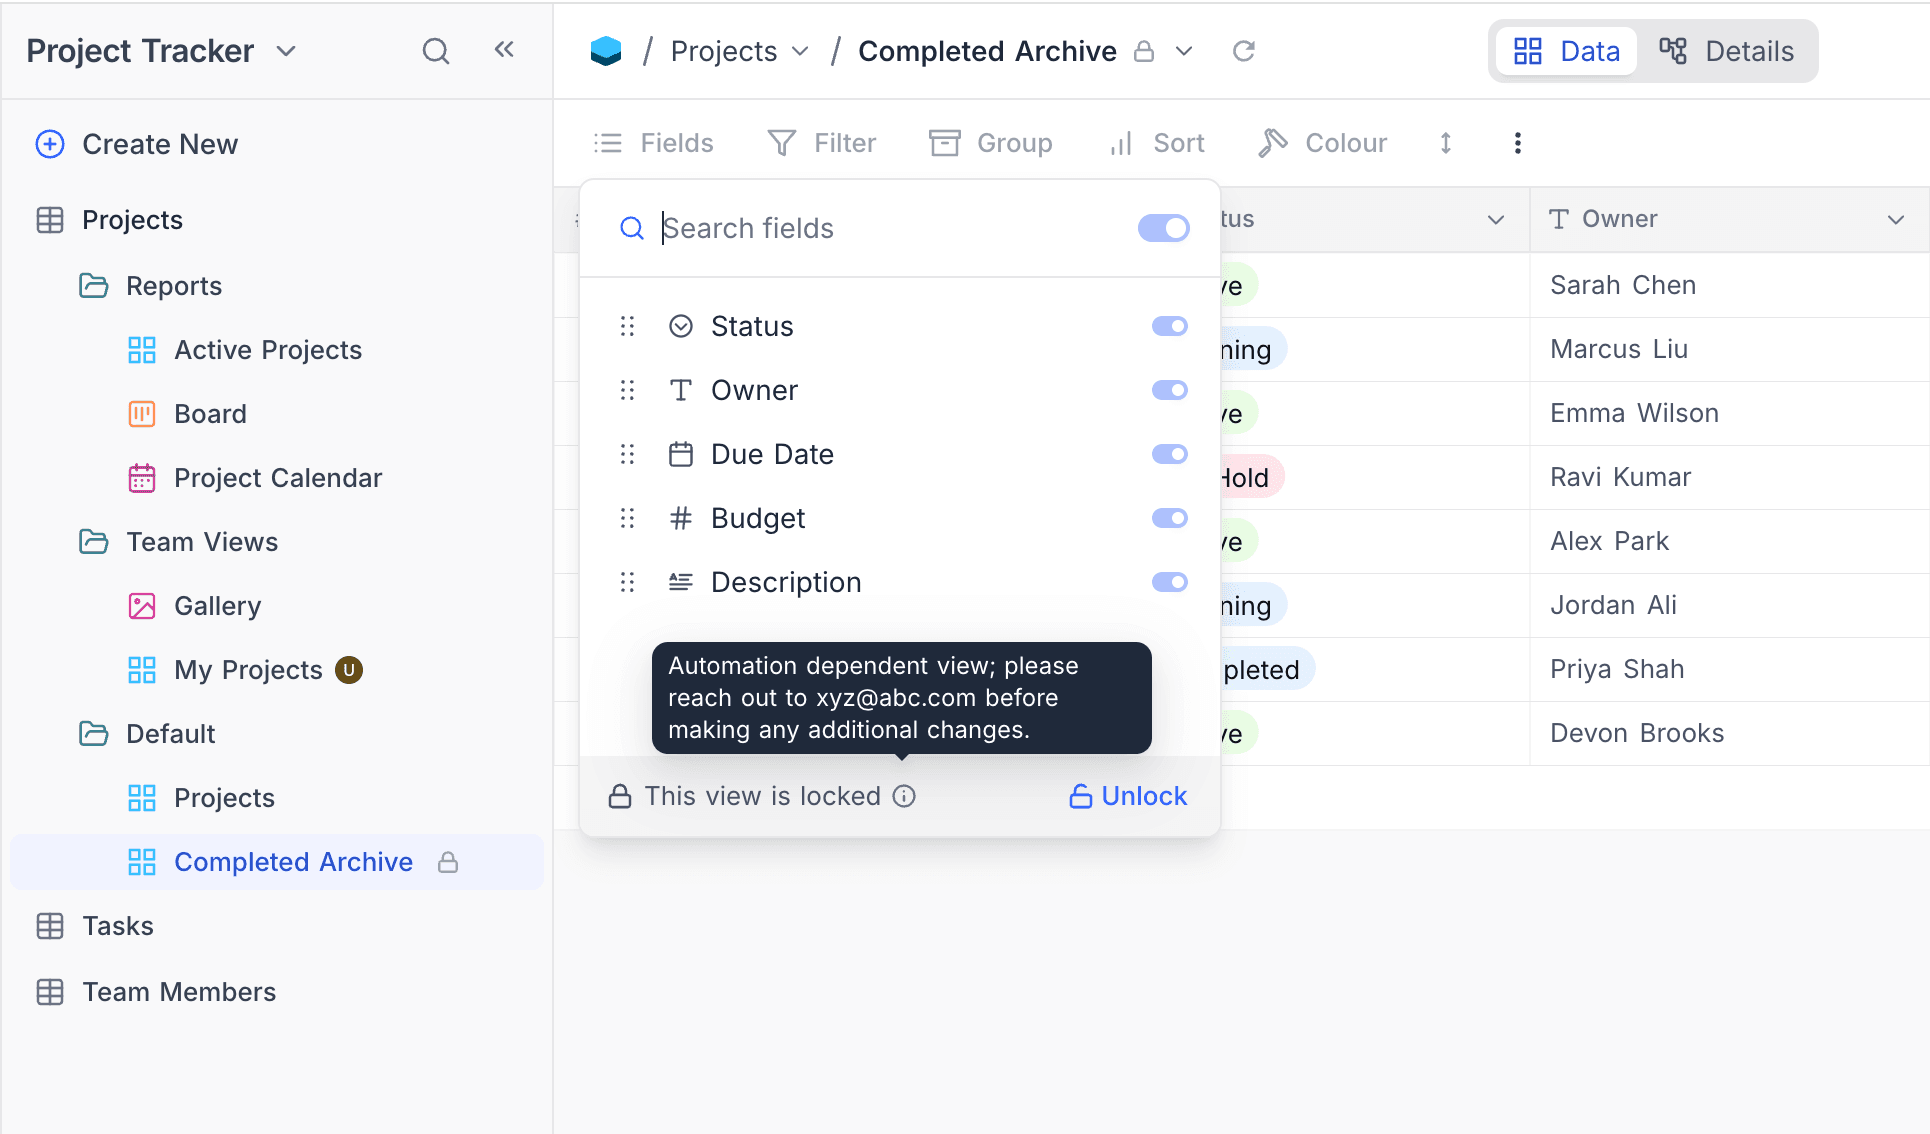
What editors can and cannot do on a locked view
Editors on a locked view can still:
- Read the saved filters, sorts, group-by and field configuration of the view (shown read-only).
- Duplicate the view. The duplicate is a new unlocked view that they can edit.
- Move the view between existing sidebar sections, or reorder it in the sidebar.
Editors cannot rename, delete or change the configuration of a locked view. If they try to do this from the view context menu, a "Disabled as View is locked" tooltip shows. Only Creators and Owners can change, delete or unlock locked views.
Personal Views ☁
In a Personal View, only the owner controls the view configurations. Other members (including other editors) keep read-only access to the view and its saved configuration. To make a view personal, change the permission type to Personal in the view context menu. To change it back to Collaborative or Locked, select that permission type.
Who can claim or reassign a personal view
- Any Editor, Creator, or Owner can convert a collaborative view into a personal view. The user who converts the view becomes its owner.
- The owner of a personal view can convert it back to Collaborative at any time. This clears the ownership assignment, and the view is a regular collaborative view again.
- Only Creators and Owners can make a view another user's personal view, or transfer ownership of a personal view to a different user. Editors can claim a view only for themselves.
Assigning a view to another user (Creators & Owners only)
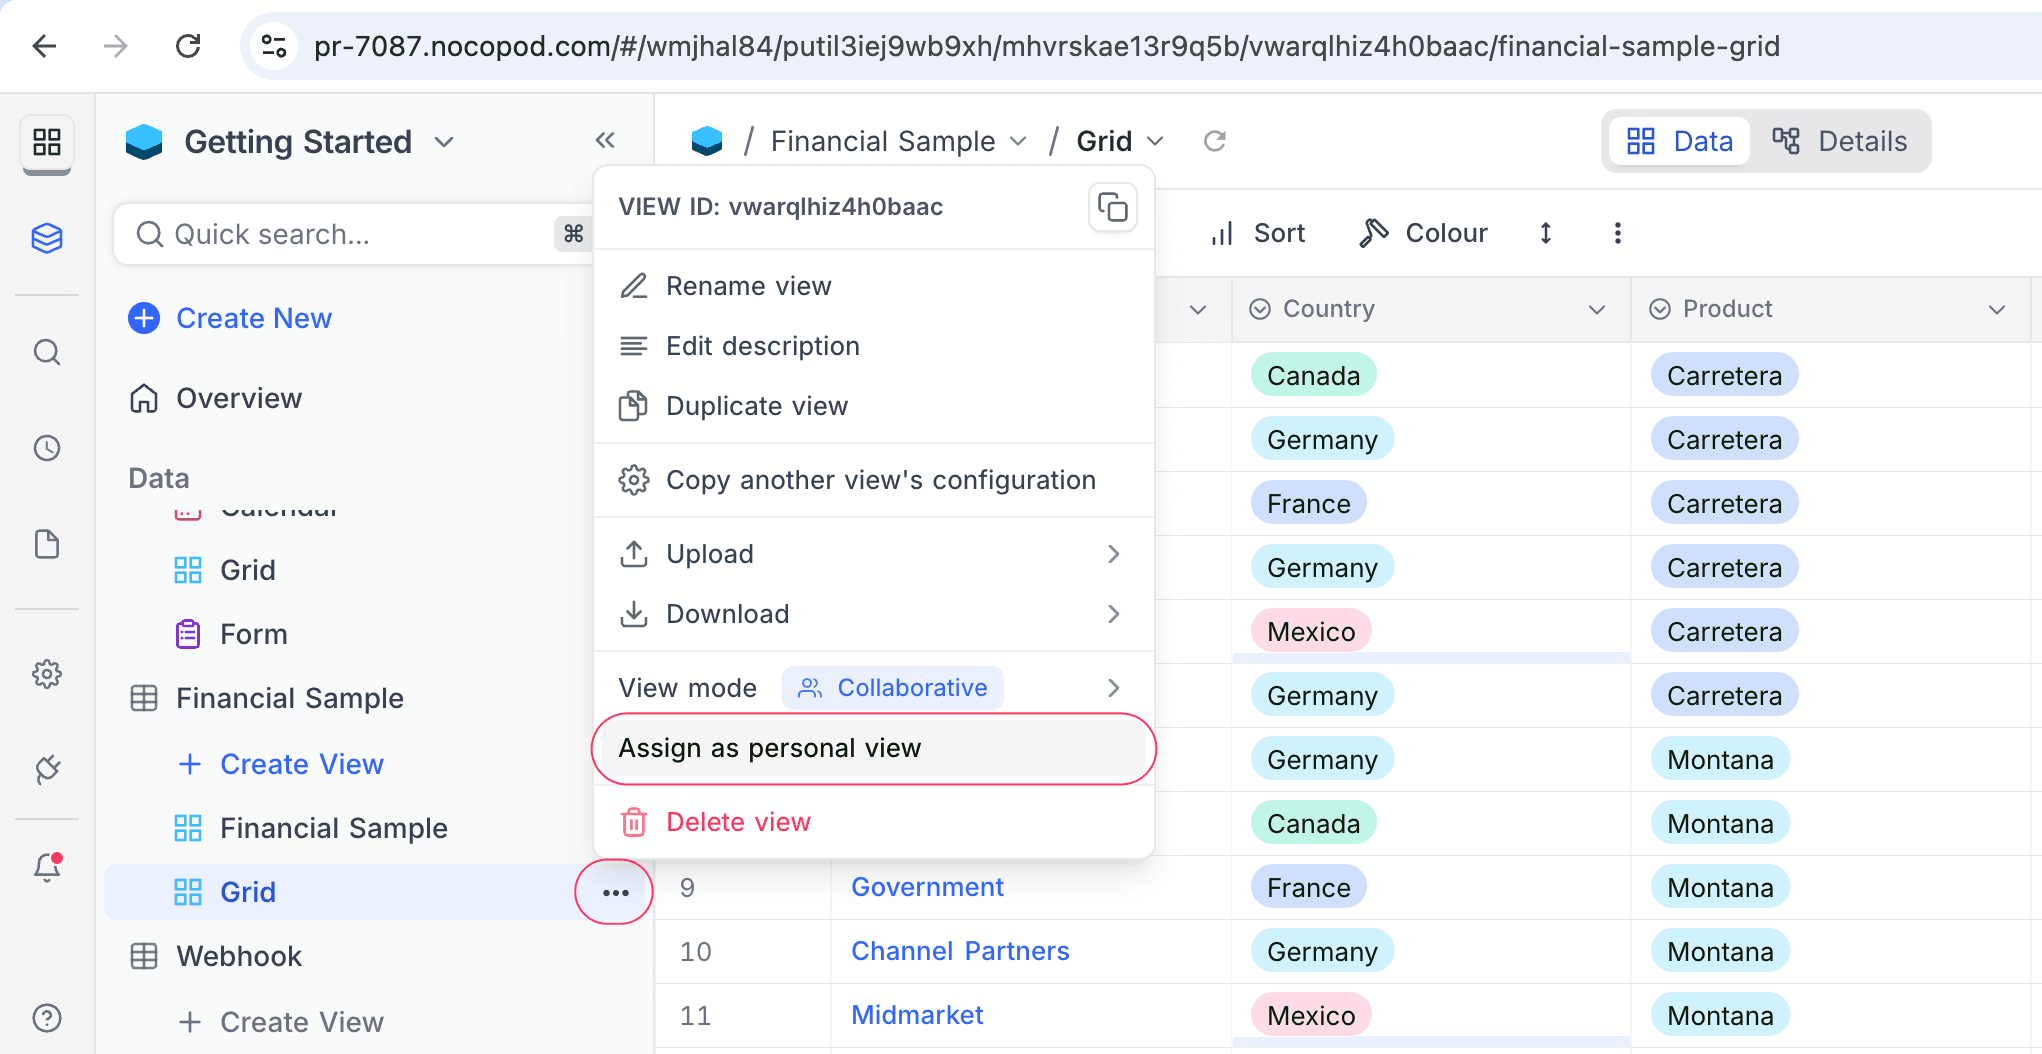
Creators and Owners can set or change the owner of a Personal View in the view context menu of the left sidebar.
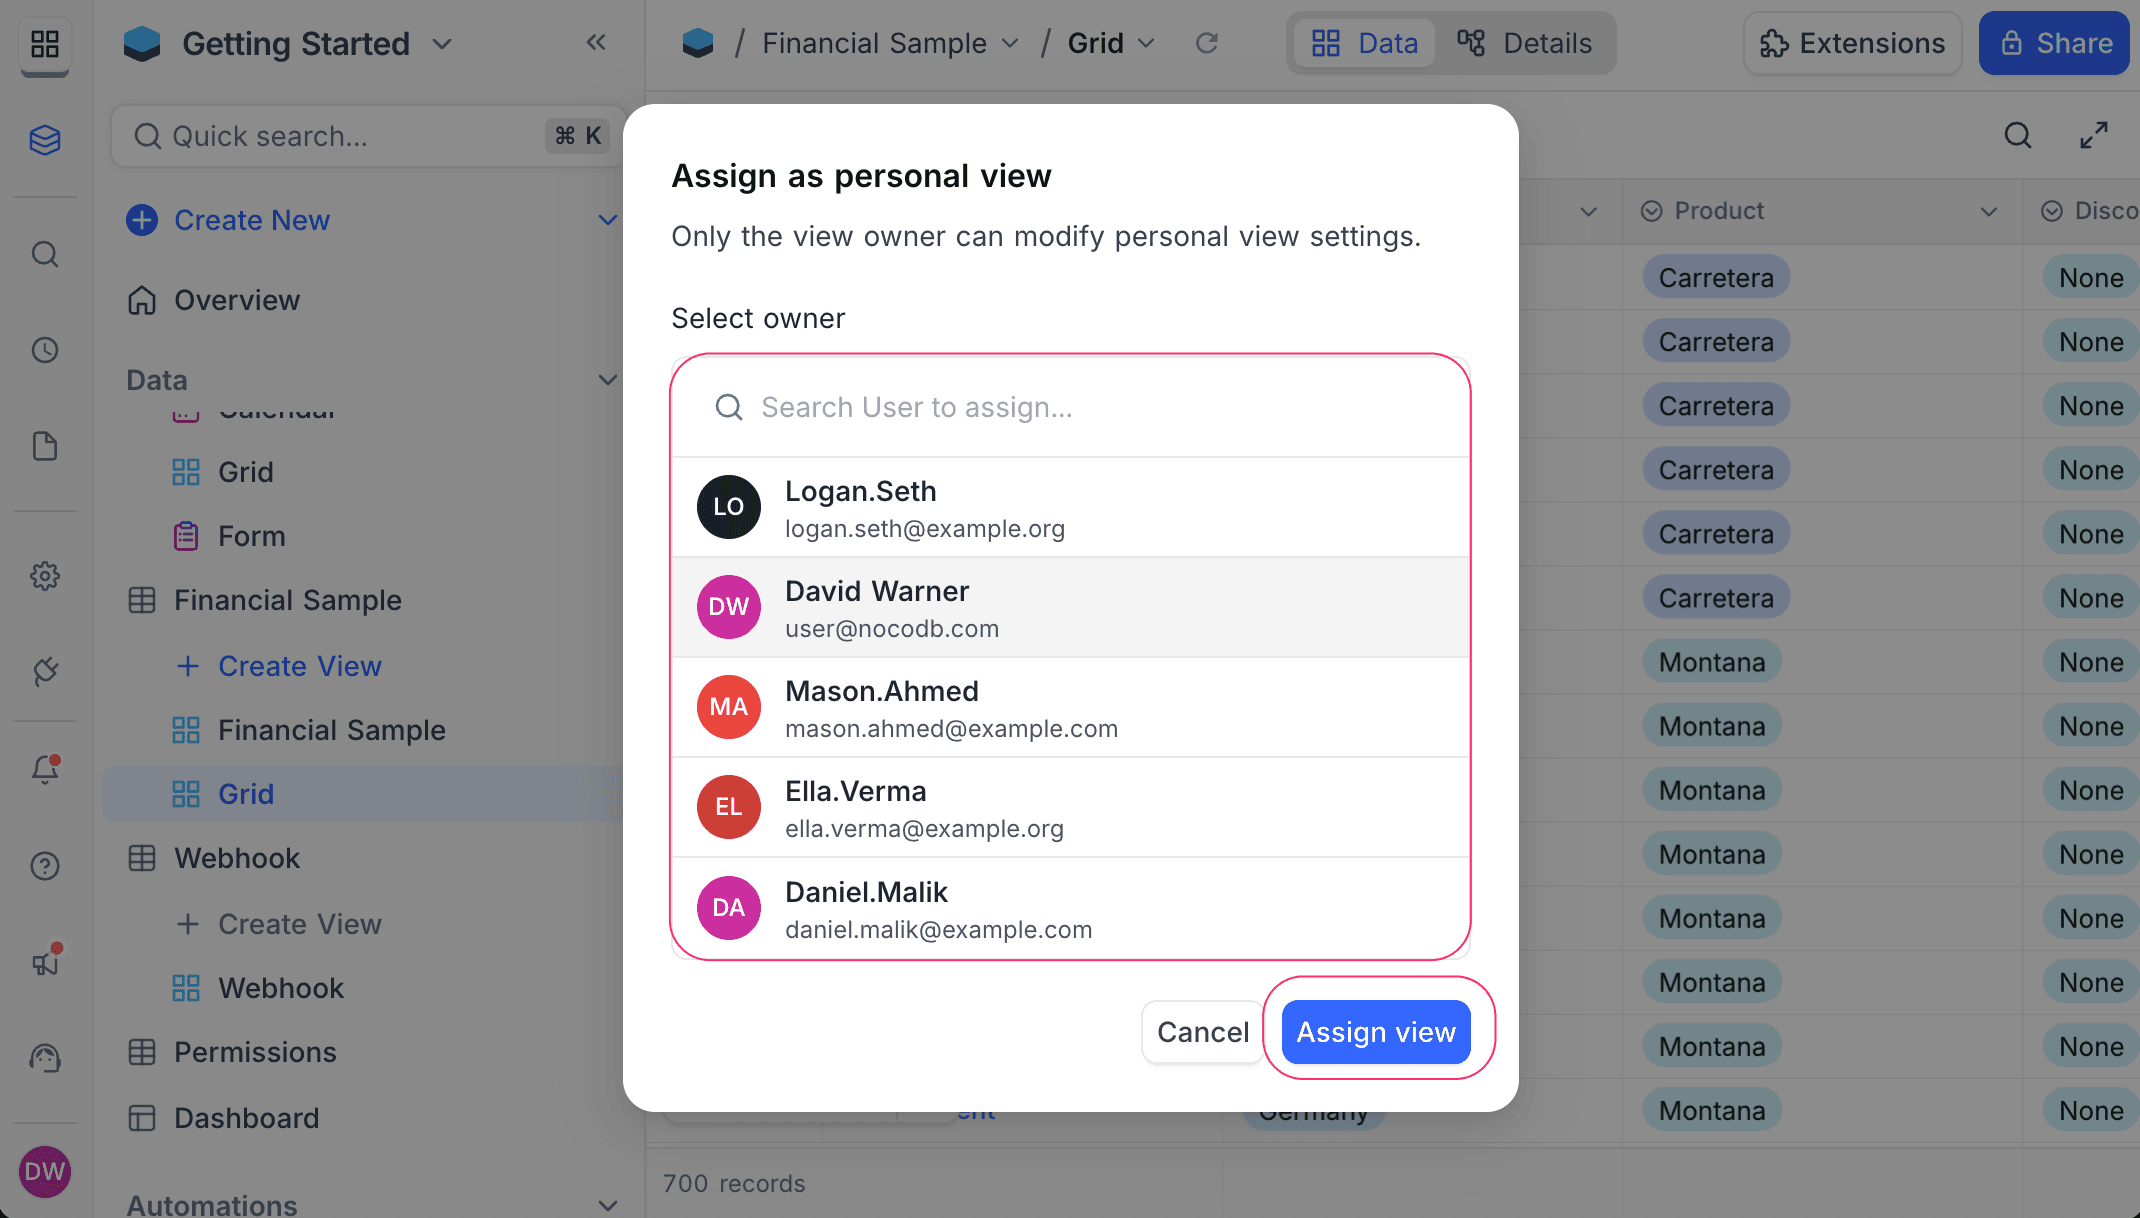
In the sidebar, a personal view shows a user icon next to the view name.
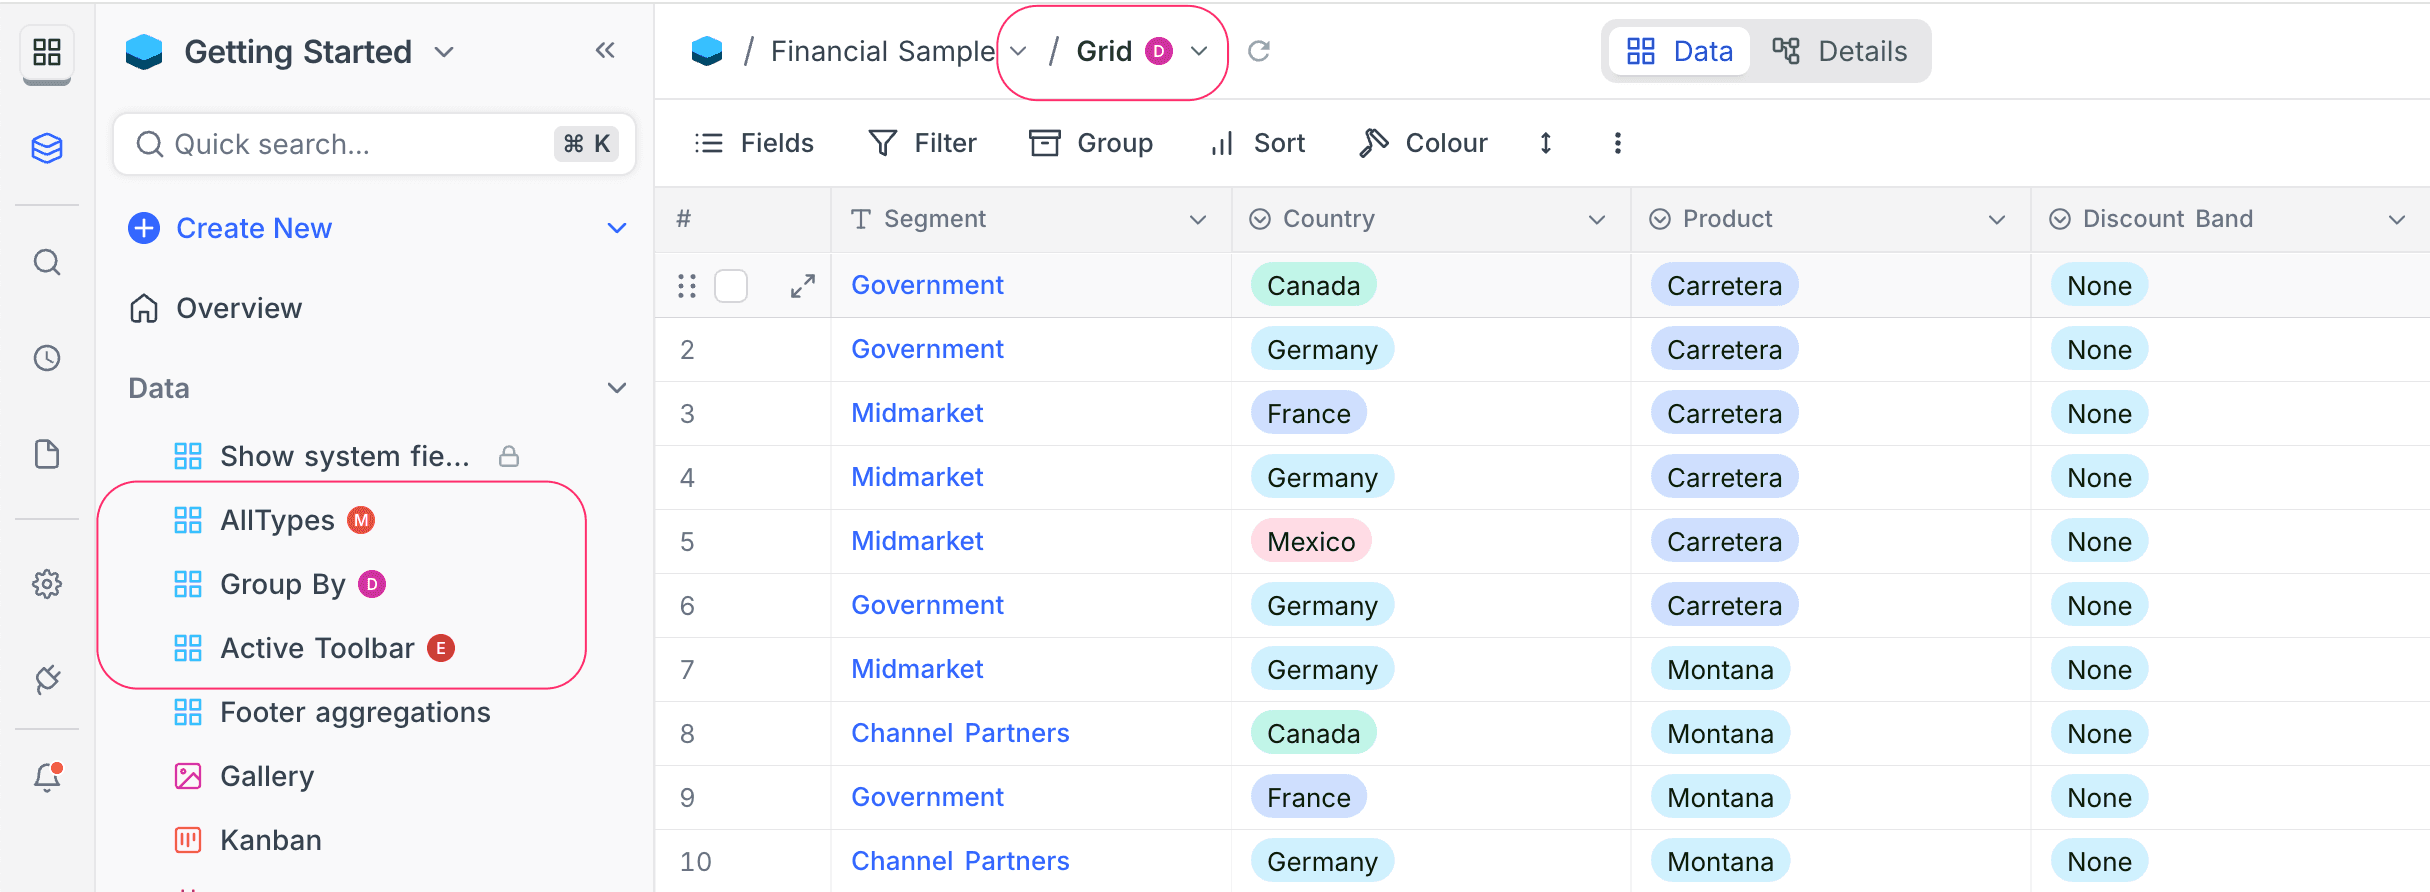
Editor access to other users' personal views
Editors who are not the owner can open a personal view. They see its data and saved configuration (filters, sorts, group-by, field visibility) as read-only. The rename, delete and edit actions on the view are disabled. A tooltip tells them that only the view owner can change or delete the view. Only the owner or a Creator/Owner of the base can make changes.
Add / edit view description
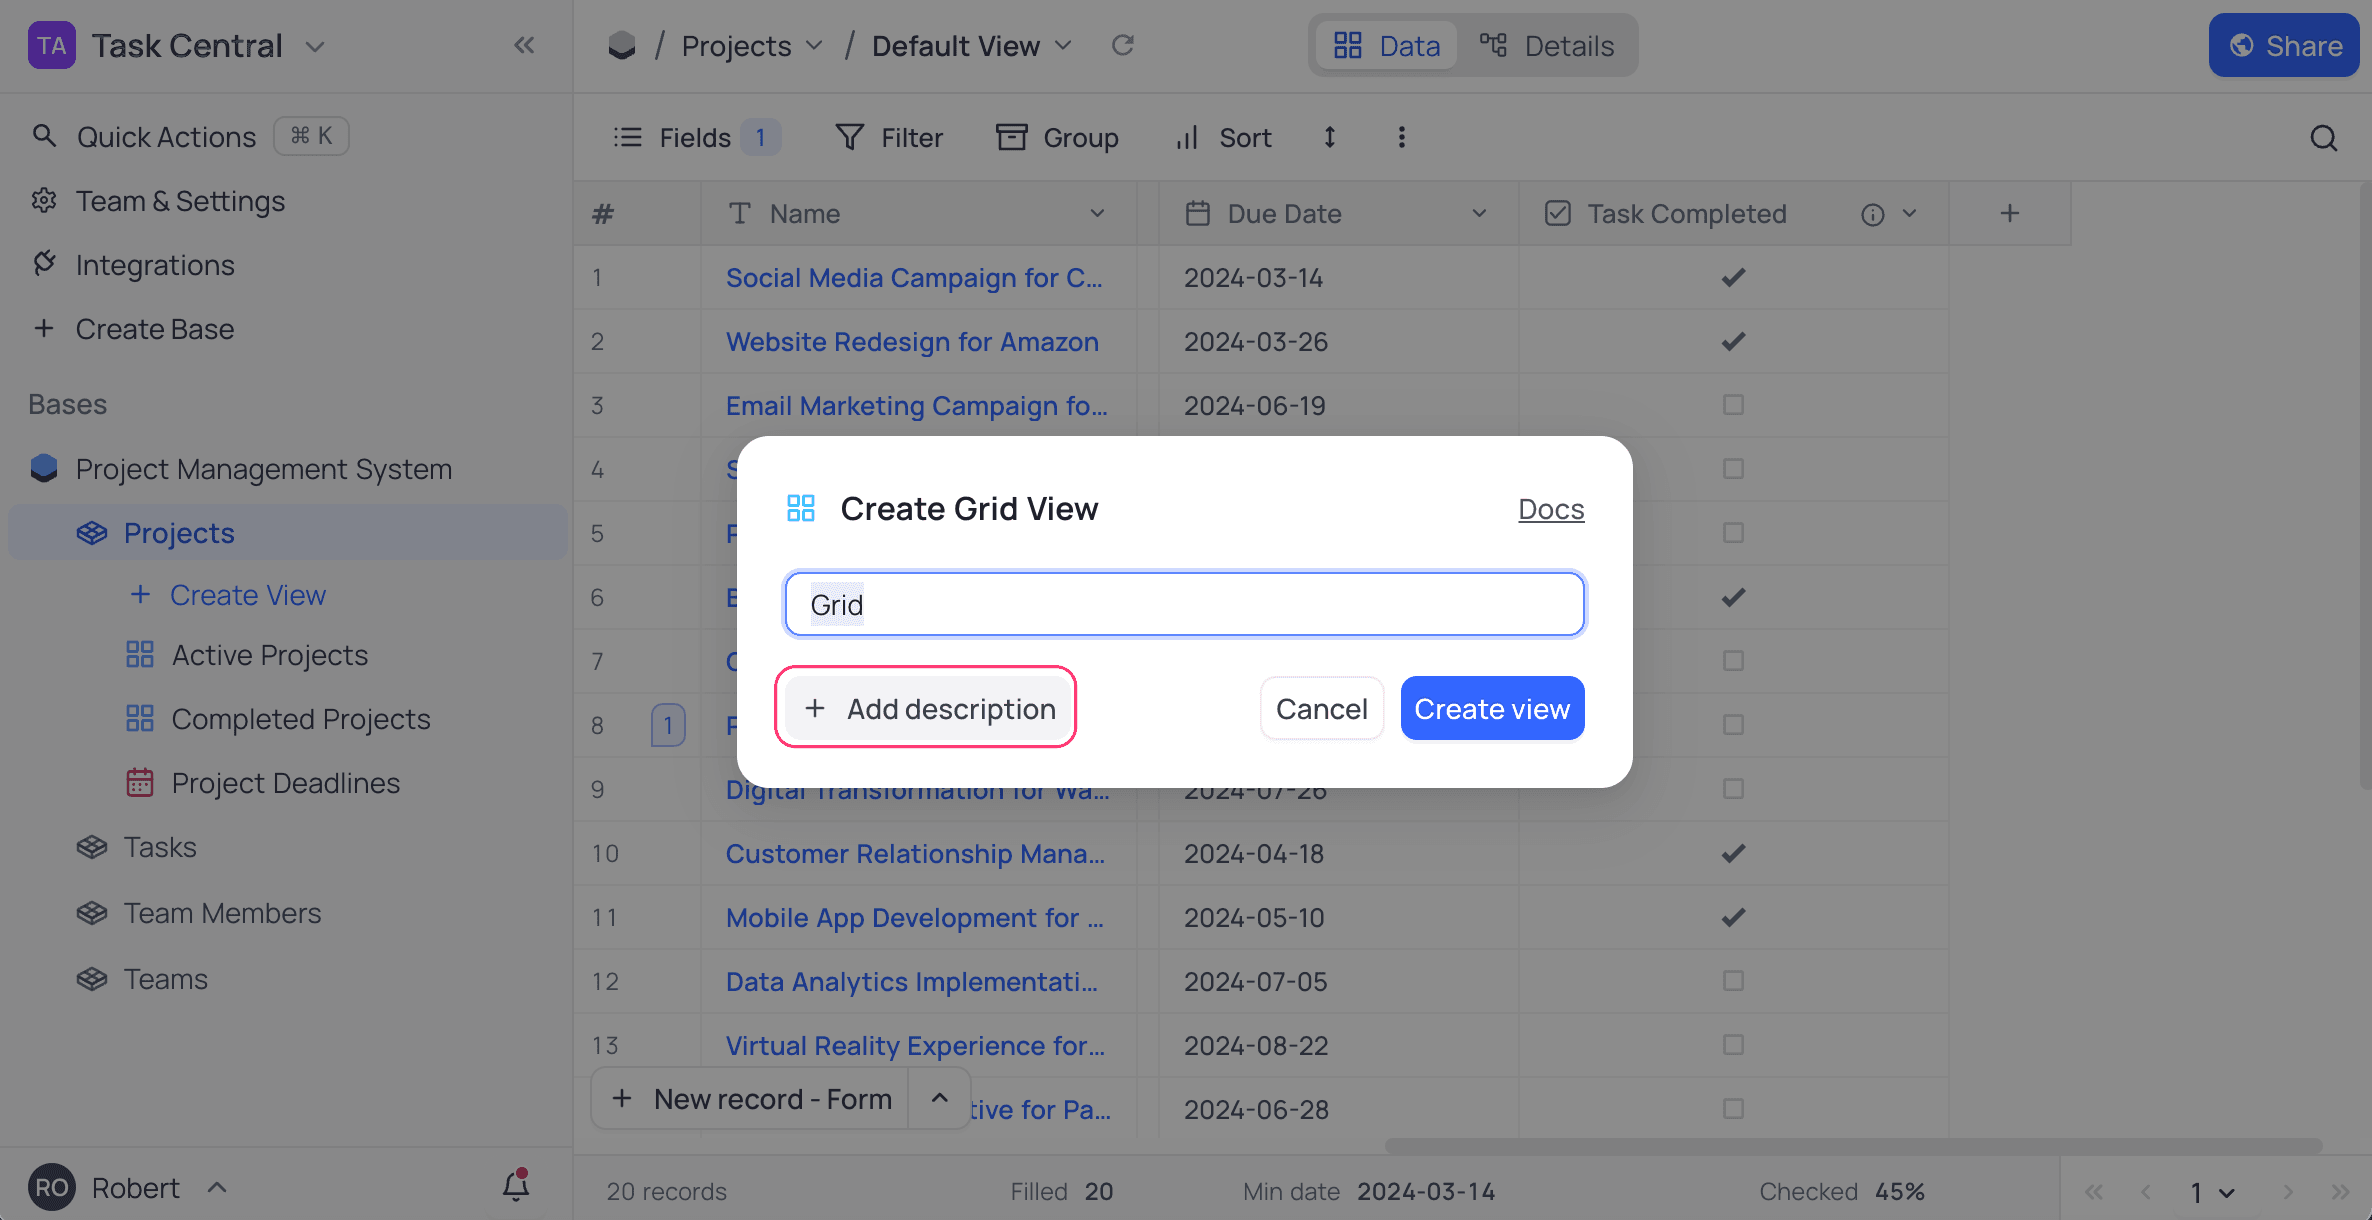
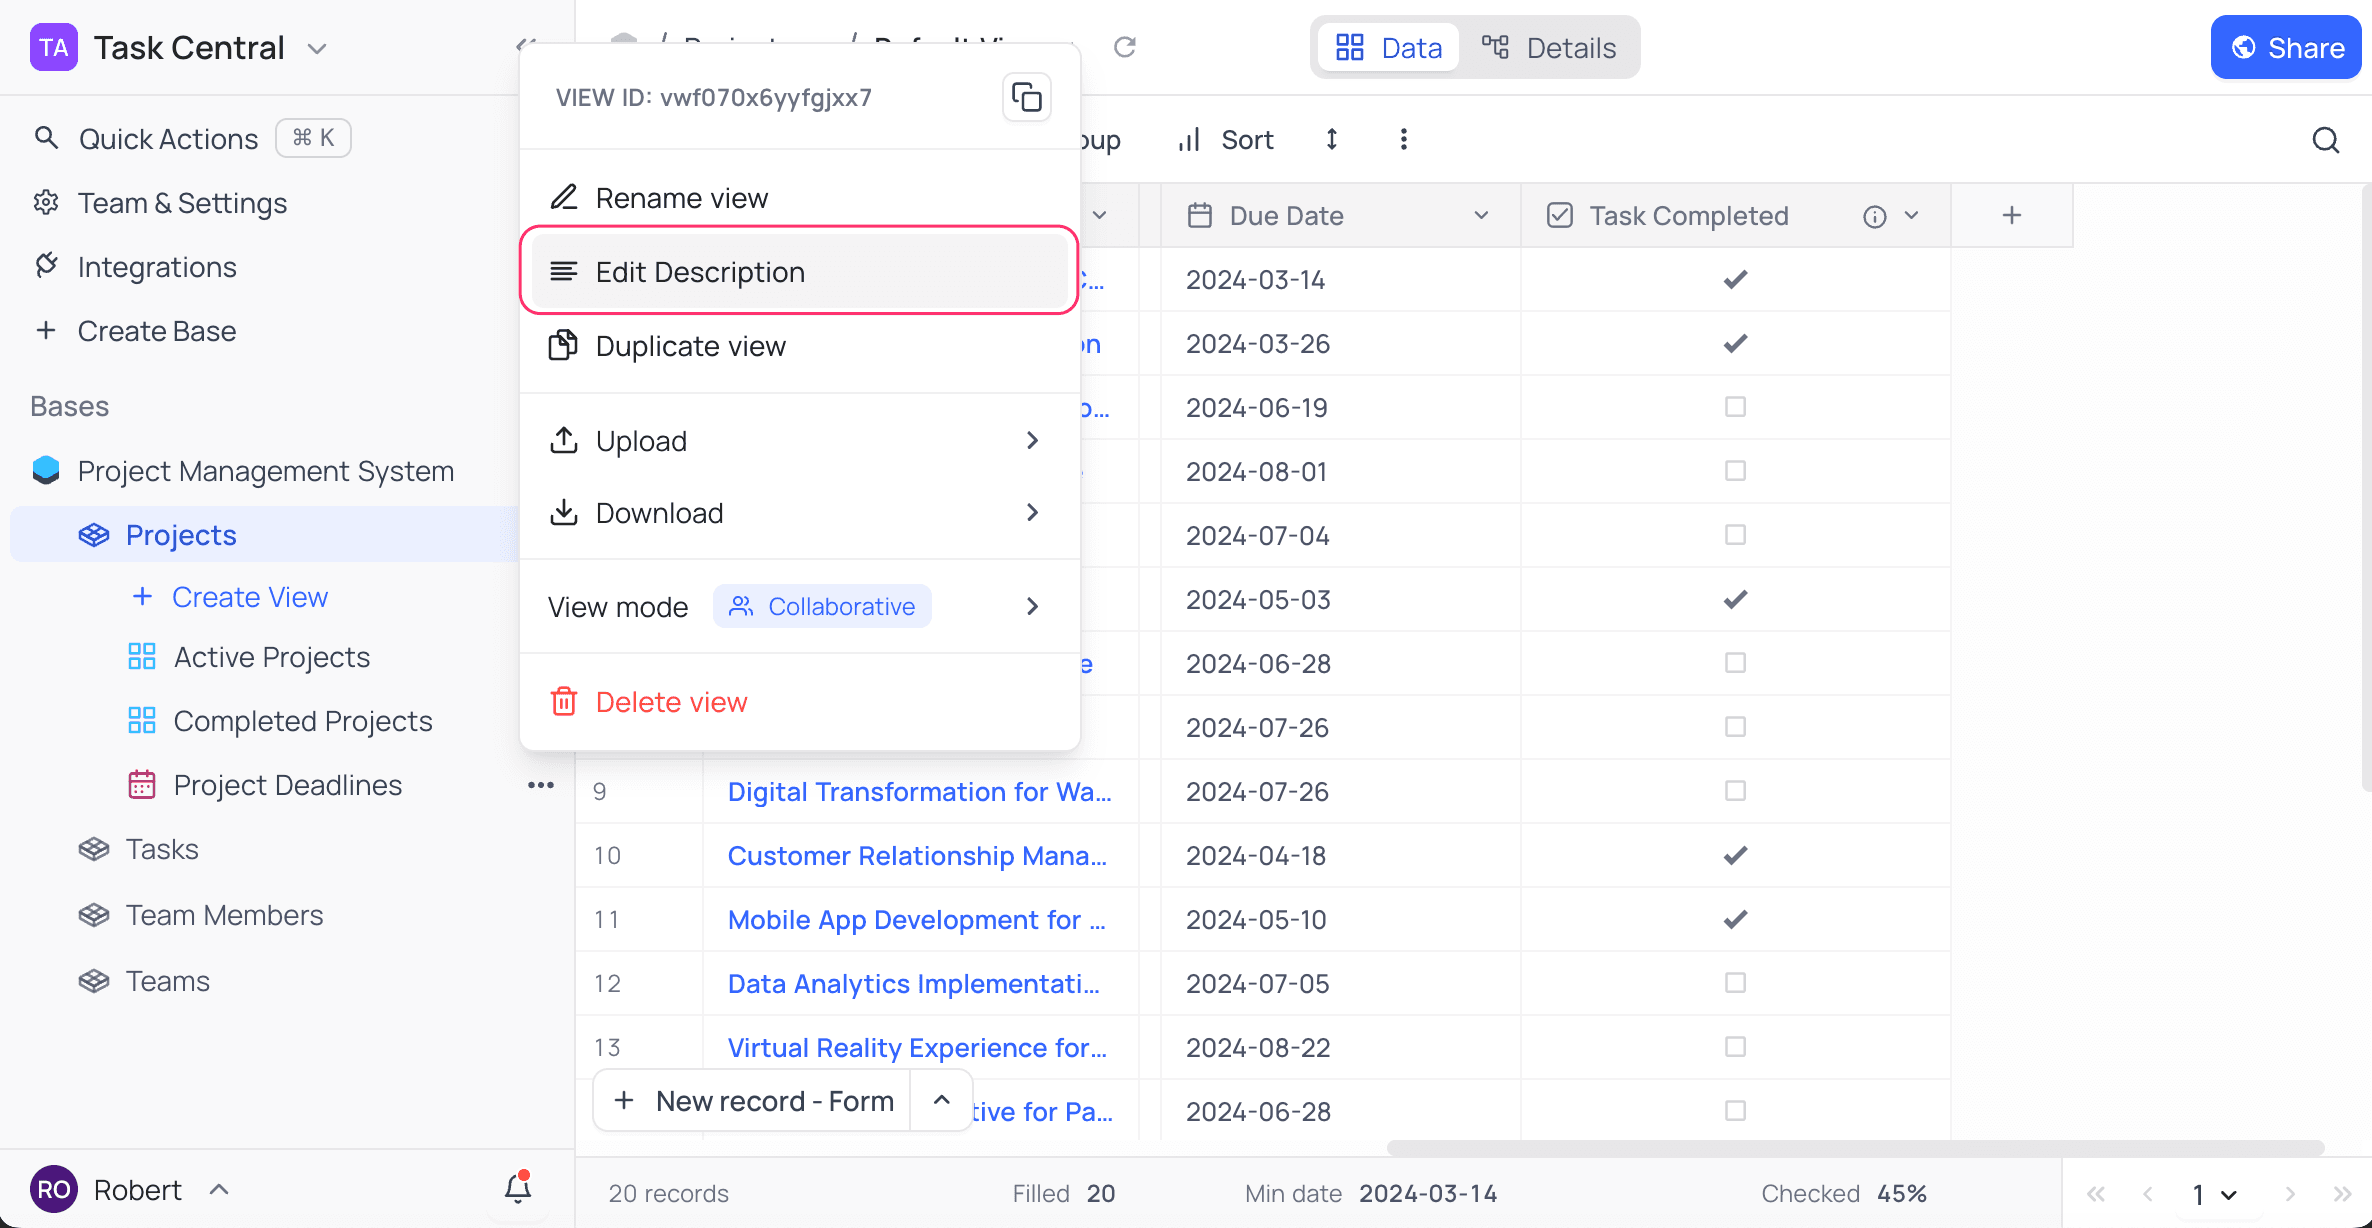
To add a view description, click Add Description in the view creation modal. You can also click Edit Description in the view context menu.
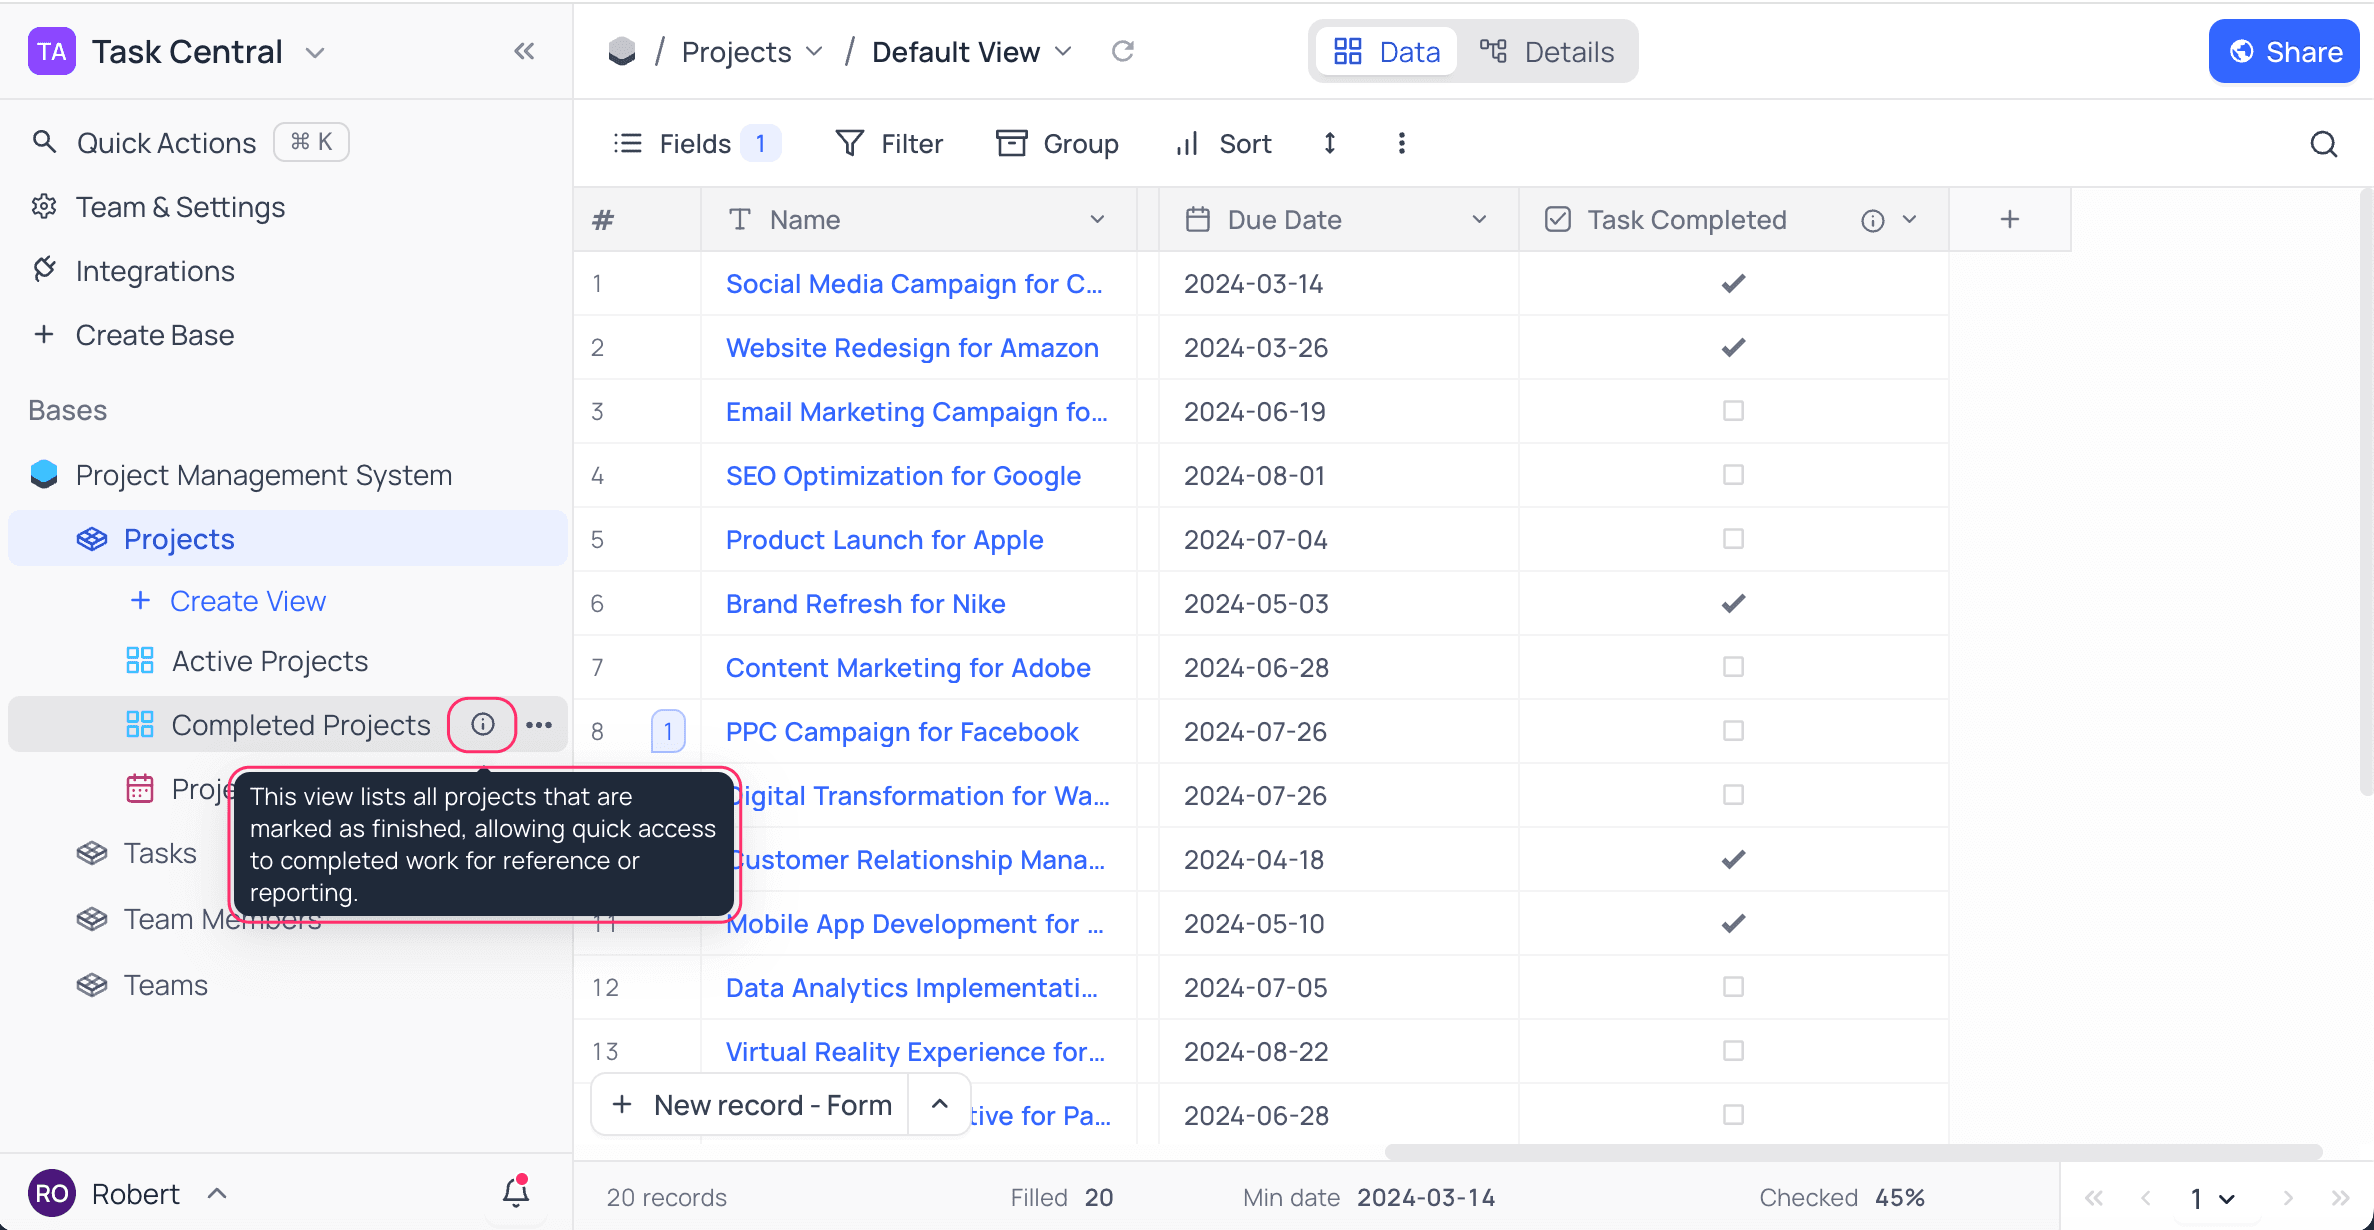
To see the description of a view, hover over the info icon next to the view name. The description shows as a tooltip.
Copy another view's configuration ☁
You can copy the configuration of another view to apply the same settings to your current view quickly. Use this to repeat filters, sorting, field visibility and other configurations in many views.
Steps to copy view configuration
-
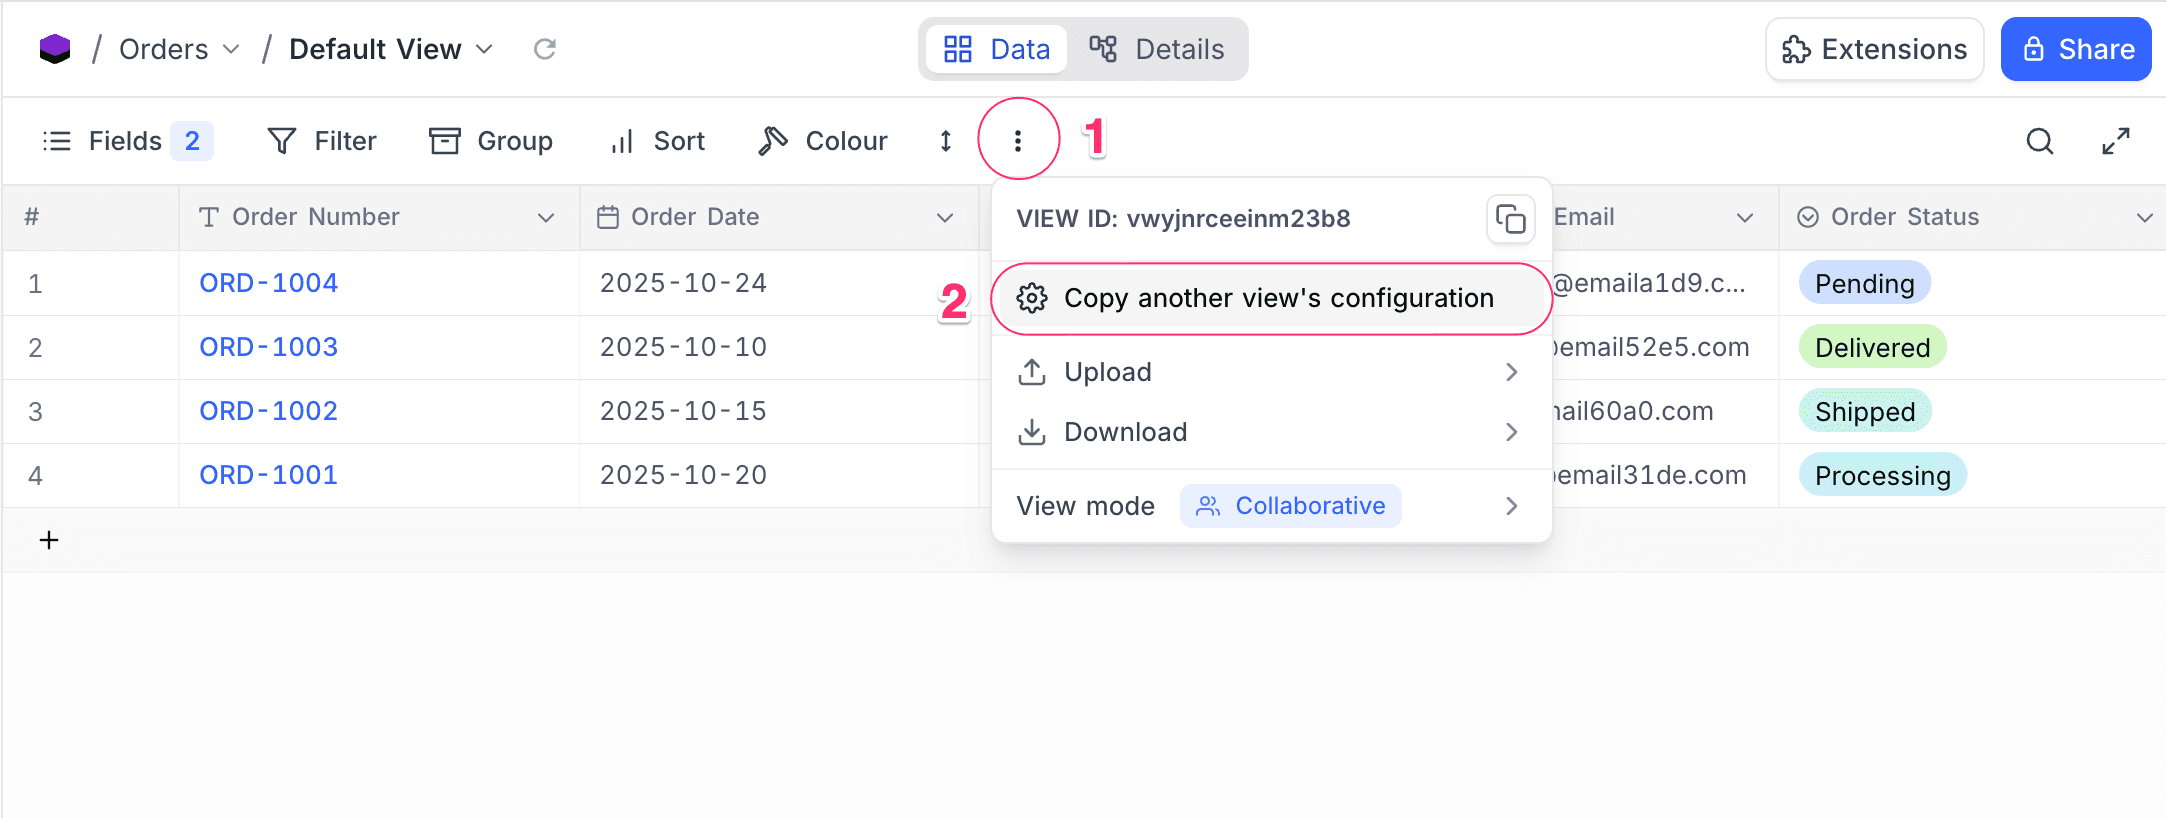
In the toolbar, click the vertical ellipsis symbol
⋮. -
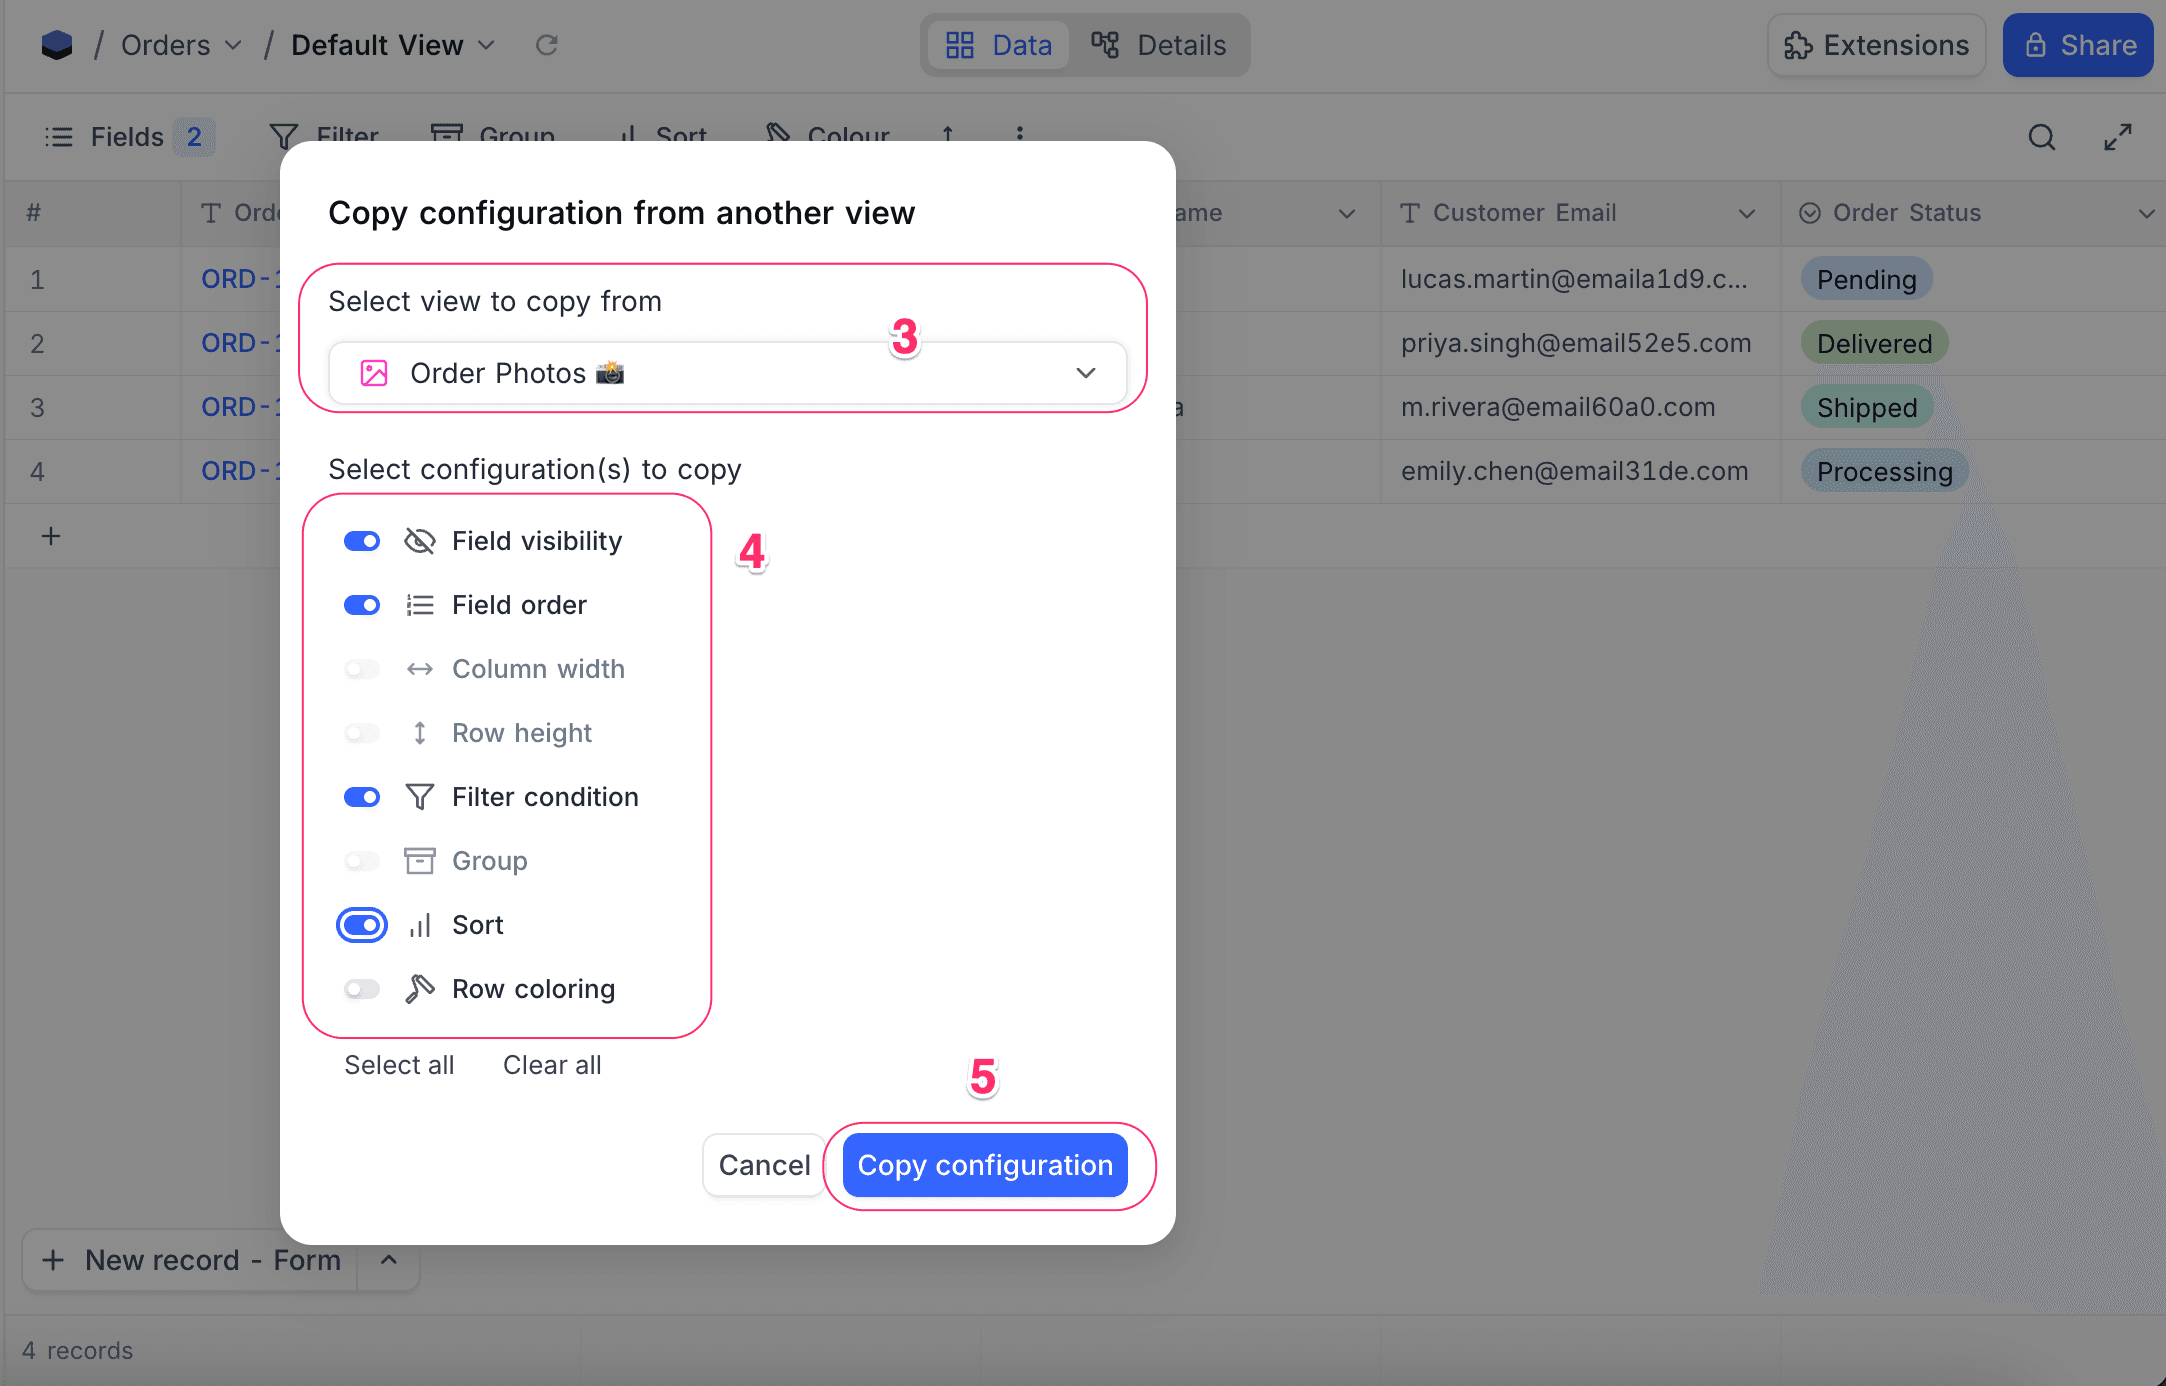
In the view context menu, select "Copy another view's configuration". A modal dialog opens.
-
In the Select view to copy from dropdown, select the source view. The dropdown lists all views in the current table.
-
Select the configuration(s) to copy:
Configuration What it copies Field visibility Which fields are visible/hidden Field order The column arrangement Column width Column width settings Row height Row height settings Filter condition Applied filters Group Grouping settings Sort Sorting settings Row coloring Row color settings -
Click "Copy configuration". NocoDB applies the selected settings to your current view.
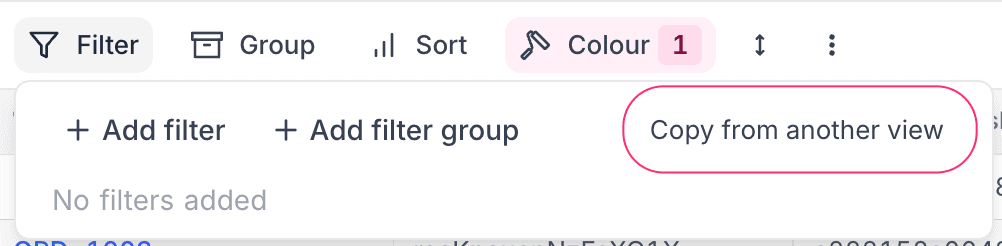
Some toolbar items, for example Filter, Group and Sort, also have a "Copy from another view" menu option. This option opens the same copy configuration modal, with the related configuration option already selected. You can then select more configurations to copy.
Note that,
- NocoDB applies only the settings that are compatible with the current view type. The copy configuration modal disables incompatible settings.
- You can select only views from the same table as source views.
When you create a new interface page, you can also use the same settings as a start. Refer to Copy settings from a view.
Views filtered by Current User ☁
NocoDB lets you filter views by the user who is logged in. Use this to create personalized views that show the records relevant to that user. For more information, refer to the Filtering records by current user section.
URL based record filtering
In NocoDB, you can filter records dynamically with query parameters in the URL. Use this to create sharable views, or to automate filtered data access in embedded dashboards or internal workflows.
Basic Syntax
The where query parameter controls the filter. It uses this format:
?where=(<field>,<operator>,<value>)Example
https://<your-nocodb-url>/#/workspaceId/baseID/tableID?where=(country,eq,France)
https://<your-nocodb-url>/#/workspaceId/baseID/tableID/viewID?where=(country,eq,France)
This filters records where the field country is equal to France.
Supported Operators
These pages list the supported filter operators for the different data types:
Combining Filters
Use logical operators to join multiple conditions:
~and→ logical AND~or→ logical OR
Example
?where=((country,eq,France)~or(country,eq,Germany))This gets the records where country is France or Germany.
?where=((country,eq,France)~and(status,eq,Active))This gets the records where both conditions are true.
Use nested parentheses to group conditions into complex logic:
?where=(((country,eq,France)~or(country,eq,Germany))~and(status,eq,Active))Filter Precedence: Toolbar vs URL
When a view has both toolbar filters and URL filters:
- NocoDB first evaluates the filters that you apply manually in the Filter menu.
- Then NocoDB applies the URL query parameter filters (
?where=...) on top of the results.
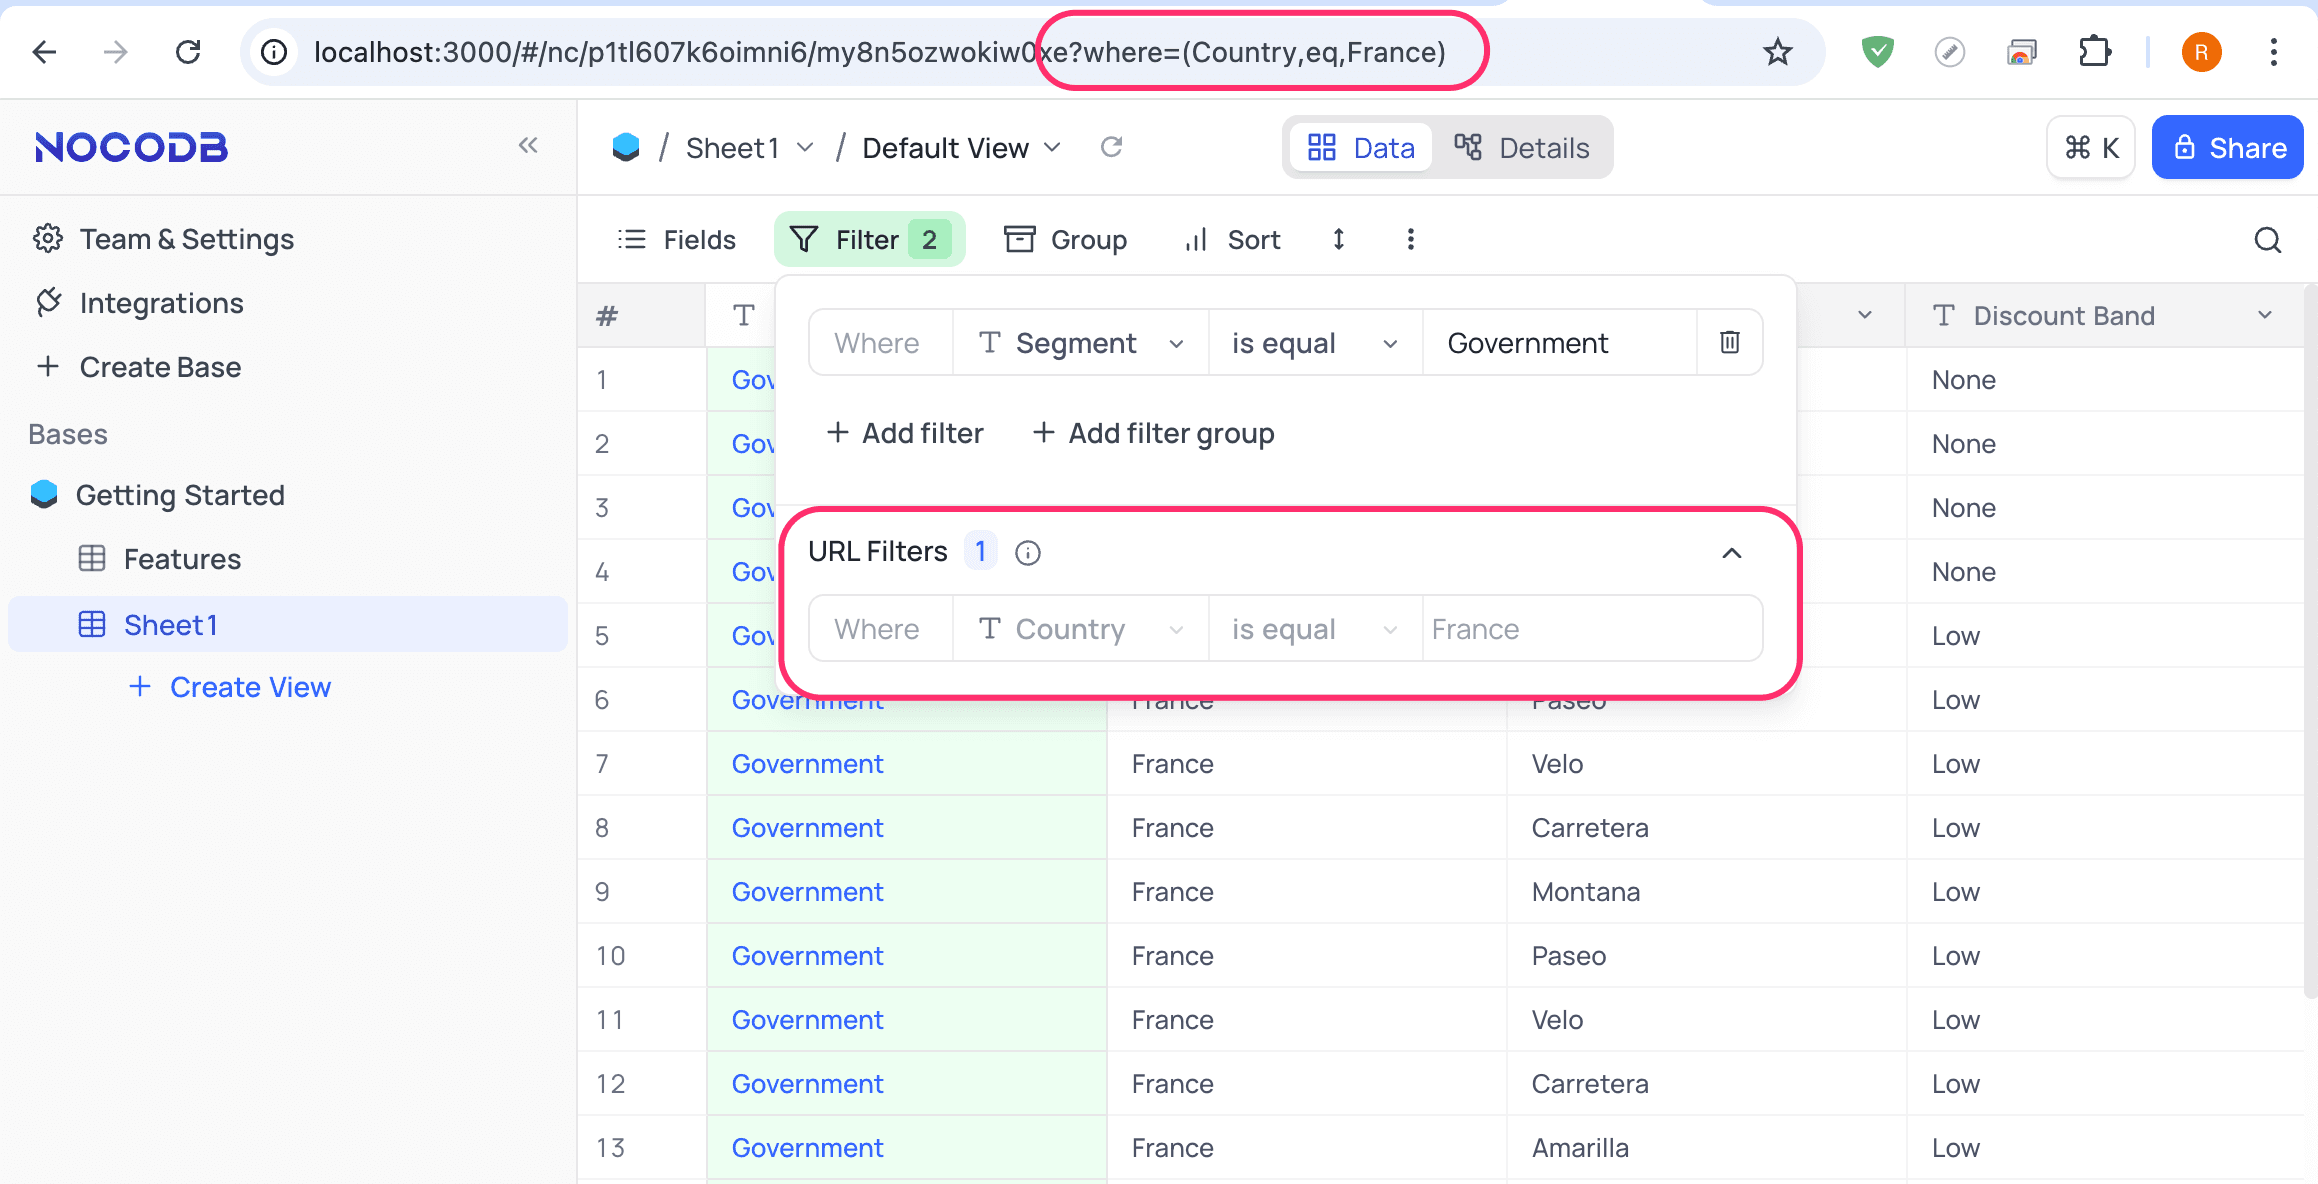
Visual Indicator: The toolbar lists both types of filters, as the screenshot below shows:
- The user-applied filter:
Segment is equal to Government - The URL-applied filter:
Country is equal to France(listed under URL Filters)
Additional Notes
- Field names must be exact (case-sensitive).
- If URL values include spaces or special characters, they must be URL-encoded.
Last updated on