Workspace Collaboration
Invite Members to Workspace
- In the workspace sidebar, click Invite Members. The Members page opens.
- Click Add Members. The Invite to Workspace dialog opens.
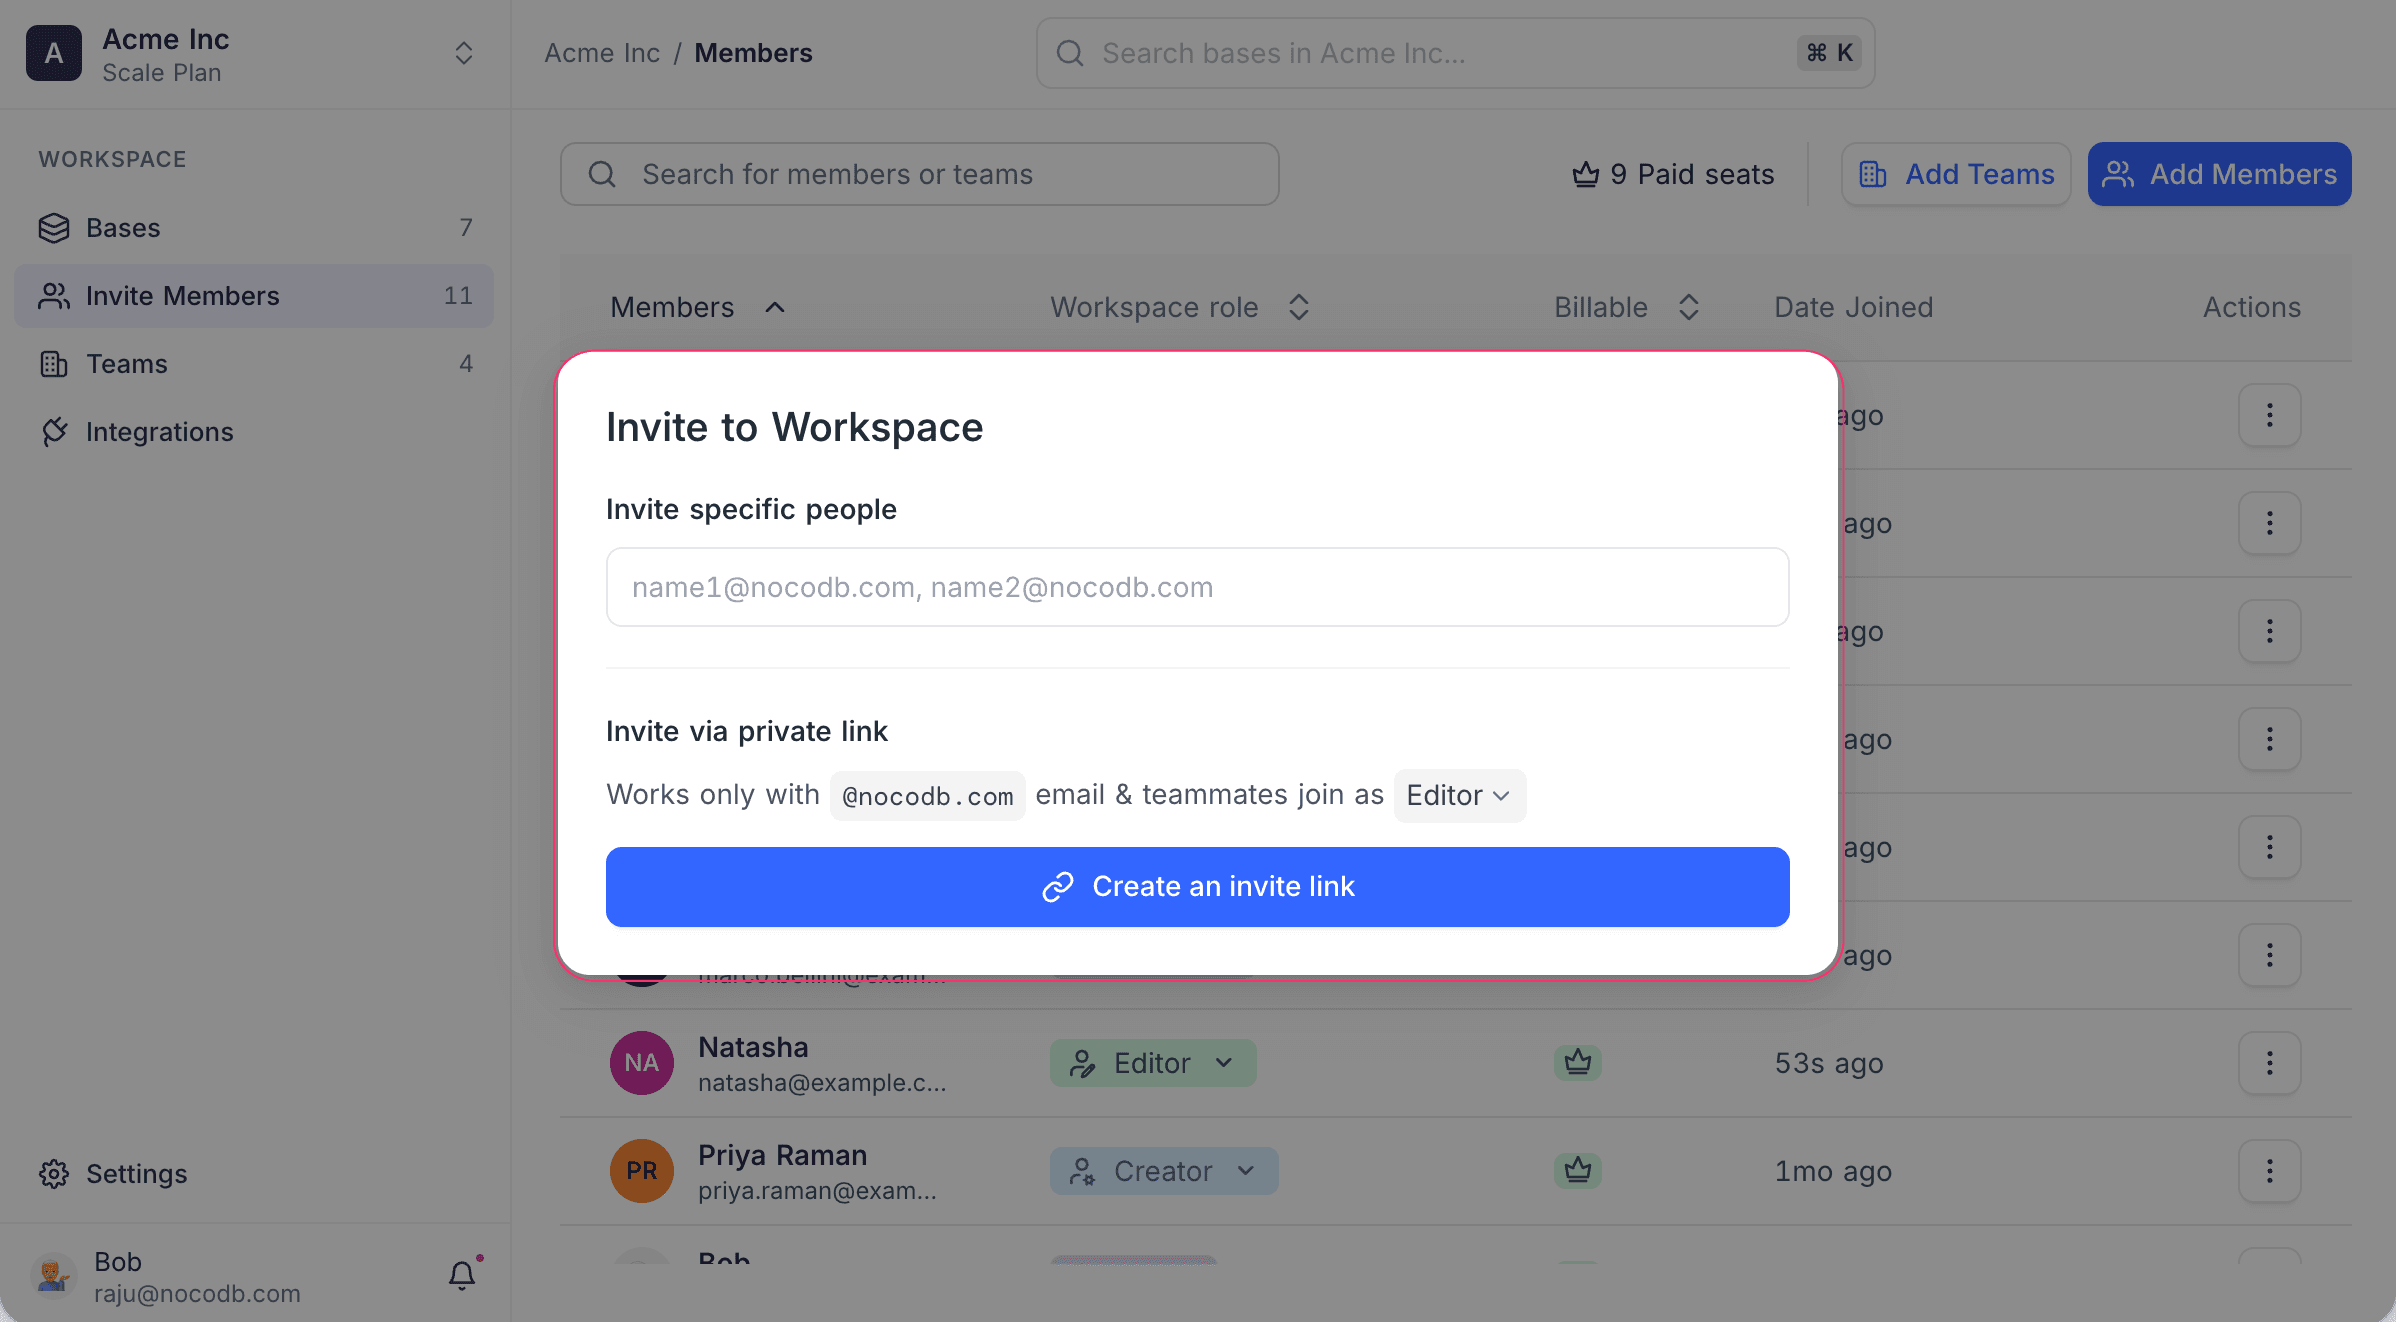
- Click the field below Invite specific people.
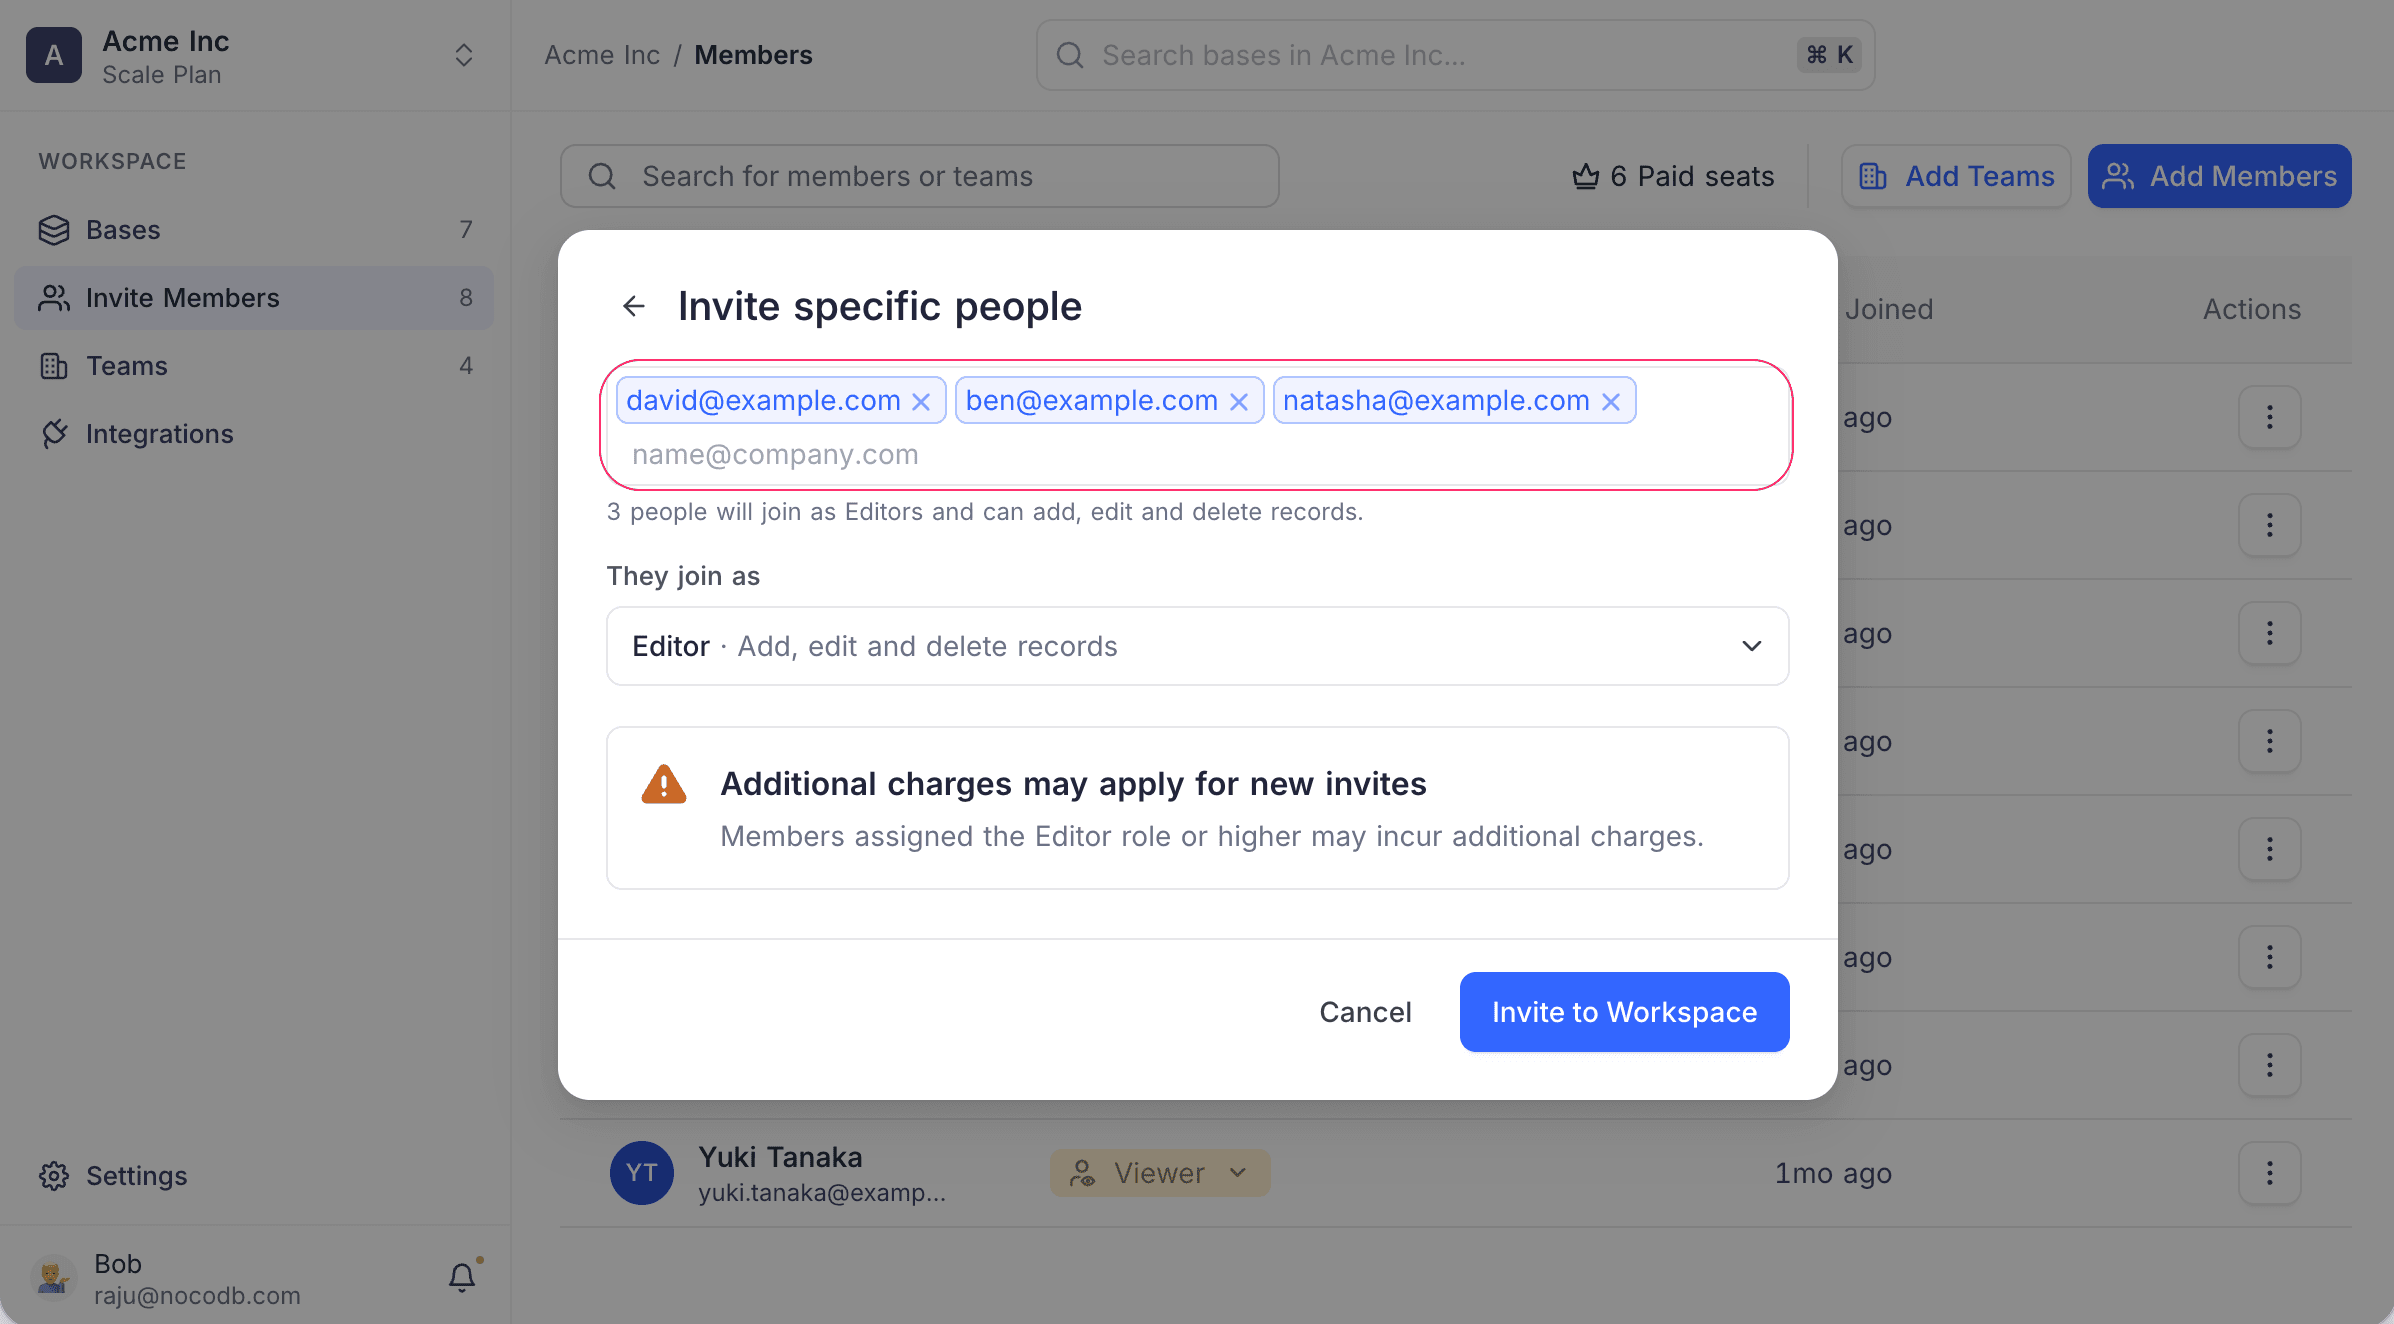
- Type one or more email addresses.
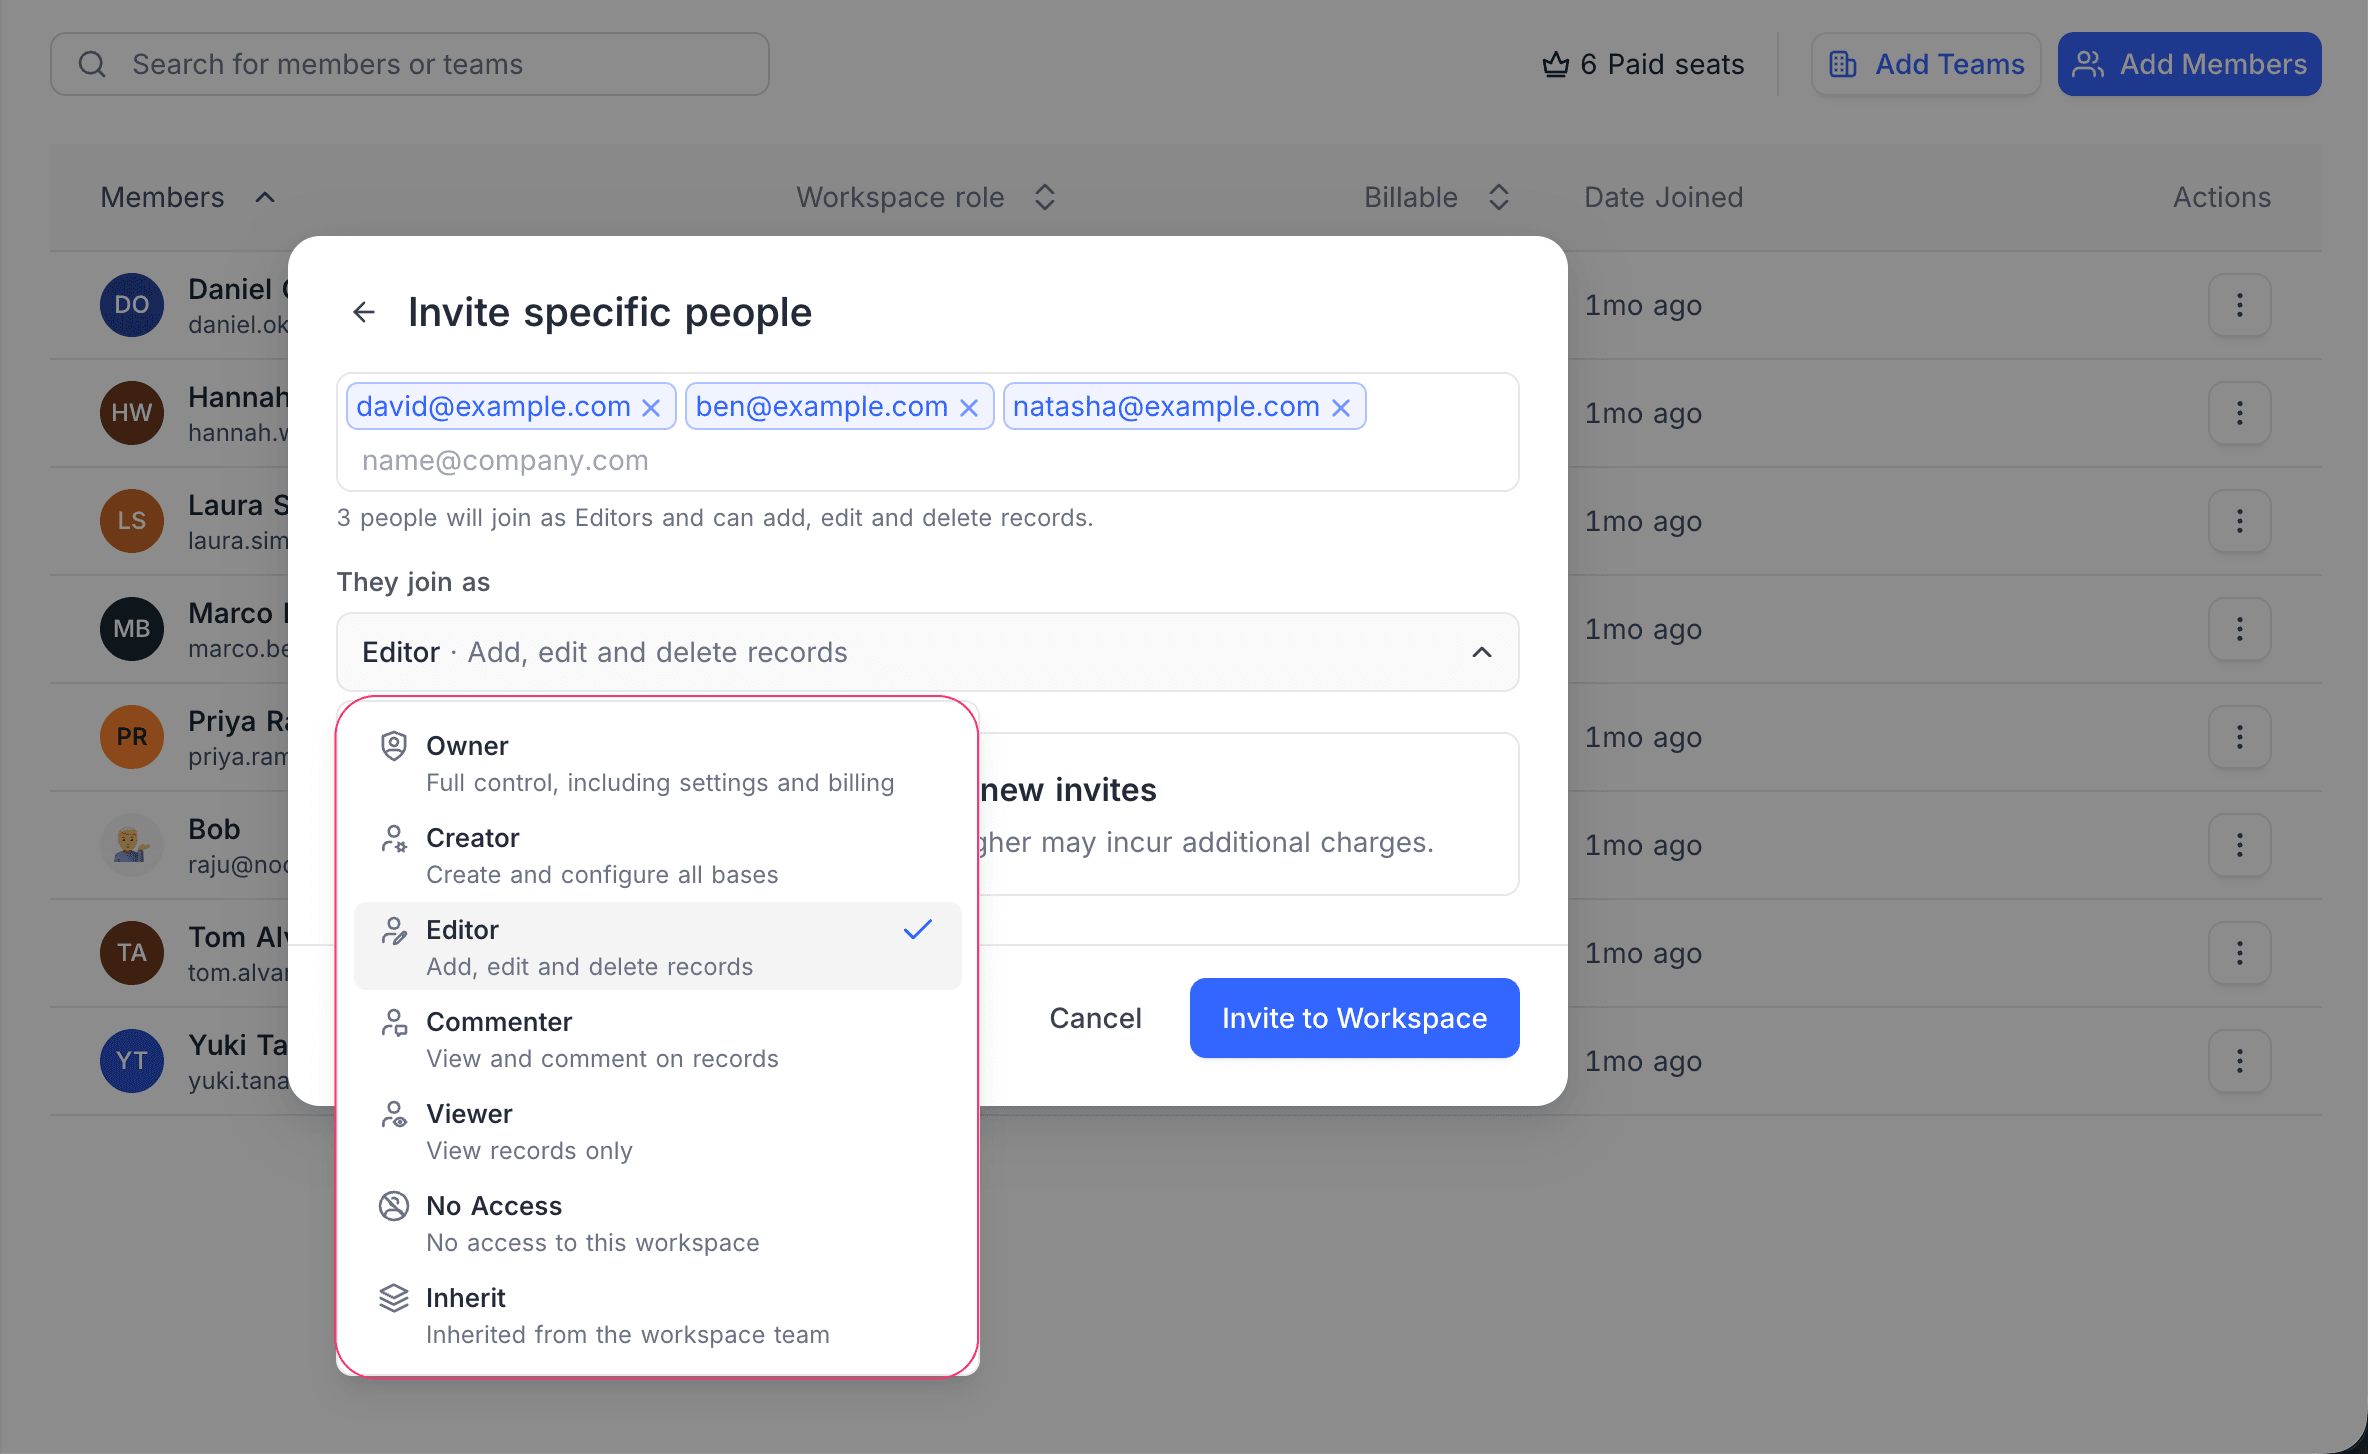
- Below They join as, select a role. All people in this invite get this role.
- Click Invite to Workspace.
Invite via Link
The same dialog also has Invite via private link. This creates a link, so you do not have to invite one address at a time. Anyone who opens the link can use it to join the workspace with a role that you select. To create a link, you need the Editor role or higher.
For more information, refer to invite links.
Invite Teams to Workspace ☁
You can invite teams to a workspace. All members of the team get the workspace role that you give the team.
- In the workspace sidebar, click Invite Members. The Members page opens.
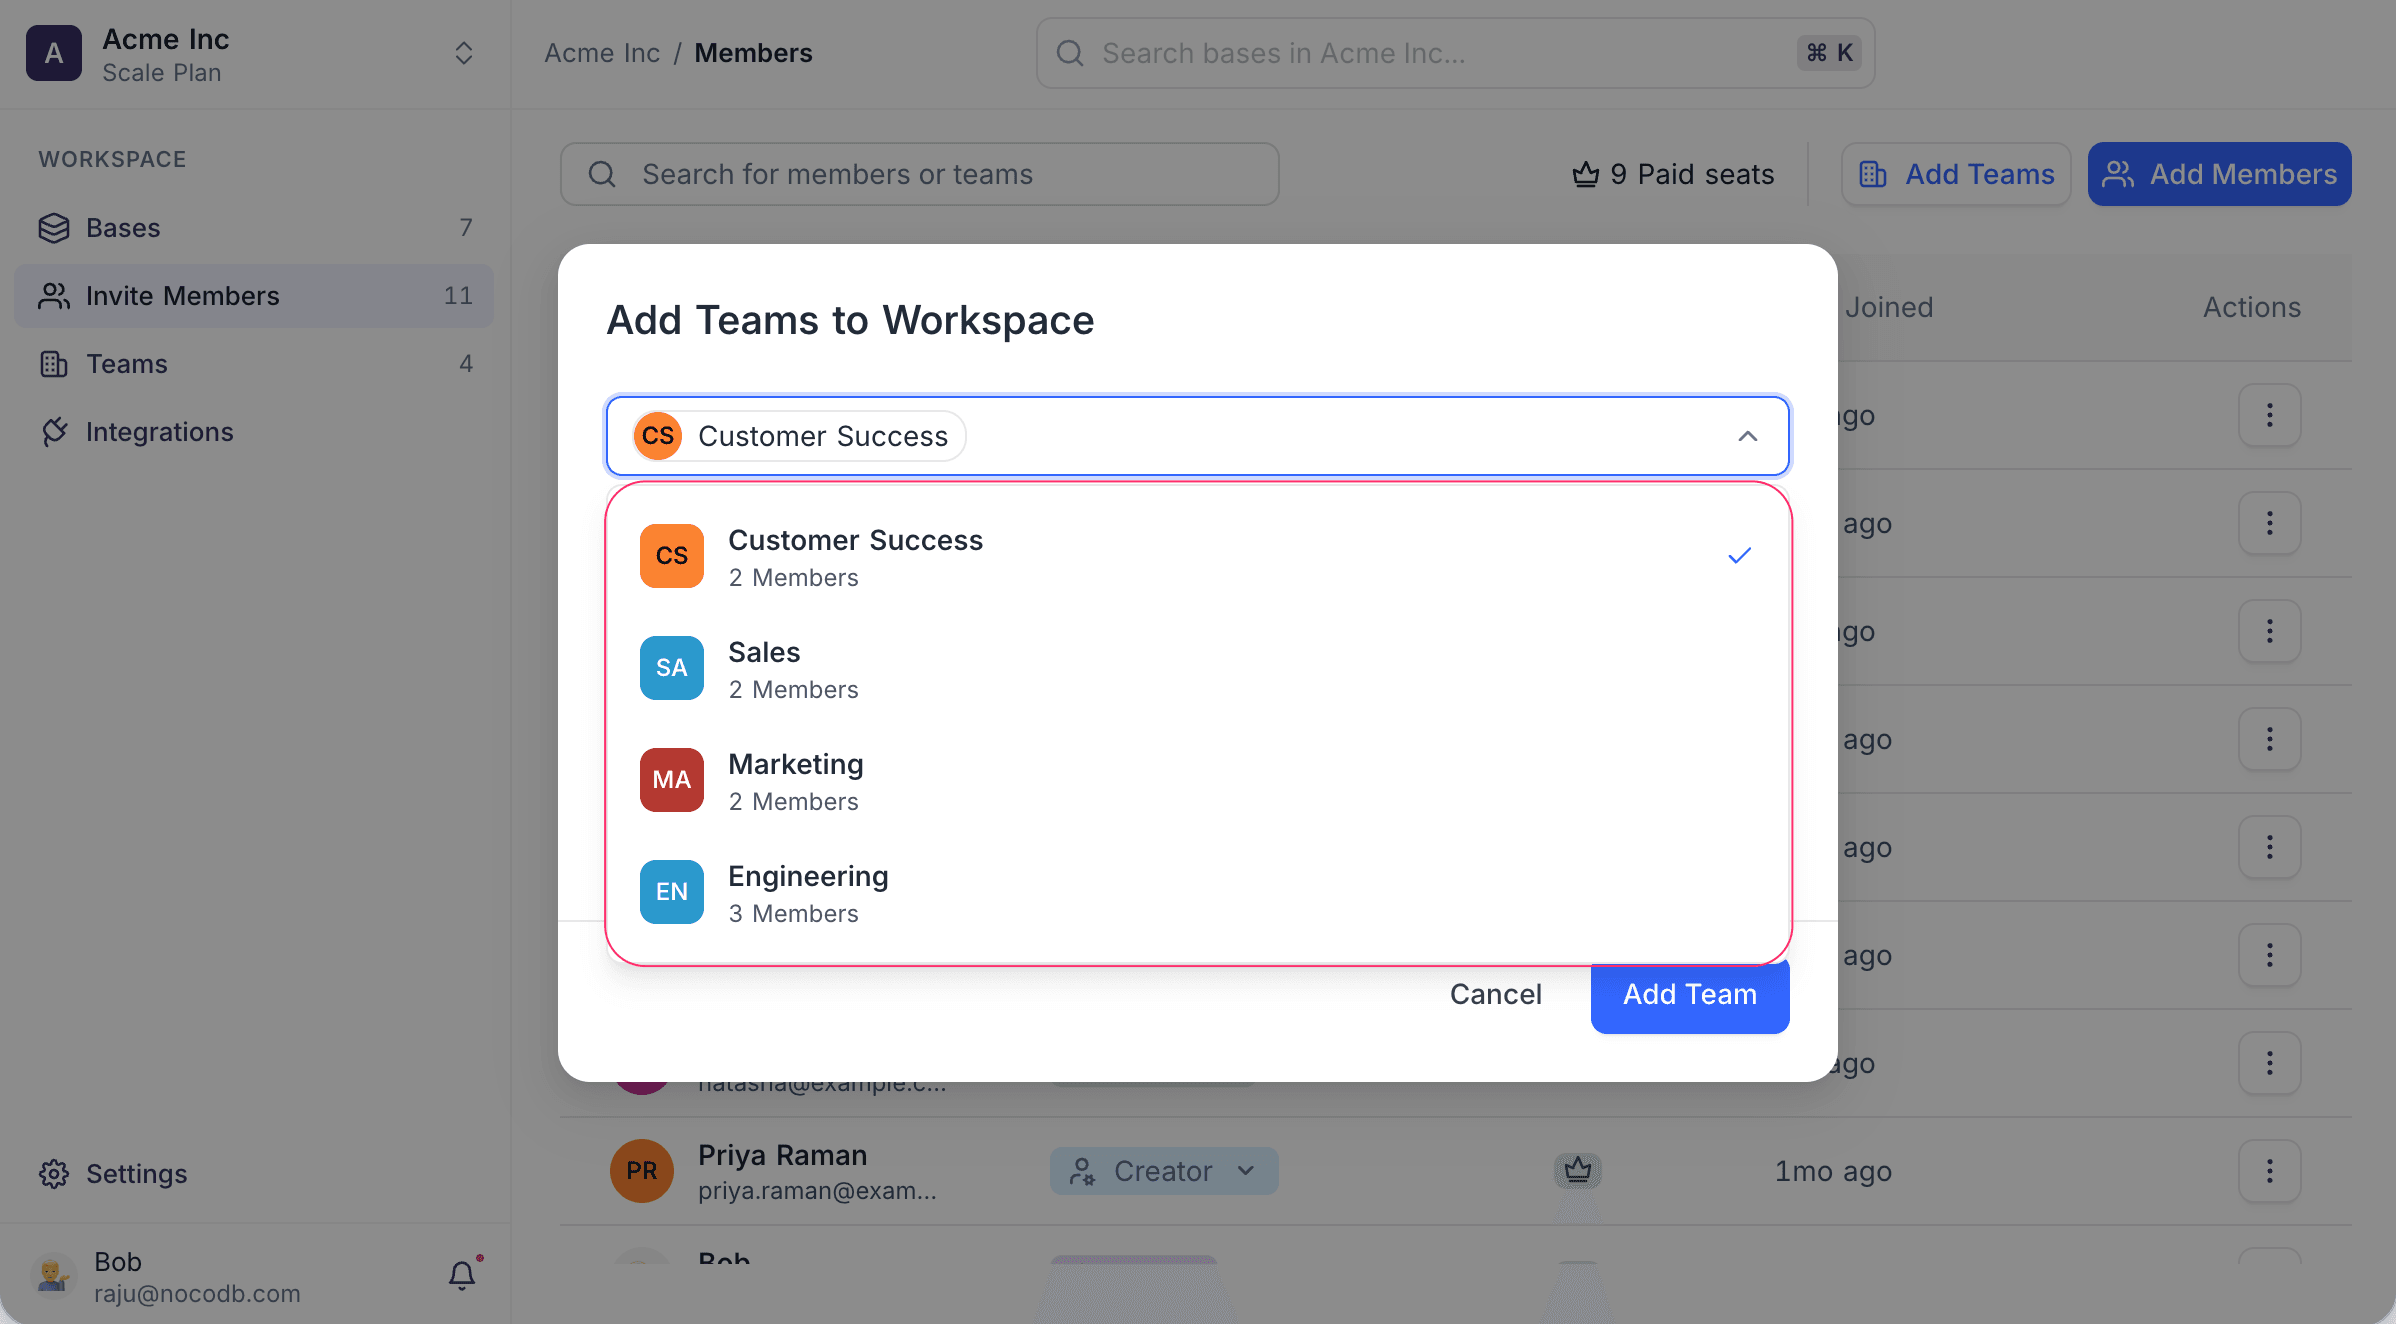
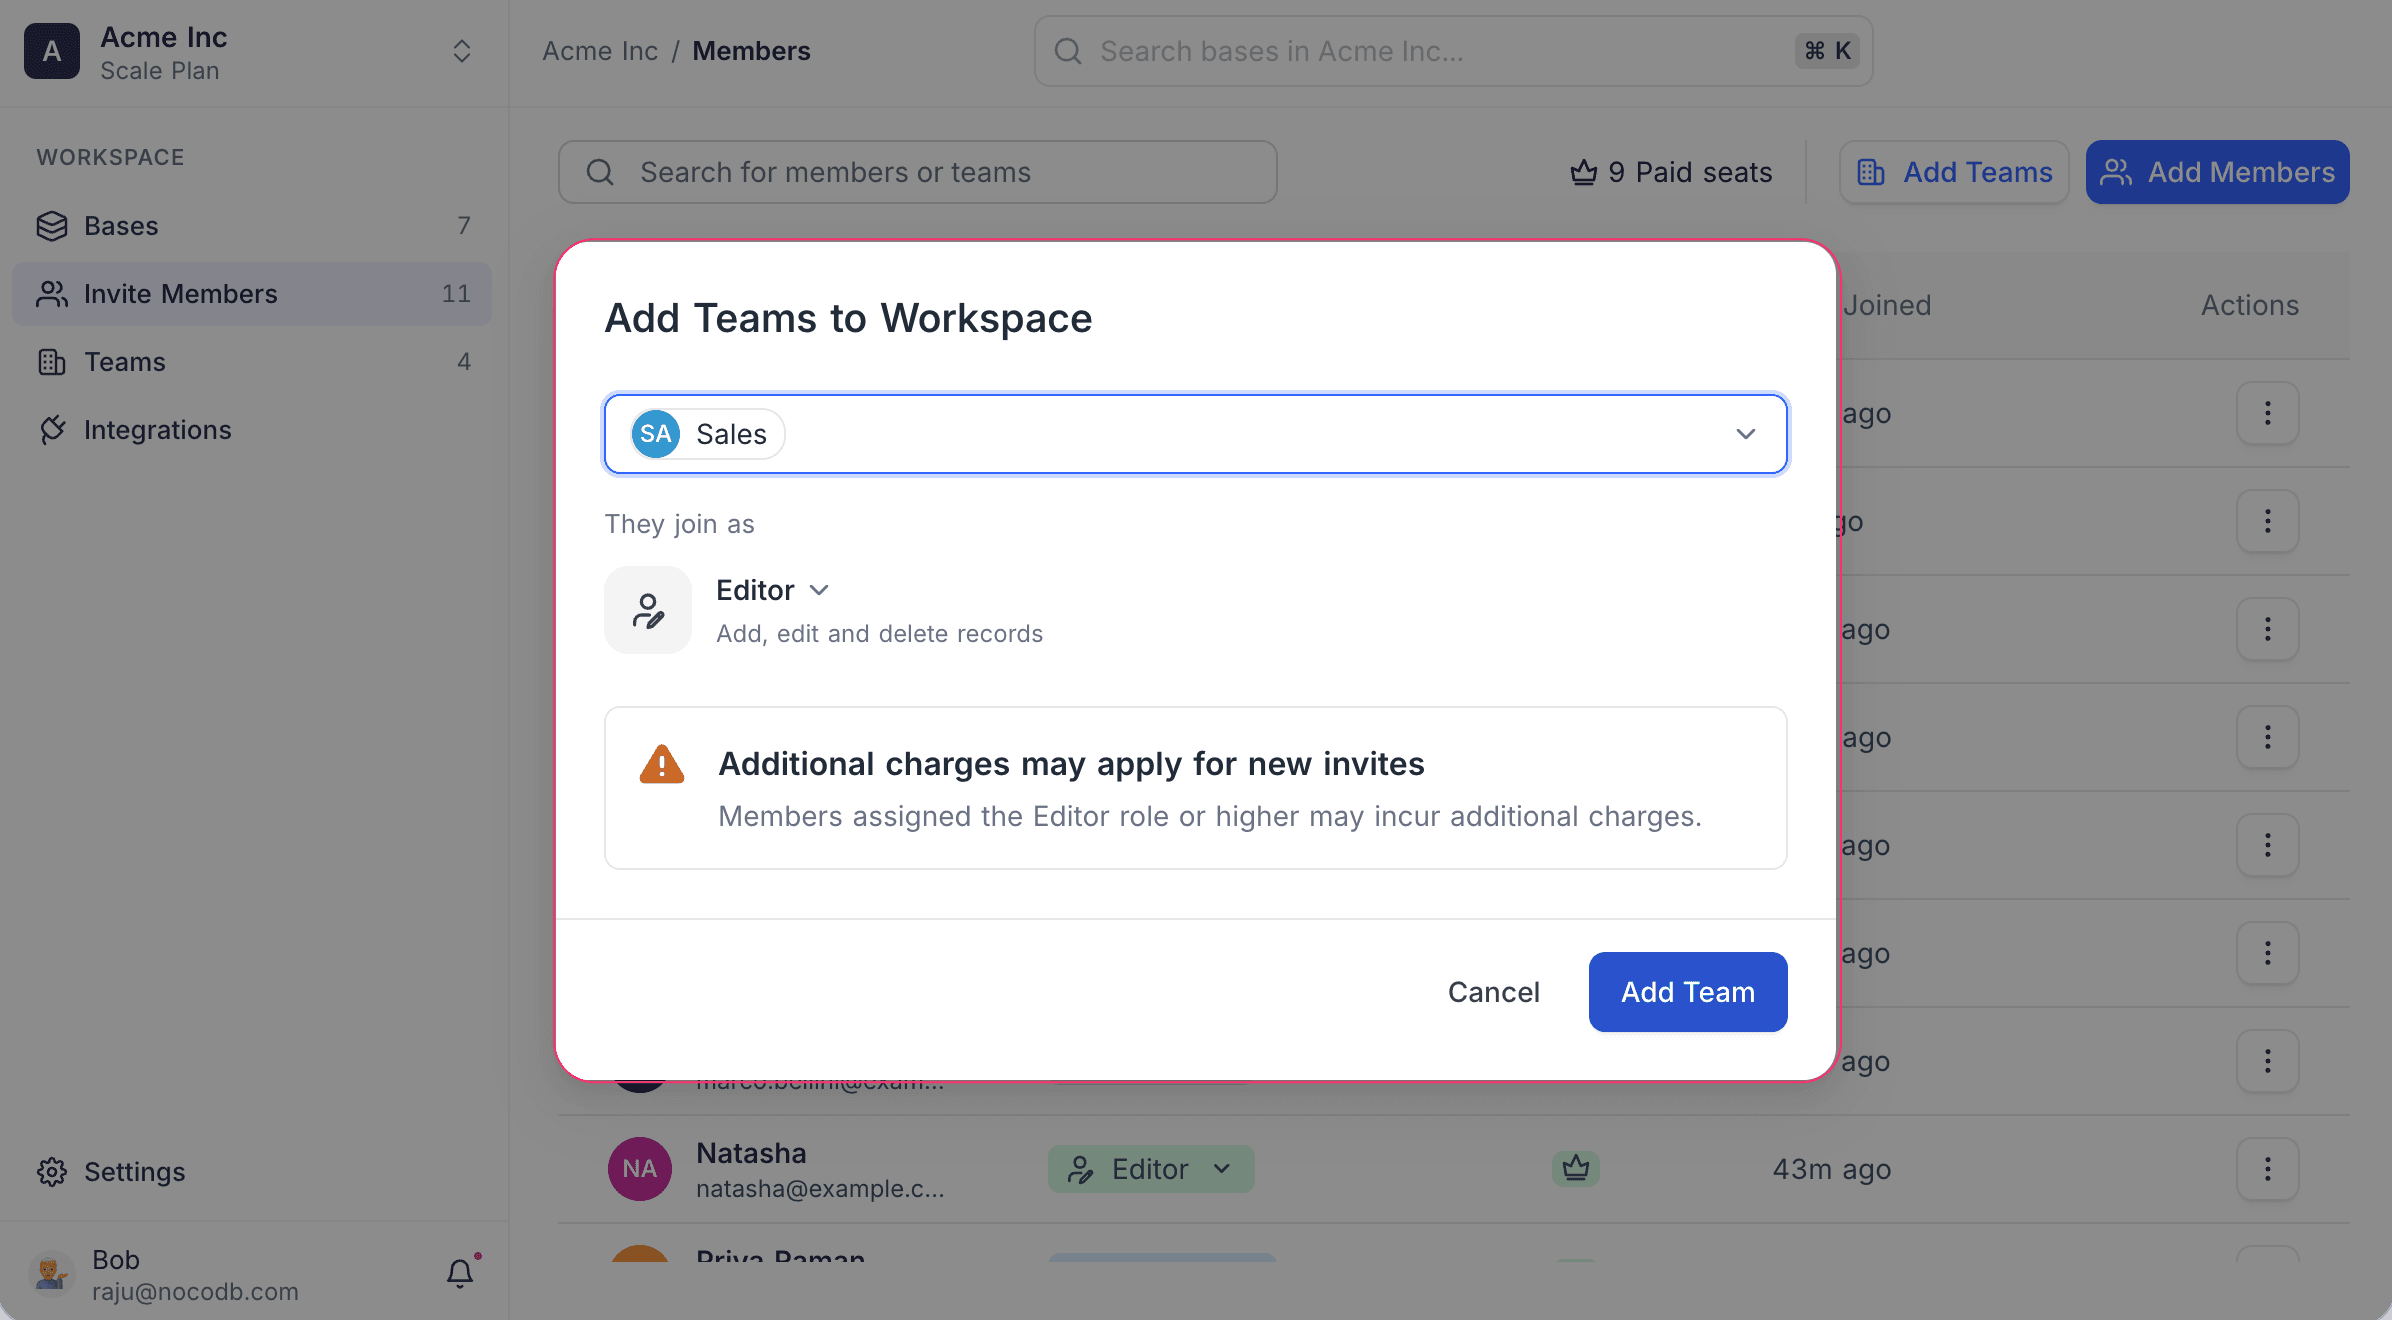
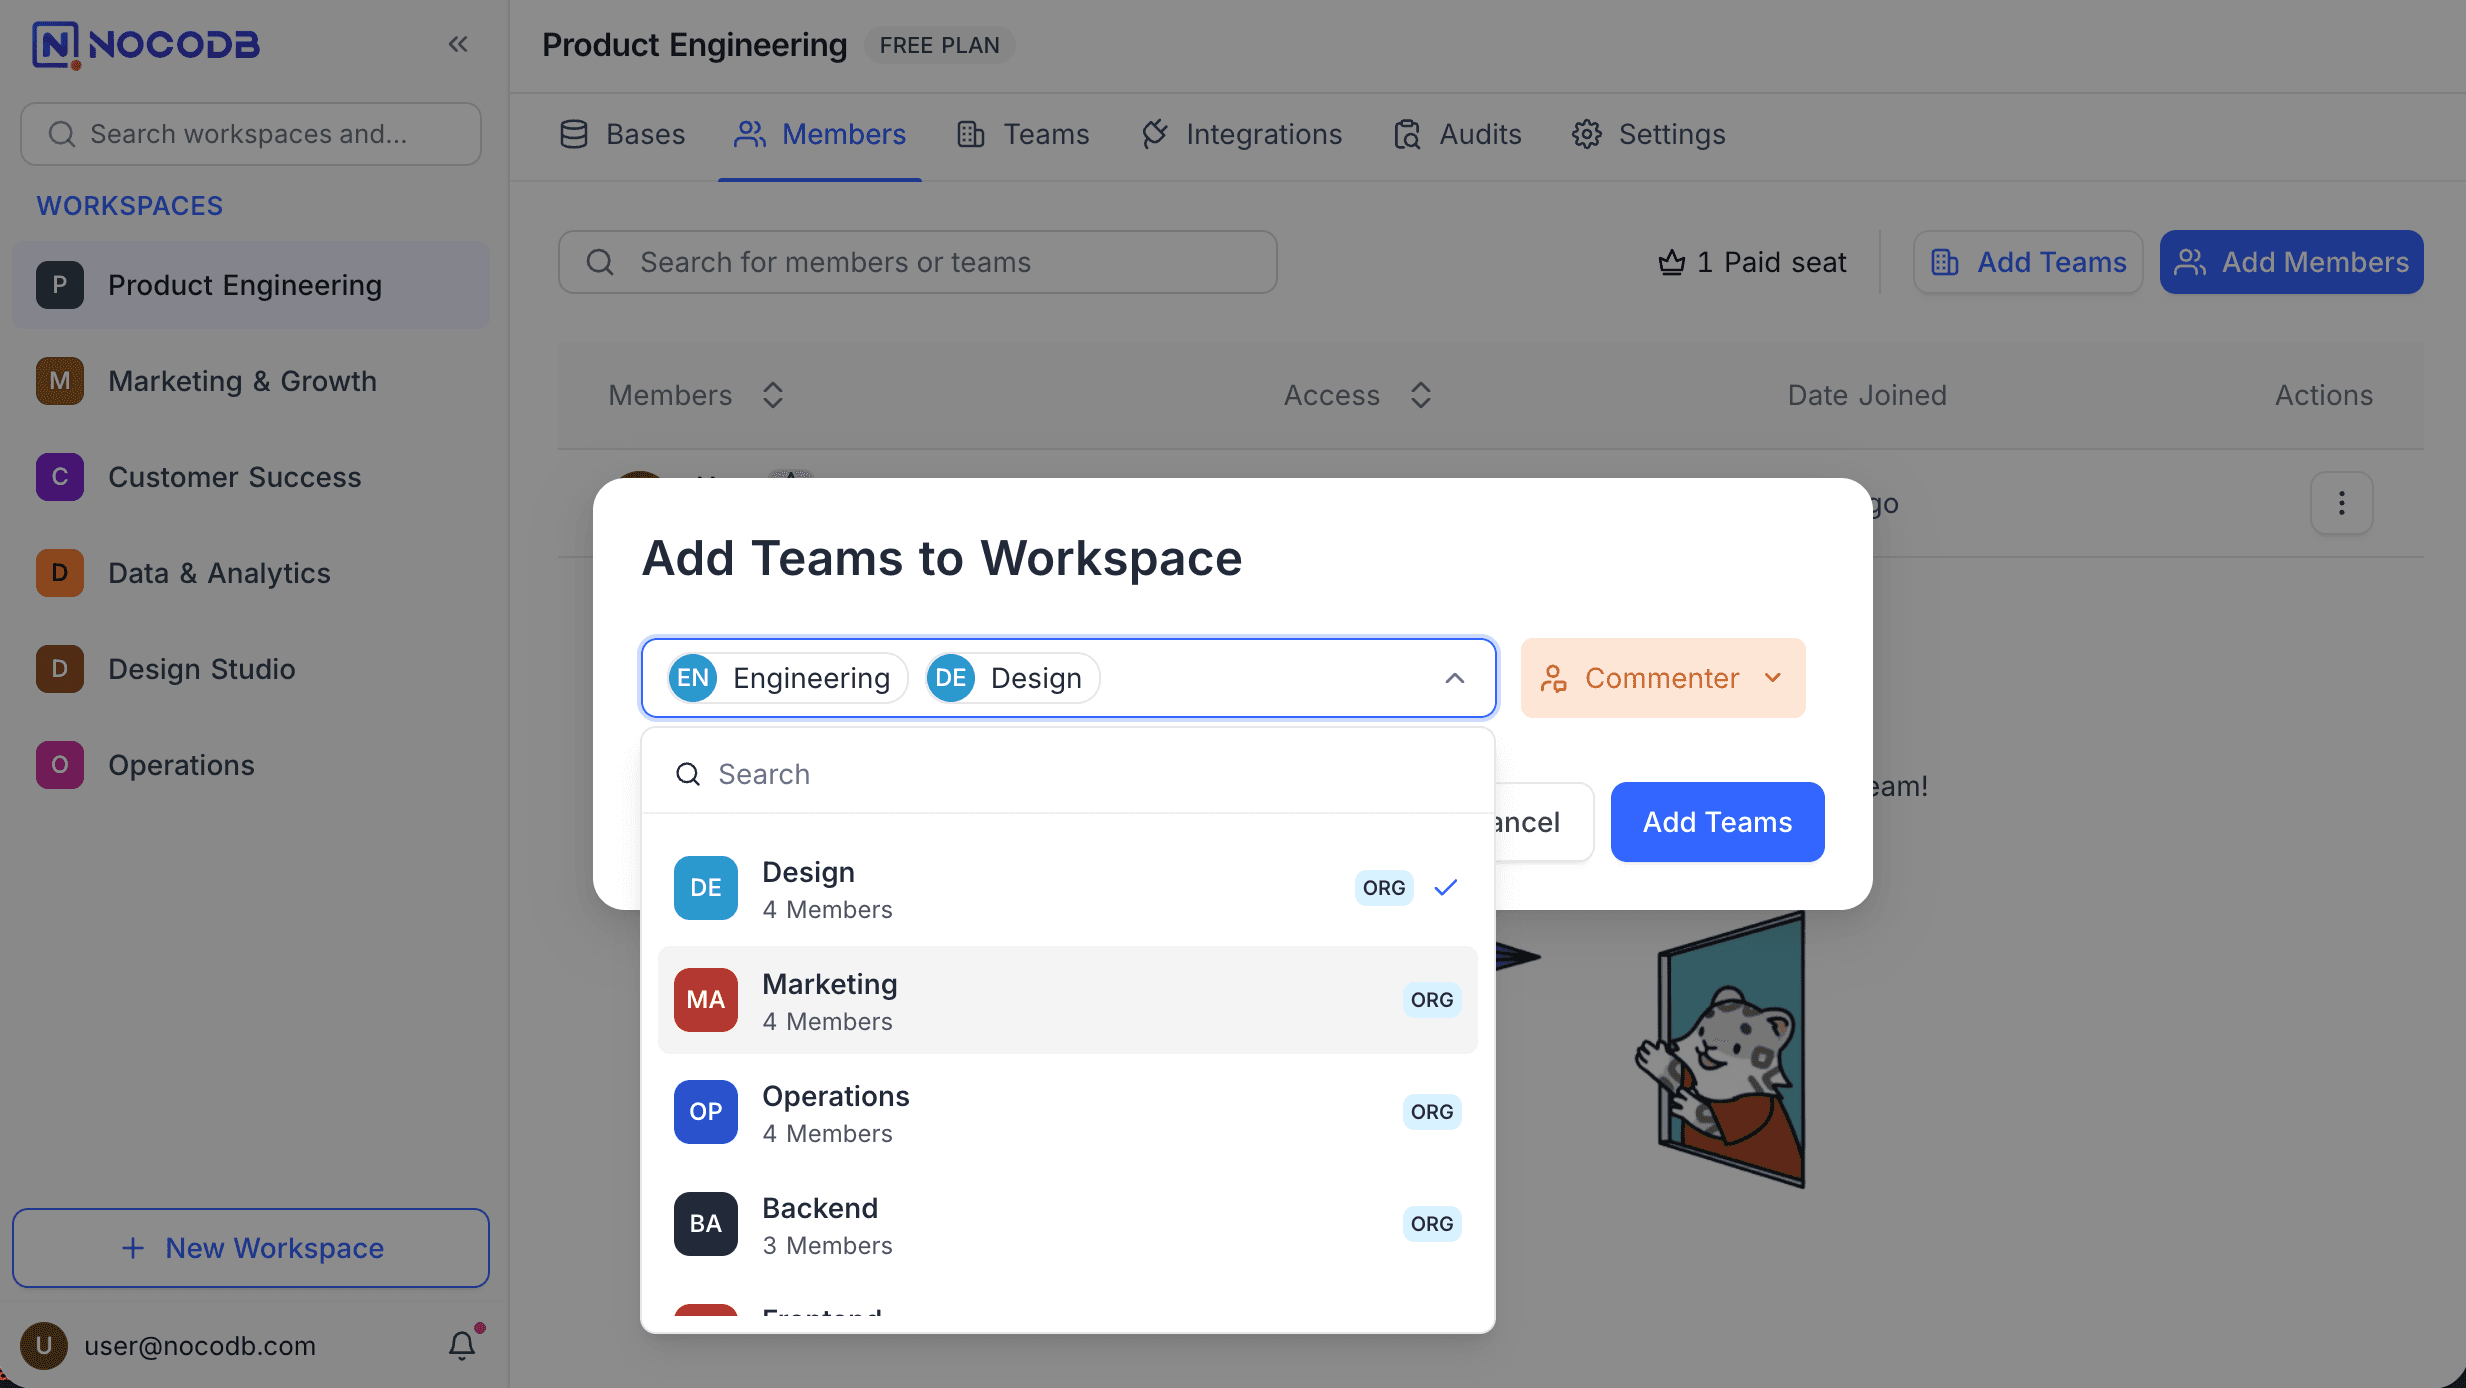
- Click Add Teams. The Add Teams to Workspace dialog opens.
- From the dropdown, select one or more teams. The list shows the number of members in each team.
- Below They join as, select the role for the teams.
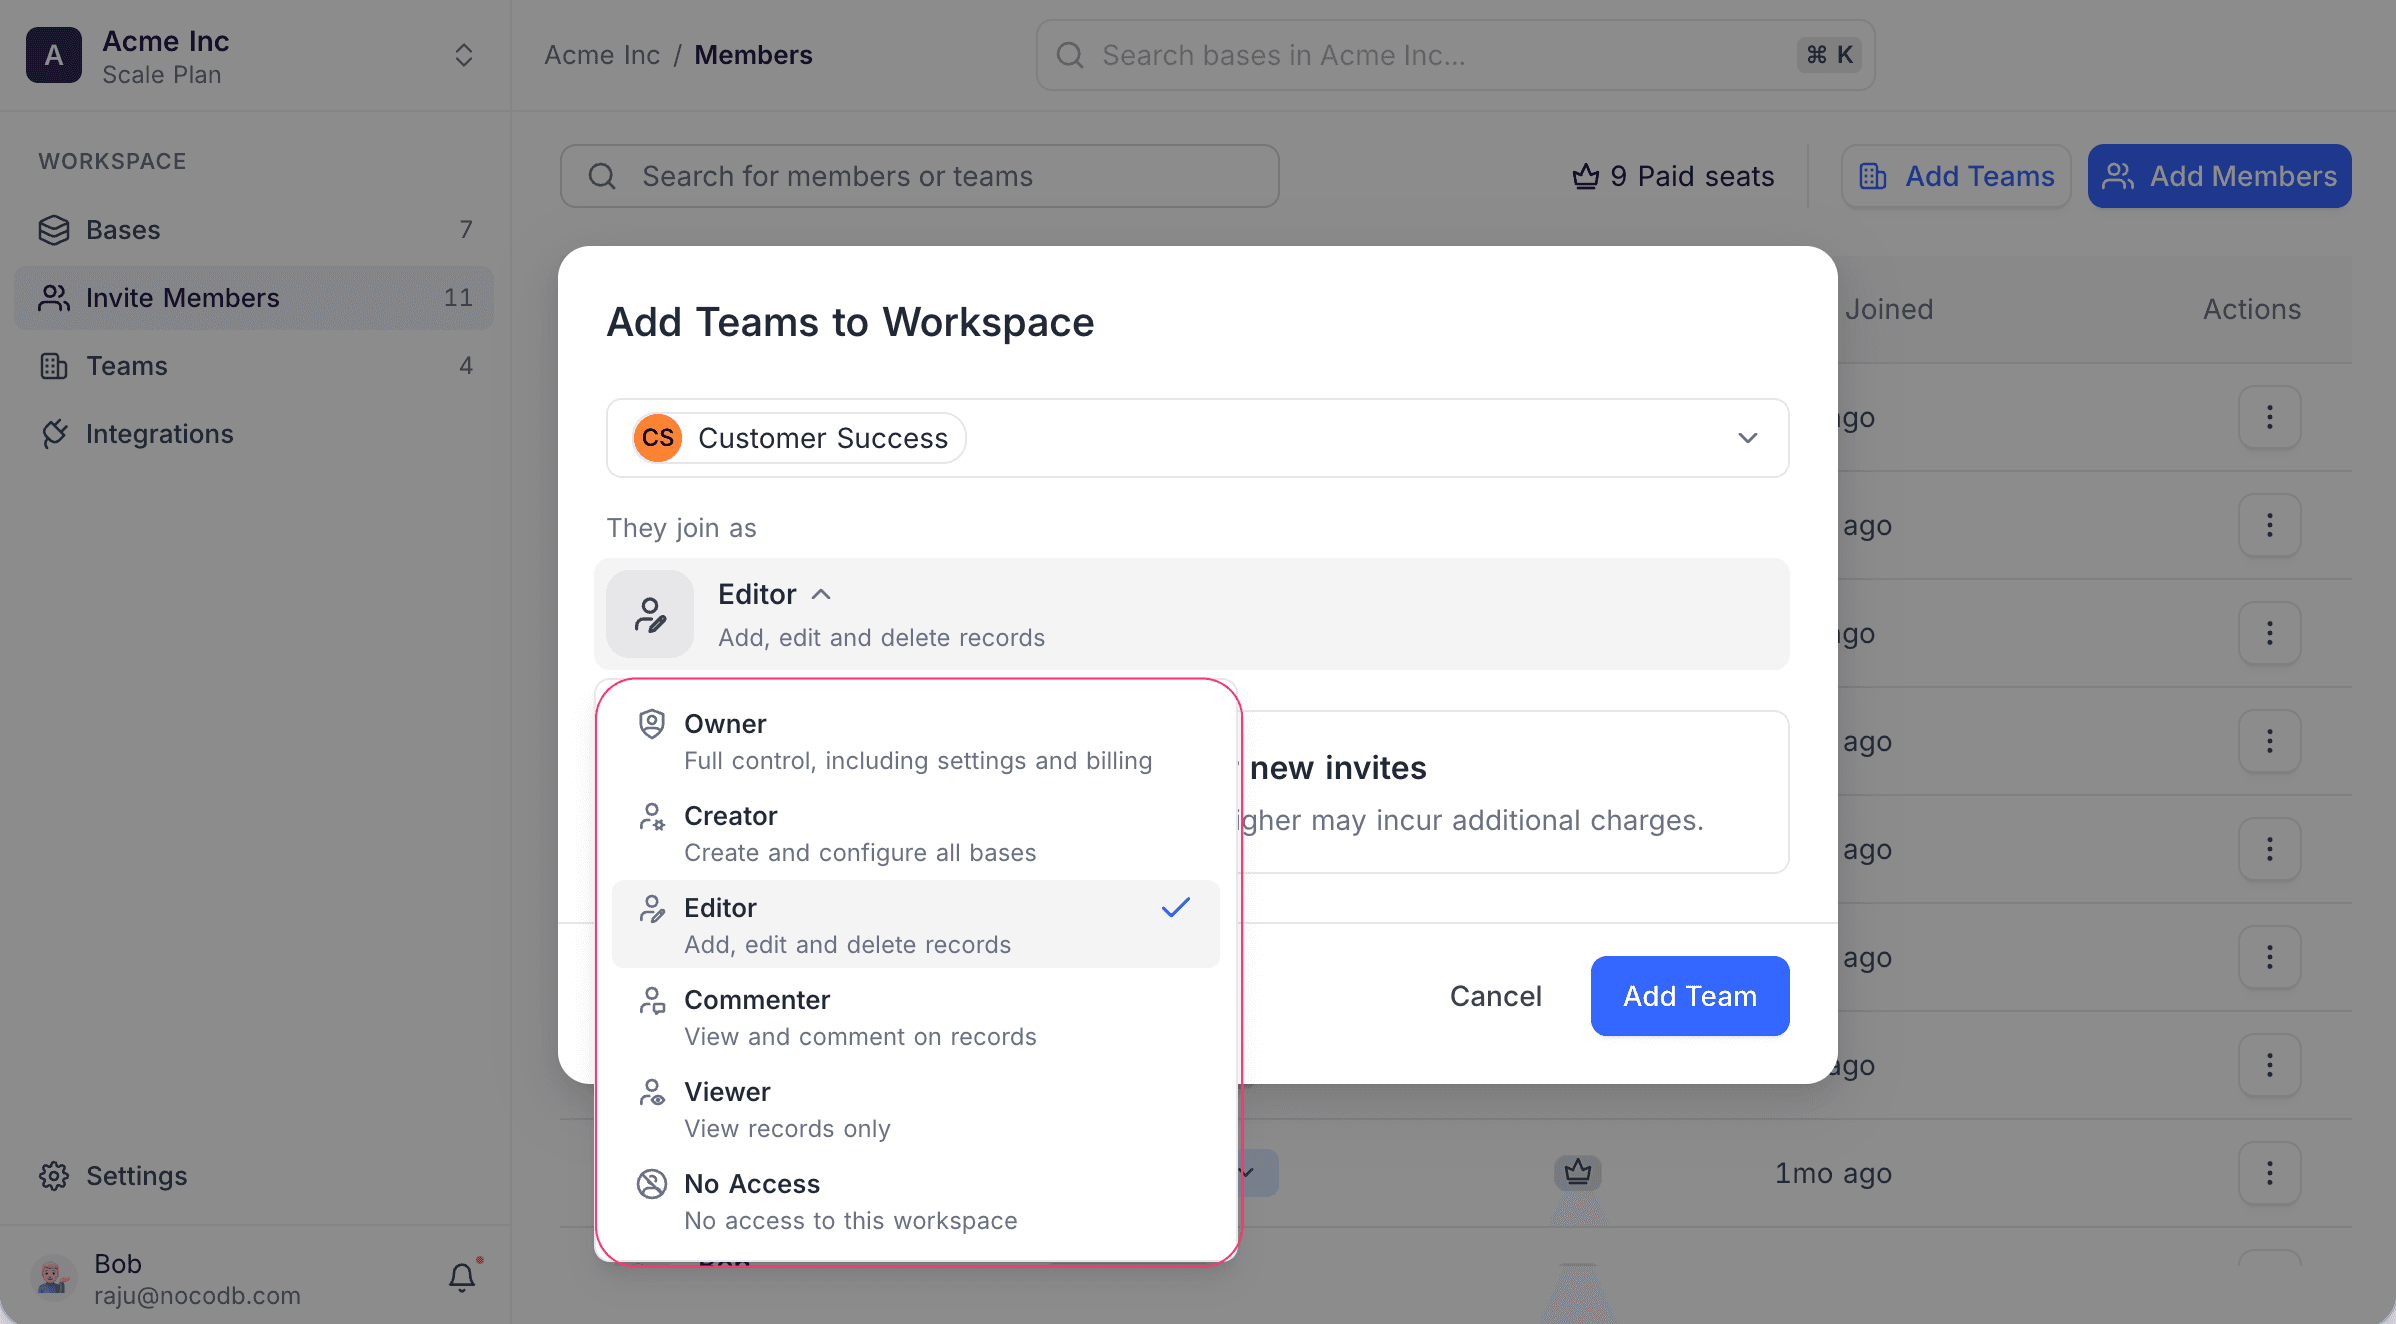
- Click Add Team. If you select more than one team, the button shows Add Teams.
To create and manage teams, refer to the Teams documentation.
List Workspace Members and Teams
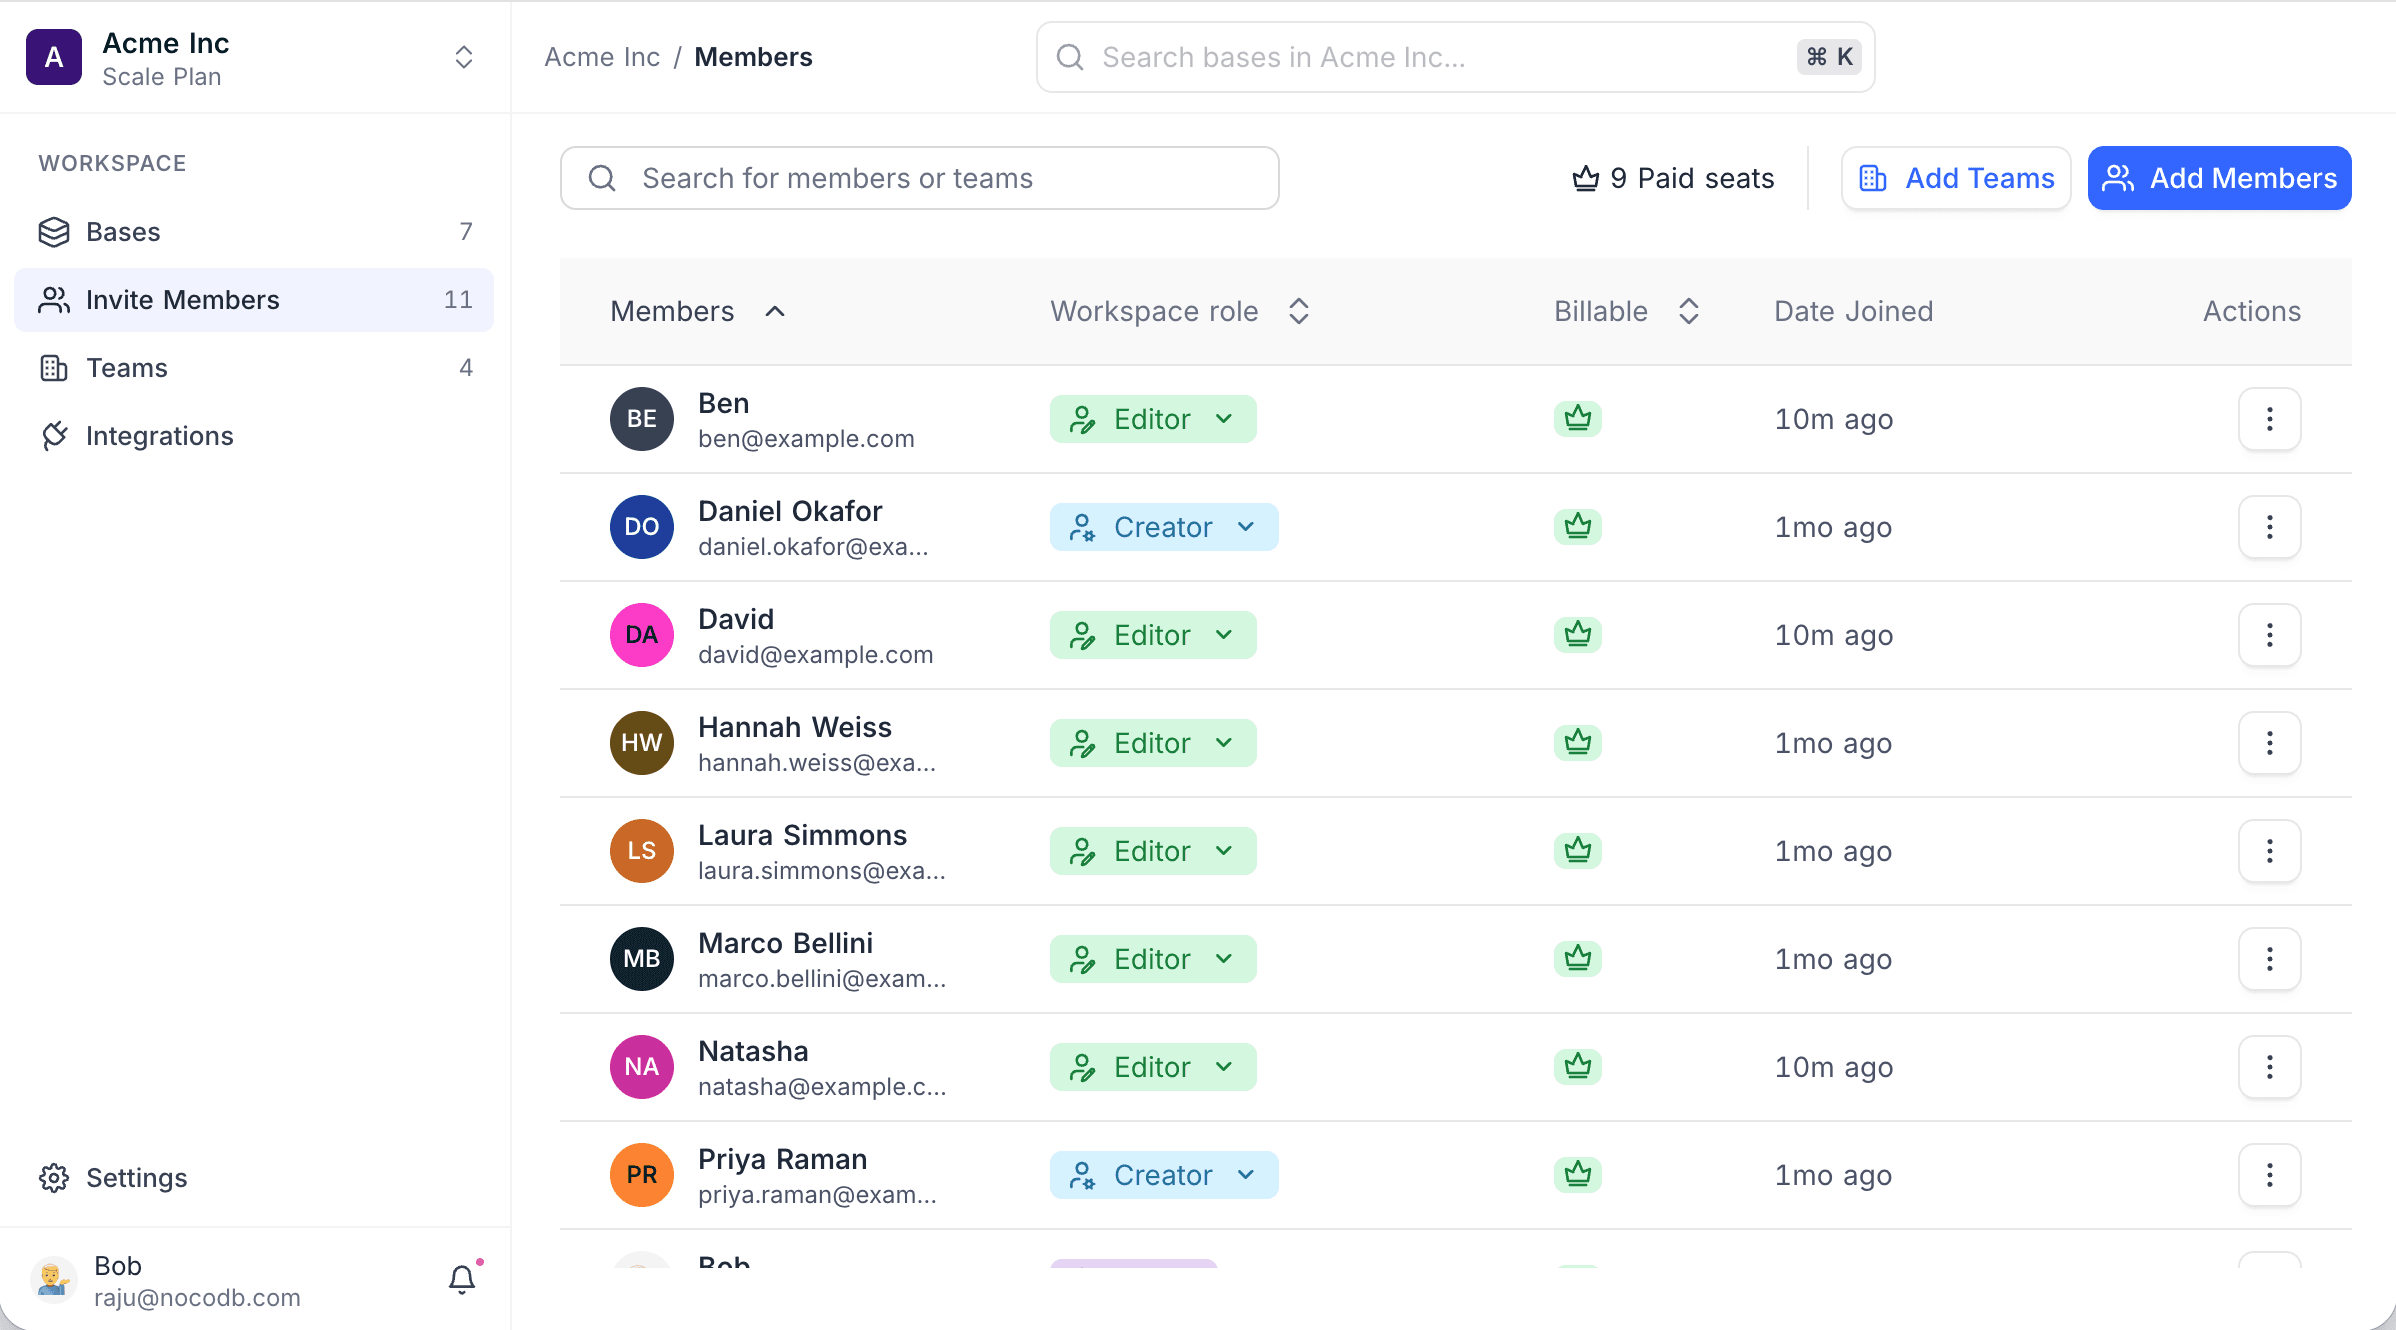
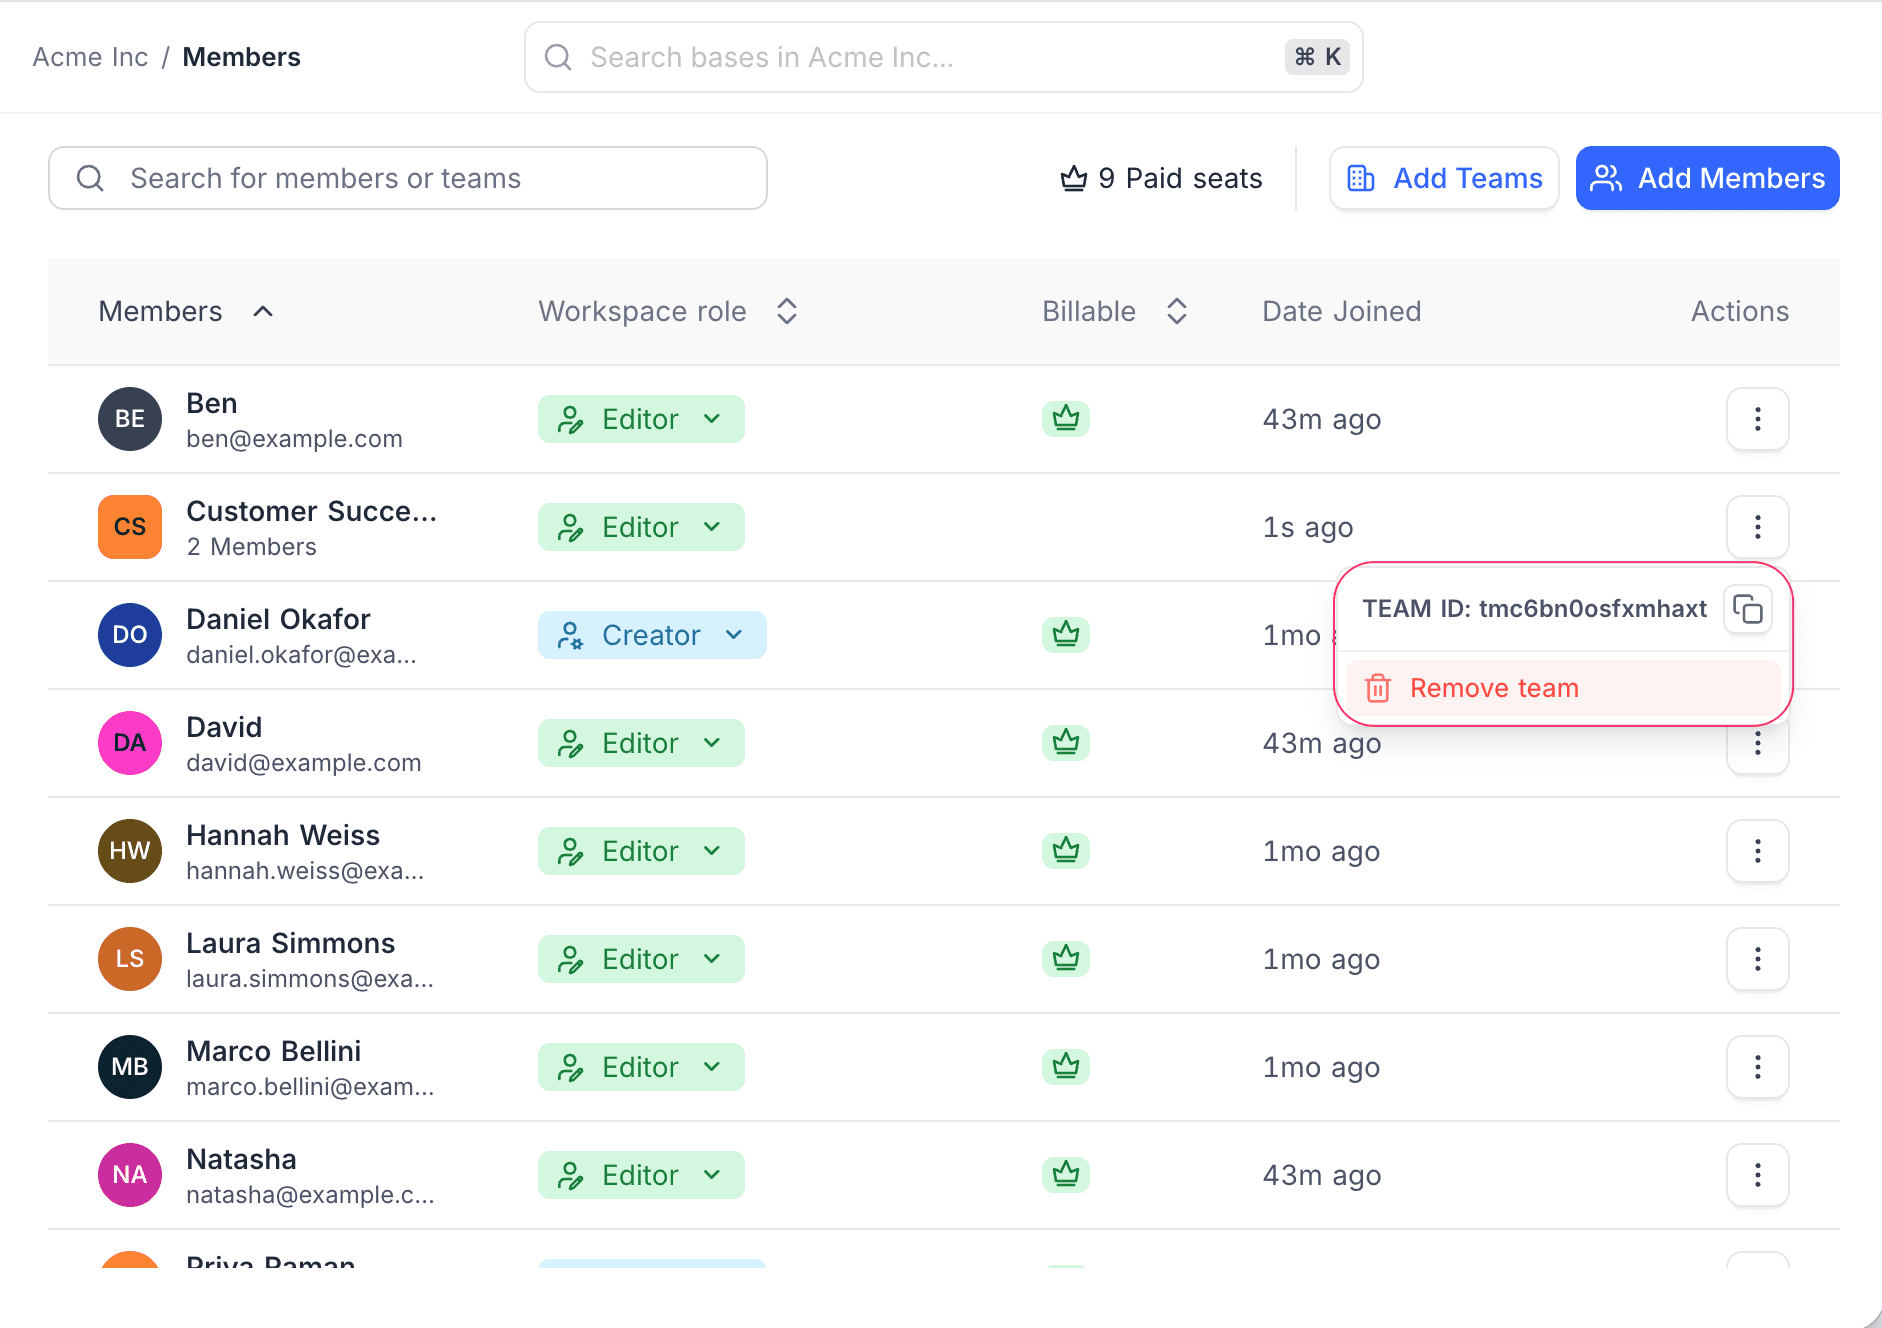
The Members page shows all users and teams that have access to the workspace.
| Column | What it shows |
|---|---|
| Members | For a member: the name and the email. For a team: the name and the number of members. Organization teams have an ORG badge, which makes them different from workspace teams. |
| Workspace role | The workspace role of the member or team. |
| Billable | A crown if the member uses a paid seat. |
| Date Joined | The date that the member joined the workspace. |
| Actions | A menu to remove the member or team. |
The page header shows the number of paid seats that the workspace uses. On Community Edition and on unlicensed self-hosted deployments, the Billable column and the seat count show Editor seat instead.
Why a member is billable
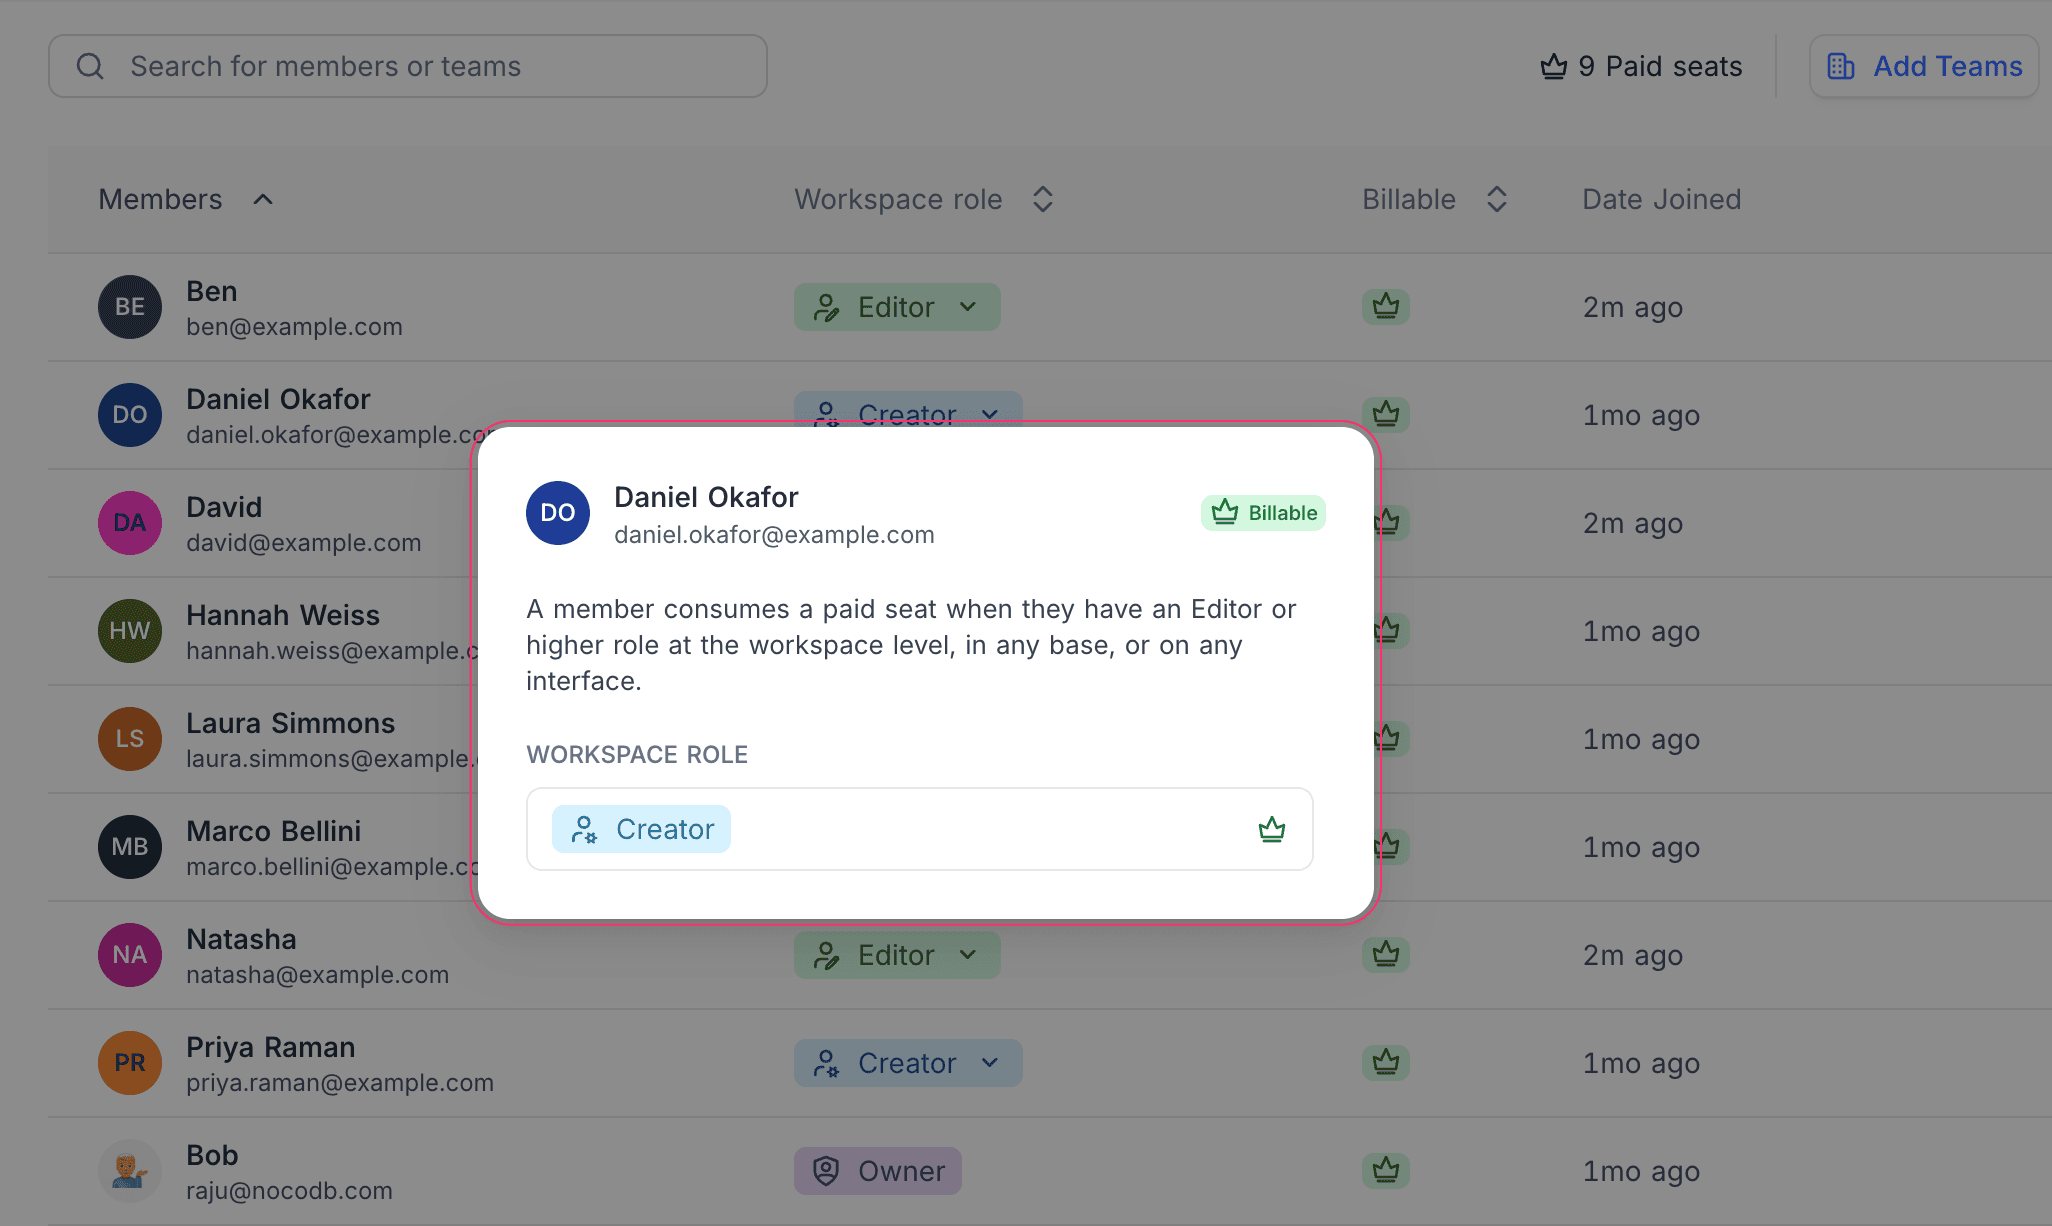
A crown in the Billable column shows a member who uses a paid seat. A member uses a paid seat when the member has Editor or a higher role in one of these places:
- the workspace
- a base
- an interface
For example, a member who is Viewer in the workspace is still billable if that member is Editor in one base. To see the assignment that makes a member billable, click the crown.
Modify Roles for Members or Teams
You can change the roles of members and teams on the Members page.
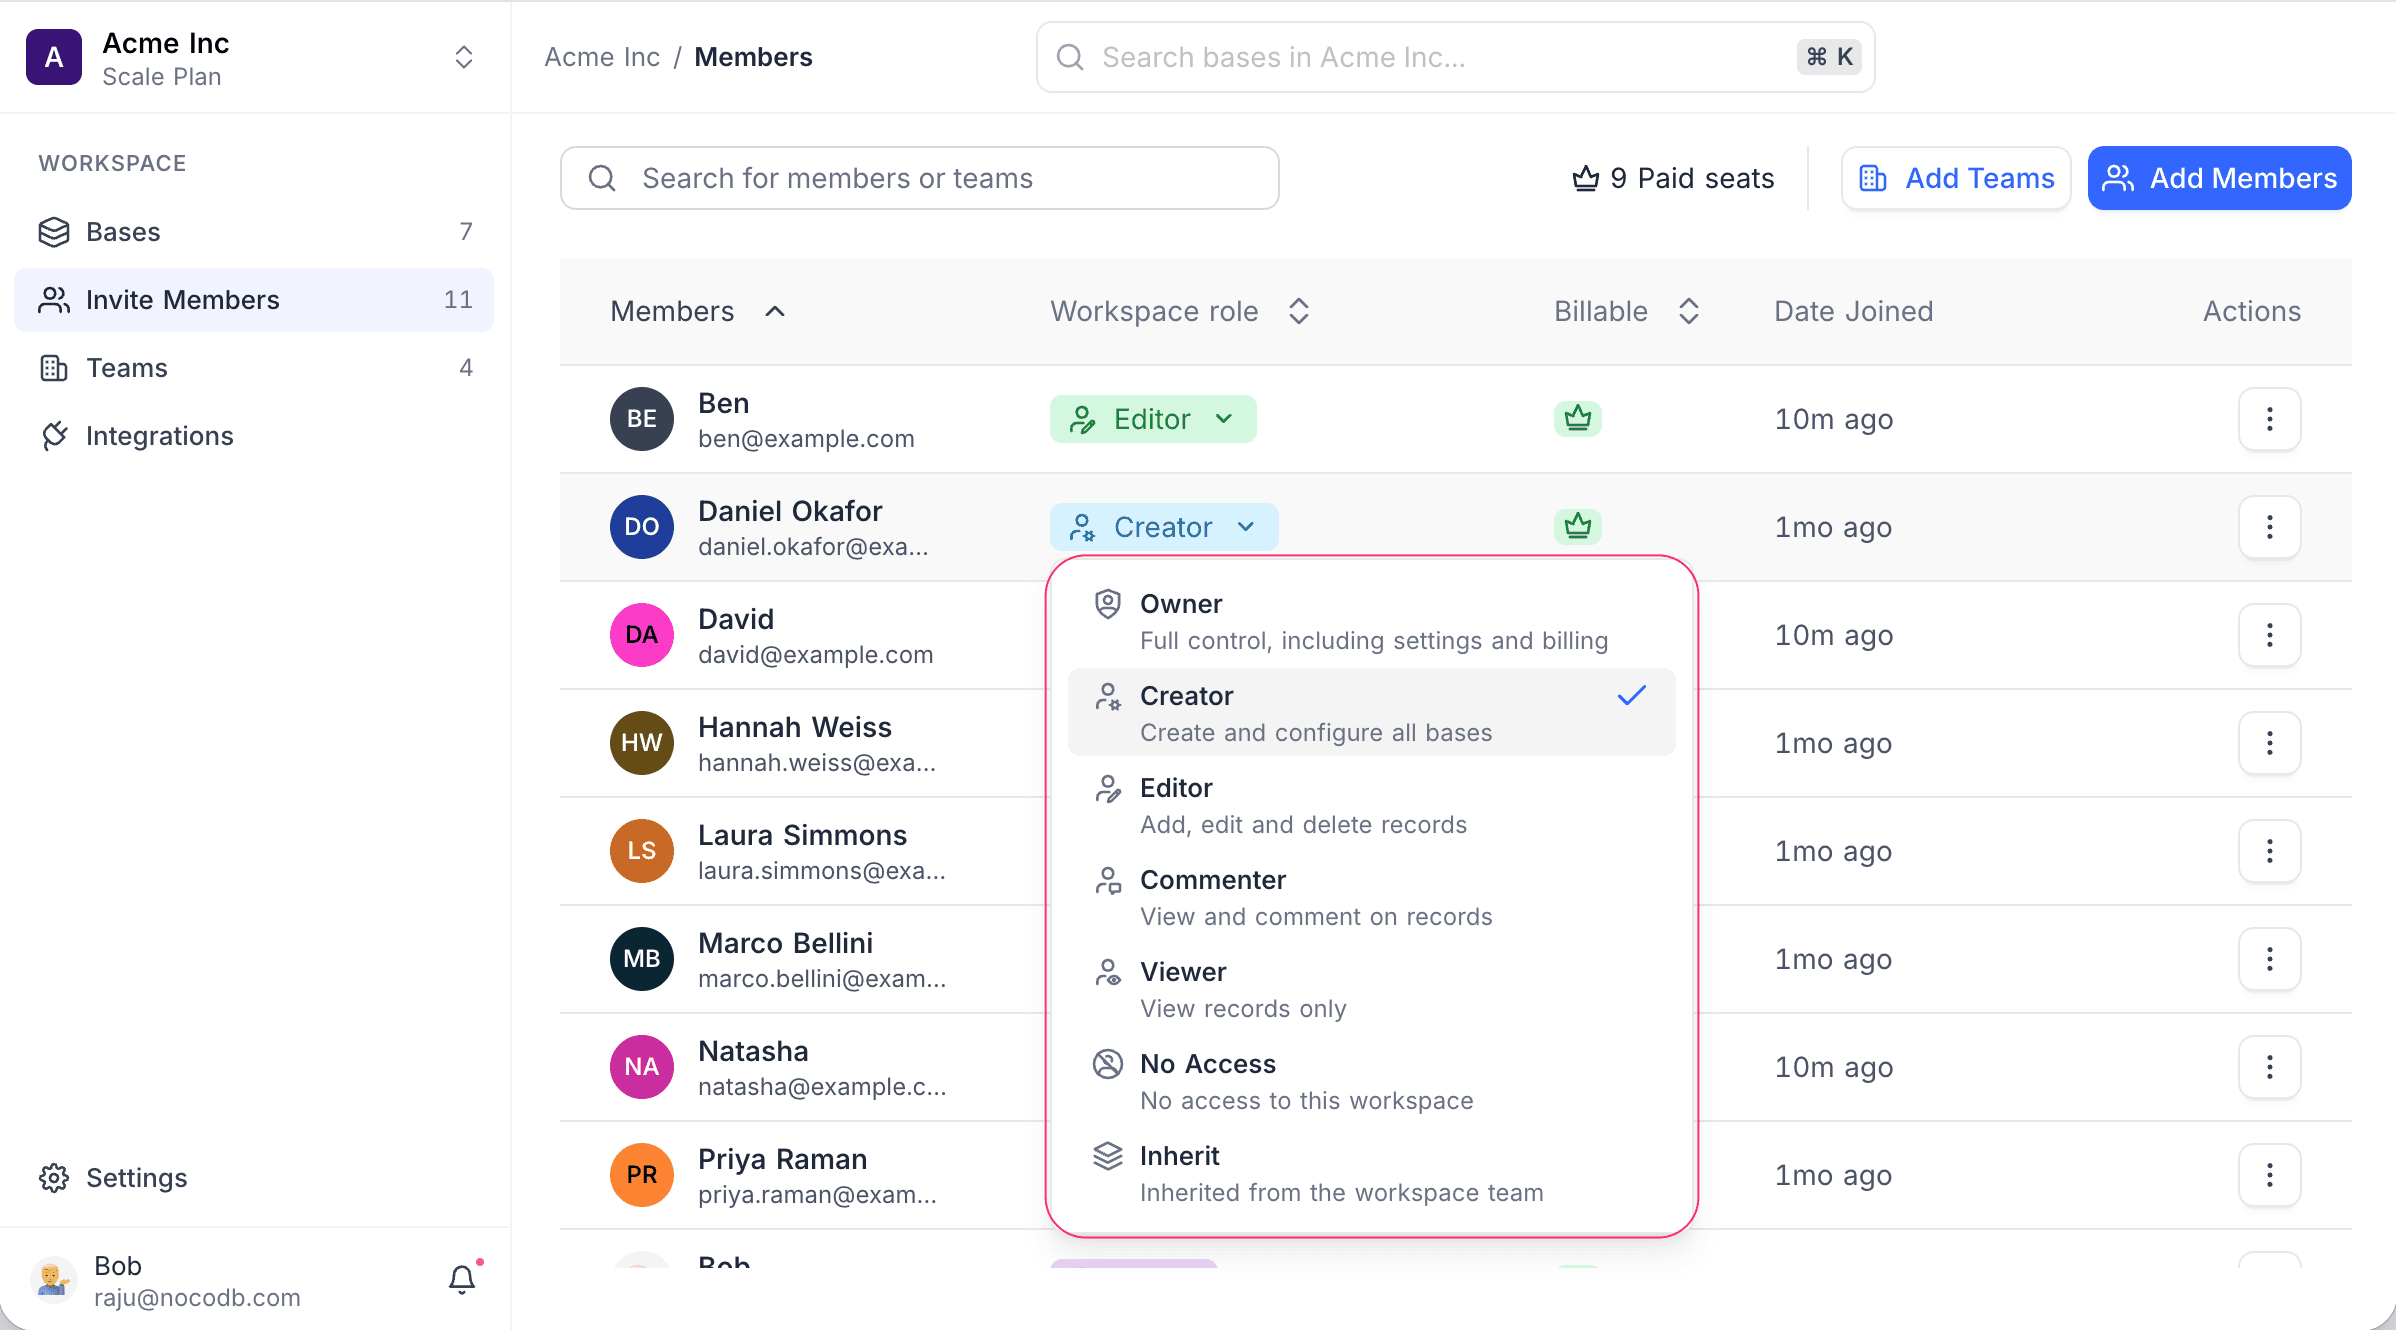
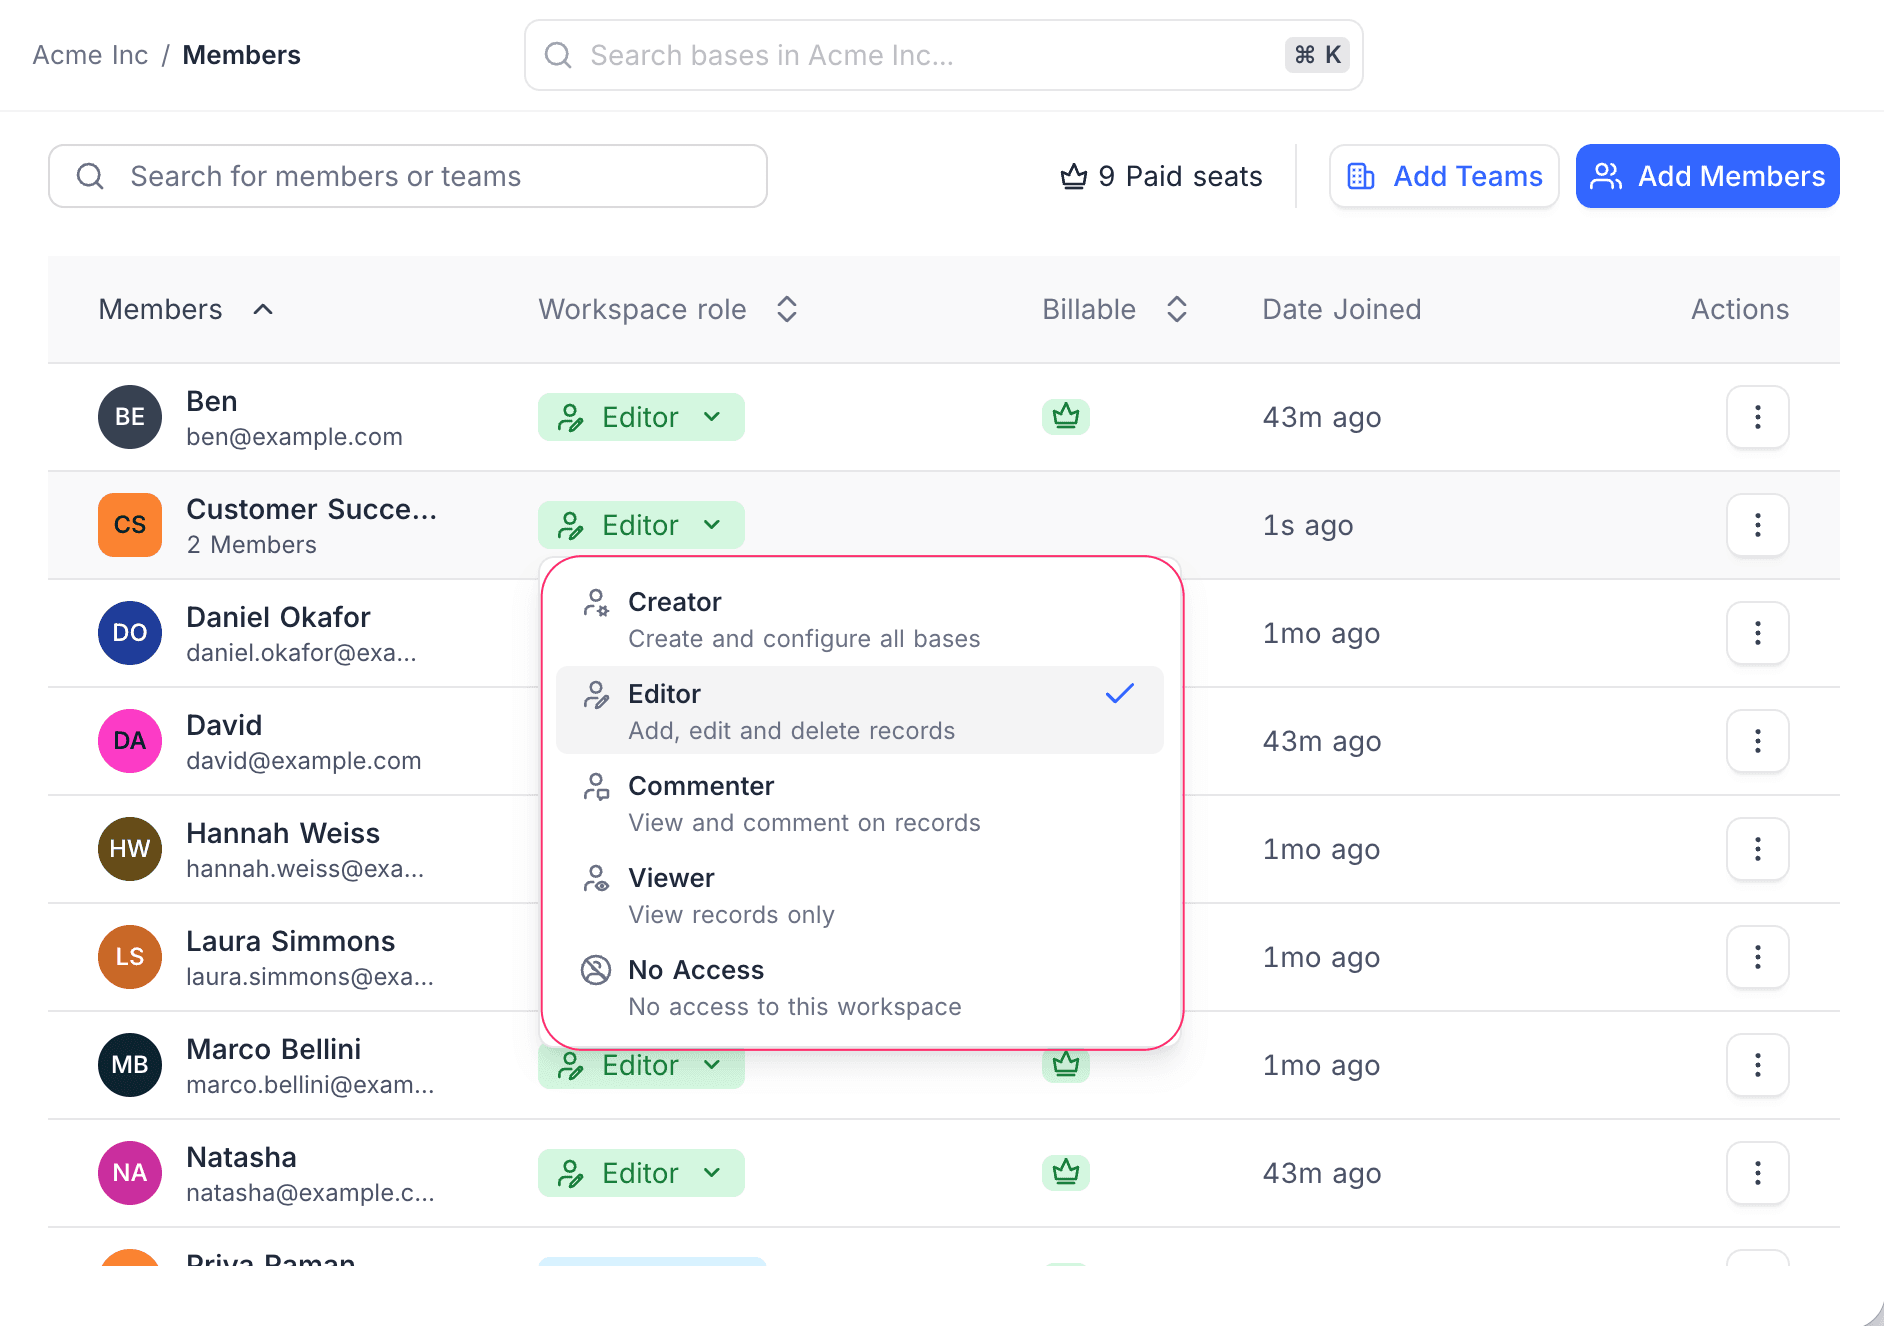
- In the Workspace role column, click the role dropdown next to the member or team.
- Select a new role. Each role shows a one-line description. A check mark shows the current role.
Role Precedence
A user can get roles from more than one source, as a member and through teams. NocoDB uses these rules to find the role that applies:
| The user has | The role that applies |
|---|---|
| An individual role and a team role | The individual role |
| A workspace role and a base role | The base role |
| Roles from two or more teams | The highest team role |
For more information, refer to the Teams effective role resolution documentation.
Remove Members or Teams from Workspace
To remove a member or team from the workspace, use the actions menu.
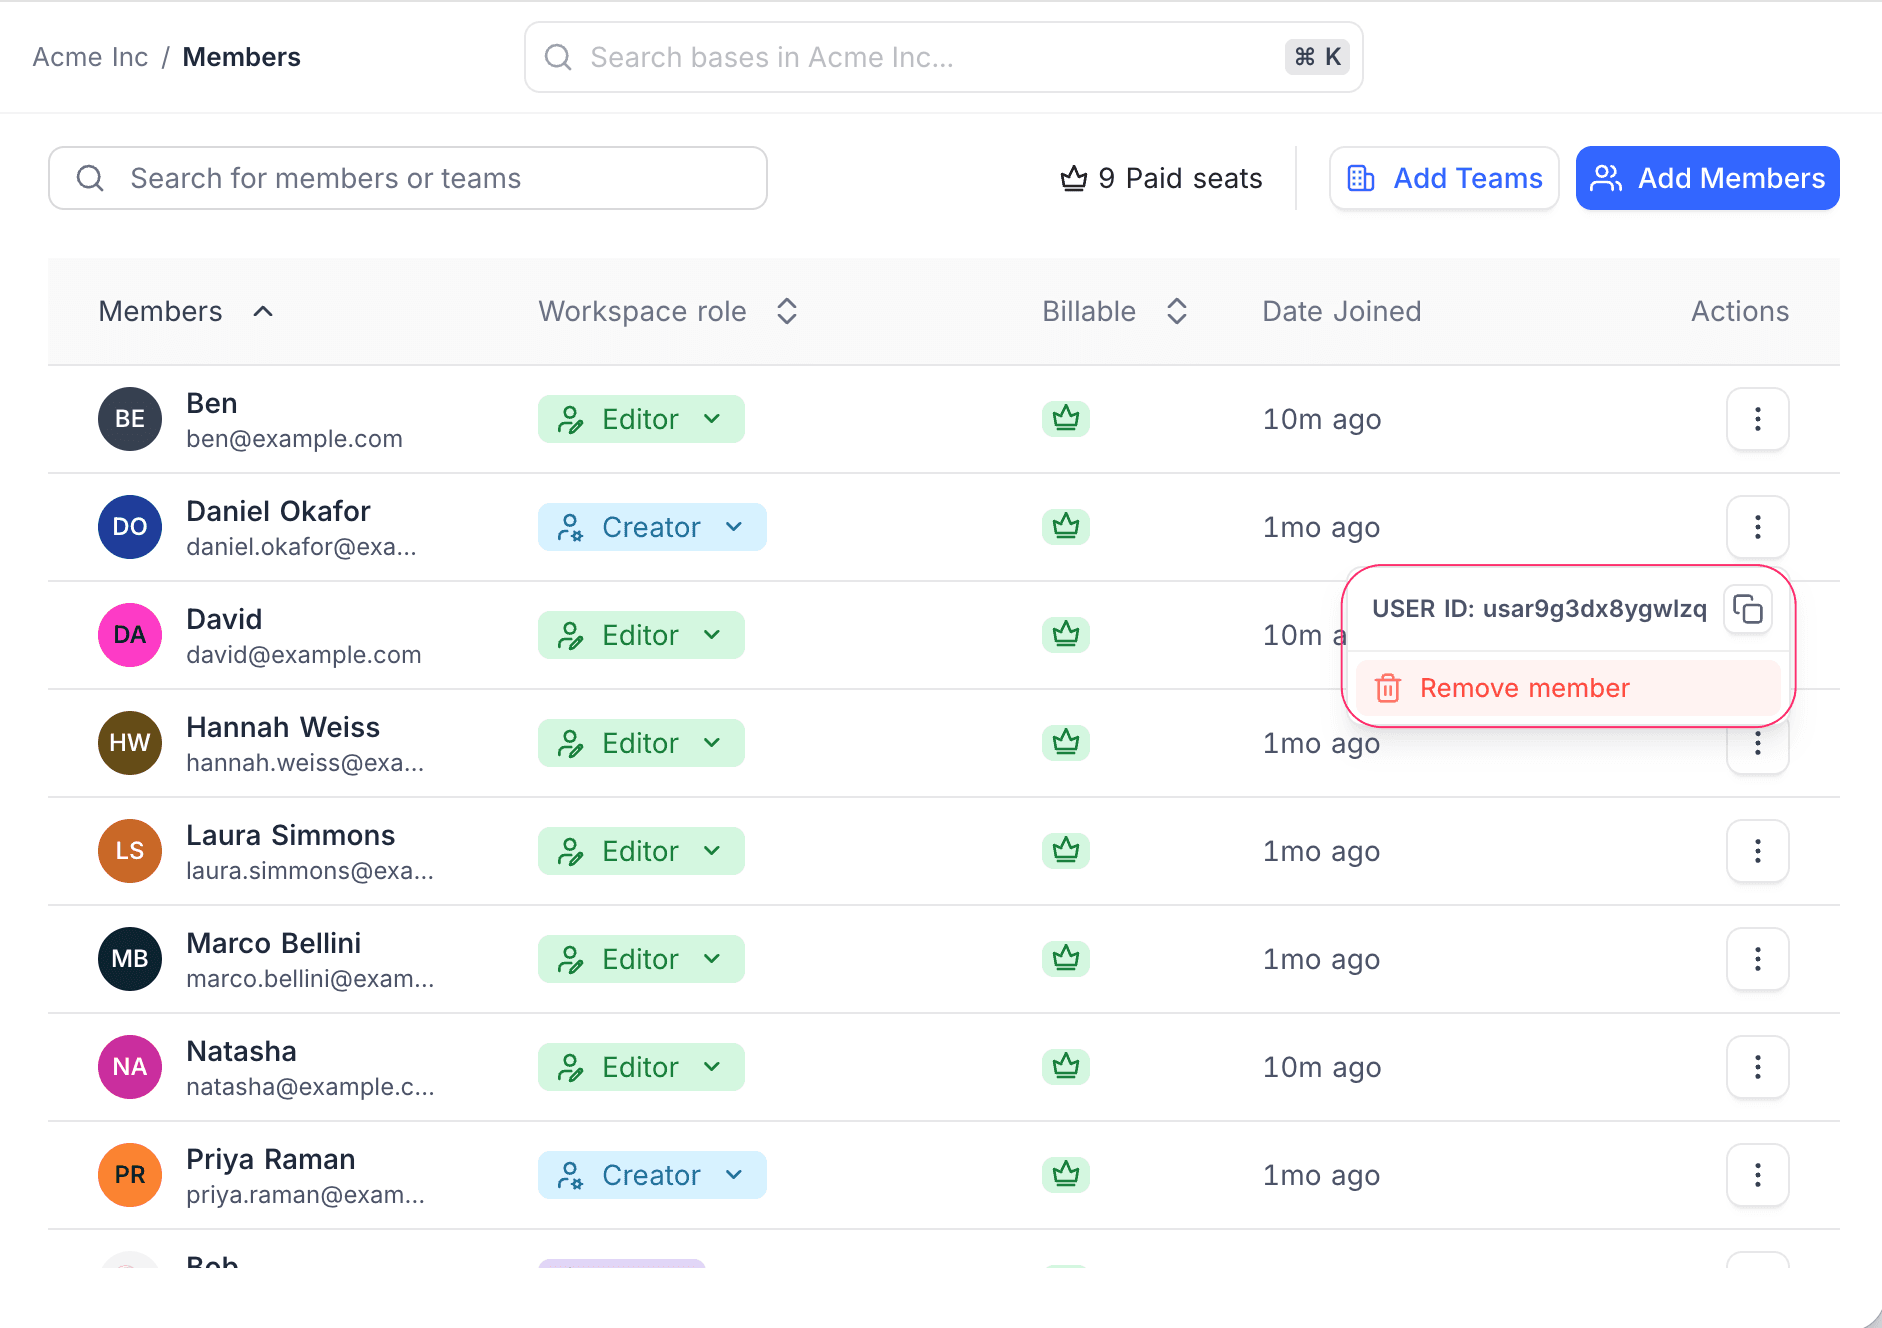
- In the Actions column, click the vertical ellipsis
⋮next to the member or team. - Select Remove member or Remove team.
The menu also shows the user ID of the member or the ID of the team. Click the copy button to copy the ID for use with the API.
Best Practice
- Invite all users to the workspace first with the Inherit role. Each user then gets access from their team roles and base roles.
- Make teams for departments or work groups, to manage roles with less work.
- In large workspaces, change team permissions, not the roles of single members.
For more information, refer to Teams best practices.
Availability
- Teams are available on NocoDB Cloud (Business plan and above) and licensed self-hosted deployments (Scale plan and above).
Related
Last updated on