Connect to an Integration
Users with the Workspace Owner or Workspace Creator role can create a new connection in NocoDB. To create a new connection:
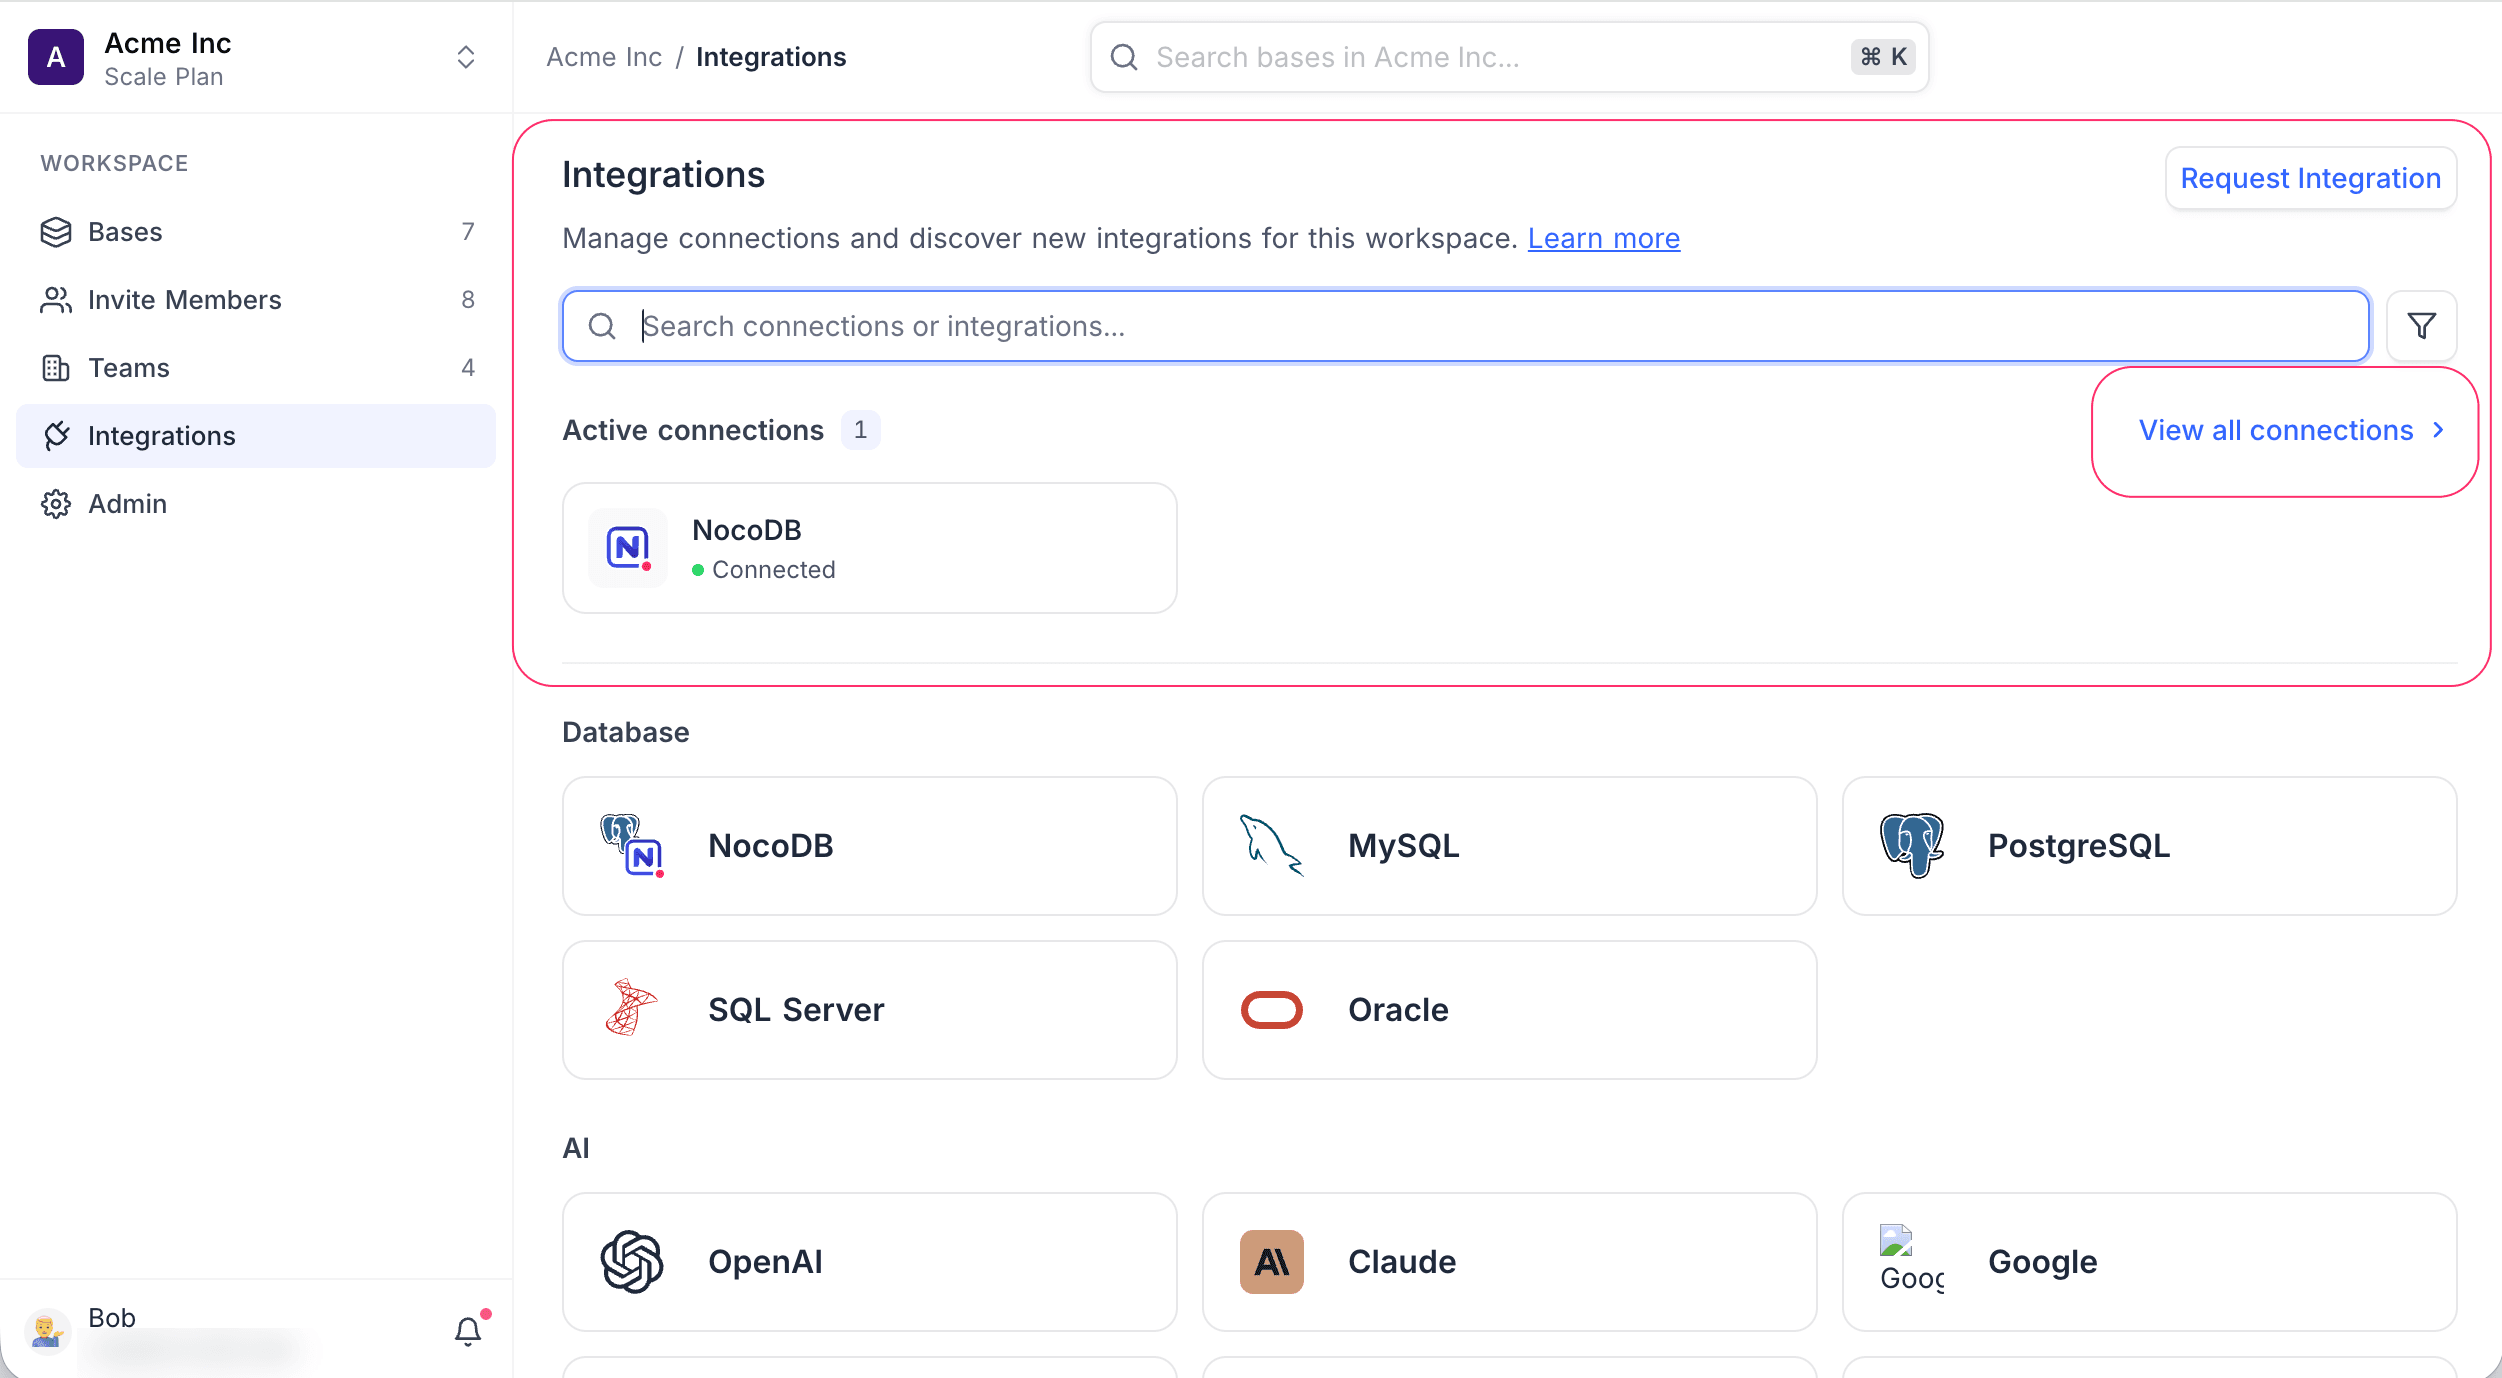
- In the workspace sidebar, click Integrations.
- In the catalog, click the integration that you want to connect to. A modal opens.
- In the modal, enter the required details. For more details, refer to the documentation for the integration:
You can also open Manage and click Add connection. Then select the integration from the dropdown.
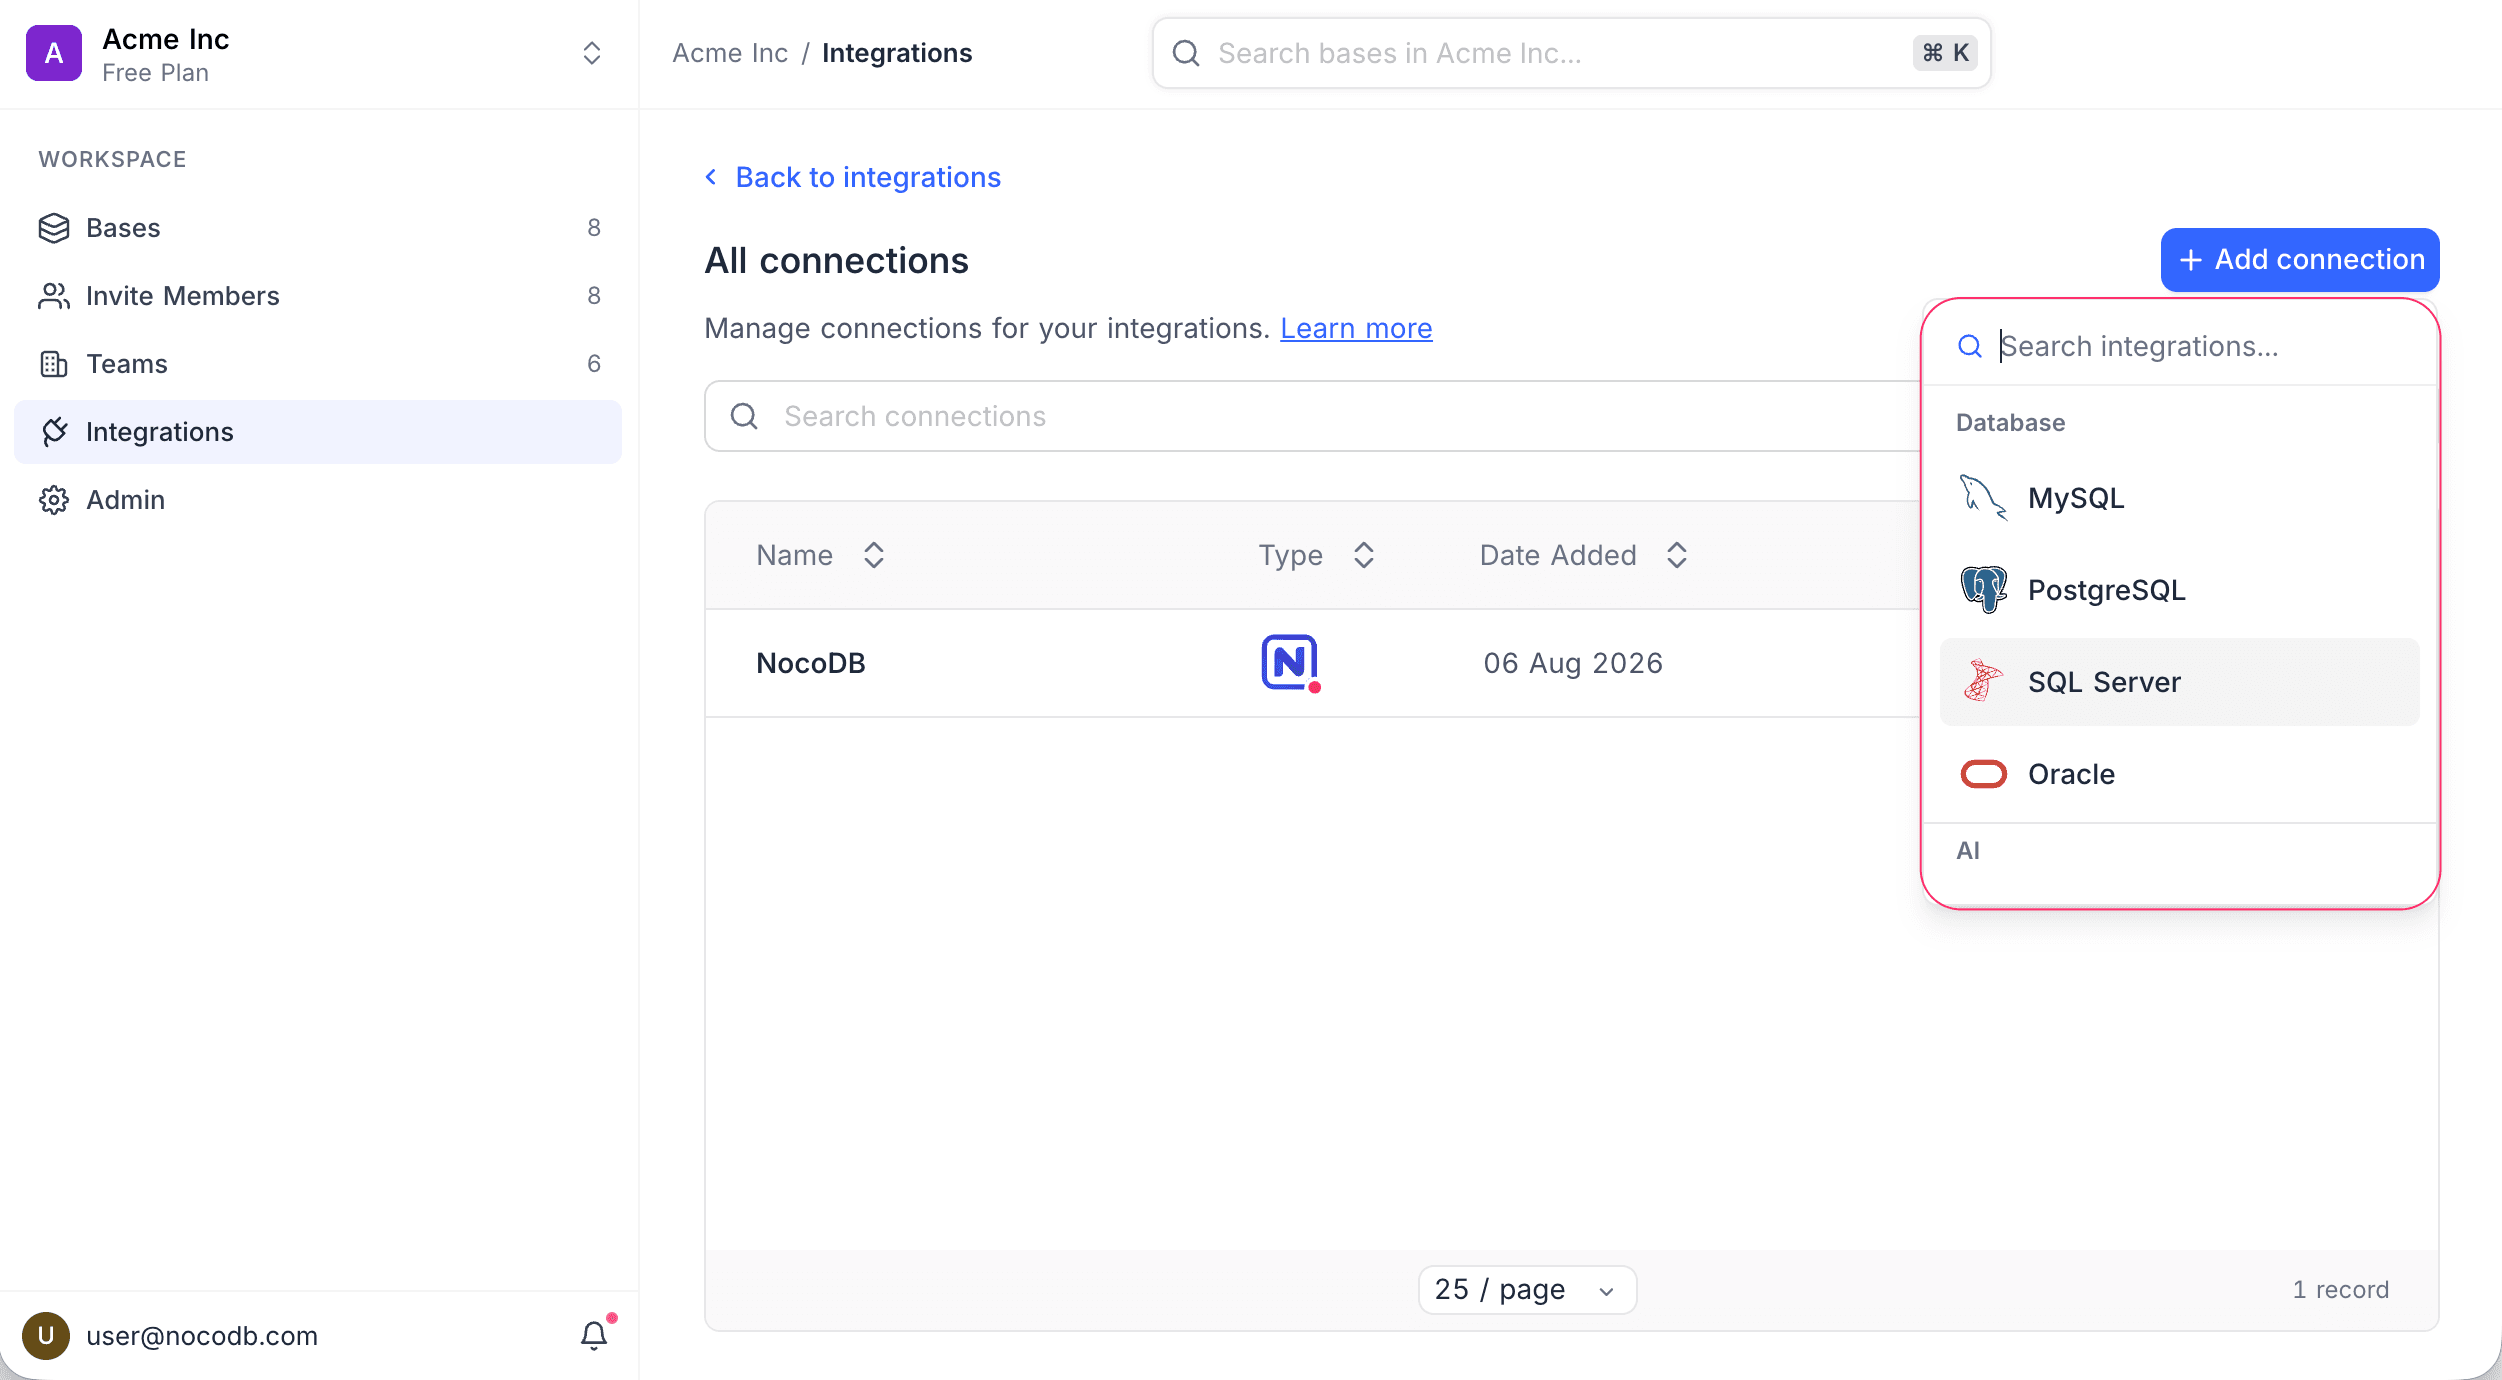
The All connections page shows the new connection to the integration.
Database Integrations
PostgreSQL
A PostgreSQL connection in NocoDB requires these details.
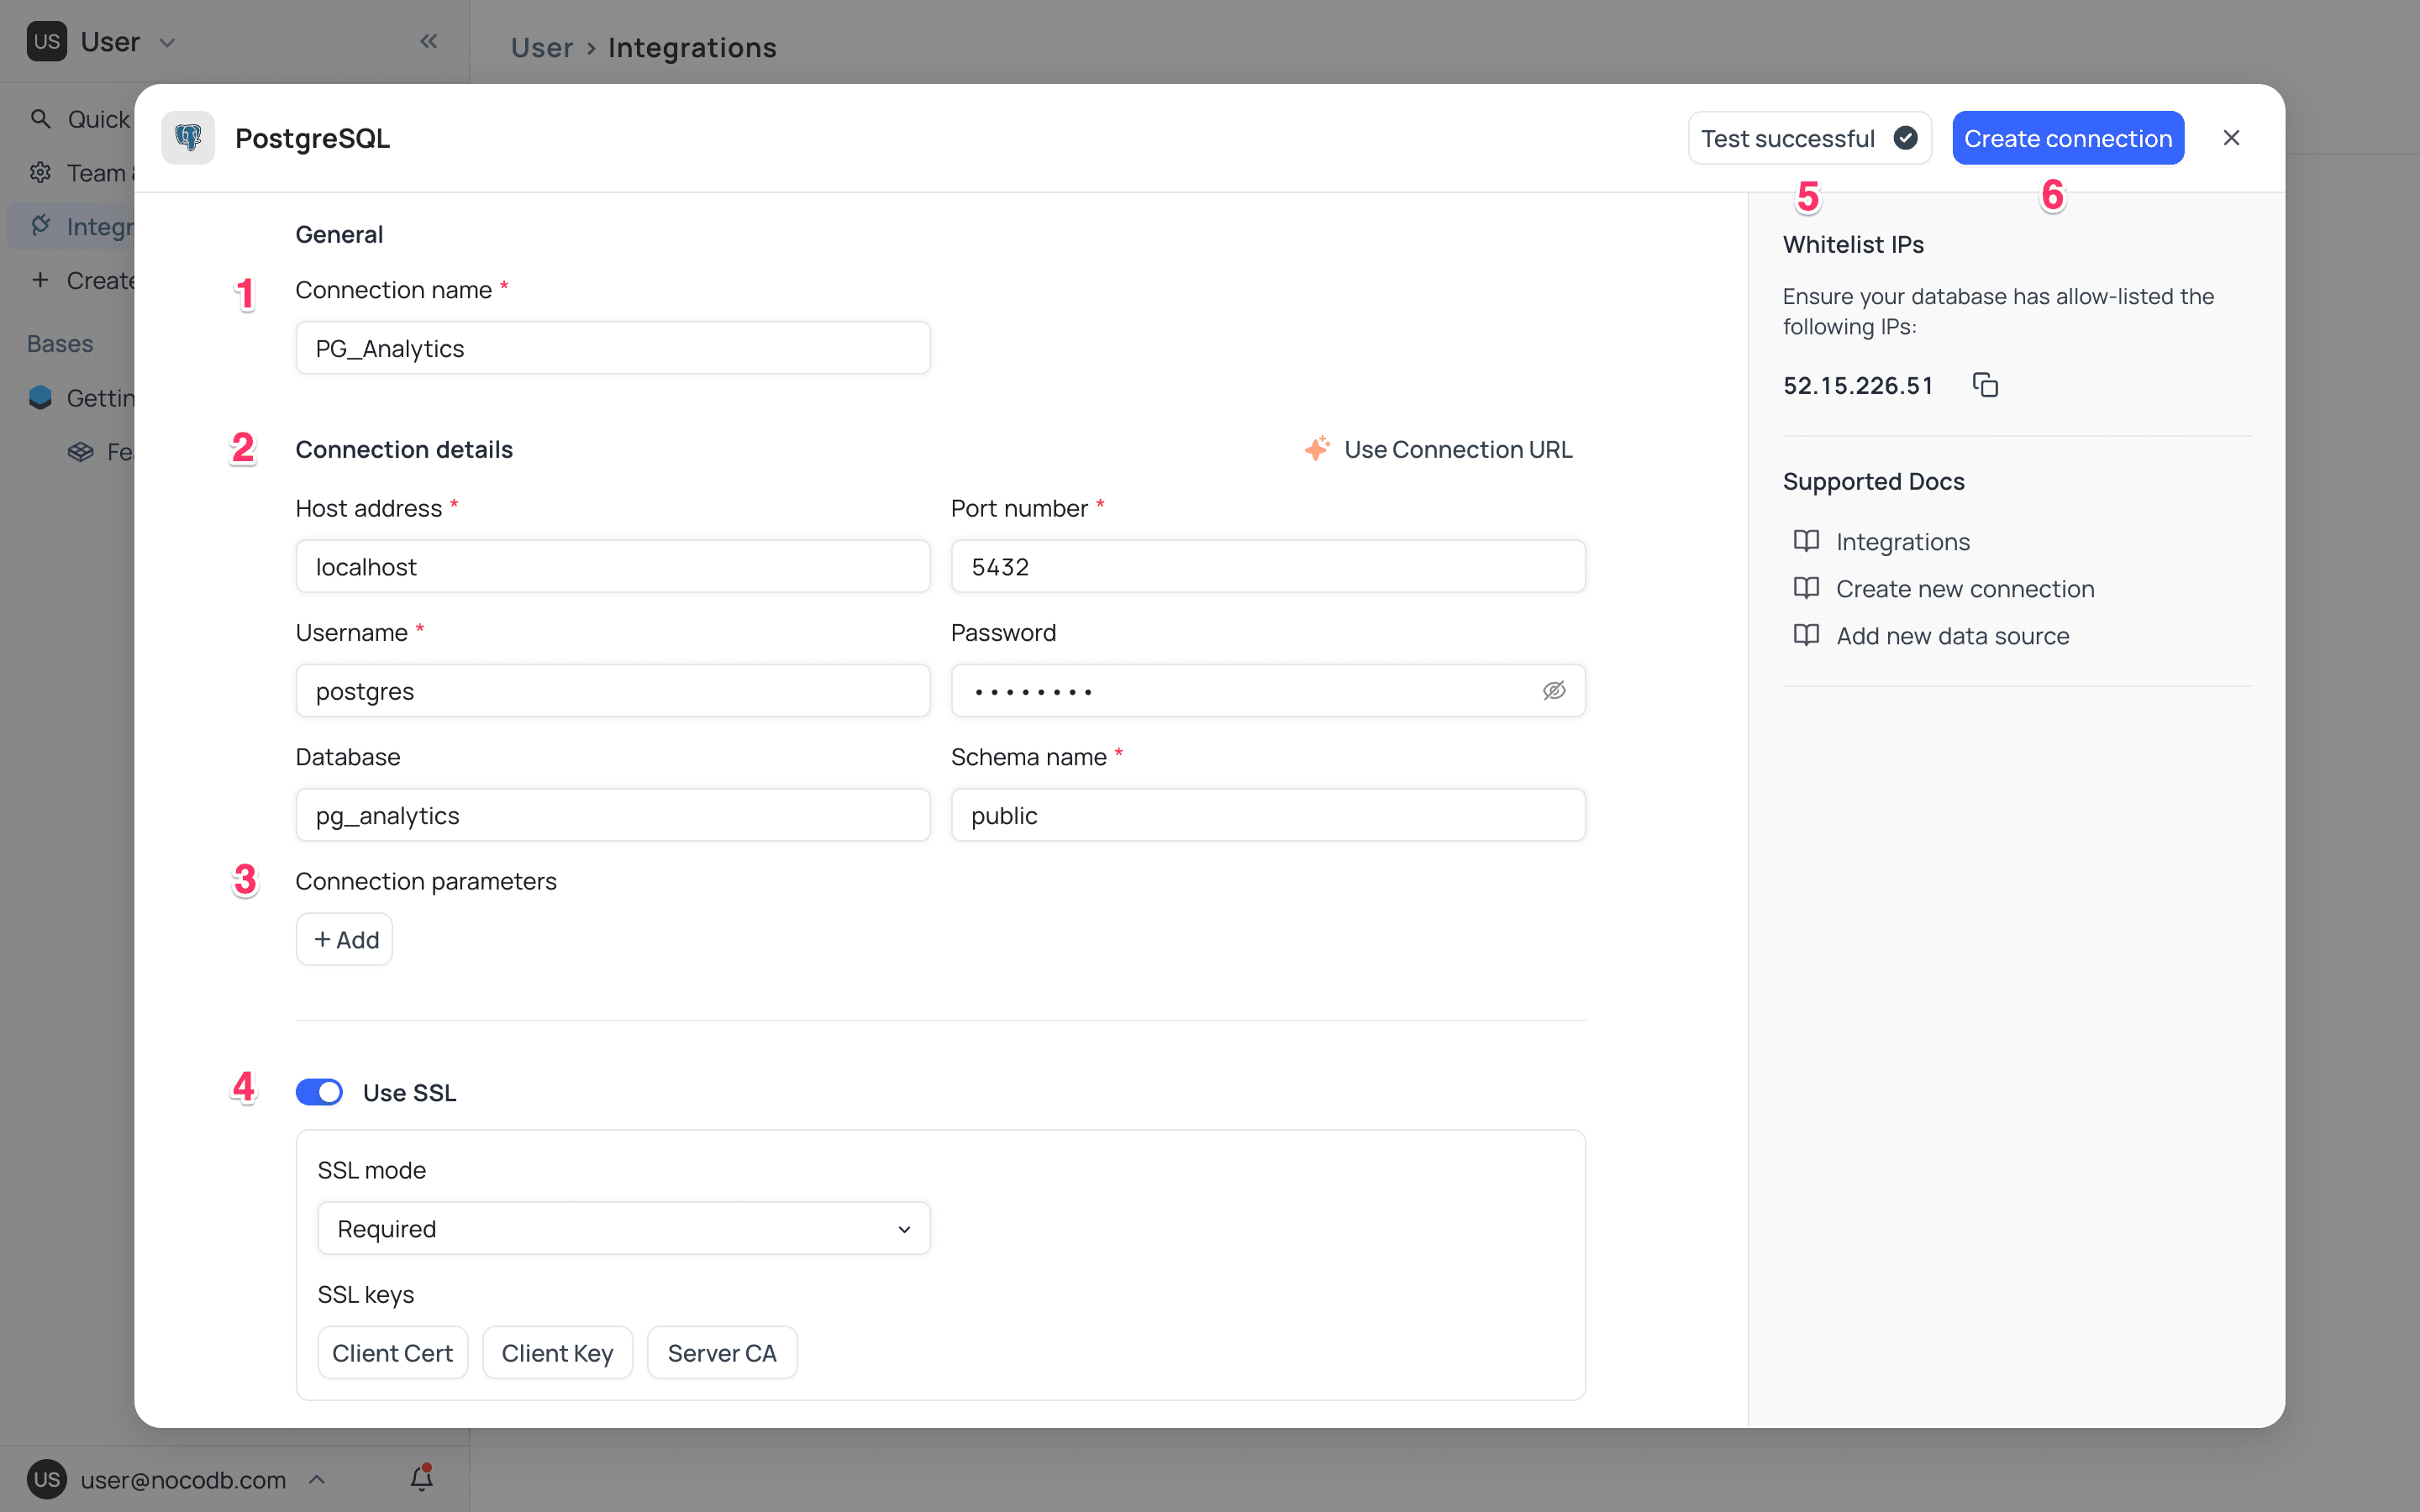
- Connection Name: The name of this connection in the NocoDB UI.
- Enter these database connection details:
- Host Address: Hostname of the PostgreSQL server.
- Port Number: Port number of the PostgreSQL server. The default is 5432.
- Username: Username for the PostgreSQL server. The default is "postgres".
- Password: Password for the PostgreSQL server.
- [Optional] Database: Name of the PostgreSQL database to connect to.
- [Optional] Schema Name: Name of the schema to connect to. :::info Database name and Schema name are optional when you create a connection. If you enter them, they are the default values when you create a new data source with this connection. :::
- Connection parameters: If necessary, add them as Key-Value pairs.
- SSL Mode: Do this step if the connection must use TLS/MTLS for MITM protection. Turn on the toggle to enable SSL for the connection. Then select the SSL mode.
- Client Certificate: Upload the client certificate file
- Client Key: Upload the client key file
- Root CA: Upload the Root CA file
- Test Database Connection: Click to verify the connection.
- Create Connection: Click to save the data source.
The All connections page shows the new connection.
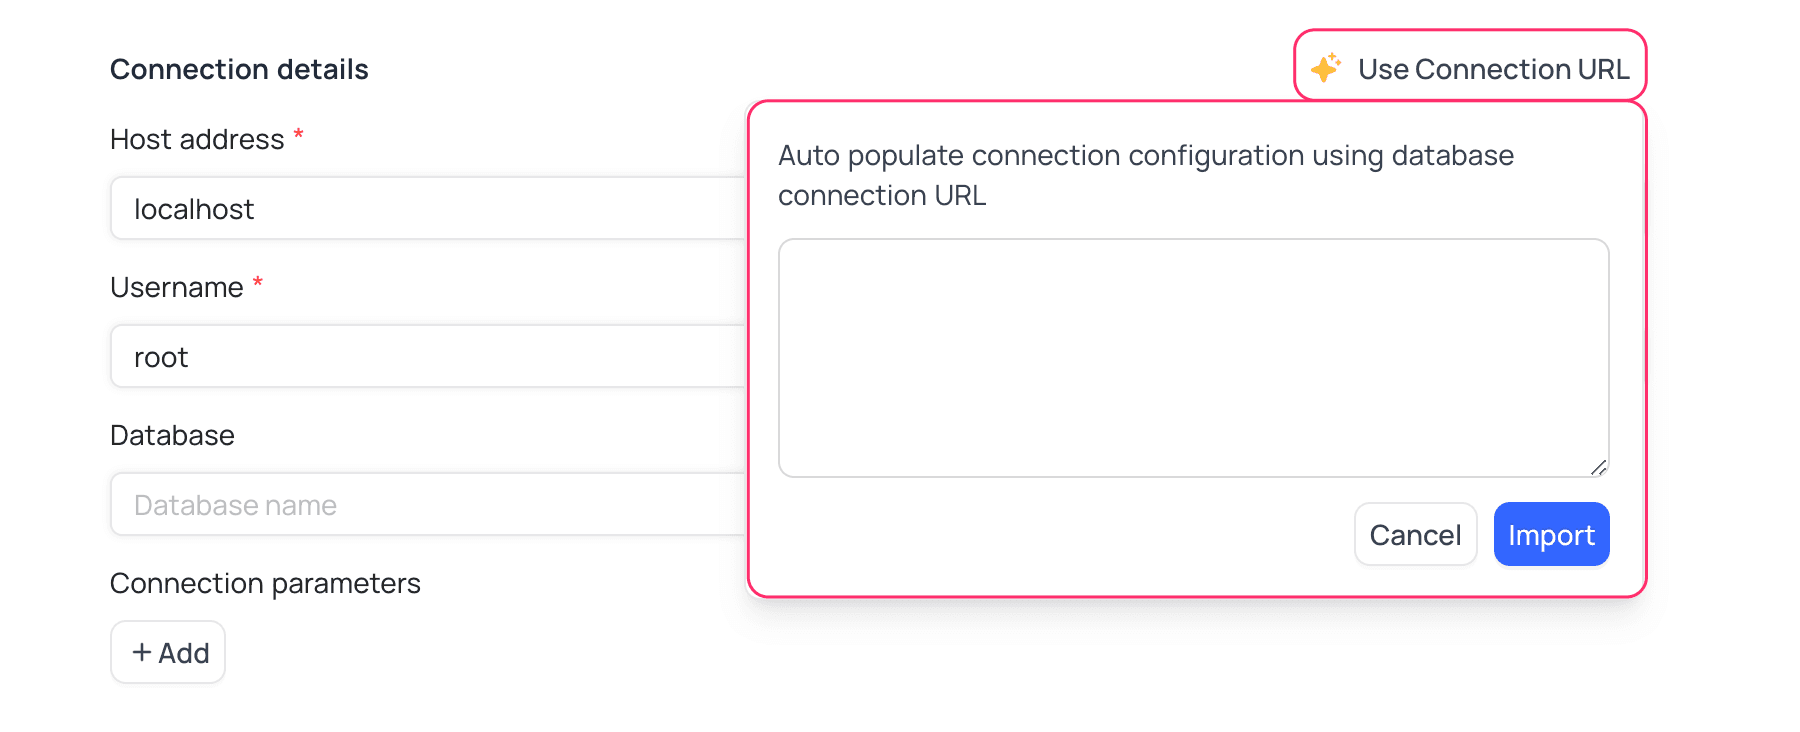
If you have a connection URL, you can use it to fill the connection details automatically.
To see all the connection parameters in JSON form, click Advanced Options. You can edit them as the database server type requires.
Example: The SSL mode is "Required-Identity," and the common name (cname) of the server certificate is different from the DNS/IP of the connection. Then the connection fails. To solve this, add a "servername" property with the same cname value in the SSL section. For more details, refer to knex configuration options.
MySQL
A MySQL connection in NocoDB requires these details.
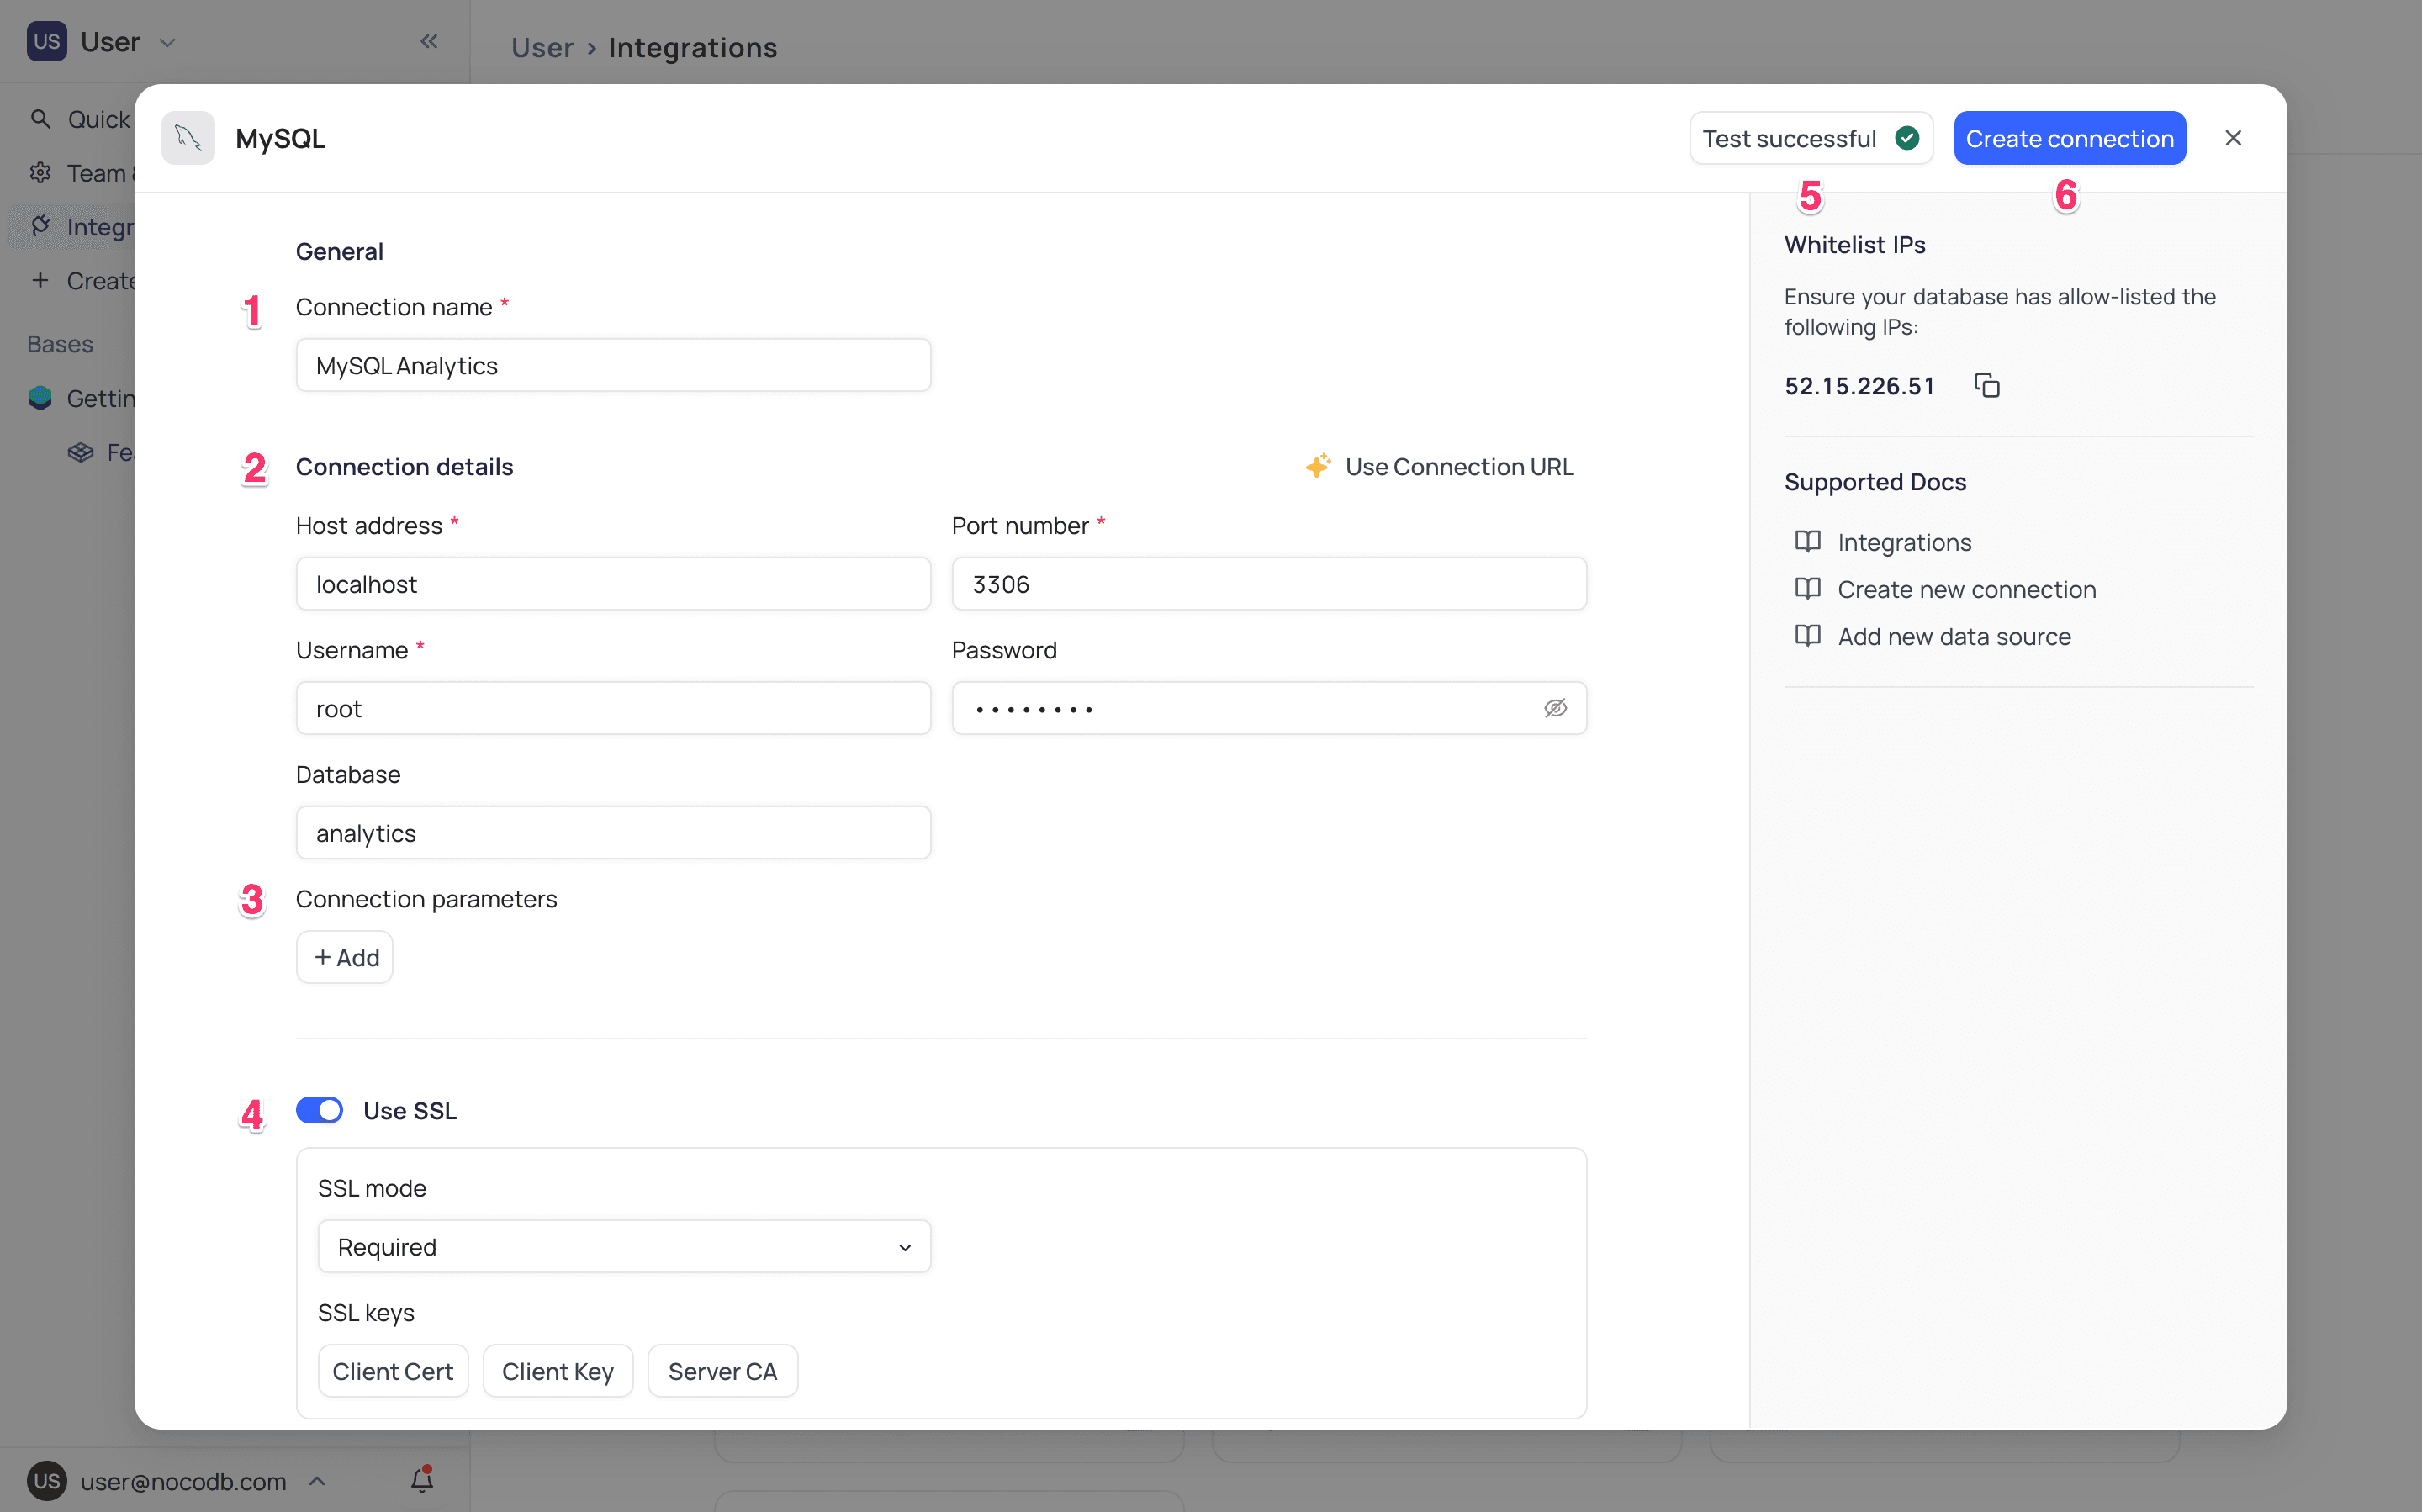
- Connection Name: The name of this connection in the NocoDB UI.
- Enter these database connection details:
- Host Address: Hostname of the MySQL server.
- Port Number: Port number of the MySQL server. The default is 3306.
- Username: Username for the MySQL server. The default is "root".
- Password: Password for the MySQL server.
- [Optional] Database: Name of the MySQL database to connect to.
- Connection parameters: If necessary, add them as Key-Value pairs.
- SSL Mode: Do this step if the connection must use TLS/MTLS for MITM protection. Turn on the toggle to enable SSL for the connection. Then select the SSL mode.
- Client Certificate: Upload the client certificate file
- Client Key: Upload the client key file
- Root CA: Upload the Root CA file
- Test Database Connection: Click to verify the connection.
- Create Connection: Click to save the data source.
The All connections page shows the new connection.
If you have a connection URL, you can use it to fill the connection details automatically.
To see all the connection parameters in JSON form, click Advanced Options. You can edit them as the database server type requires.
Example: The SSL mode is "Required-Identity," and the common name (cname) of the server certificate is different from the DNS/IP of the connection. Then the connection fails. To solve this, add a "servername" property with the same cname value in the SSL section. For more details, refer to knex configuration options.
Communication Integrations
Twilio
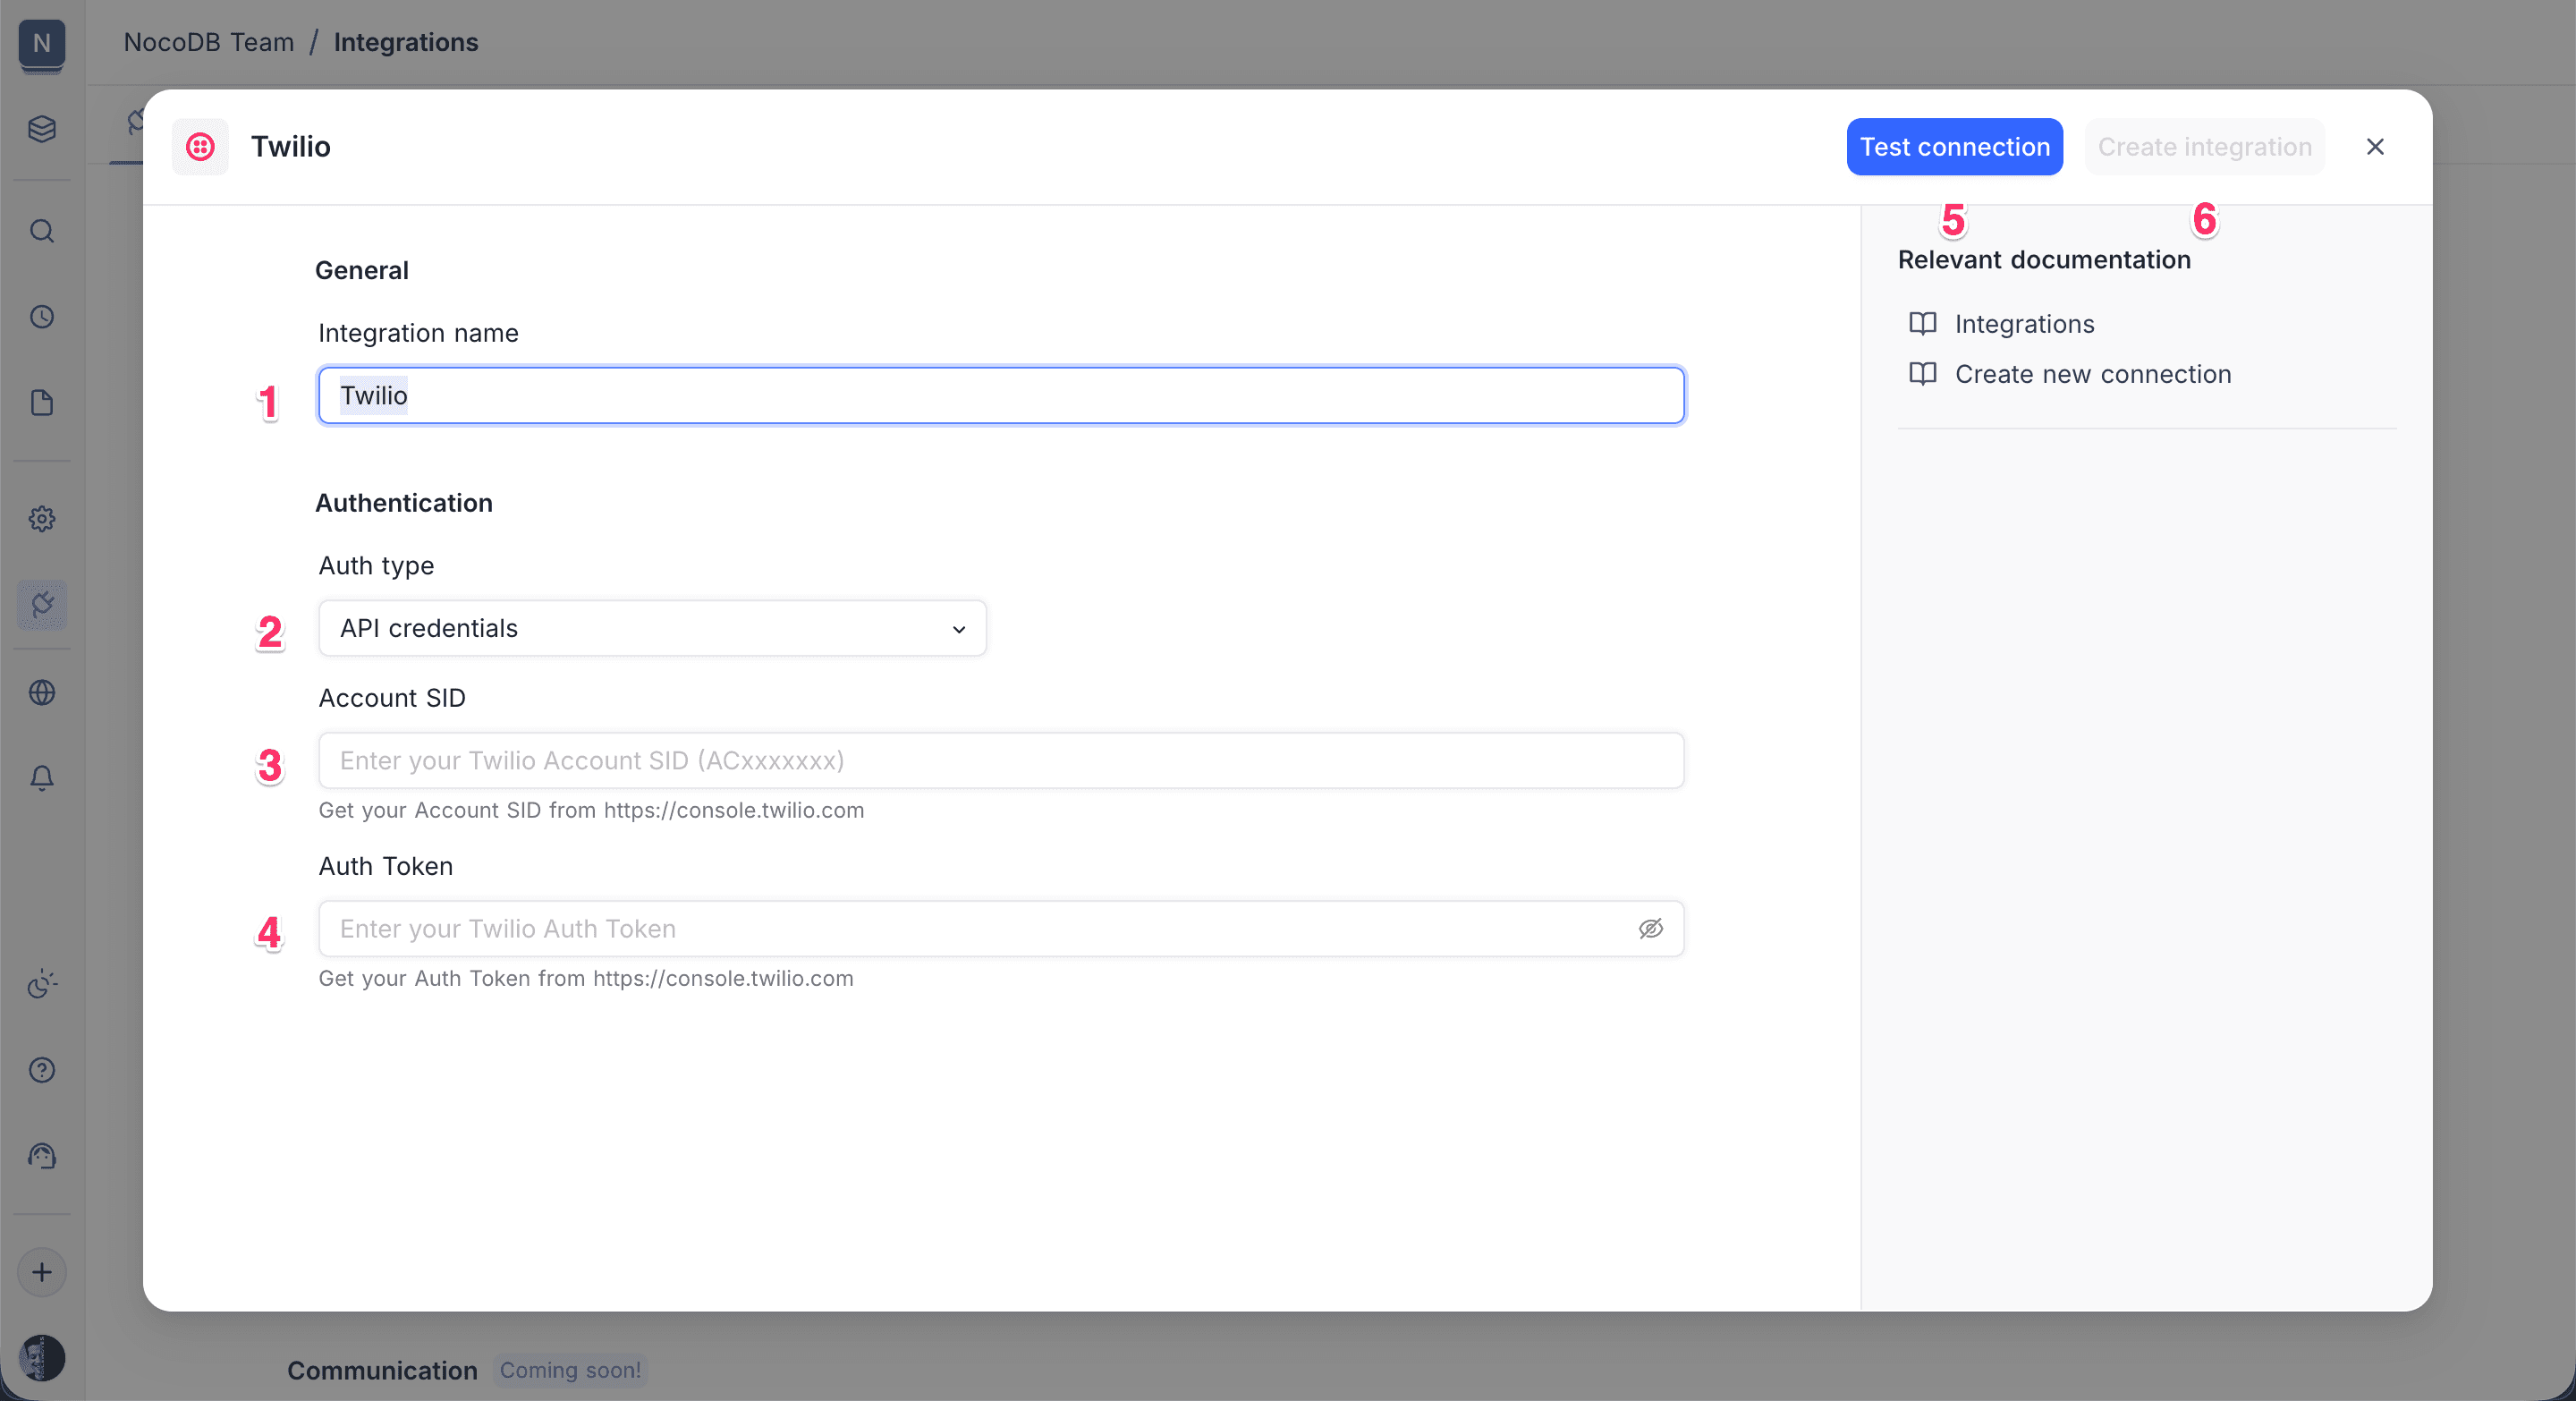
A Twilio integration in NocoDB requires these details.
-
Integration Name: Enter the name of this integration for the NocoDB UI.
-
Authentication Type: Select API credentials as the authentication method.
-
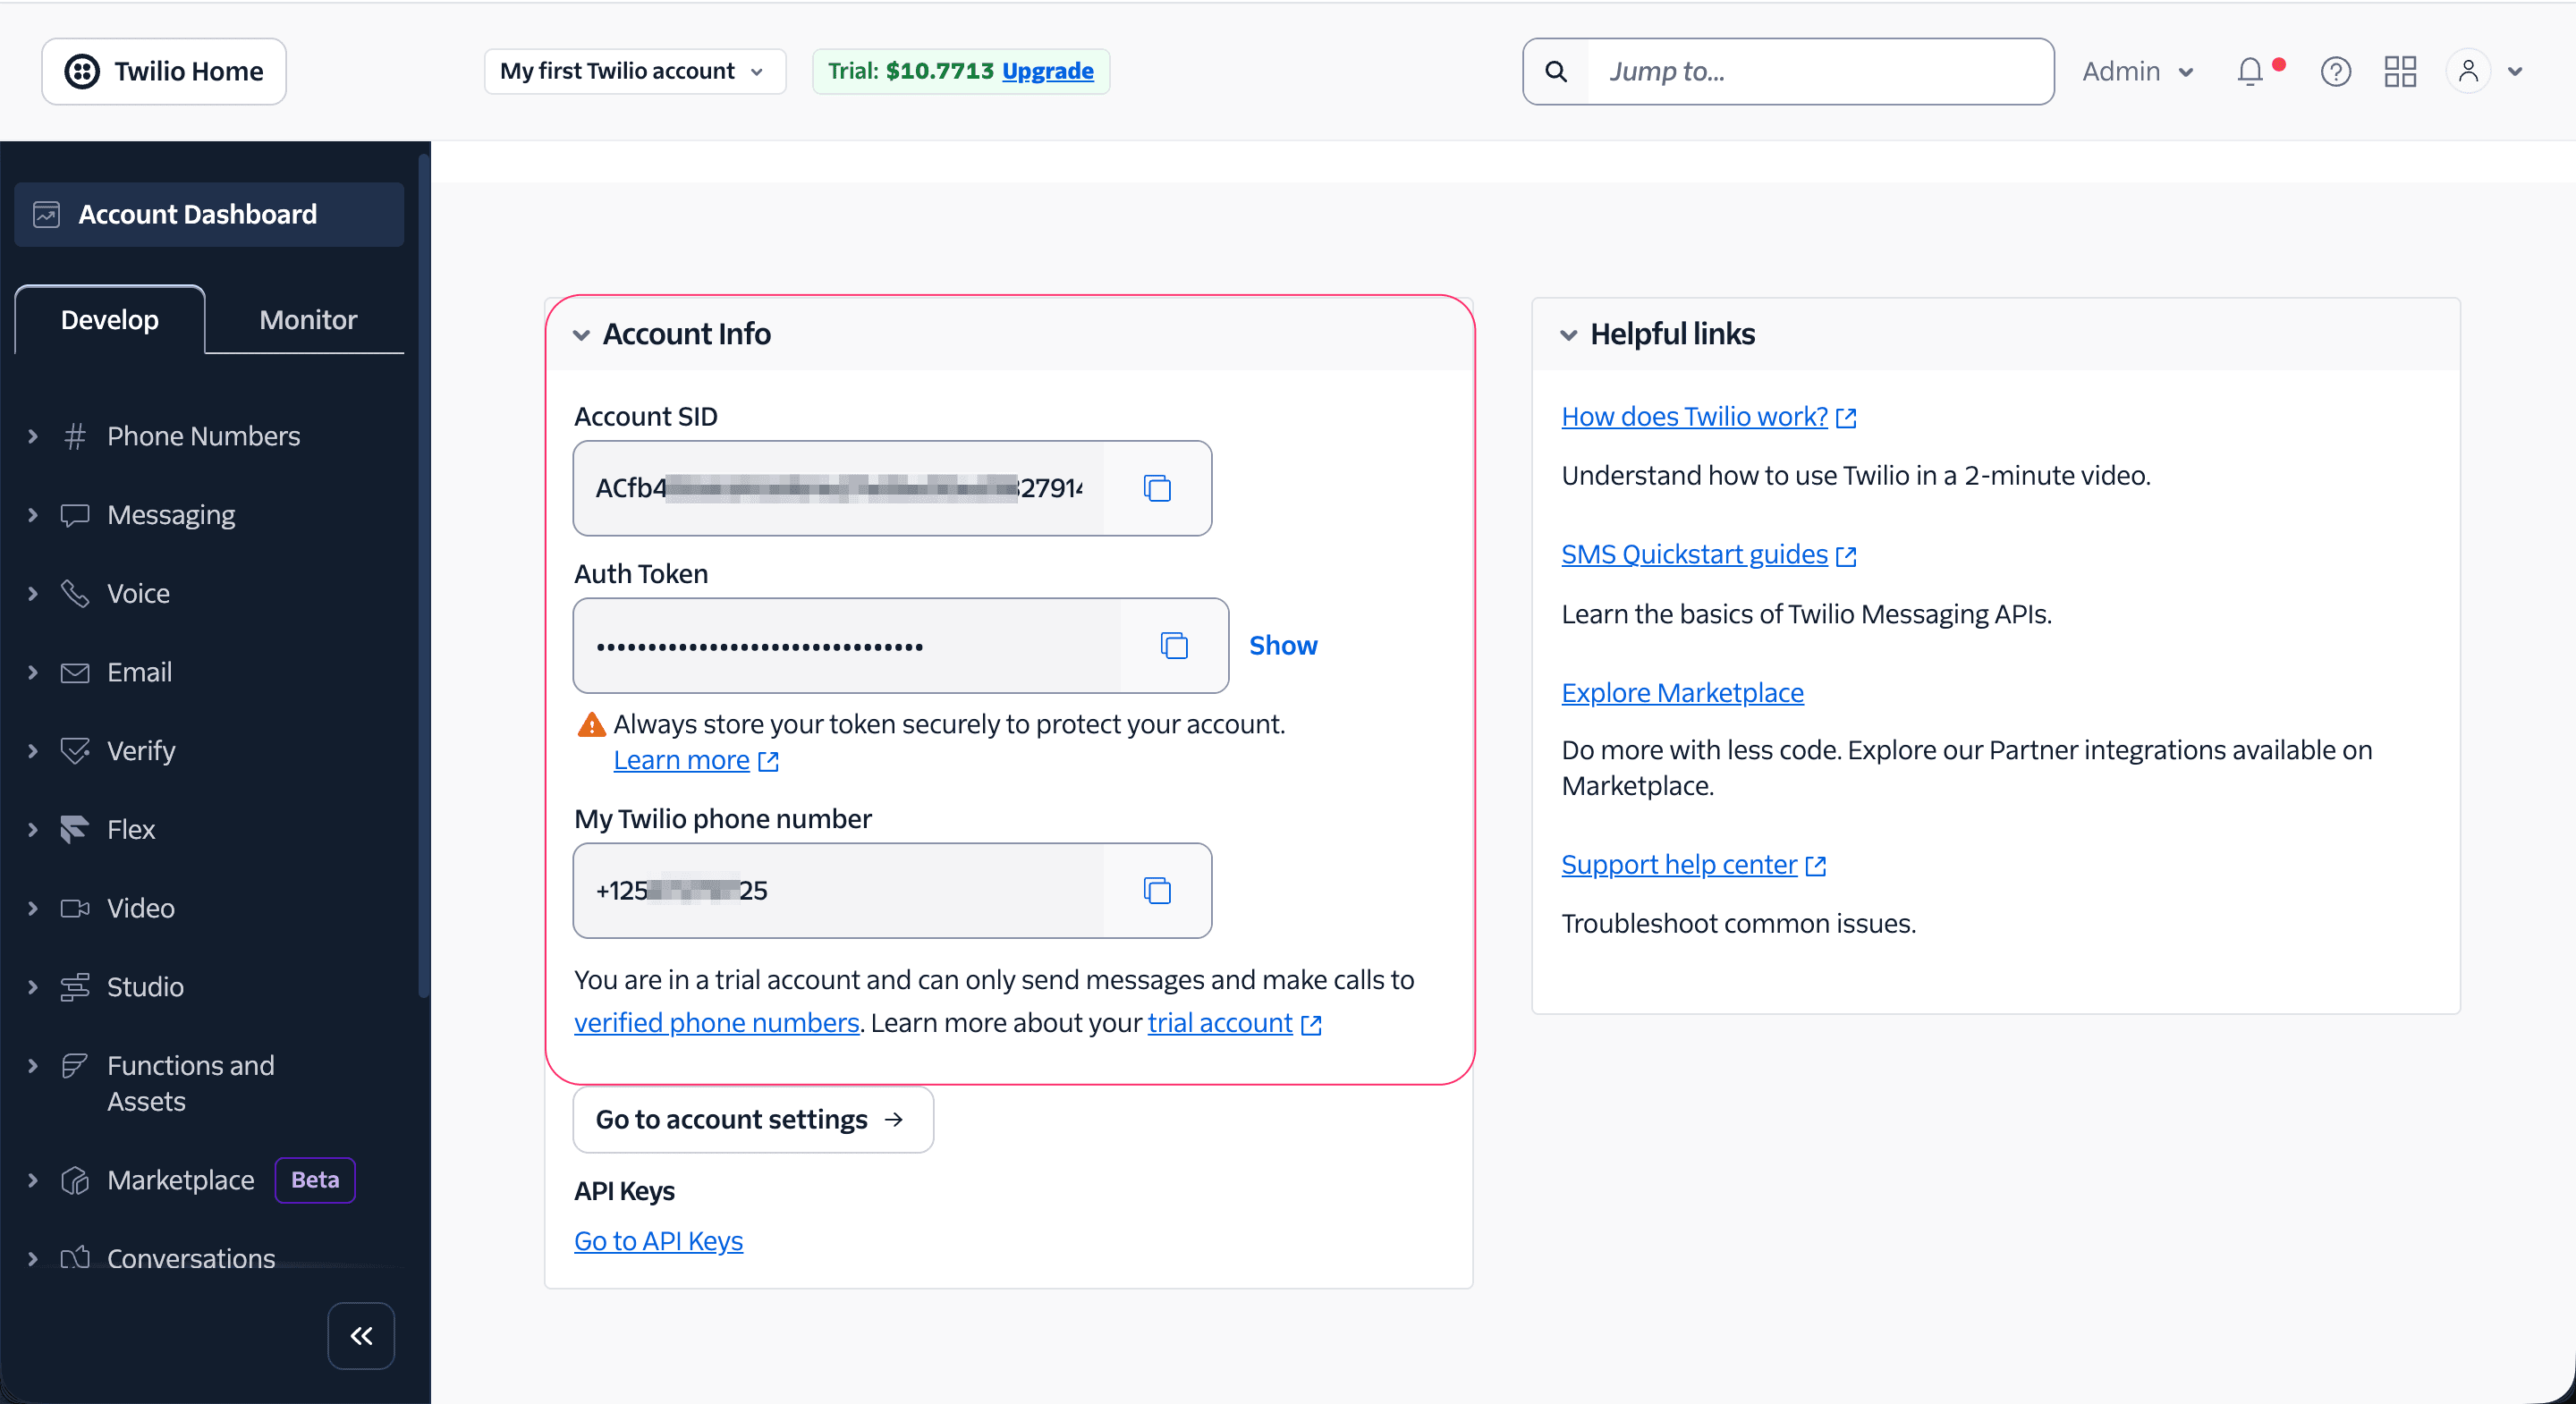
Account SID: Enter your Twilio Account SID. You can get it from the Twilio Console, under Account Info.
-
Auth Token Enter your Twilio Auth Token. You can get it from the Twilio Console, under Account Info. Make sure that you keep this value secure.
-
Test Connection Click Test connection. This verifies that the credentials are valid and that NocoDB can connect to Twilio.
-
Create Integration Click Create integration to save the connection.
After you create the Twilio integration, the All connections page shows it. You can use it in all eligible features that support Twilio.
References
Availability
- Connections in NocoDB do not have owners. All eligible users in a workspace can use all the connections in that workspace.
- Users with Workspace Creator+ permissions can create, edit, duplicate and delete connections.
- Users with Base Creator+ permissions can create data sources that use database connections.
Last updated on