Form
A Form page lets users create new records in the connected table. It can also update a record that a user already has open. You control which fields show, their labels, their arrangement and their rules. This keeps the form simple, even when the table is not simple.
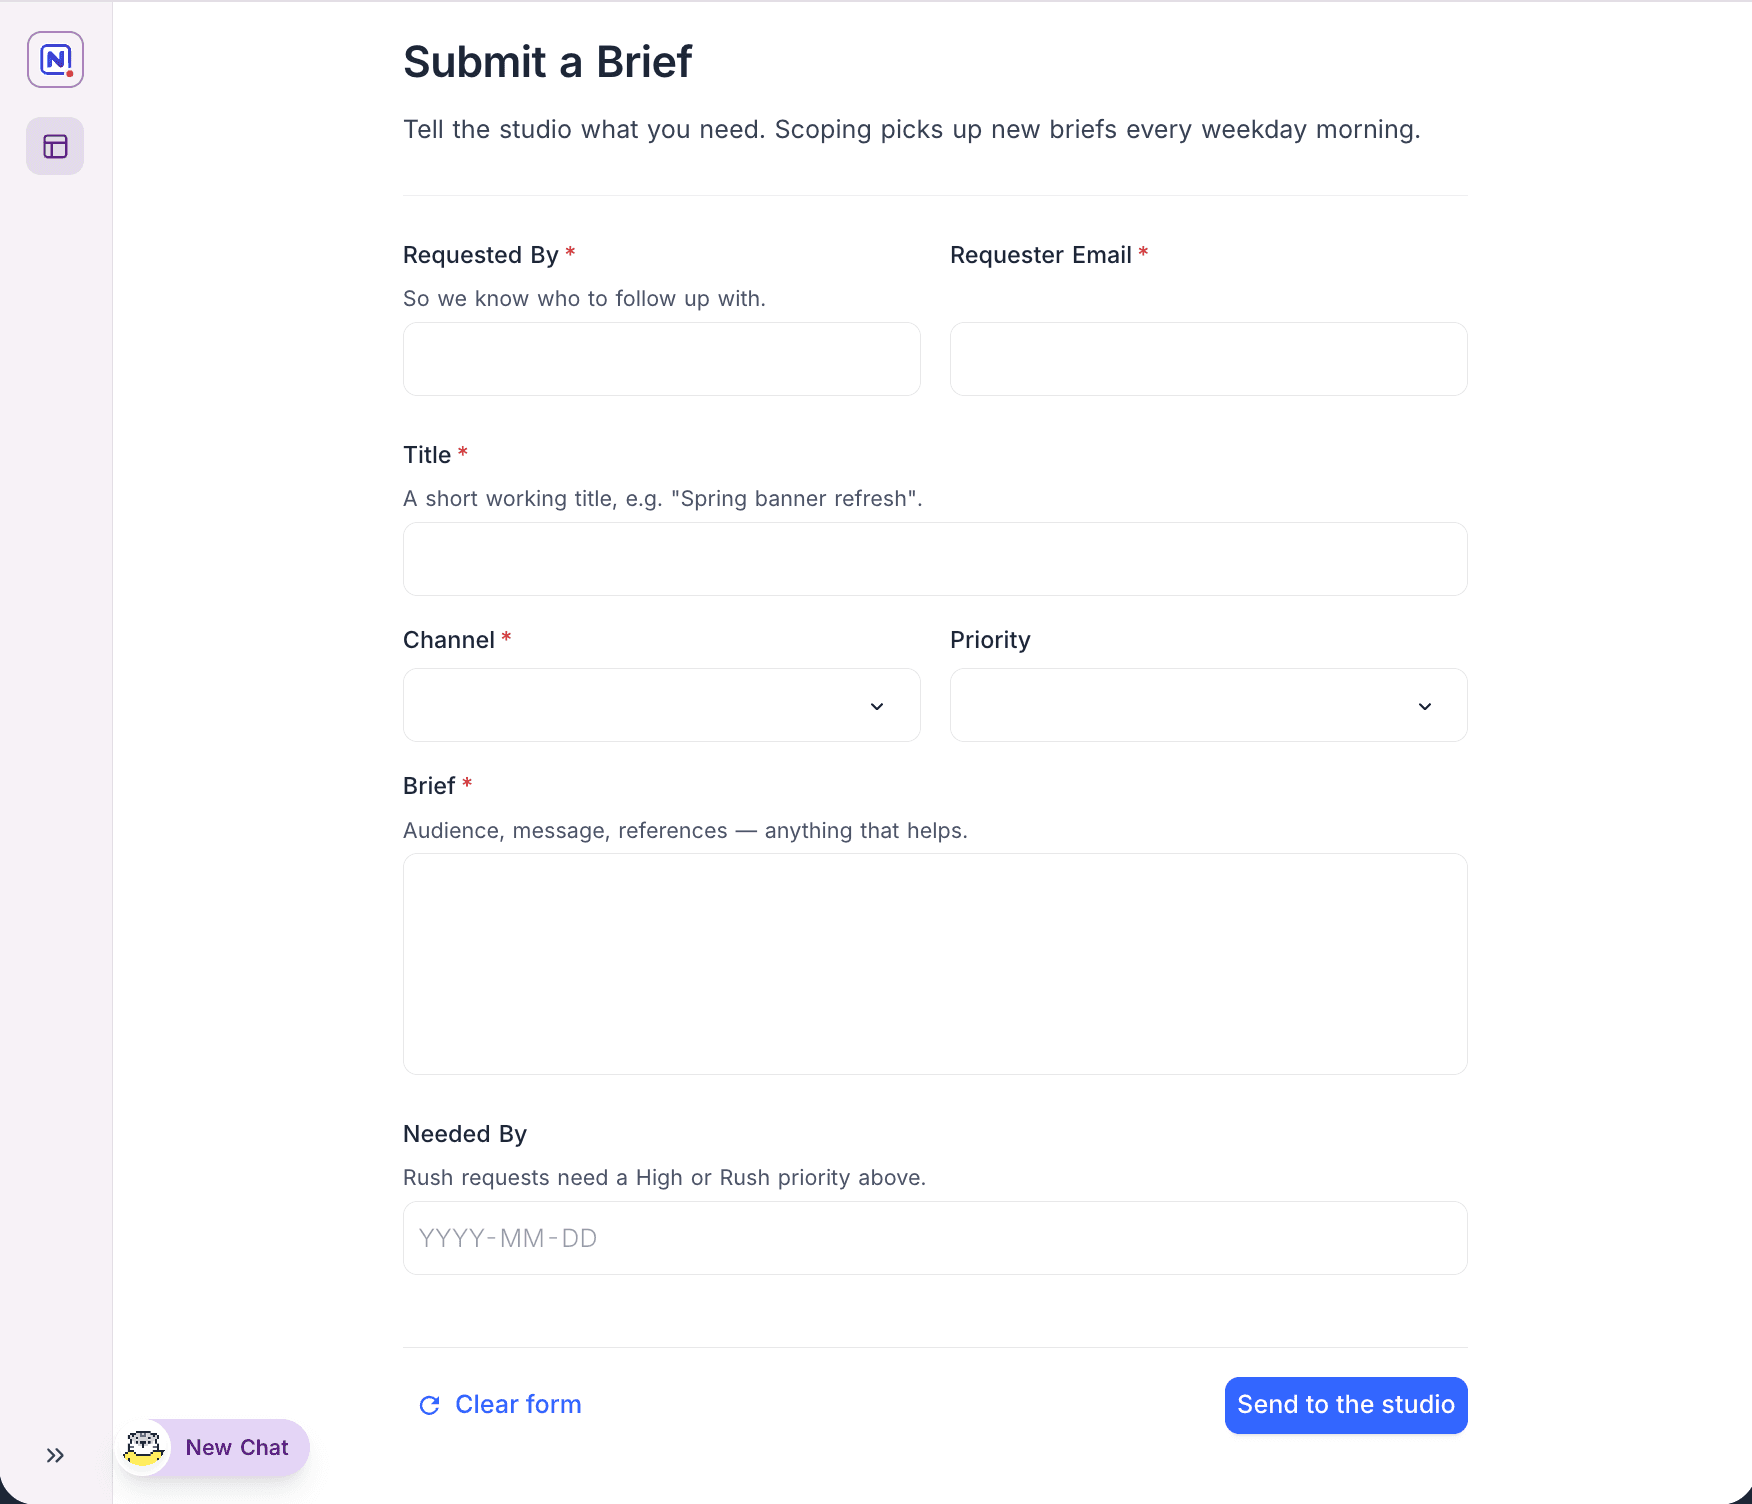
Designing the form
Add the fields that users must fill in. Then configure each field in the properties panel. You can put fields in groups with a title and a description. To make forms with more than one column, put fields side by side in rows. To arrange fields, rows and groups, drag them.
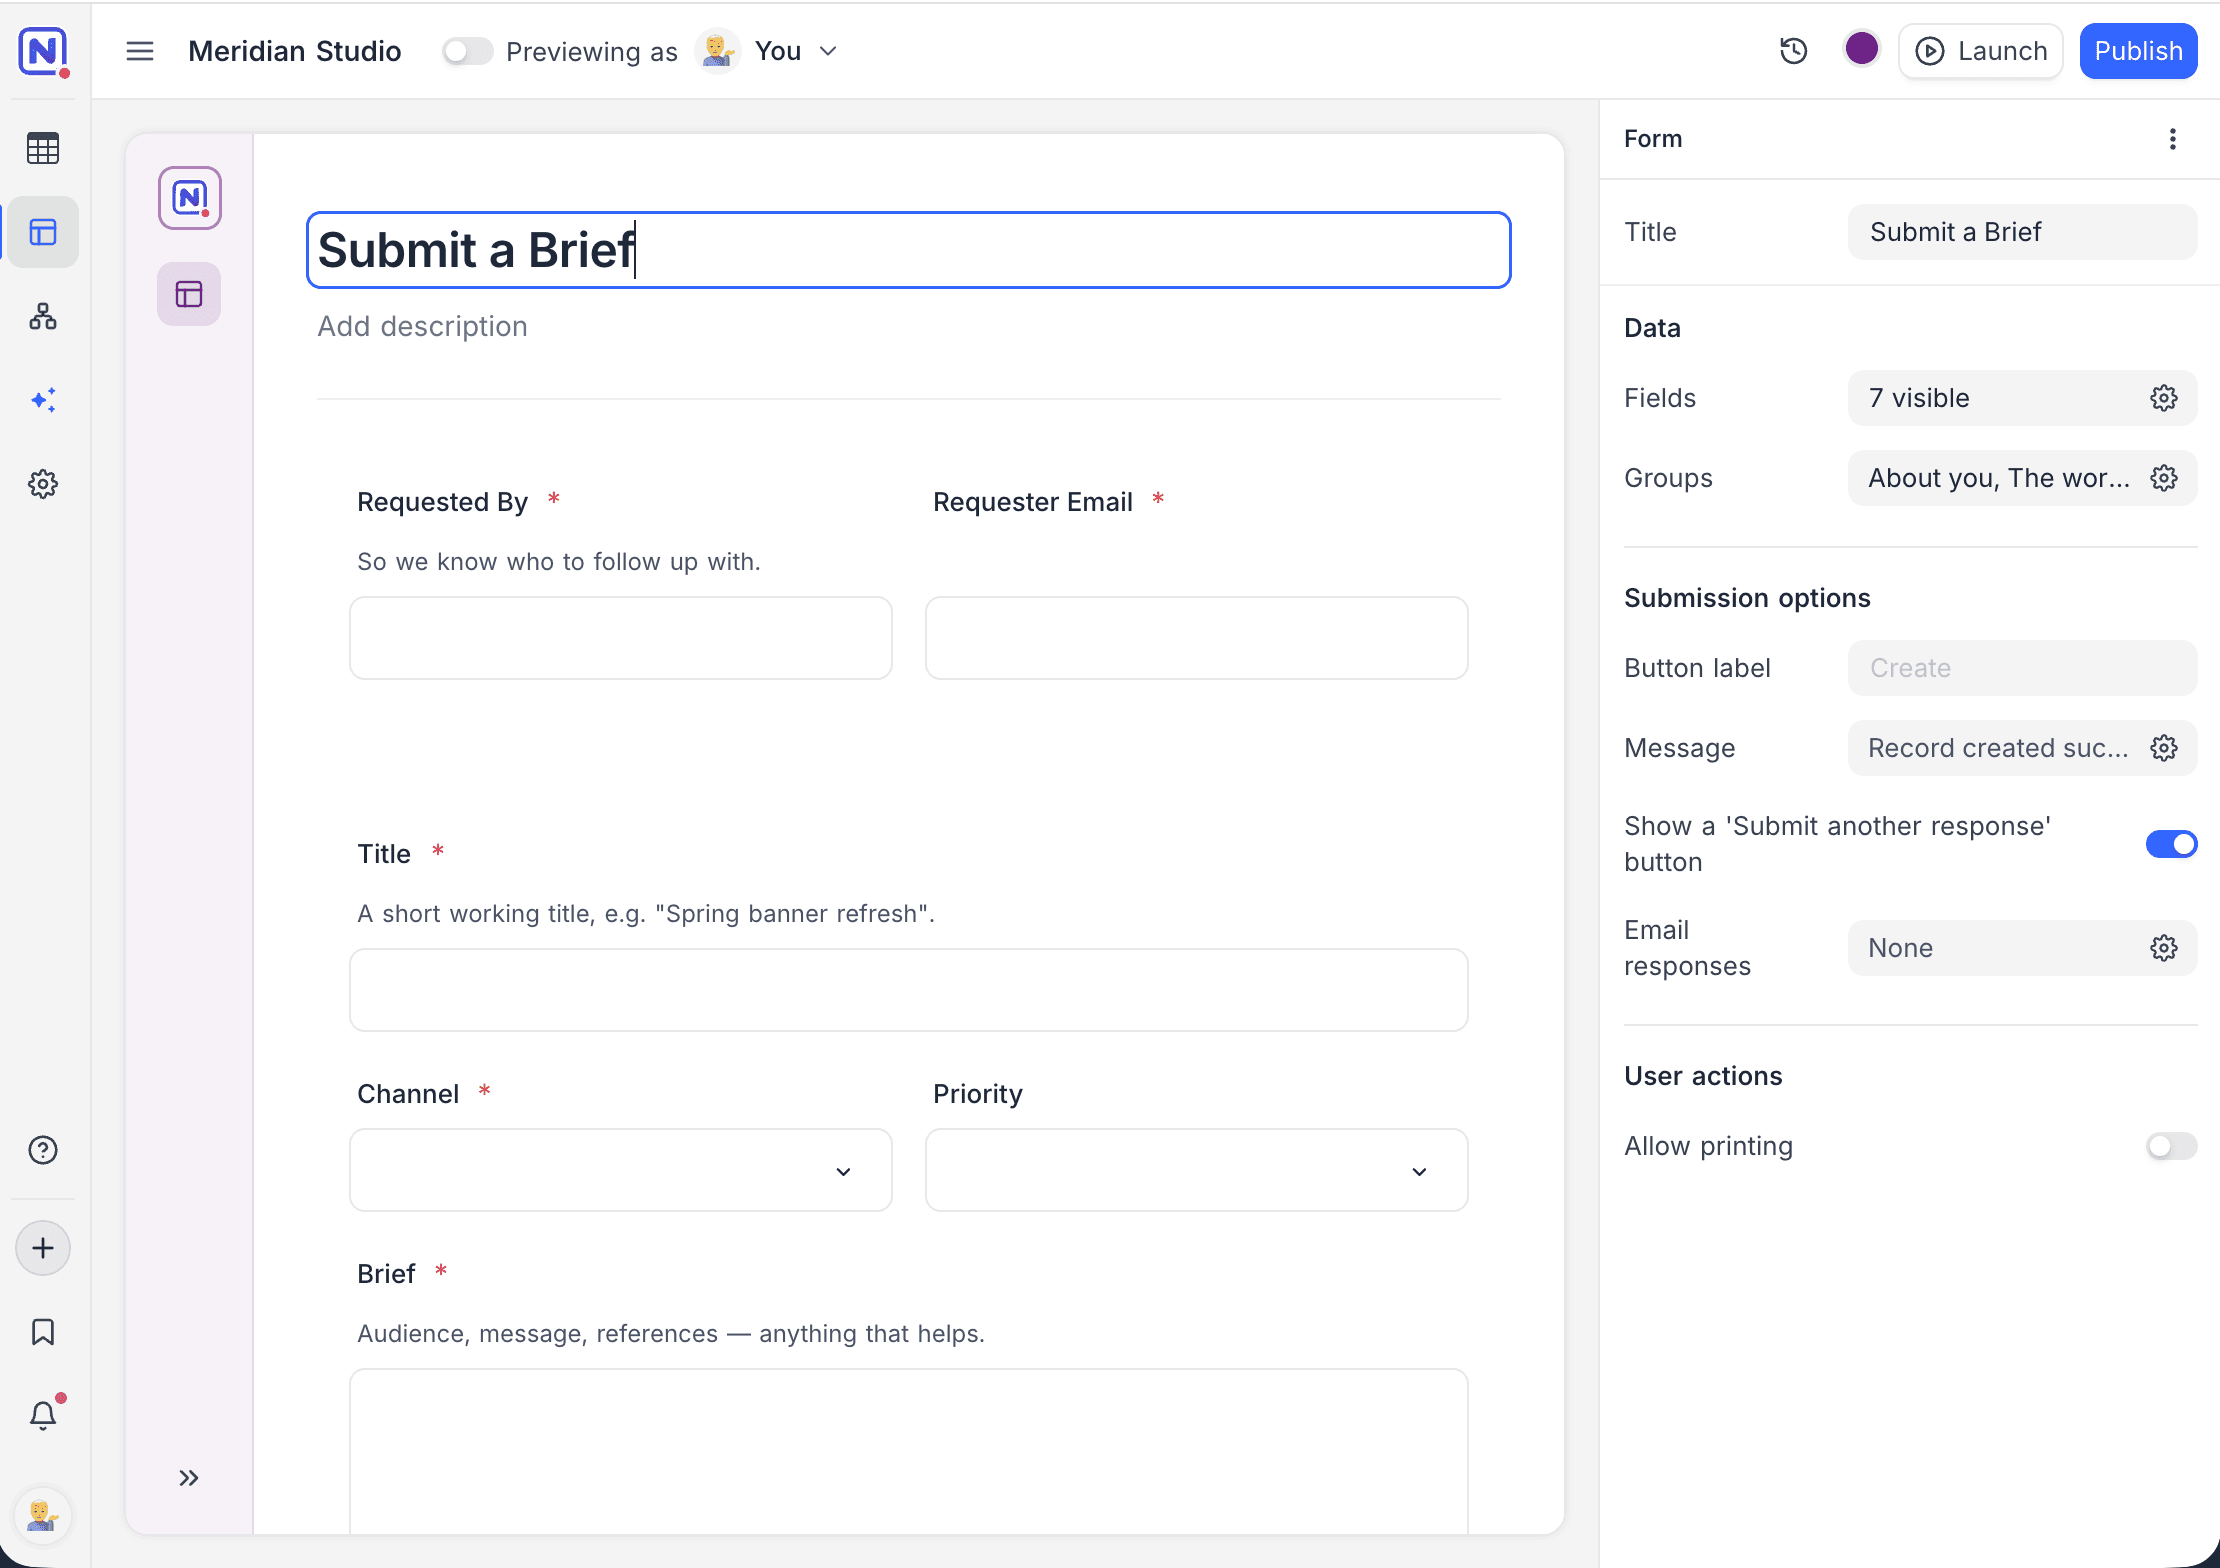
Each field can have its own label and helper text. Use them when the field names are not clear to the reader. A default value can fill in the input before the user types.
To keep submissions clean, use these settings:
- Mark fields as required.
- Add validation rules or a character limit to text inputs. The form then catches bad data before it gets to the table.
- For select fields, use limit options to control the options that users can select. Optionally, let users add a new option when no existing option fits.
Appearance options control the input size (default, large or extra large) and style variants for select fields. They also control the width of the field: a third, half or the full row. Use the width to put fields side by side.
Conditional visibility shows or hides a field based on the values of other fields. The form then asks only for the data that applies. For example, show a "Needed by" date only when the priority is Rush.
For the full reference on field elements, see Fields, buttons & filters.
Submission options
The properties panel of the form controls what happens at submission:
| Setting | What it does |
|---|---|
| button label | Sets the text of the submit button. |
| message | Sets the confirmation that shows after NocoDB creates a record. |
| 'Submit another response' button | Shows a button so users can submit several entries one after the other. |
| Email responses | Sends a notification to the recipients that you select on each submission. |
| allow printing | Lets users print the completed form. |
Update an existing record
A form can update the record that a user has open, and not create a new record. Use this to give people controlled editing. The record gets the same labels, help text, validation and conditional visibility as an intake form.
Set up the update form from the record, not from the form:
- Open a record detail page, or the record pane of a record review page.
- In the properties panel, open User actions.
- Set Edit fields to Form. The first time you select Form, NocoDB creates the form and connects the record to it.
After that, use the Form picker to select a different form, Create new form or Duplicate current form. Edit form opens the selected form in the builder.
You design an update form the same way as an intake form. Because it submits back into an open record, it has two differences:
- 'Submit another response' button and Email responses are not offered.
- The defaults are Save and Record updated successfully, not Submit and a creation message.
Update forms do not show in the interface navigation. They open from the record that is connected to them. A viewer opens a record and selects to edit it. A viewer never opens an update form from the page list.
Last updated on