Create Workflow
Each workflow in NocoDB belongs to one base. To create a workflow, open the base. Then:
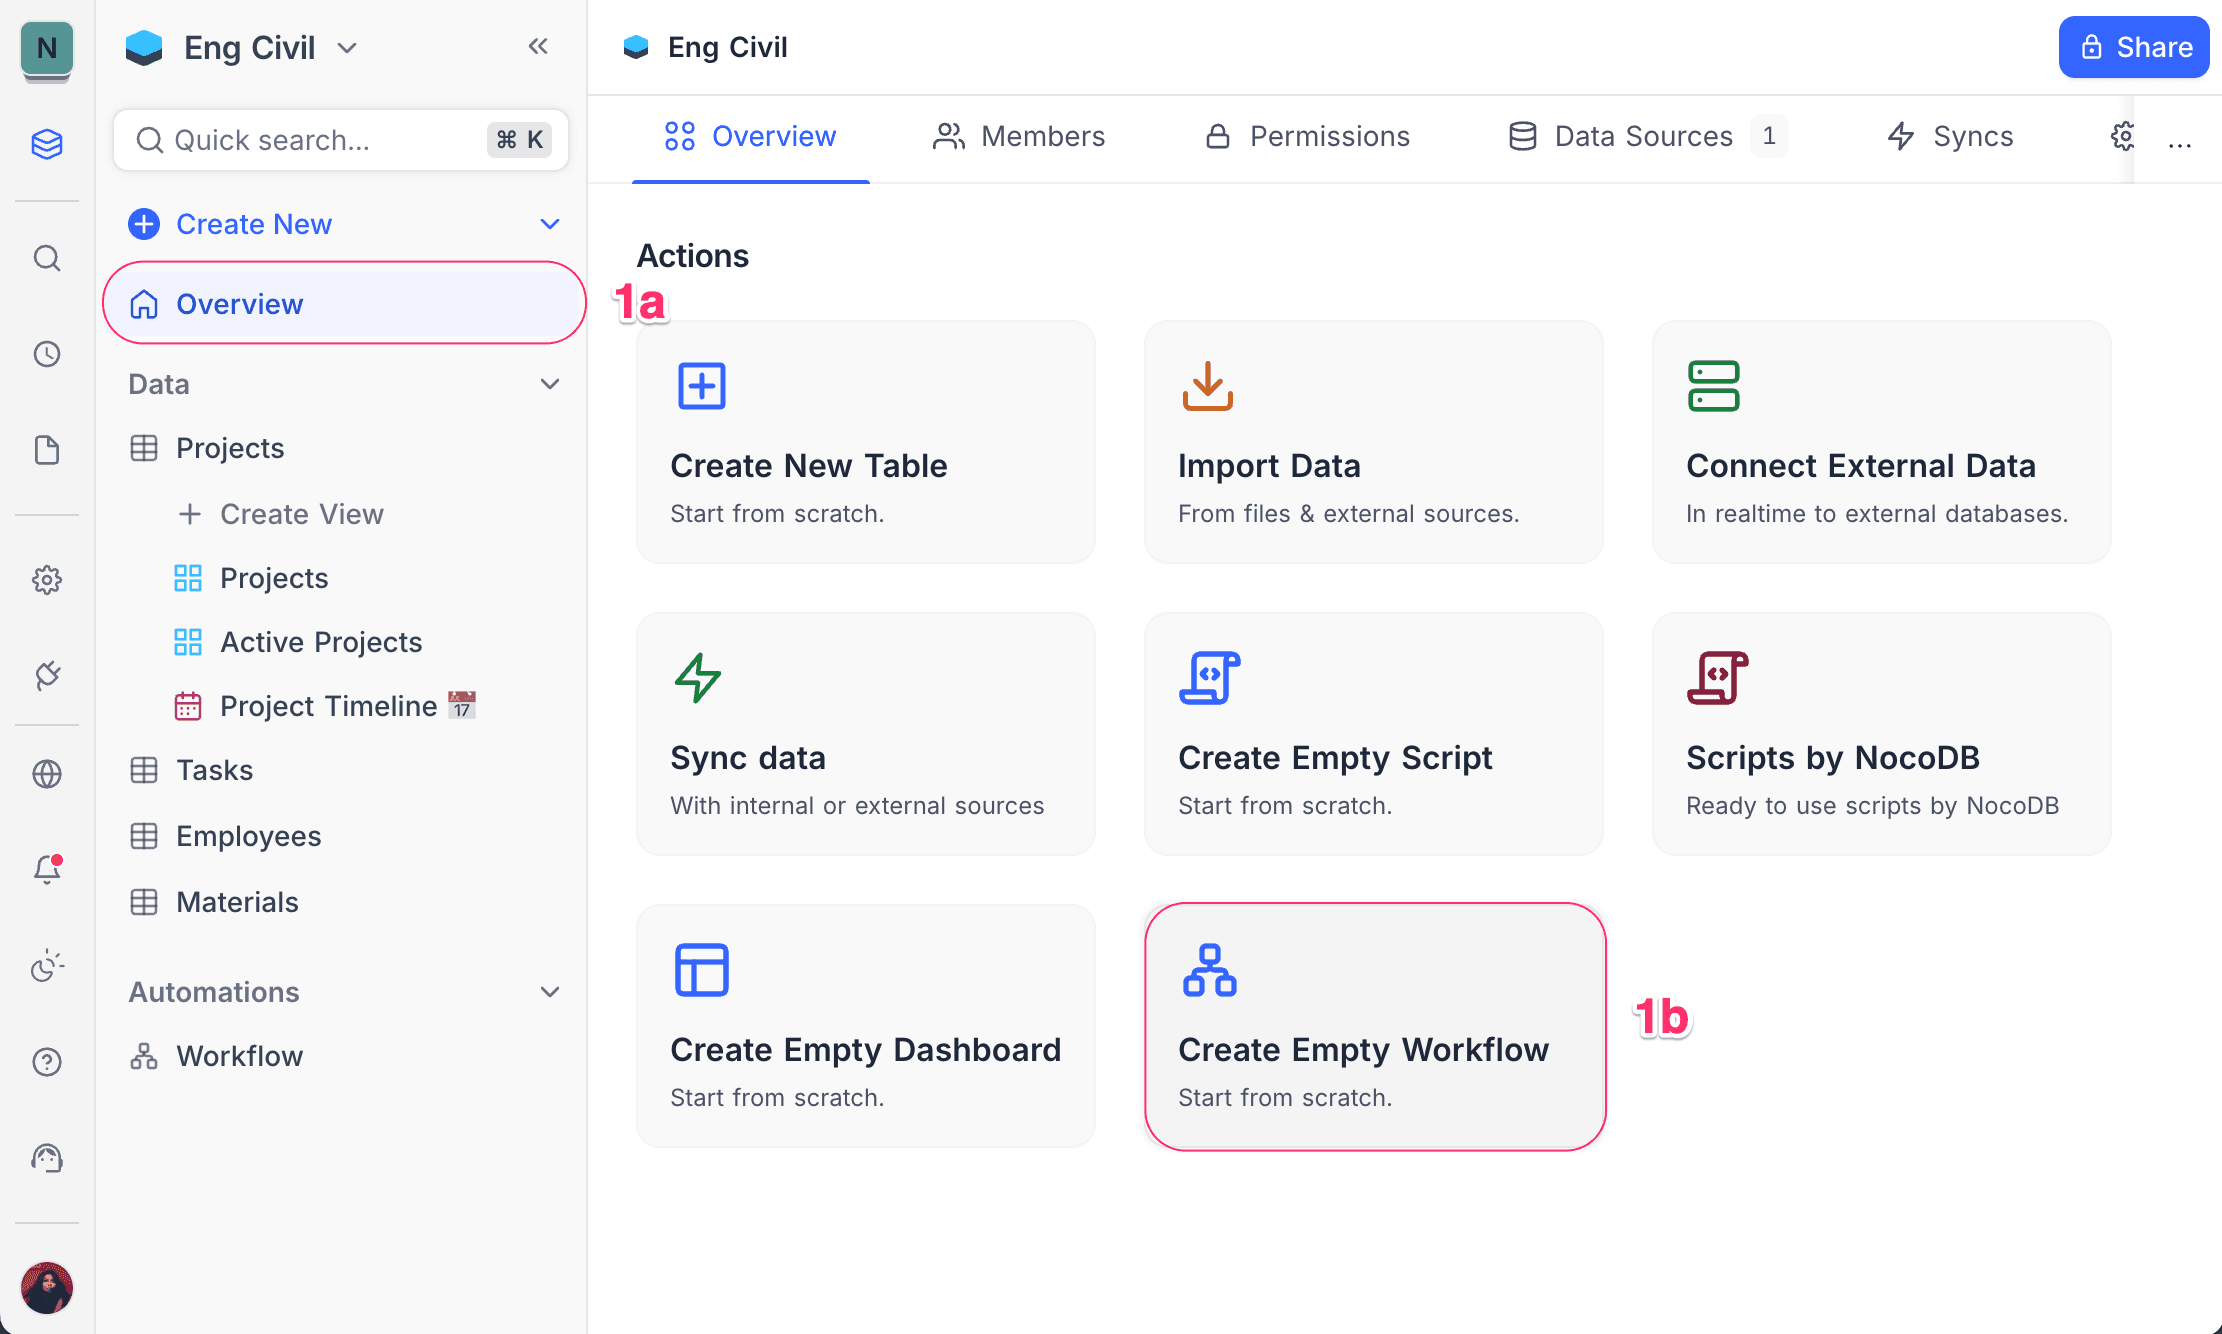
- On the base Overview page, click Create Empty Workflow.
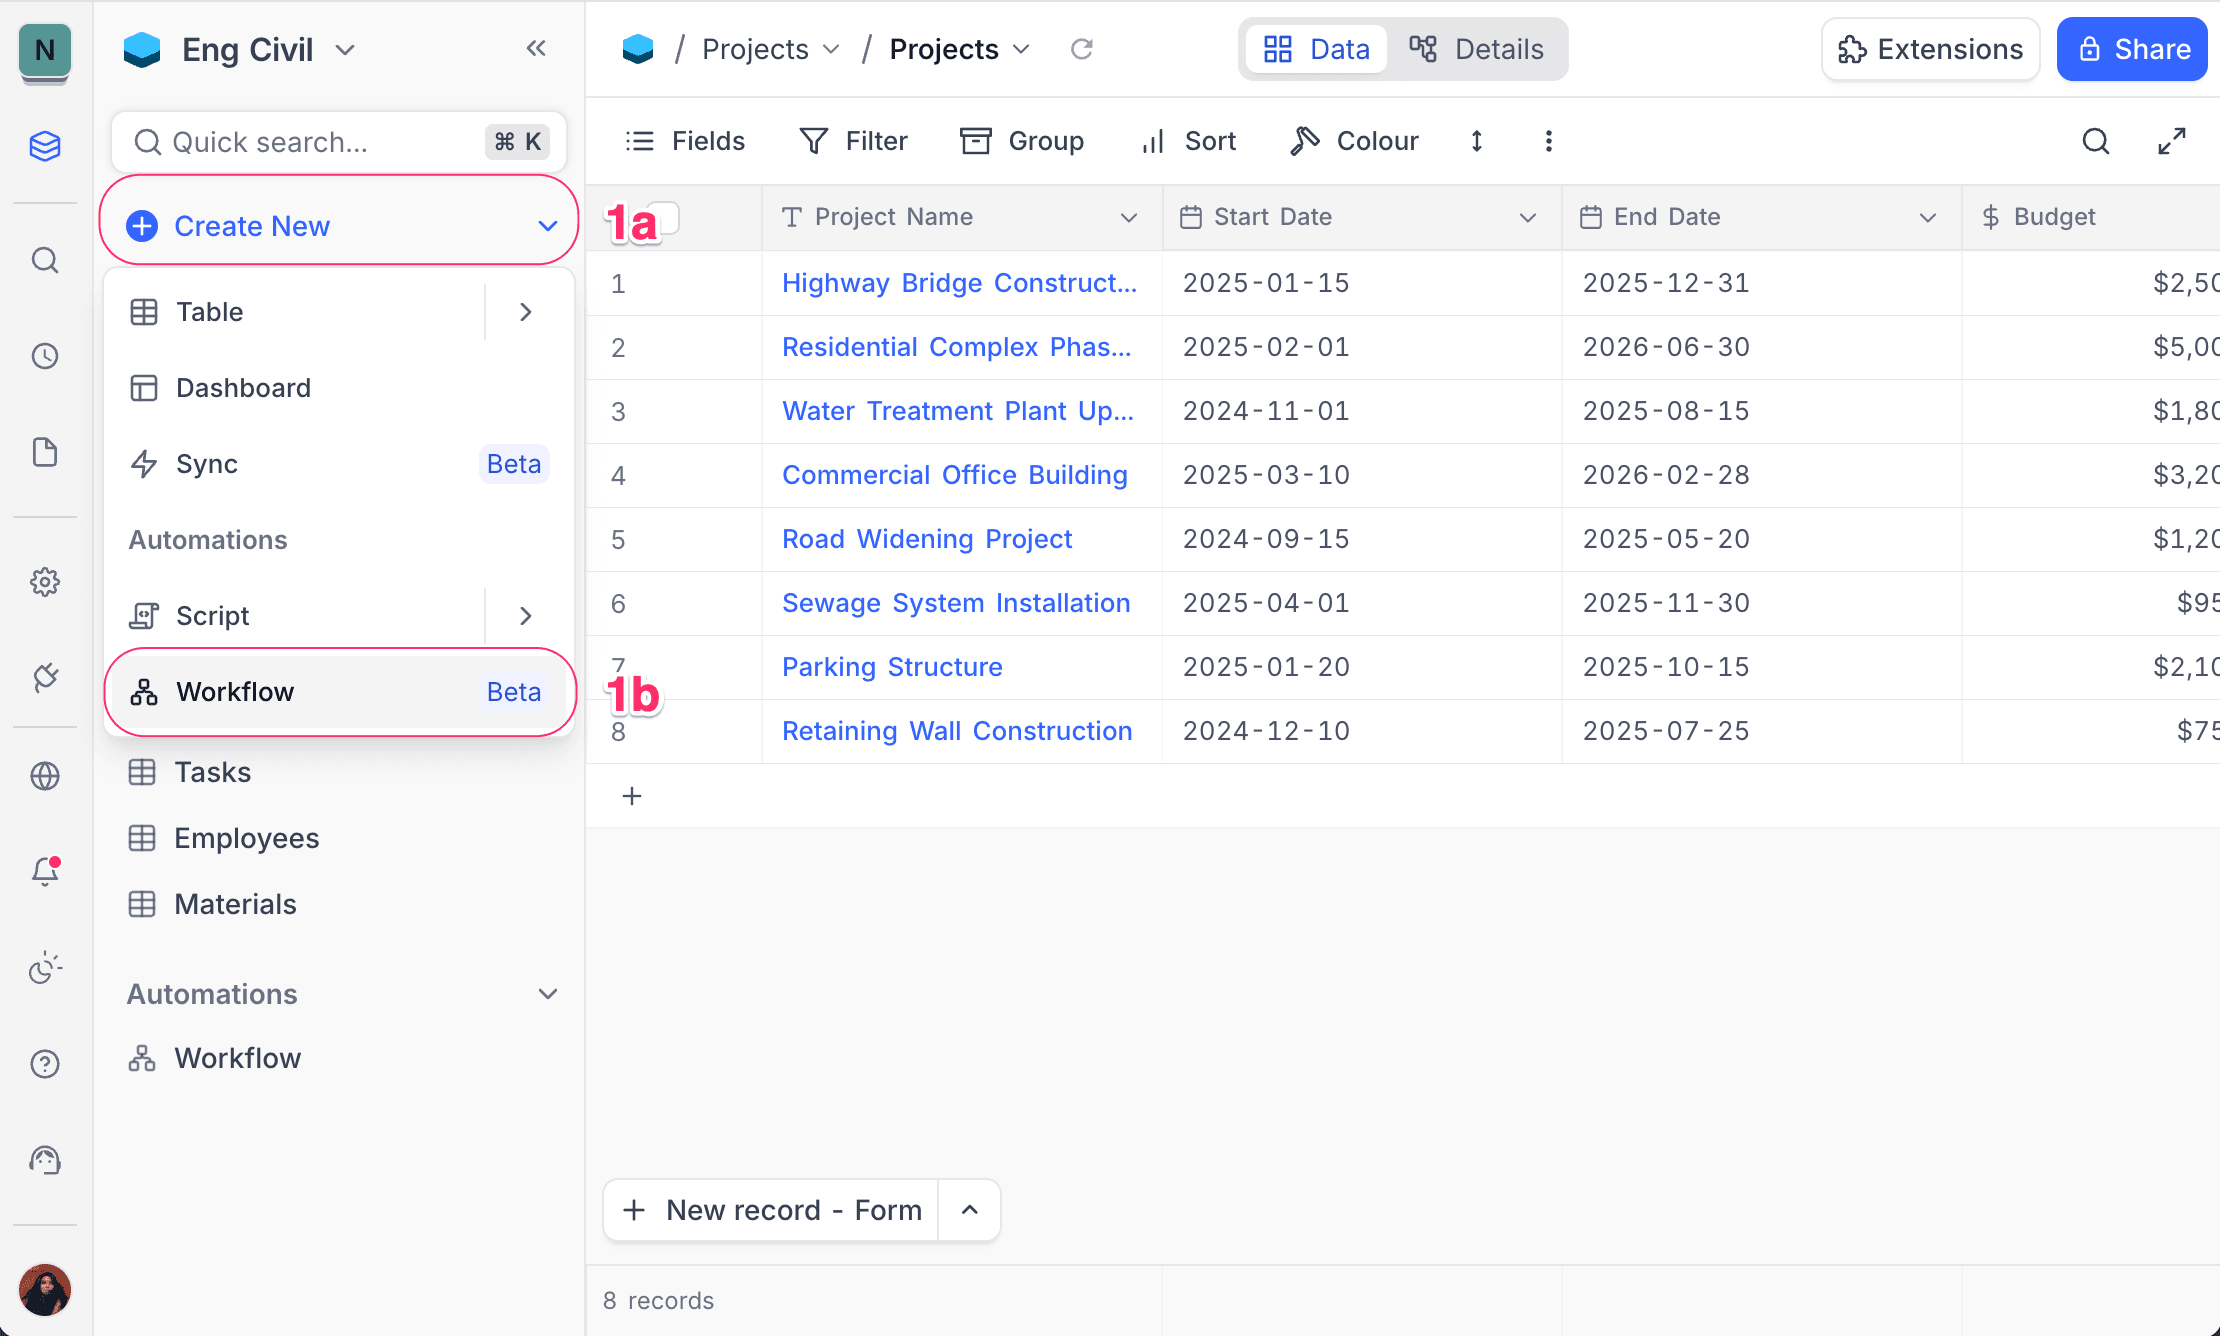
- Alternatively, click Create New in the left sidebar and select Workflow.
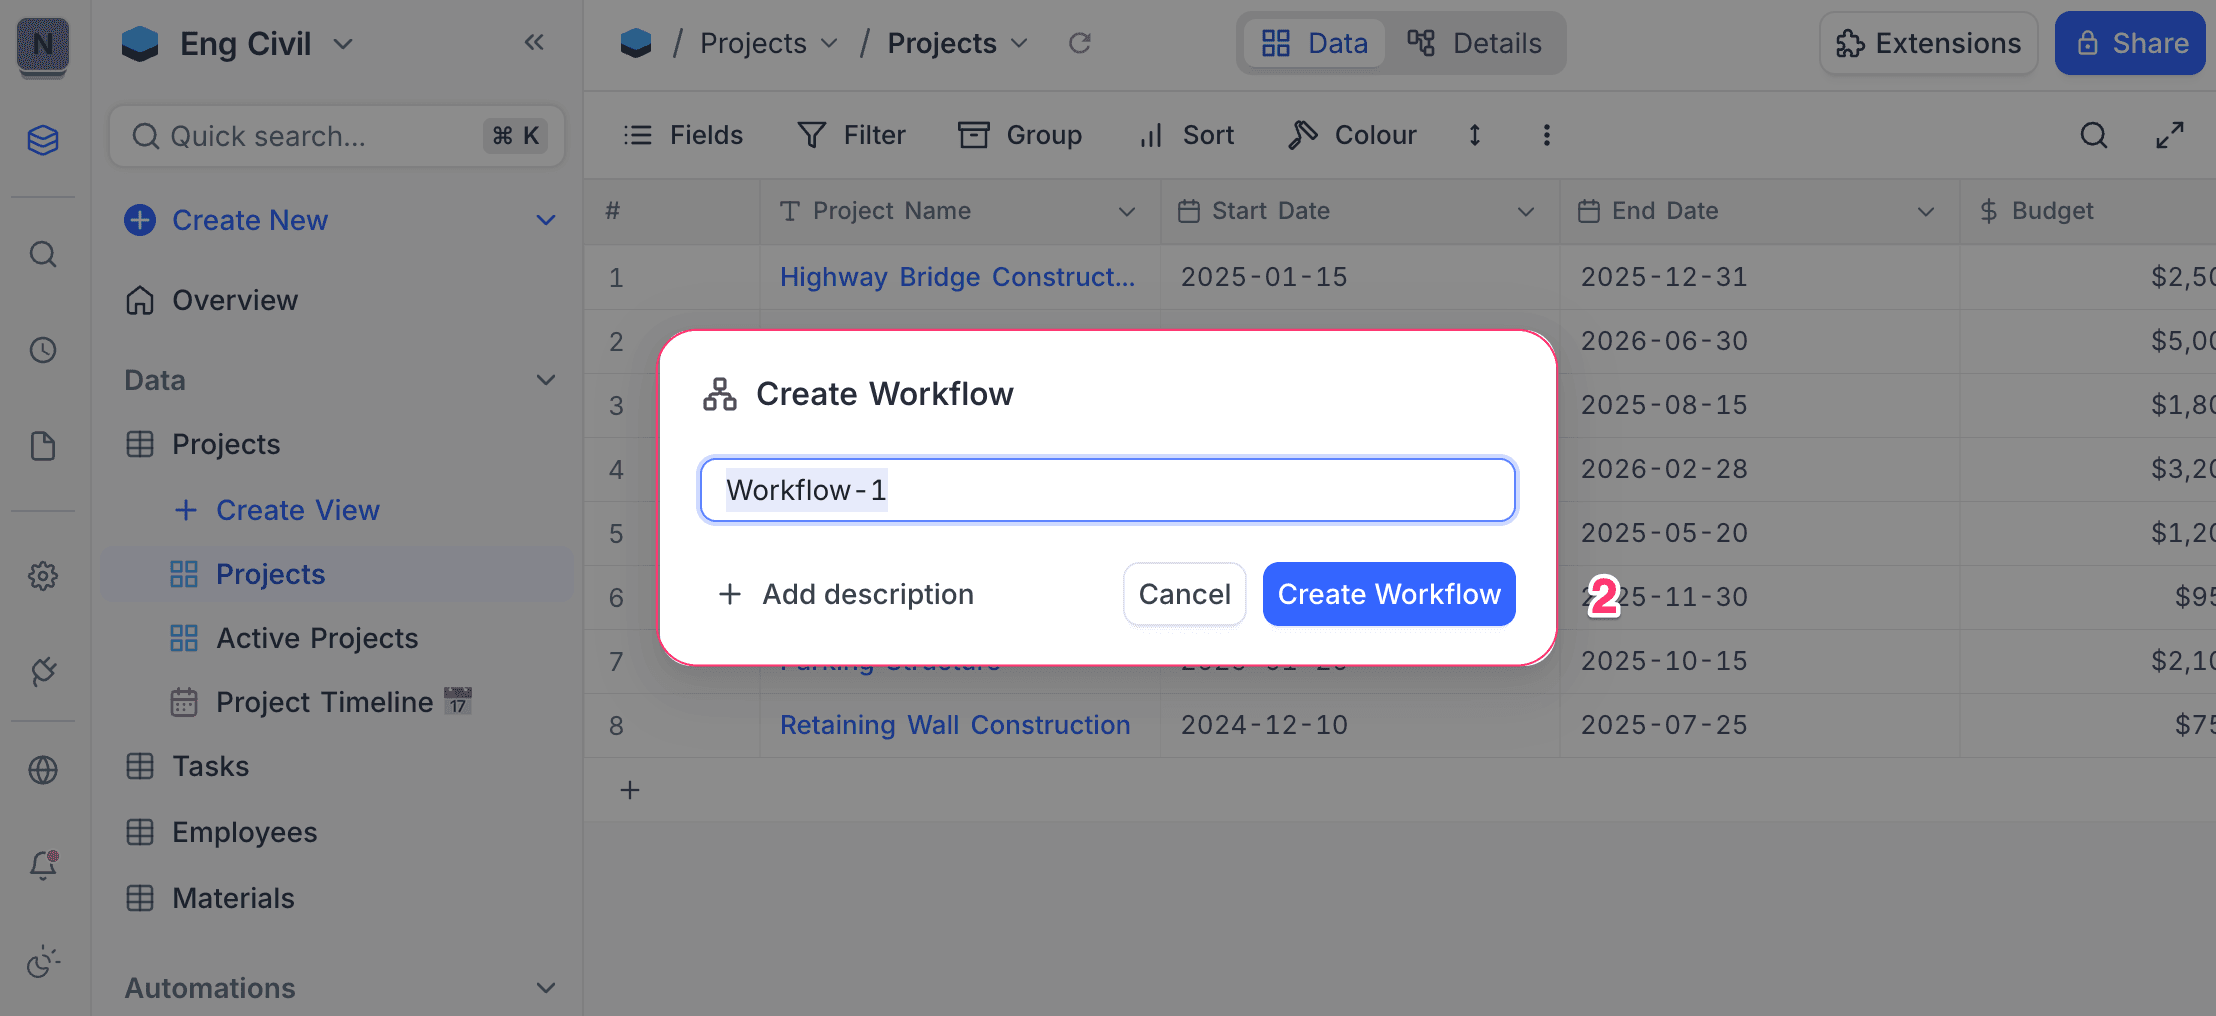
- Type a name for the workflow.
- Optionally, type a description to explain the purpose of the workflow.
- Click Create Workflow.
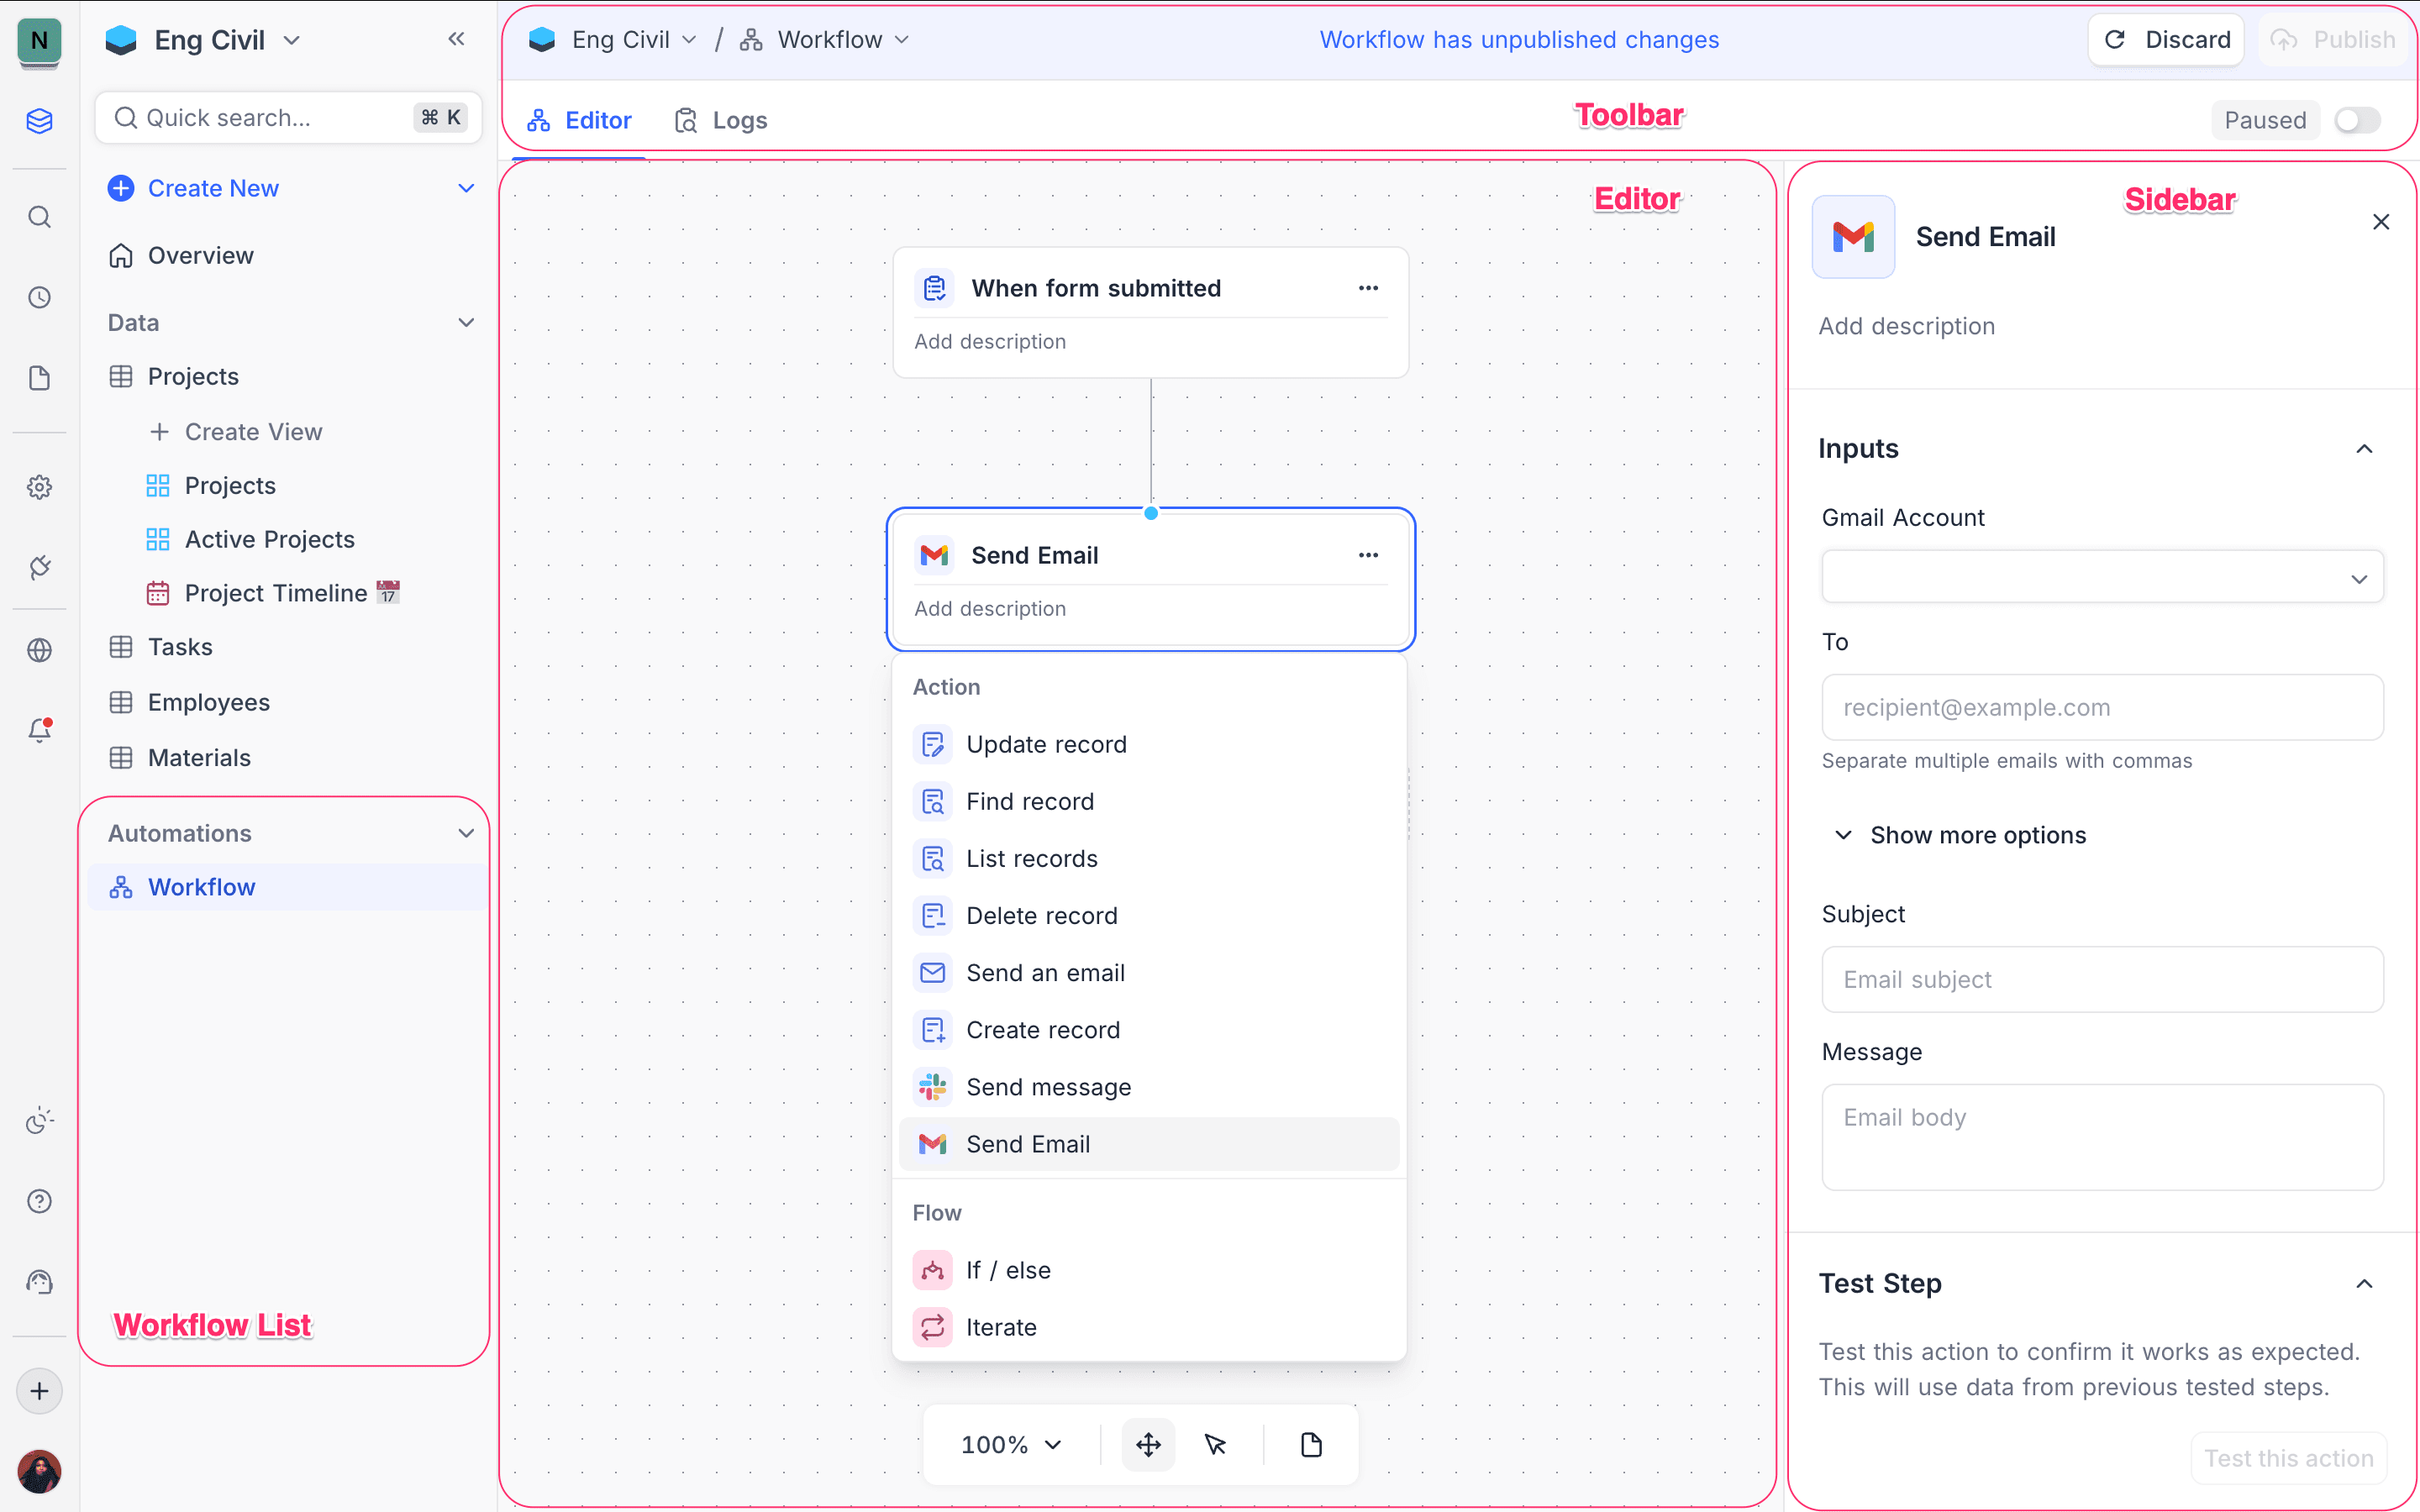
The workflow editor page opens. Configure the workflow on this page. The page has these parts:
- Workflow list : Shows all workflows in the base, in the left sidebar
- Toolbar : Gives access to workflow actions and settings
- Editor canvas : Design the workflow here. Add nodes and connect them.
- Sidebar : Configure the properties of the selected node
Copy a prompt, paste it into NocoAI in any base, and replace the words in [brackets] with your own.
- Build a workflow that emails [the requester] when a new [ticket] is created
- Build a workflow that creates a [Task] whenever a [Deal] moves to [Won]
- Build a workflow that updates [Status] to [Overdue] when [Due Date] passes
- Publish the [workflow name] workflow
Configuring workflow
The NocoDB Workflow builder is a visual interface. You design automation logic with connected nodes. To configure a workflow, do these steps:
-
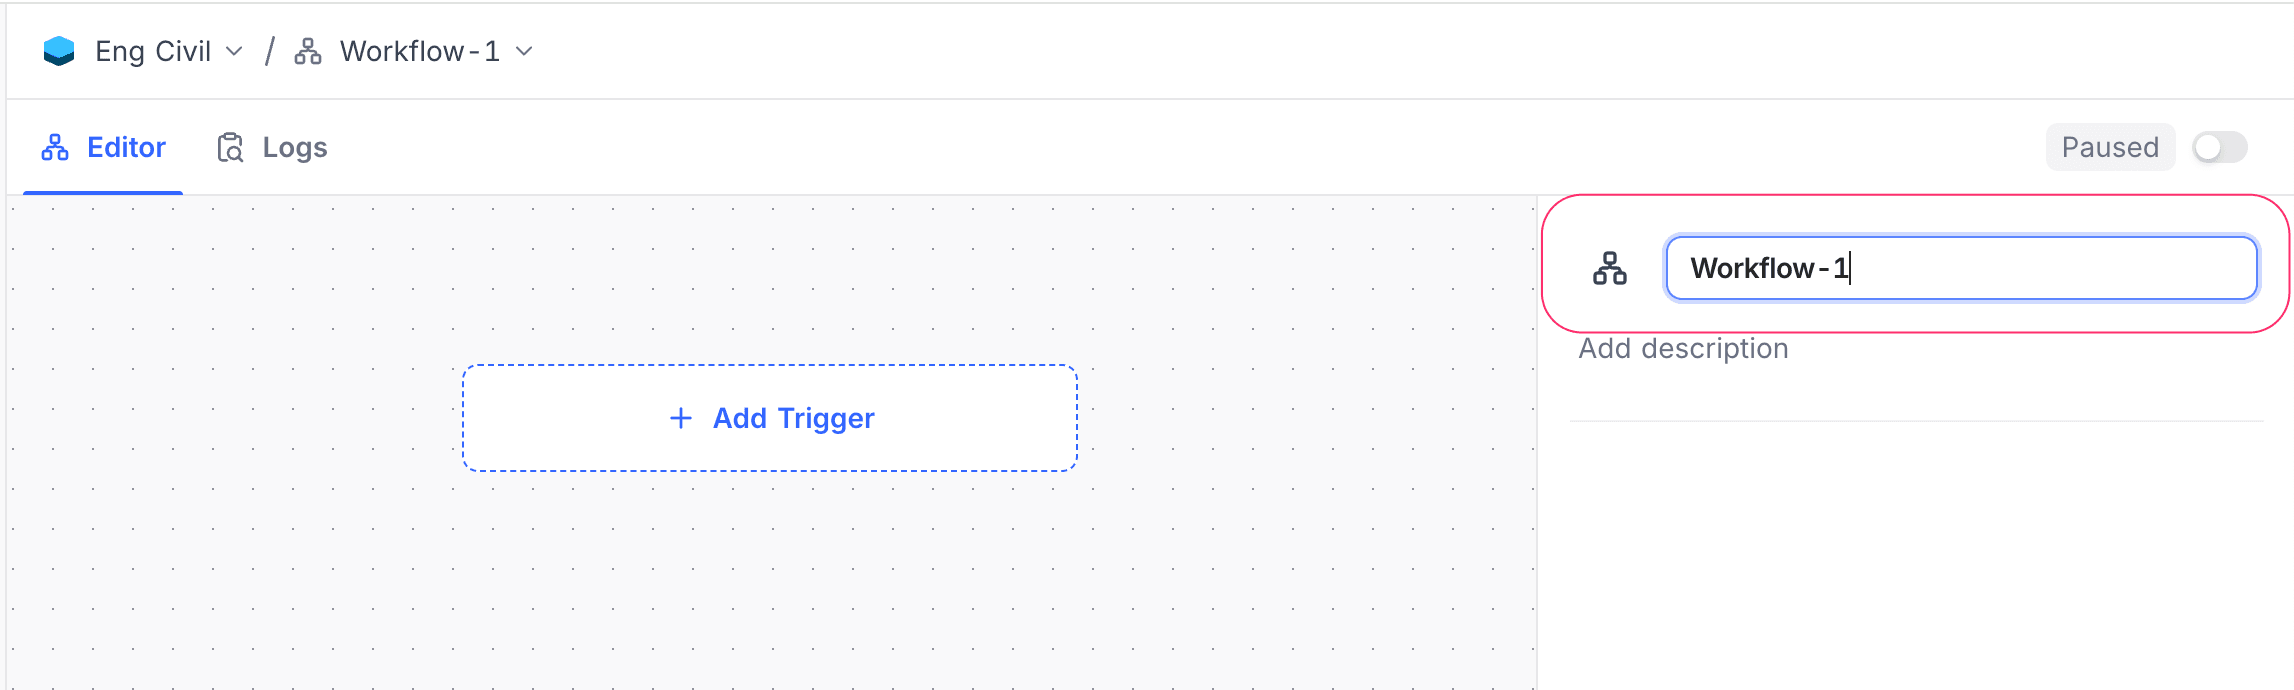
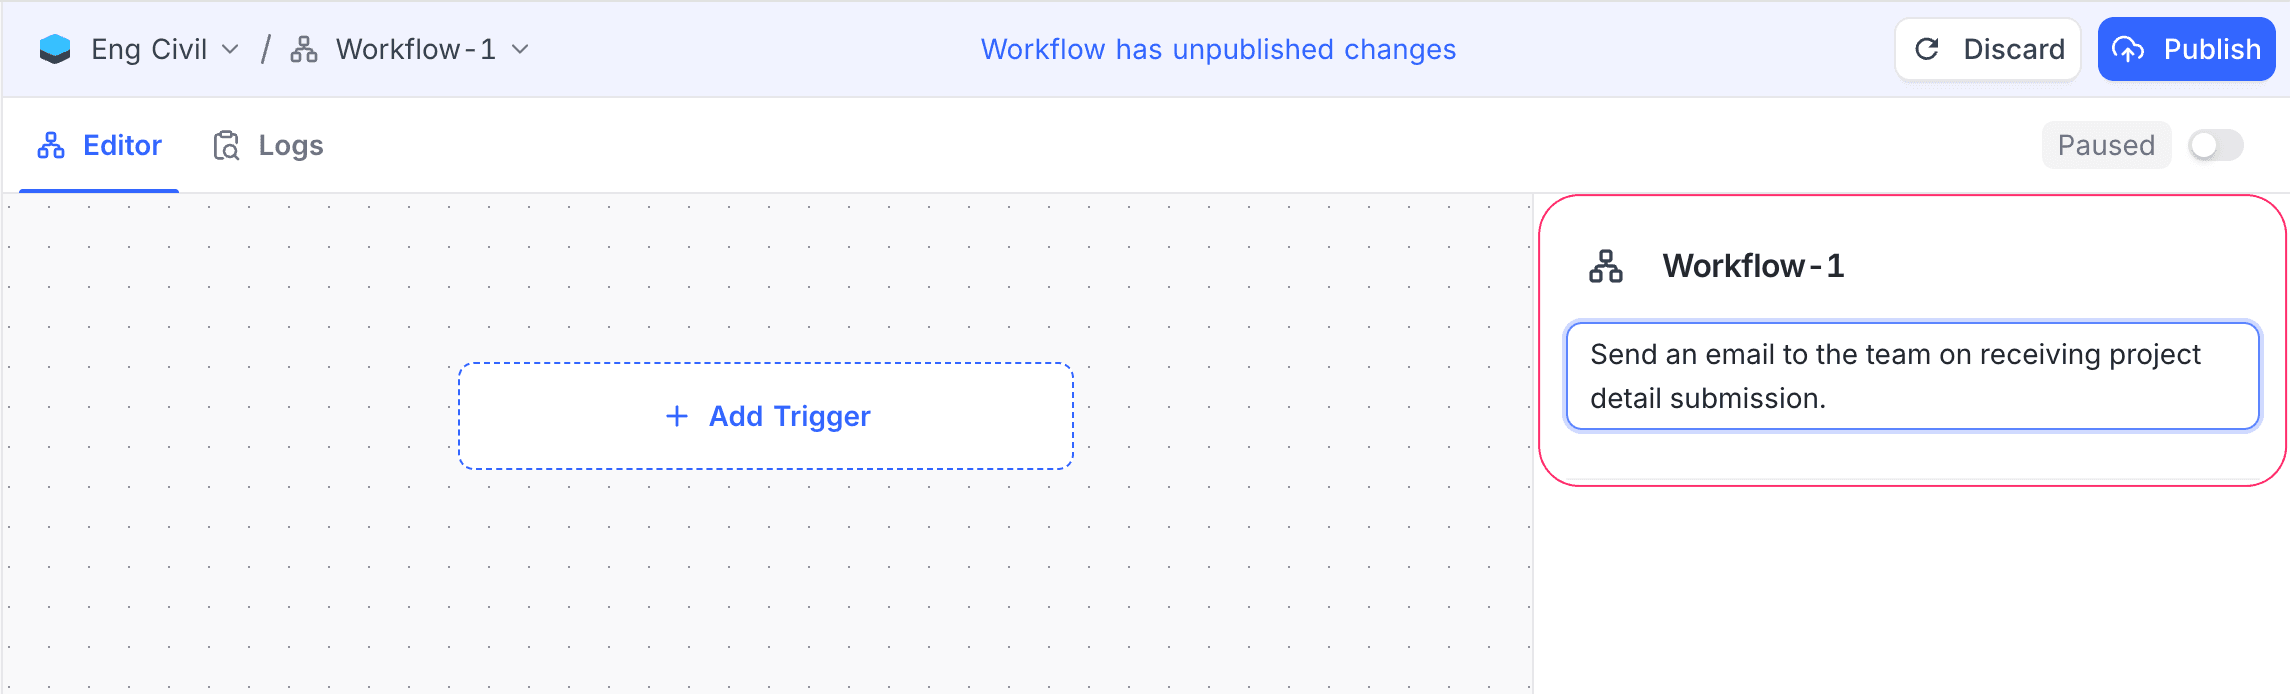
Name the workflow: Type a clear name that identifies the workflow. Optionally, add a description to explain its purpose.
-
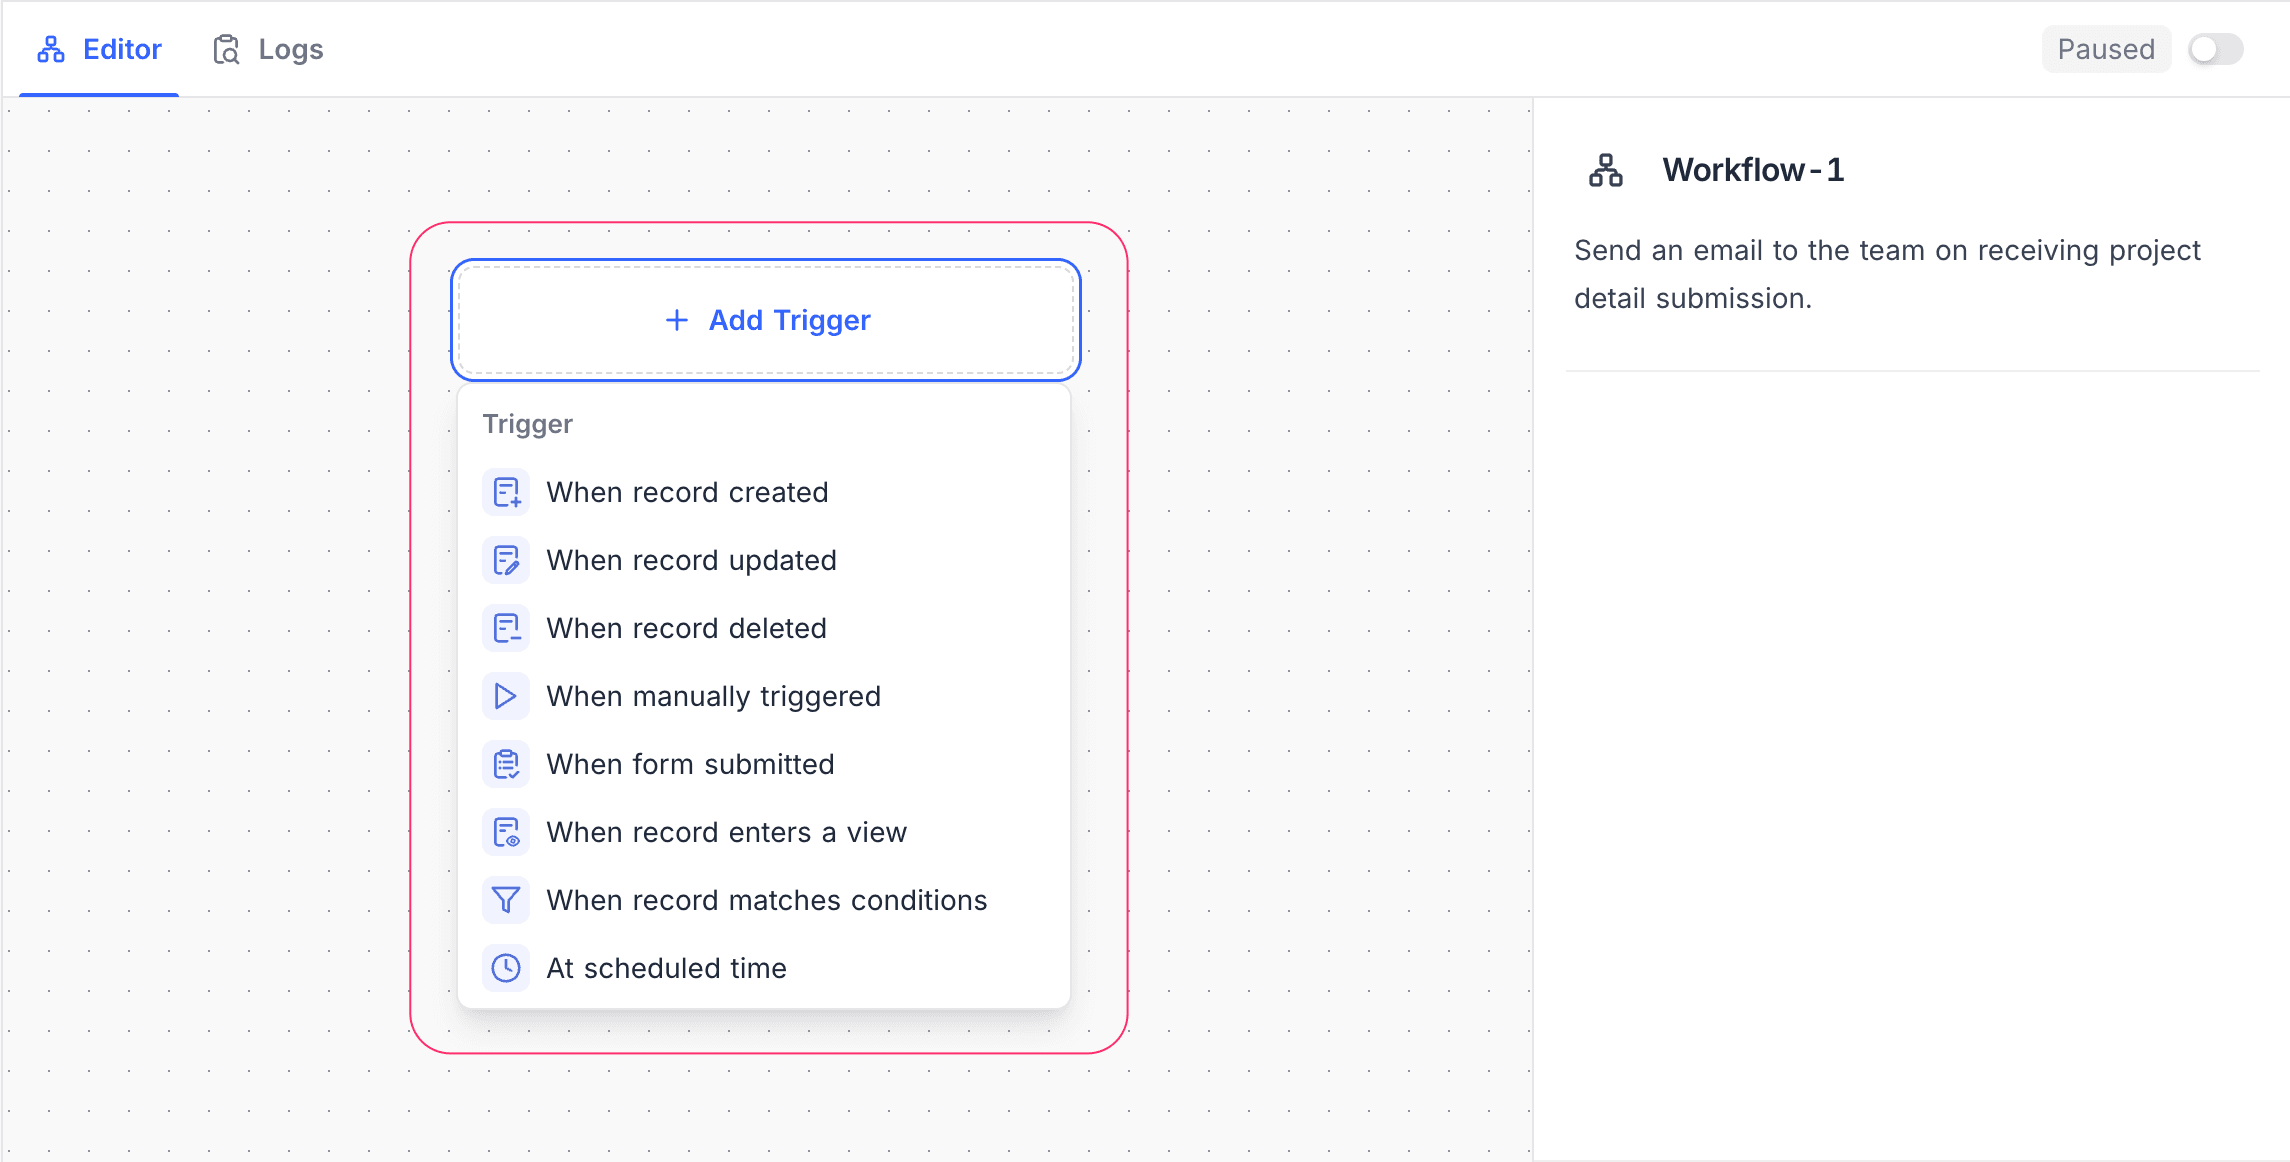
Select Trigger: Select how the workflow starts. Then configure the node settings (resource and conditions) as necessary. A workflow can have only one trigger node. The supported trigger types are:
- Record trigger: Runs when a record is created, updated, or deleted
- Manual trigger: Runs when a user triggers it manually
- Scheduled trigger: Runs at specified time intervals
-
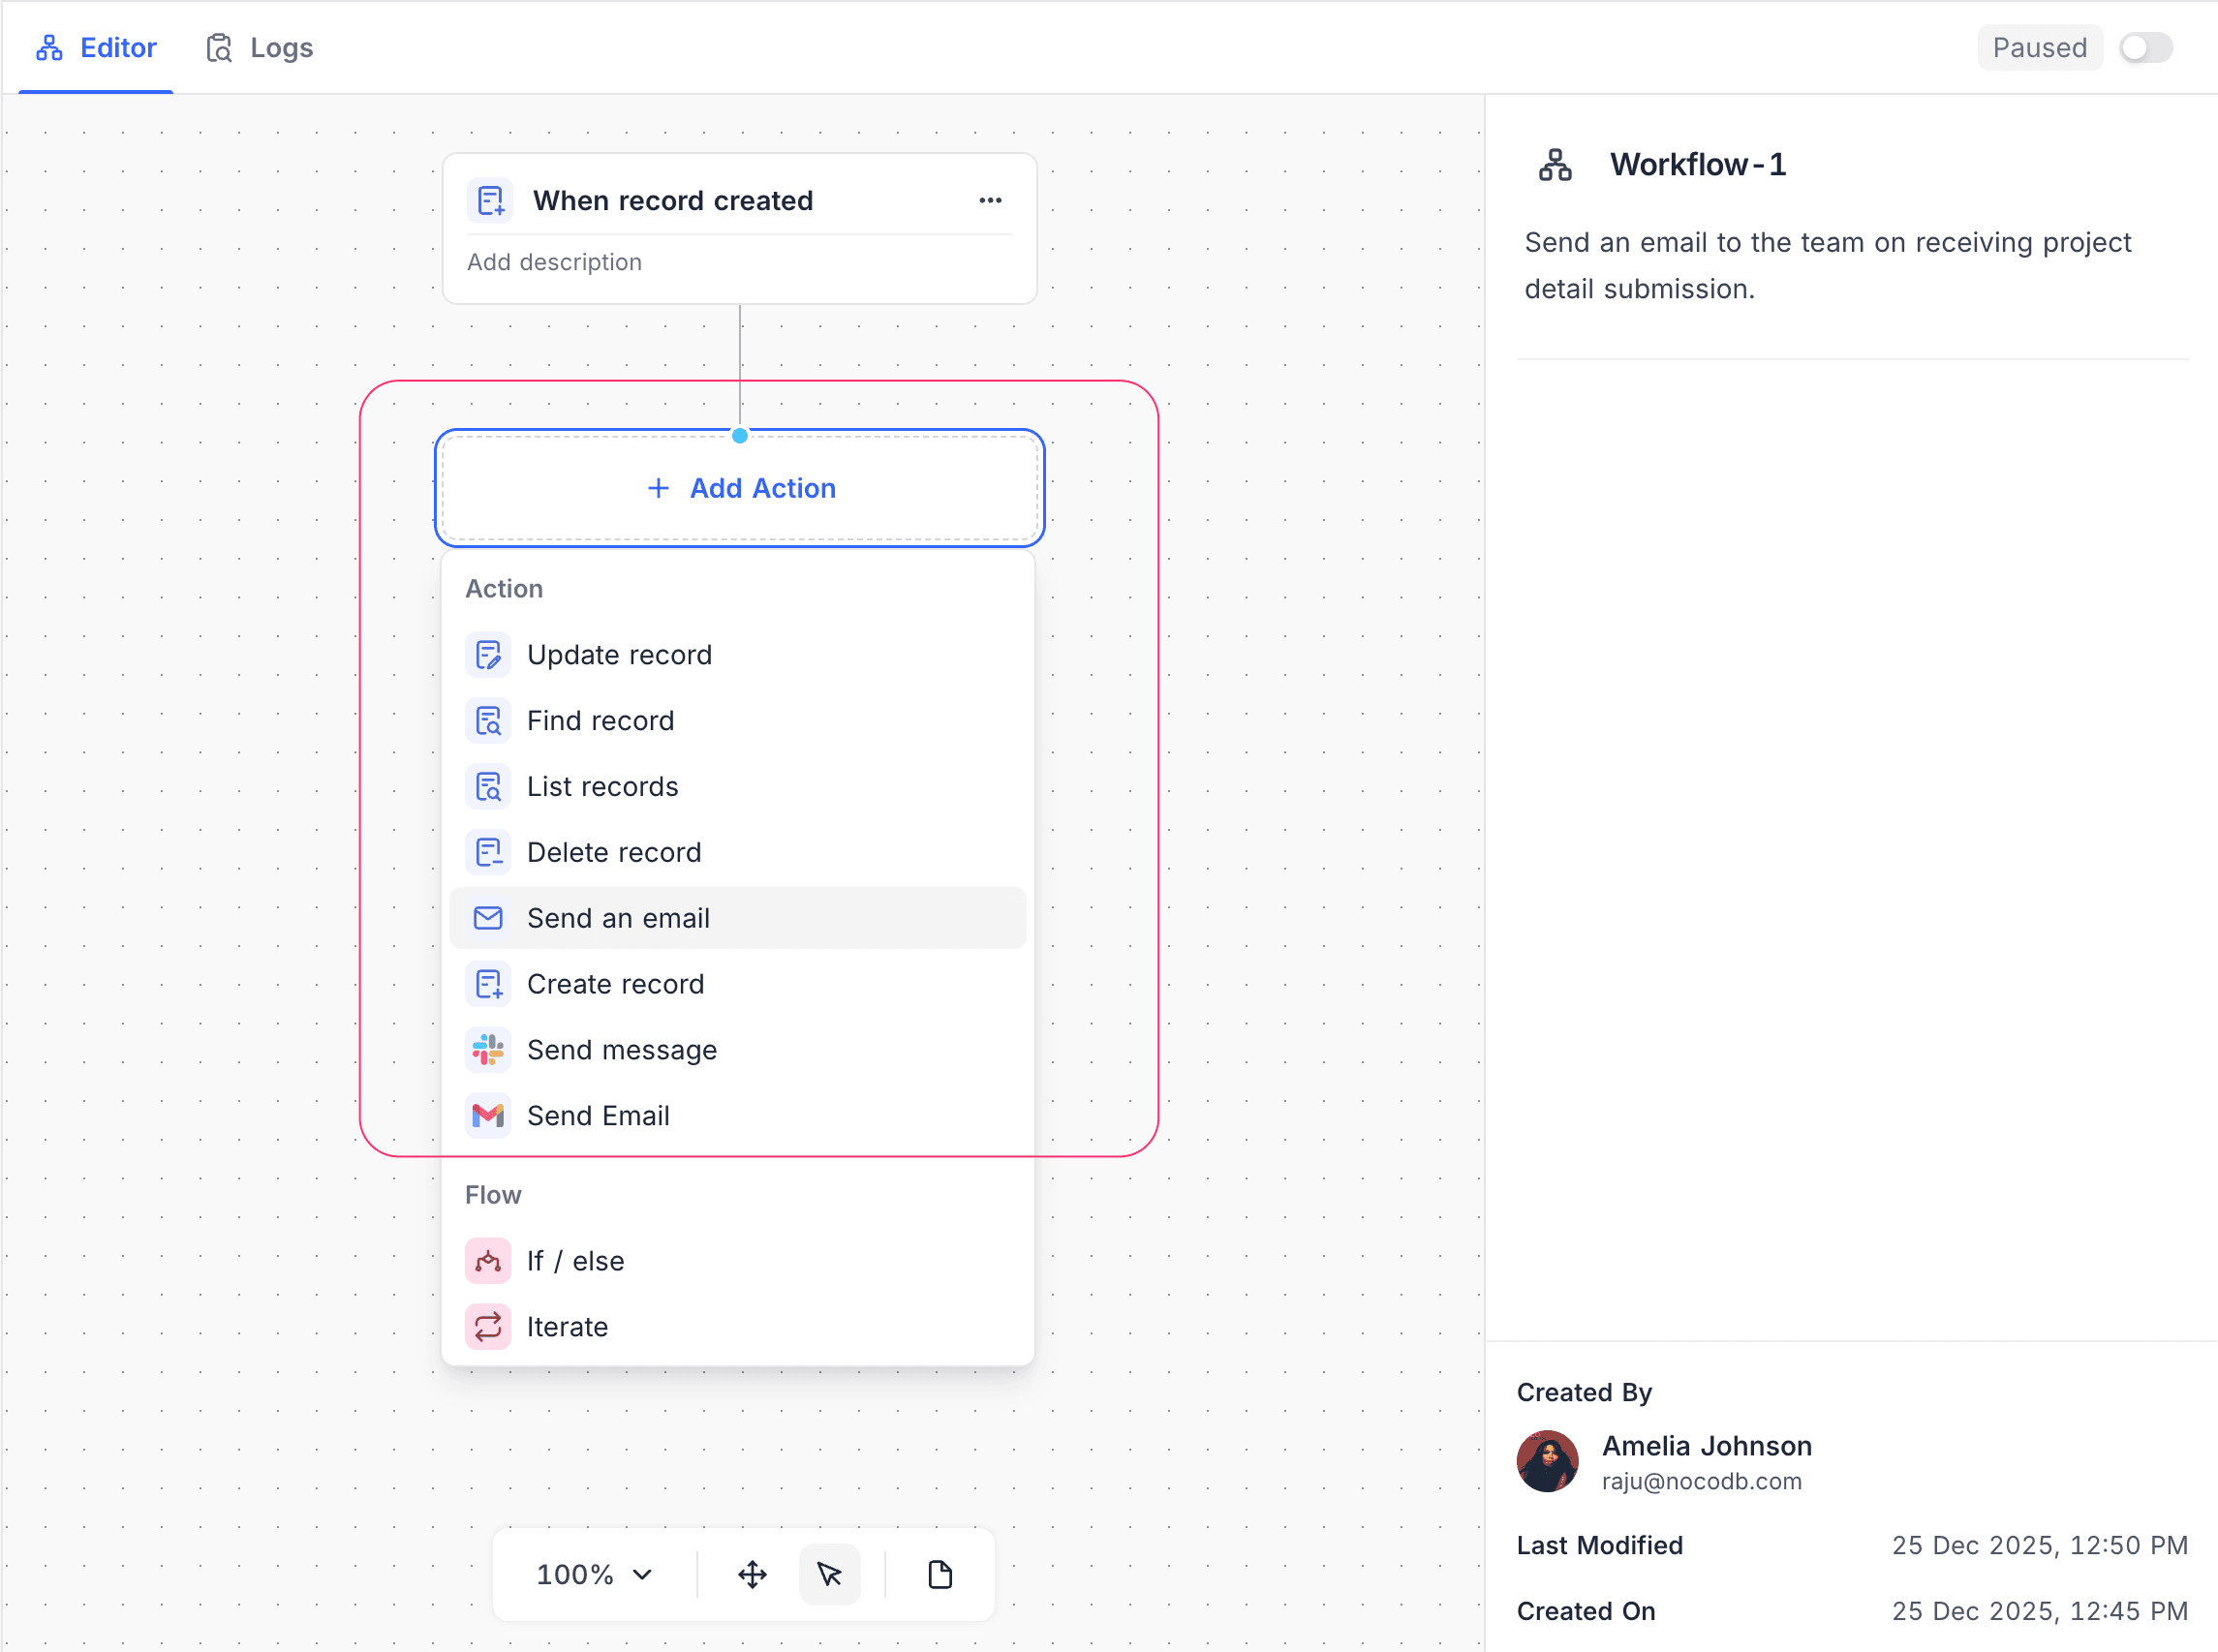
Add Action nodes: Define what occurs when the workflow is triggered. To do operations in sequence, connect many action nodes in a chain. Common action nodes are:
- Create / Update / Delete Record: Change data in a table
- Send Notification: Notify users through supported channels
-
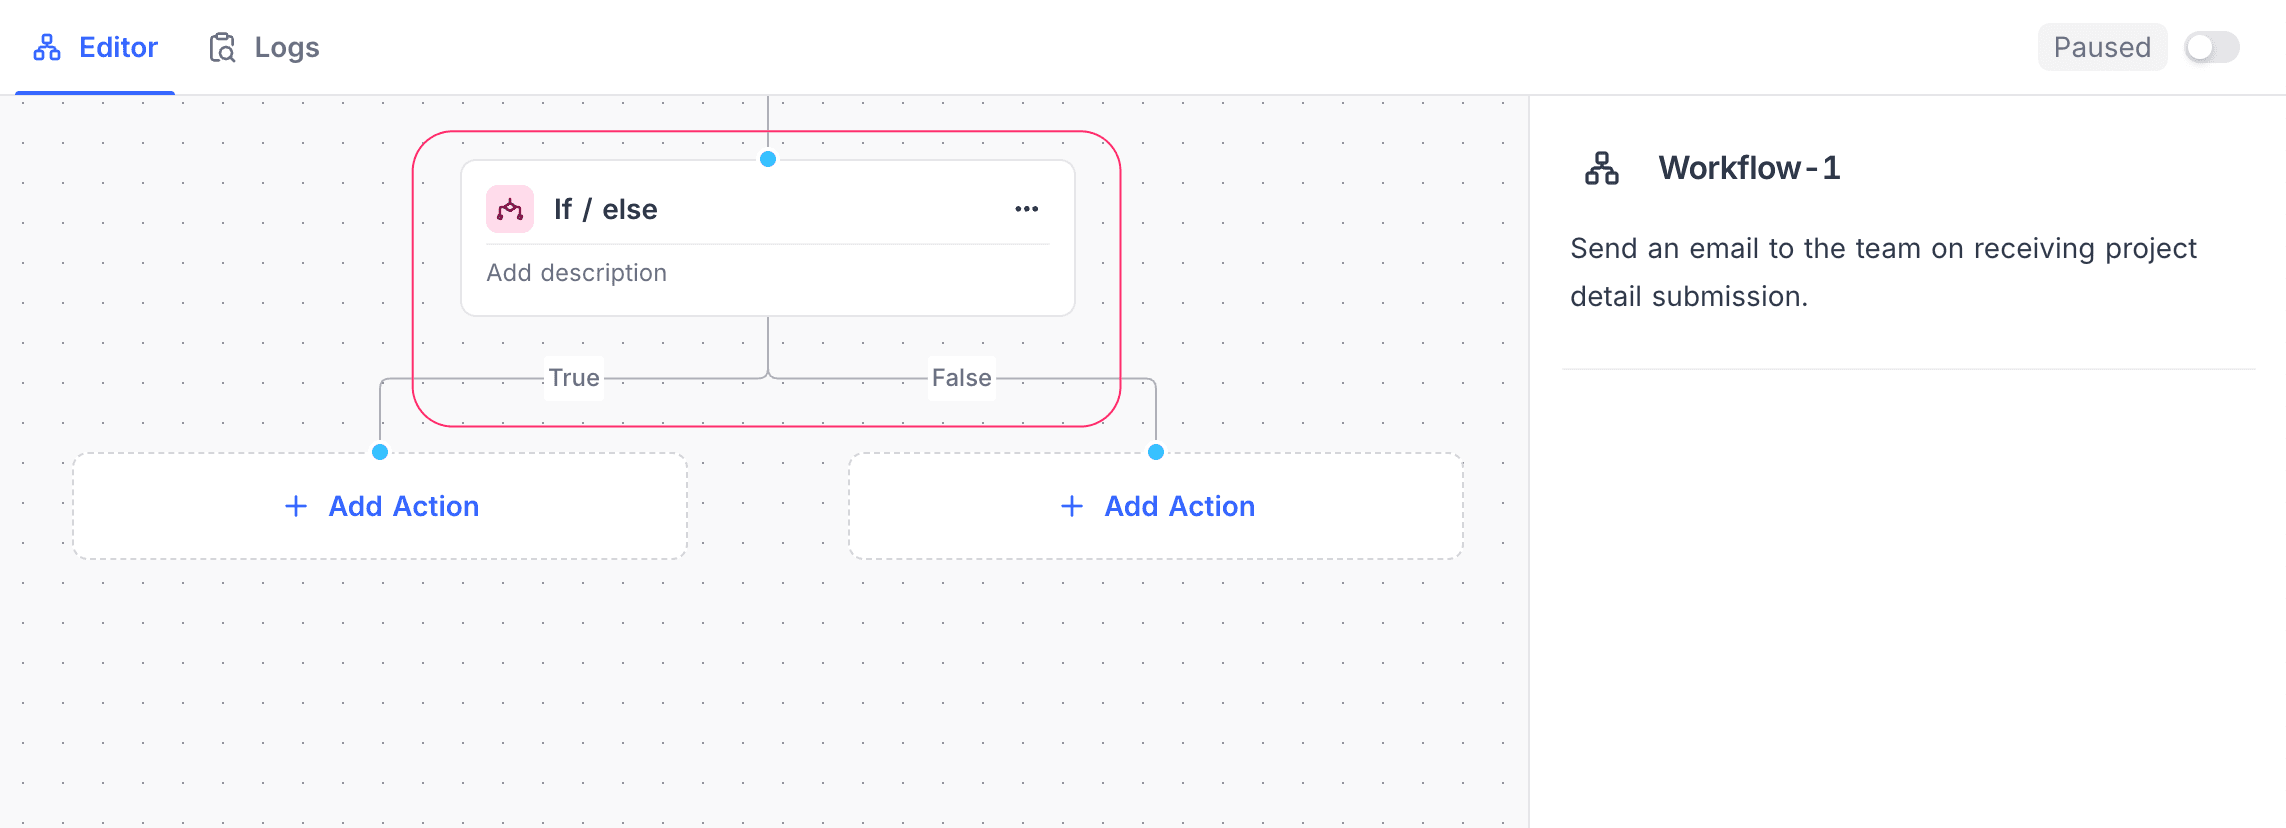
Include Flow control nodes: [Optional] Add flow control nodes to control the execution logic, such as:
- If / else: Branch on a condition, based on field values or runtime data
- Iterate: Do actions for each item in a list
- Delay: Pause execution for a specified time
- Wait until: Pause execution until a condition is true
-
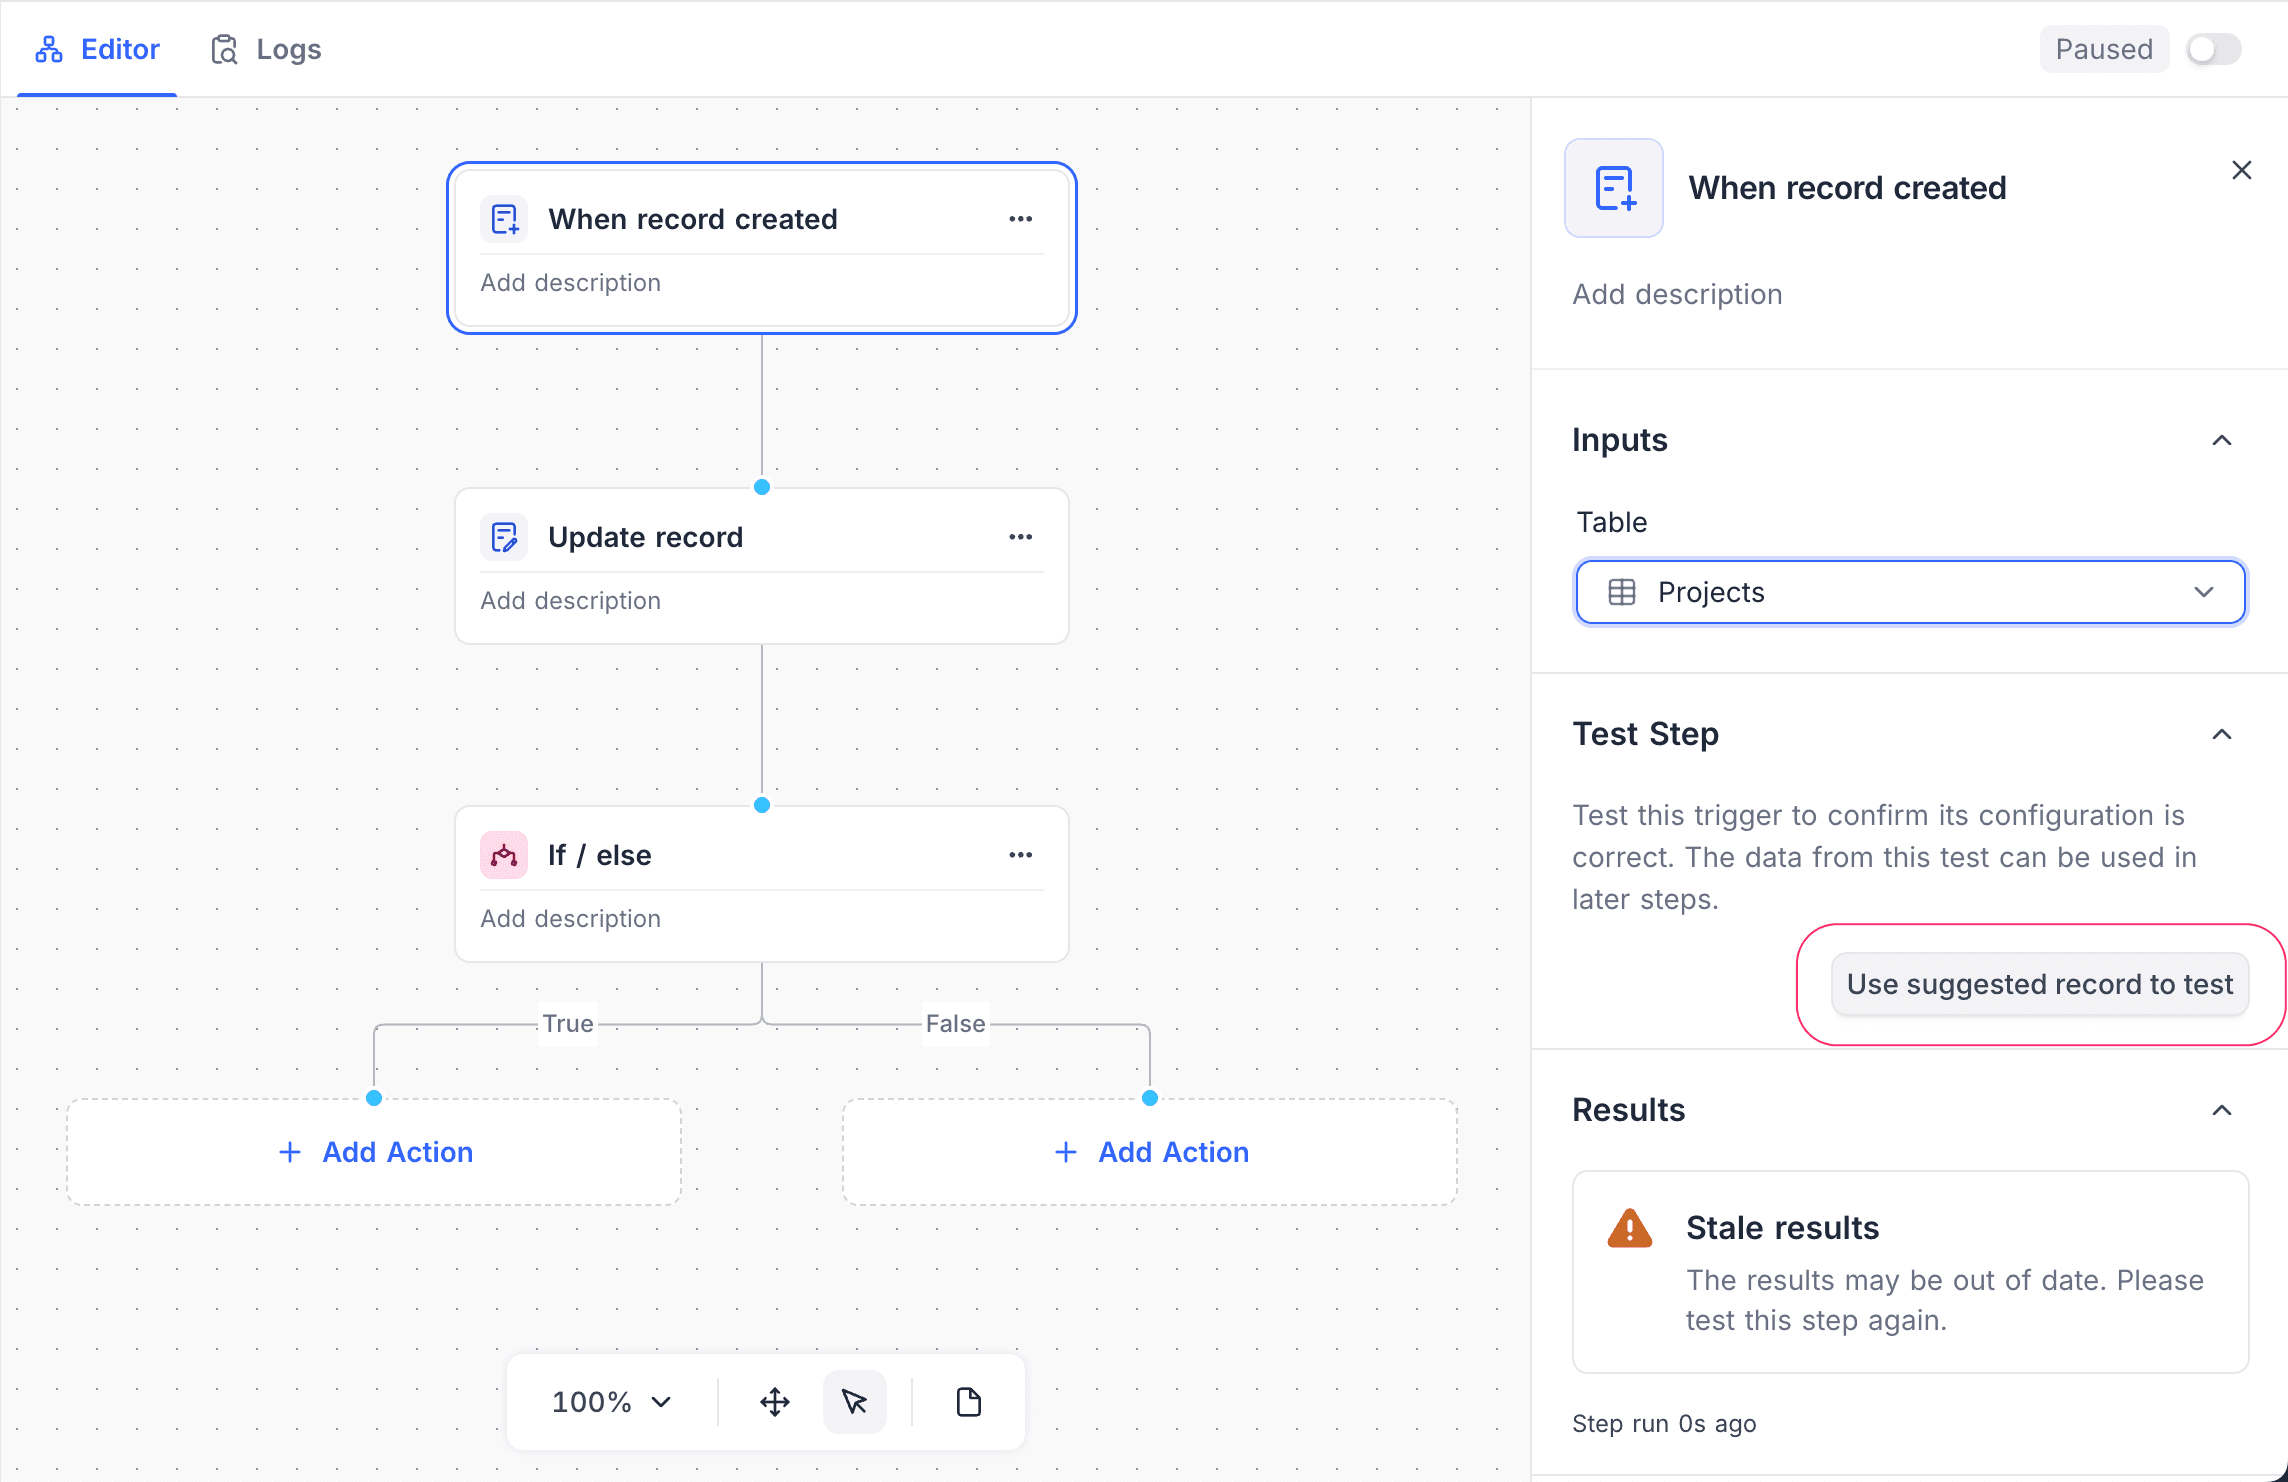
Test workflow: Use Test Step to test individual nodes. Make sure that each node has the correct configuration and works as expected.
-
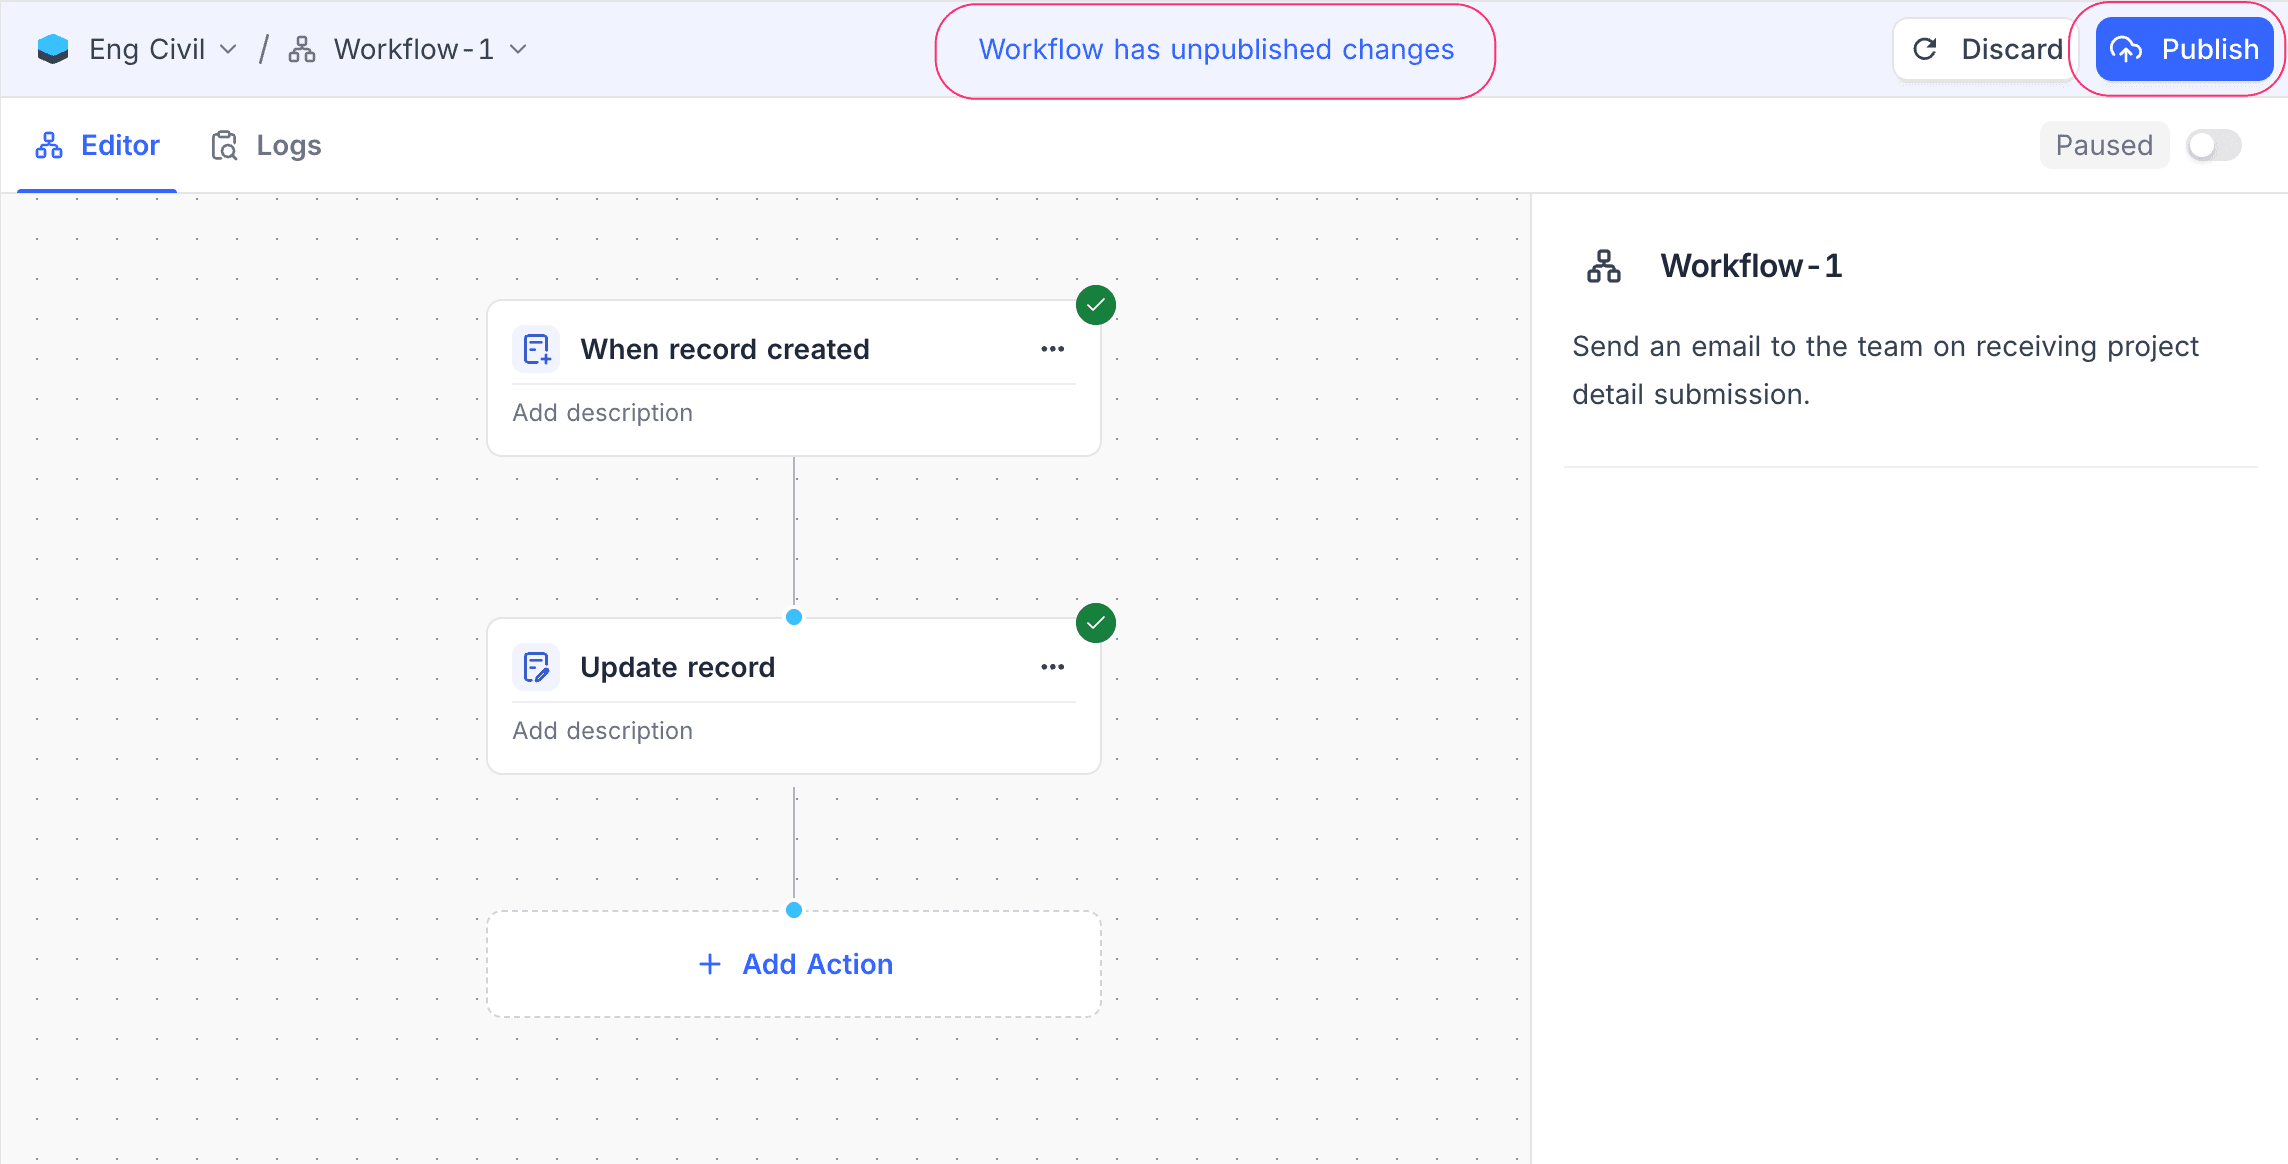
Publish workflow: When the configuration is correct, use the toggle button in the toolbar to enable the workflow. Then click Publish to save the changes. An enabled workflow runs automatically when it is triggered.
Availability
- Workflows are available on NocoDB Cloud (all plans) and on self-hosted deployments. The Community Edition includes 2 workflows per base. These workflows can use the record and manual triggers, the record action nodes, and the If and Iterate flow nodes.
- To use workflows, you must have the Creator role or a higher role in the base.
Last updated on