Expanded record
Learn how to expand a record & work with it in NocoDB.
Overview
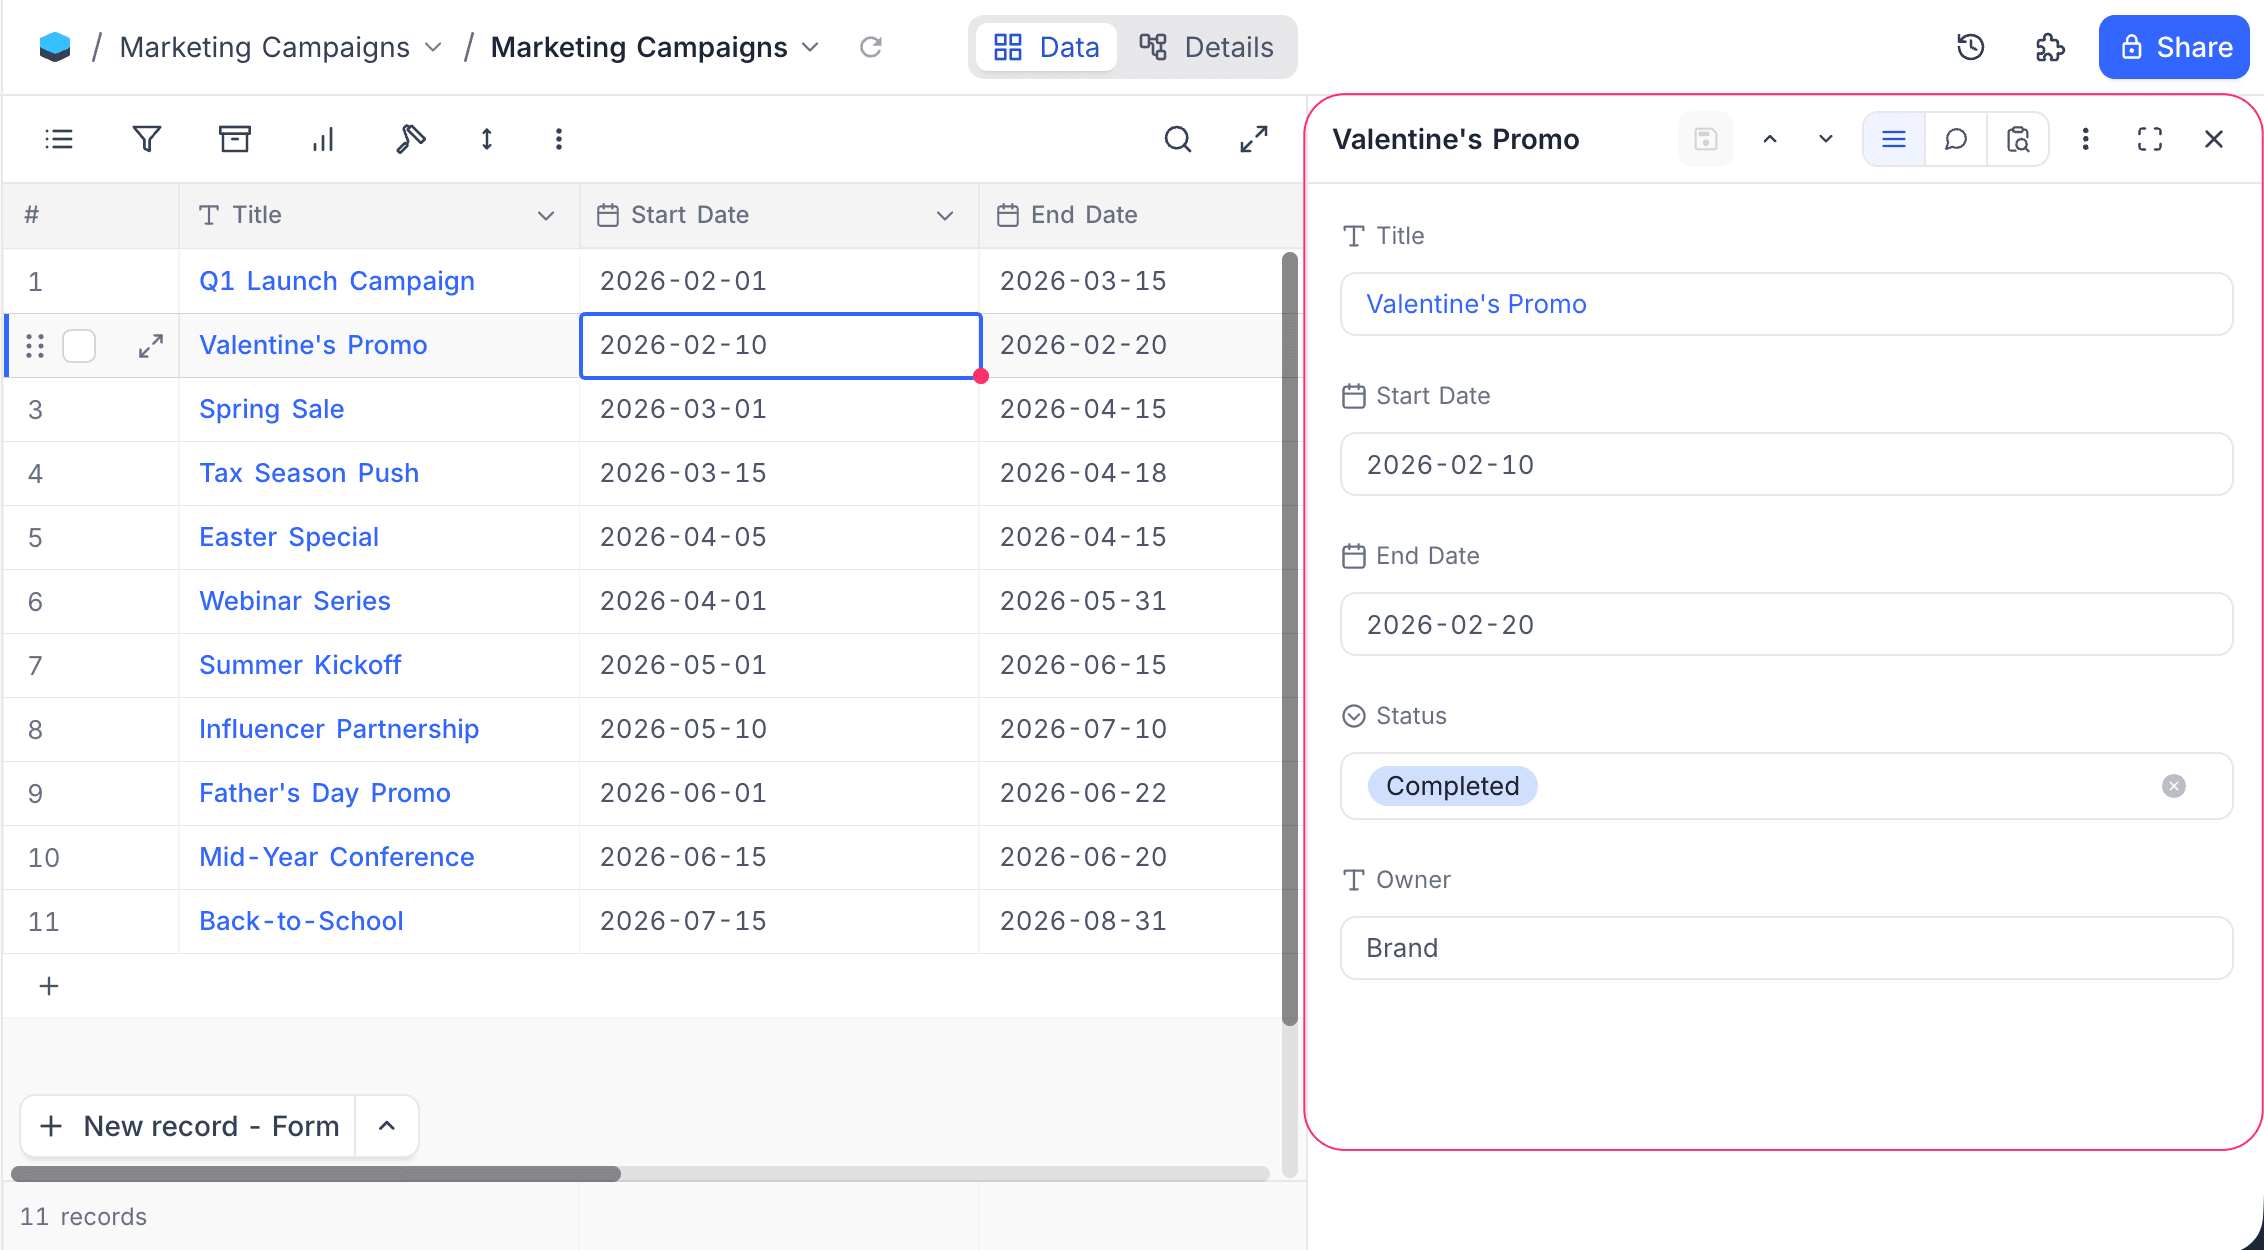
The expanded record opens by default as a side panel to the right of the grid, so you can keep the underlying data in view while editing a record, reading comments, or scanning revision history. From the side panel you can also enter fullscreen mode when you need the full editing surface, with file preview and discussion modes available in that layout.
Expanding a Record
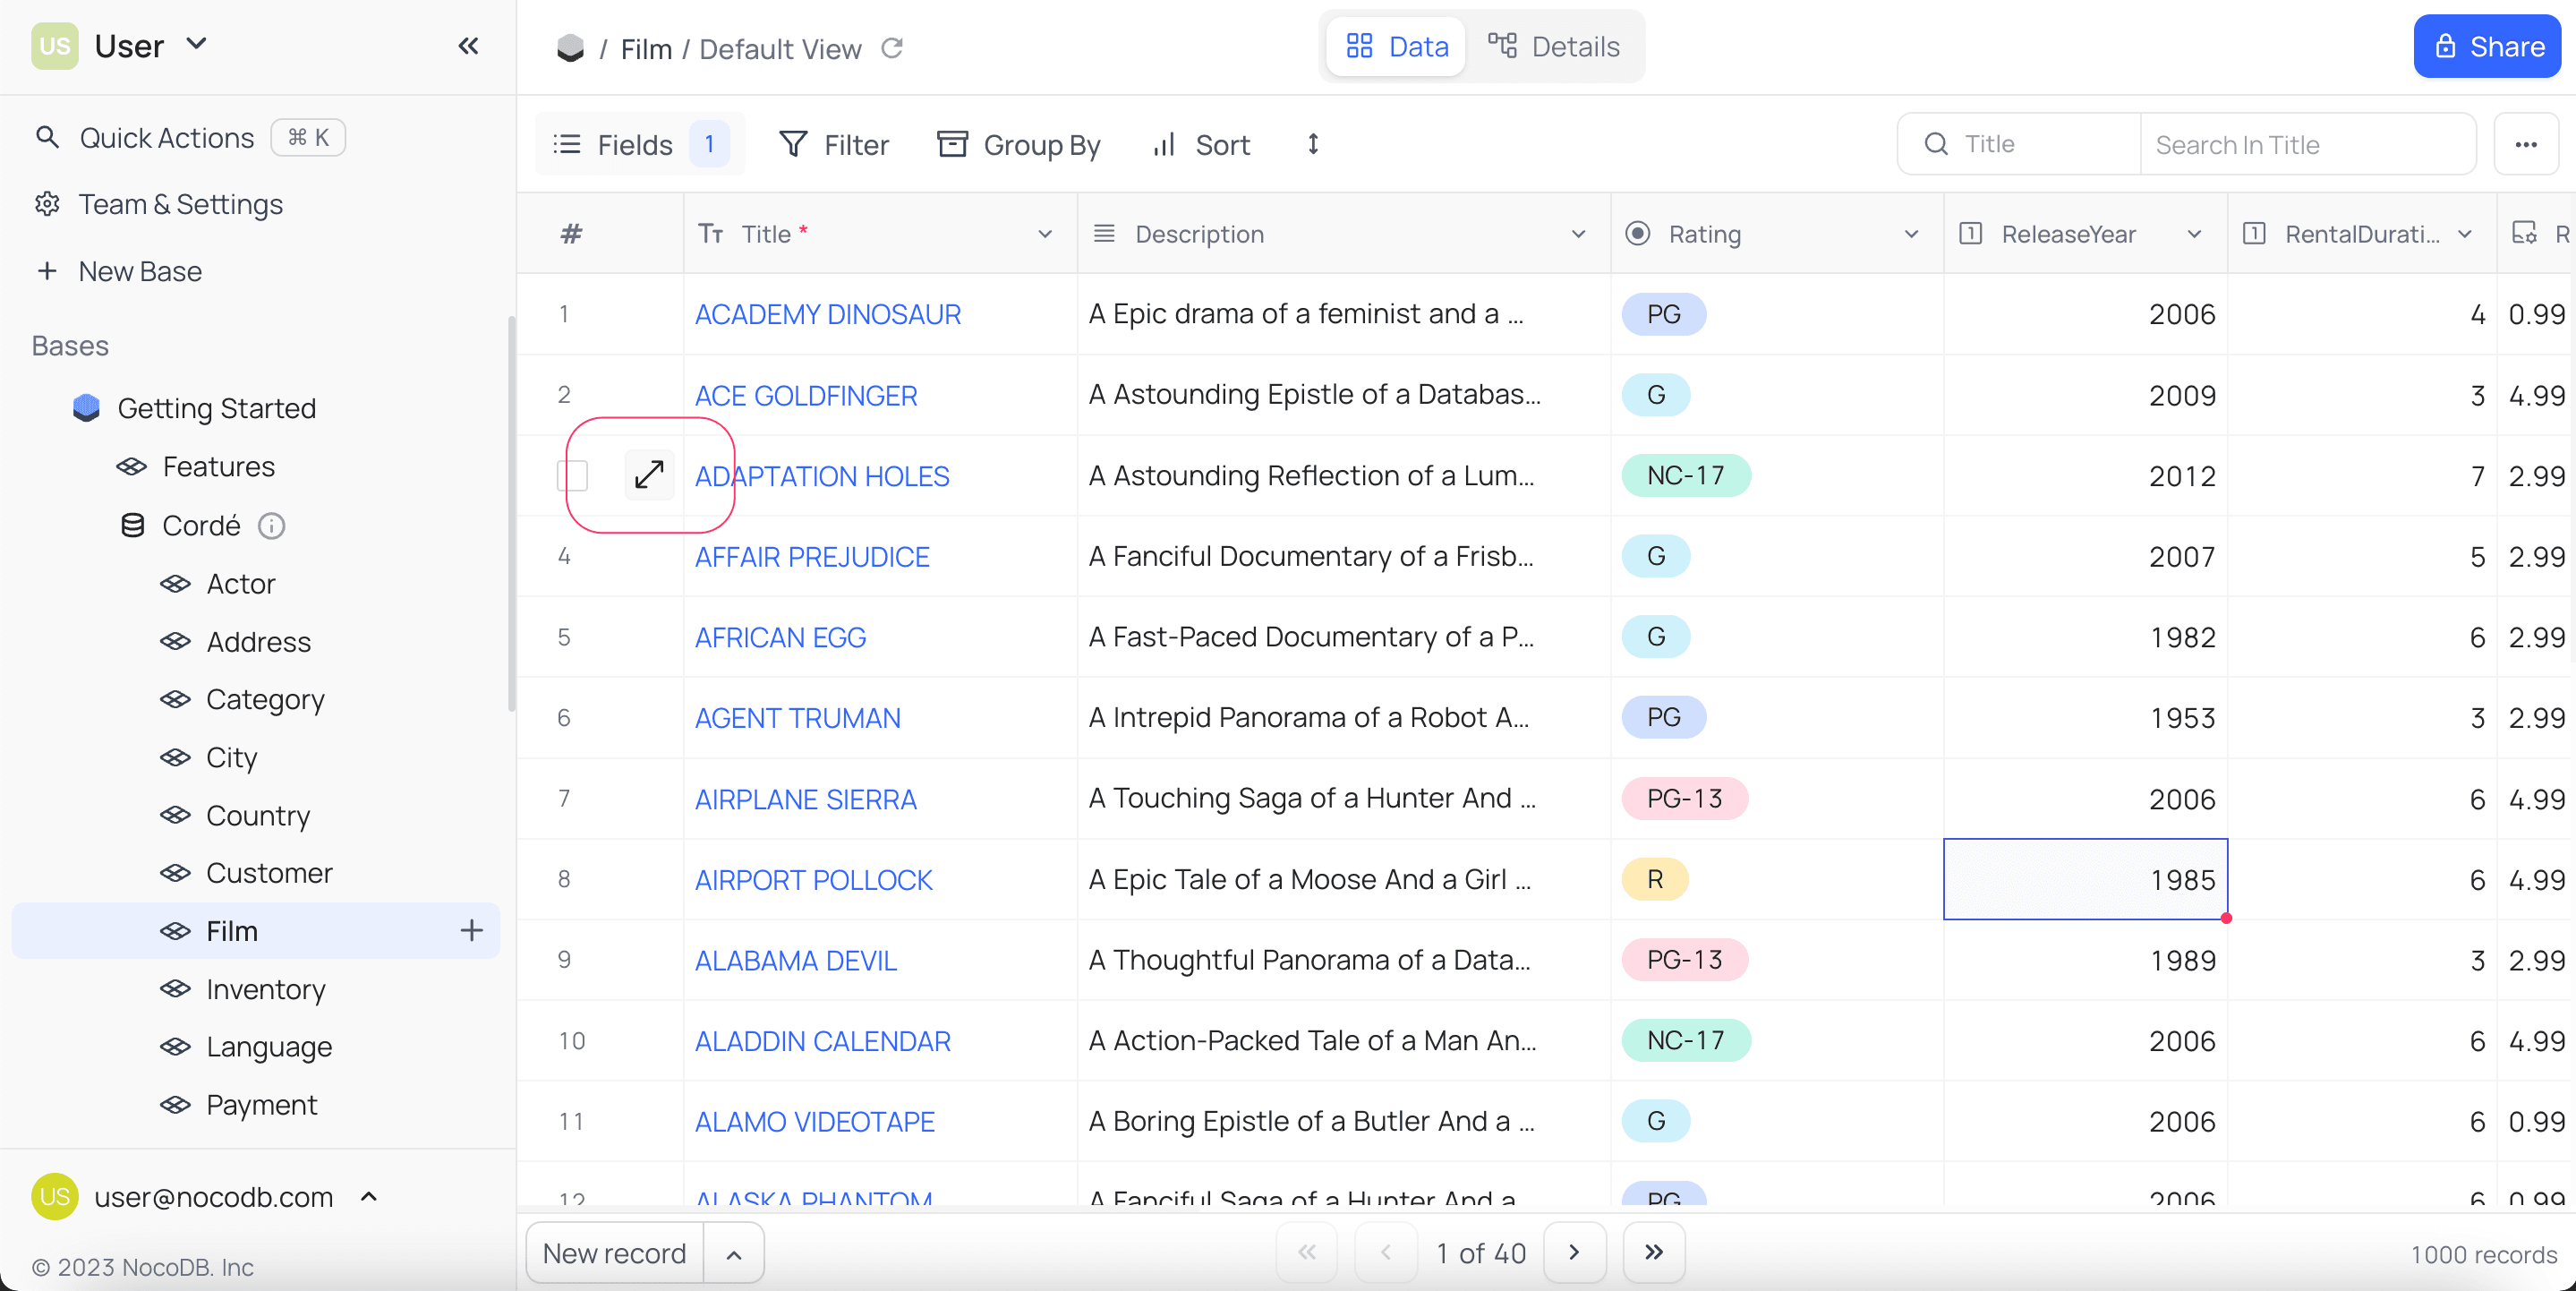
To expand a record in a grid view, hover over the index column (first column) and click the expand icon.
Space on any selected cell to expand the associated record.The panel slides in from the right and is resizable via the handle on its left edge. The width is remembered across sessions.
Edit record
The Fields tab lists every field of the record in a single column. Each field is labelled and rendered with the editor that matches its type.
- Click any field to edit it. The Save button in the header activates once there are pending changes.
- Hidden fields collapse into a Show hidden fields toggle at the bottom of the list, useful when most fields are usually hidden from the grid.
- Use the Previous / Next buttons in the header to walk through records without closing the panel.
- Edits to links (link / unlink) are buffered along with field-value edits and committed together when you click Save, so nothing is persisted until you save the record. (Inline link editing directly from the grid still applies immediately.)
Side Panel Header
The header at the top of the side panel groups all record-level controls:
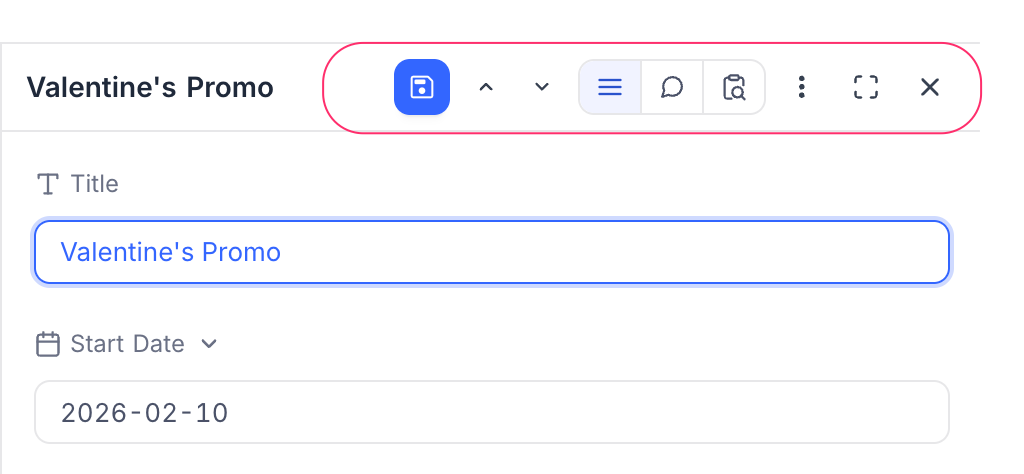
| Control | Behaviour |
|---|---|
| Record title | Shows the display value of the open record. Reads New Record when creating a new entry. |
| Save | Saves edits or creates the record when in new-record mode. |
| Previous / Next | Step to the previous or next record in the current view, respecting filters, sorts, and grouping. |
| Fields / Comments / Revision History | Segmented switch that swaps the panel body between the field list, comments thread, and revision history. |
More options (...) | Per-record actions: Copy Record URL, Send Record ☁, Duplicate record, Delete record. See Record Actions. |
| Enter / Exit fullscreen | Toggles the fullscreen layout described below. |
| Close | Closes the panel. |
Record Audit
The Revision History tab shows every change made to the record, including who made the change and when.
- Click the Revision History icon in the header switch.
- The audit trail loads in the panel body, ordered newest first.
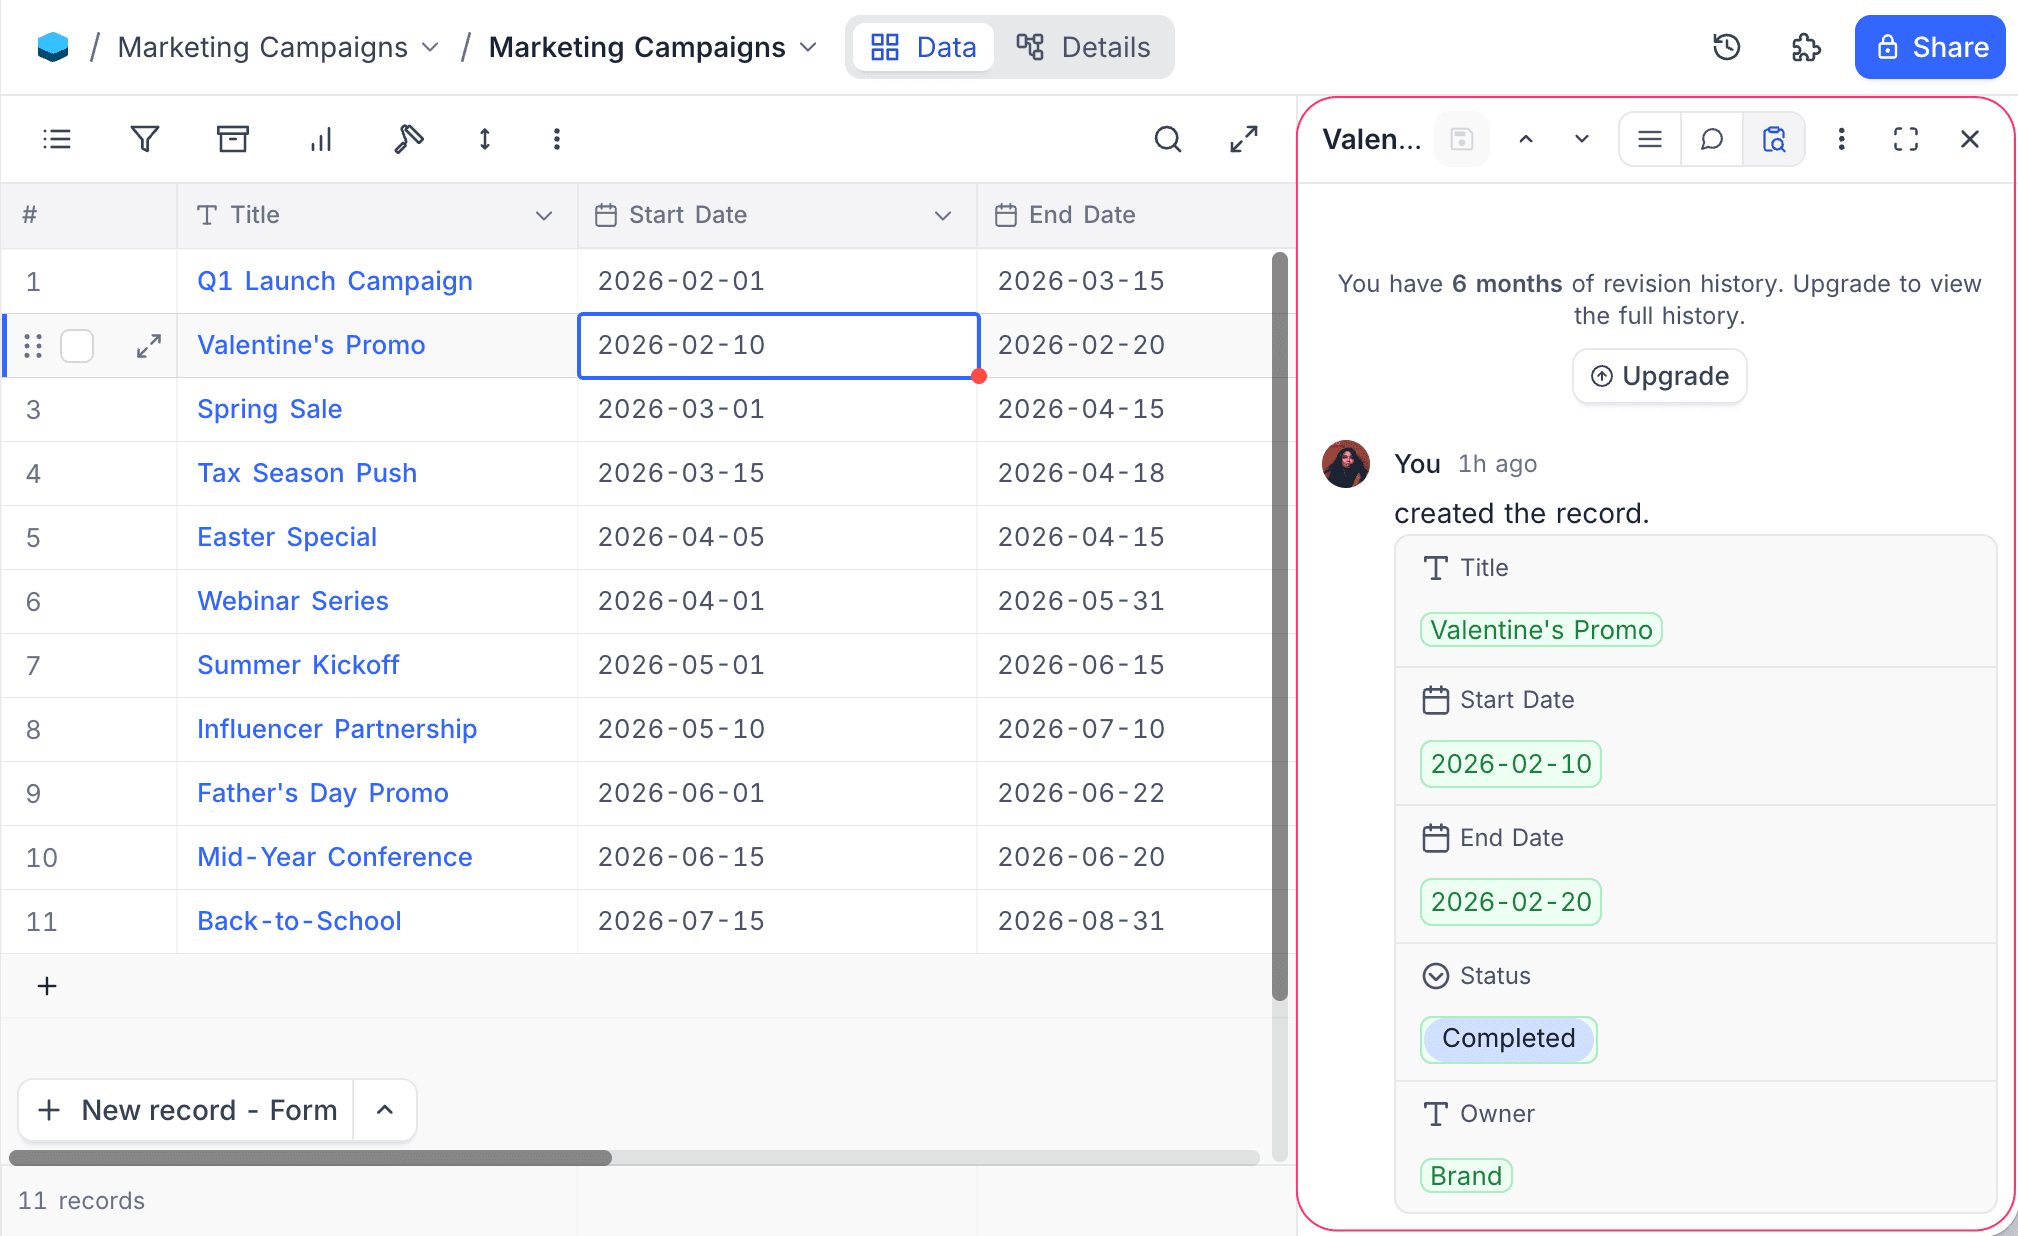
- Revision history is read-only — you cannot edit or delete entries.
- The amount of history retained depends on your workspace plan.
Record Comment
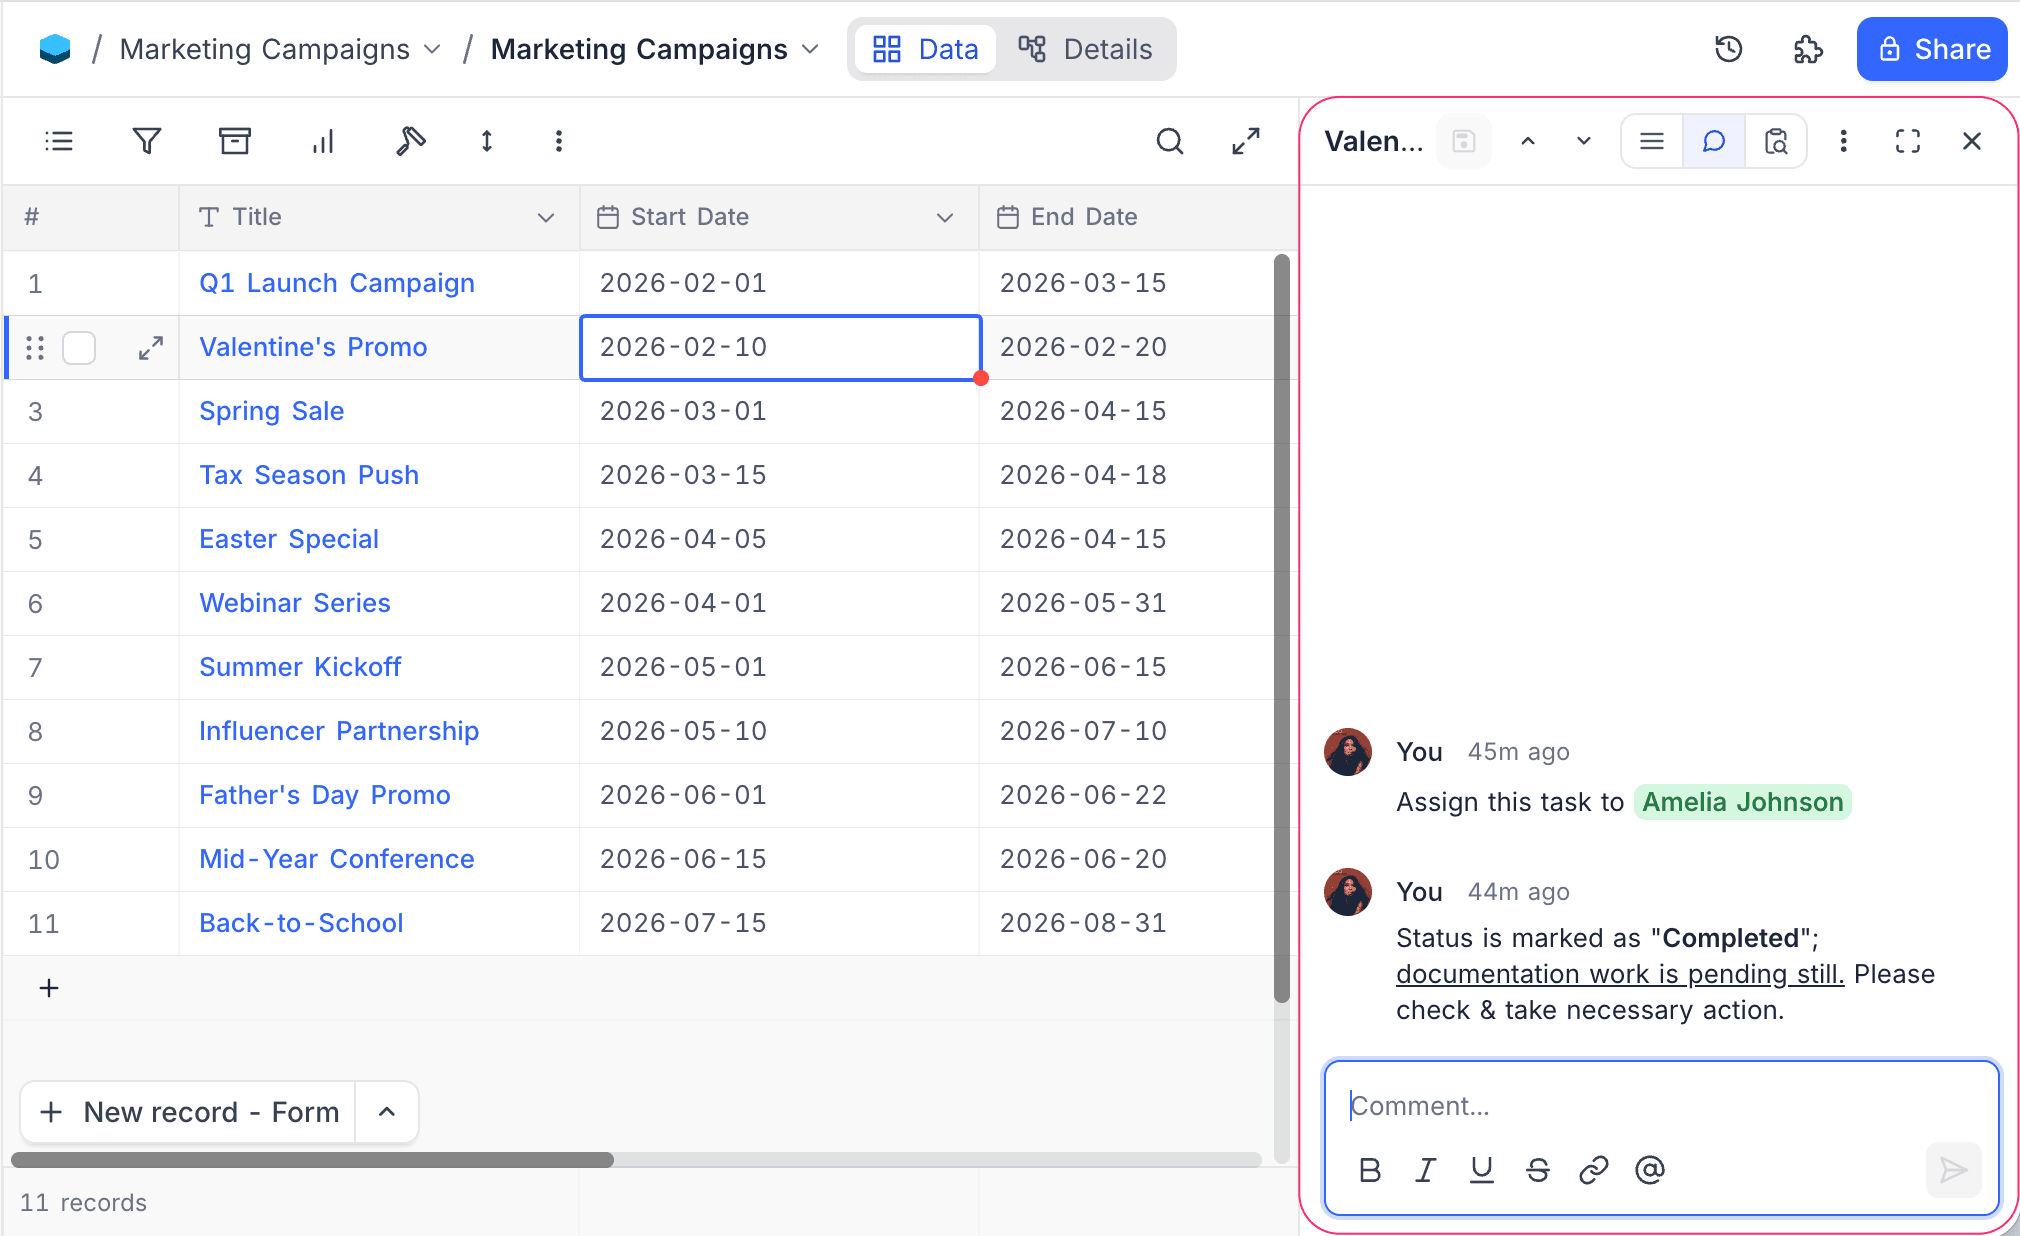
The Comments tab opens the record's comments thread inside the panel, so you can discuss the record while keeping the grid visible. You can also receive notifications for updates, ensuring everyone stays informed in real time.
Add Comment
- Click the Comments icon in the header switch.
- The thread loads in the panel body, with the composer pinned to the bottom.
- Type a comment and press
Enterto post.
Edit Comment
Hover any comment you posted to reveal the ... options menu on the right, then choose Edit, Copy URL, or Delete.
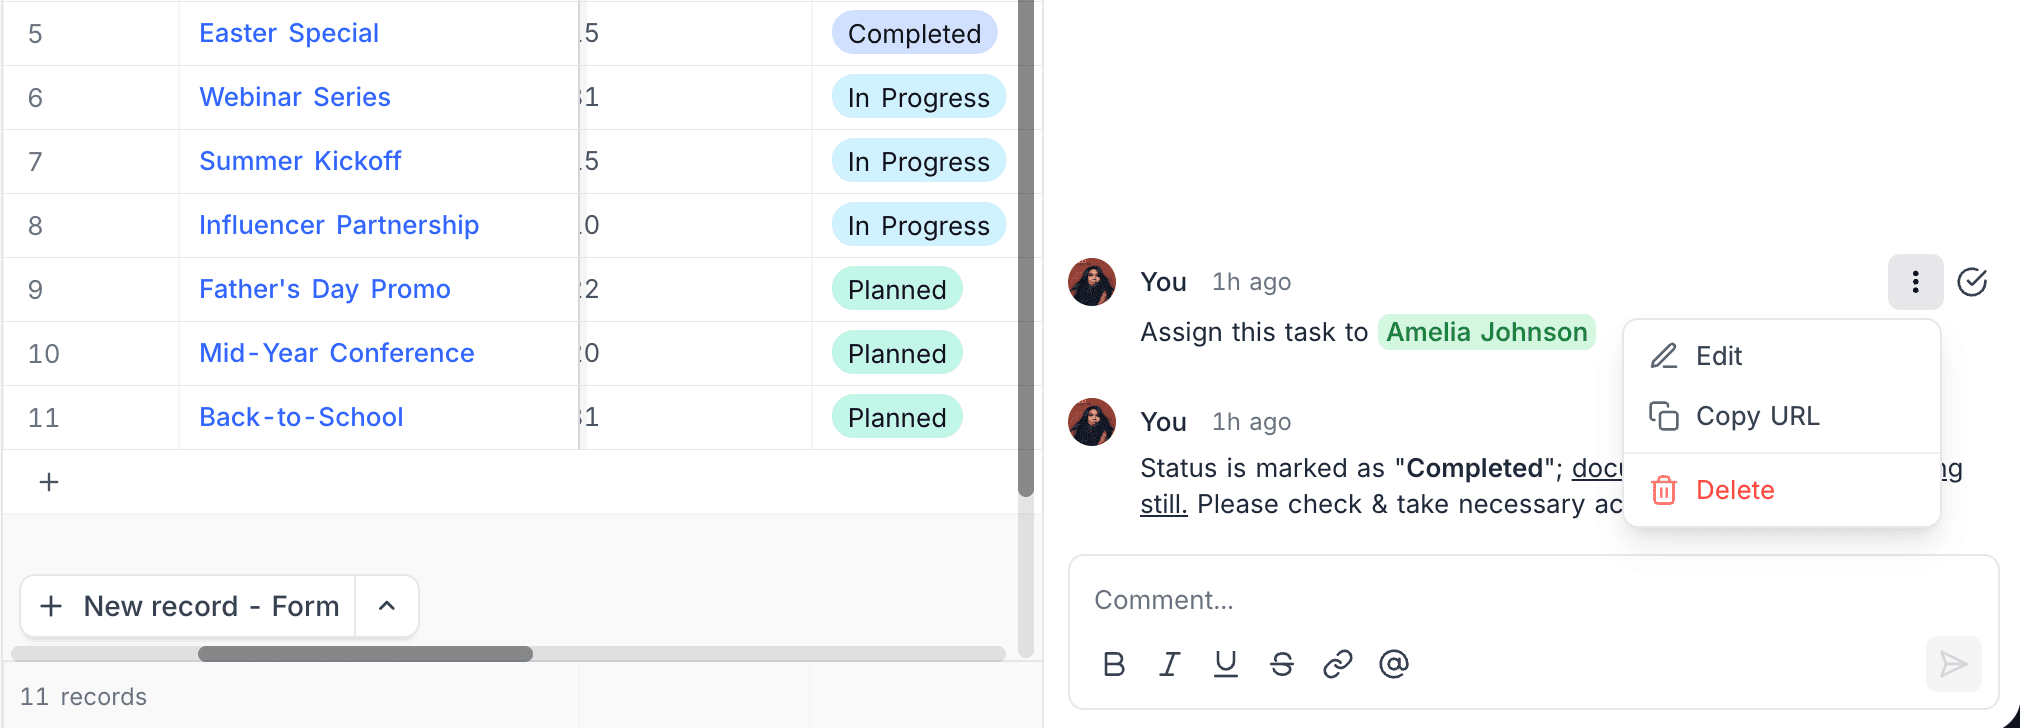
To edit:
- Click Edit from the menu.
- Update the text.
- Click Save, or press
Enter, to commit the change.
Copy URL copies a deep link to the comment that opens the record and scrolls the thread directly to this entry. Delete removes the comment after confirmation.
Resolve Comment ☁
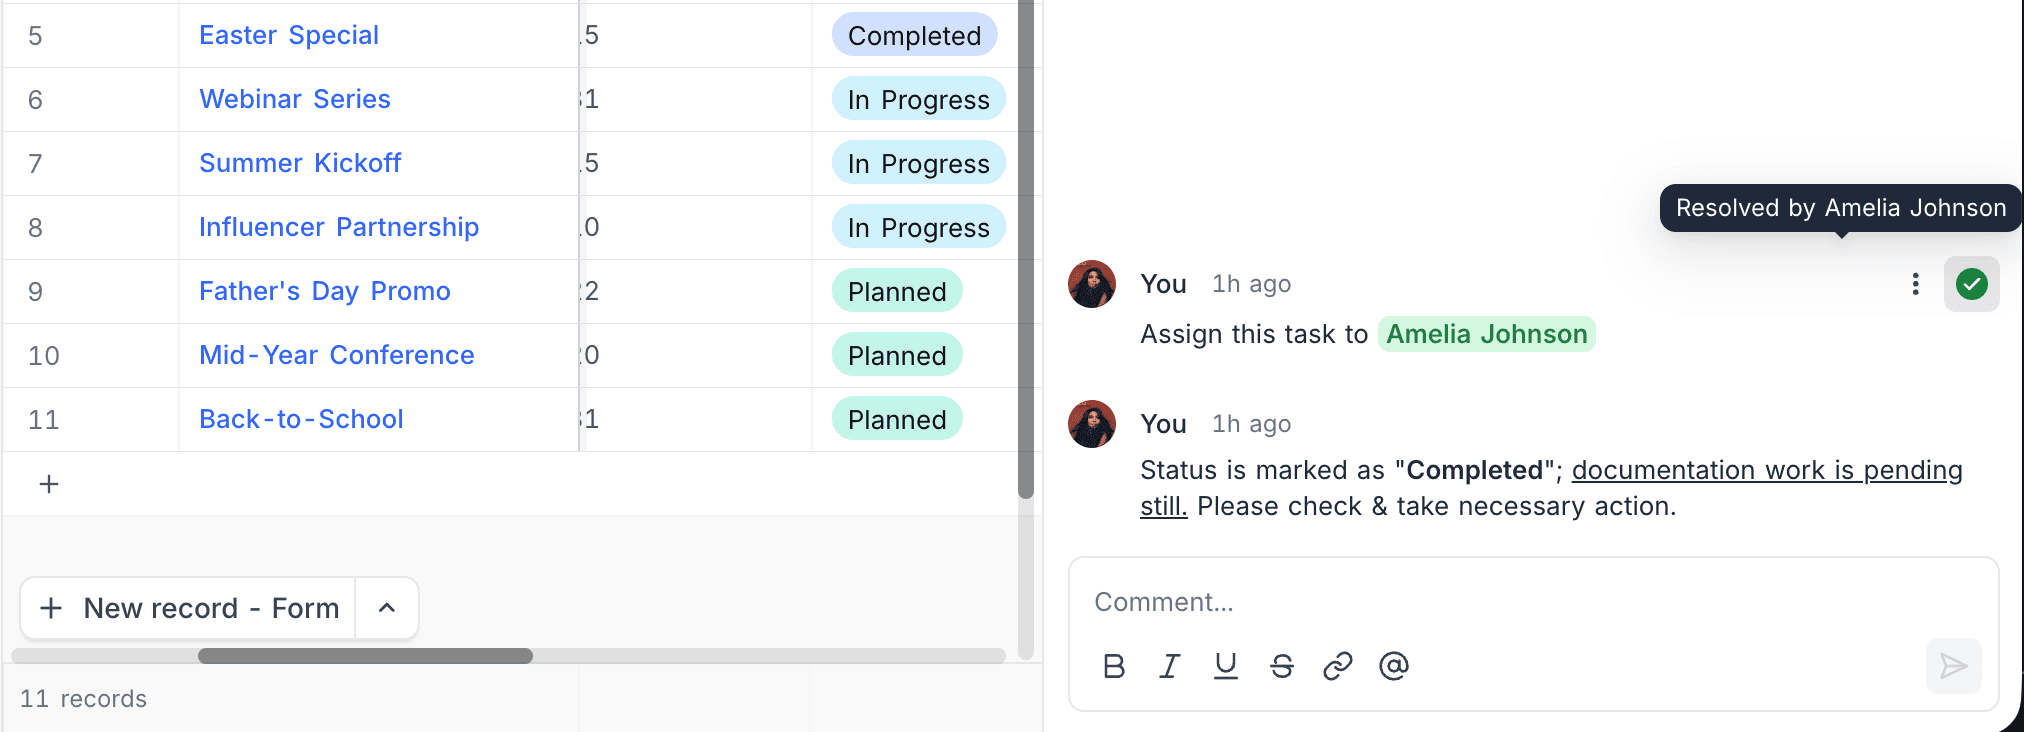
Hover a comment and click the green tick icon to mark the thread as resolved. Resolved comments display a tooltip showing who resolved them (e.g. Resolved by Amelia Johnson). Click the tick again to unresolve.
Attach Files to a Comment ☁
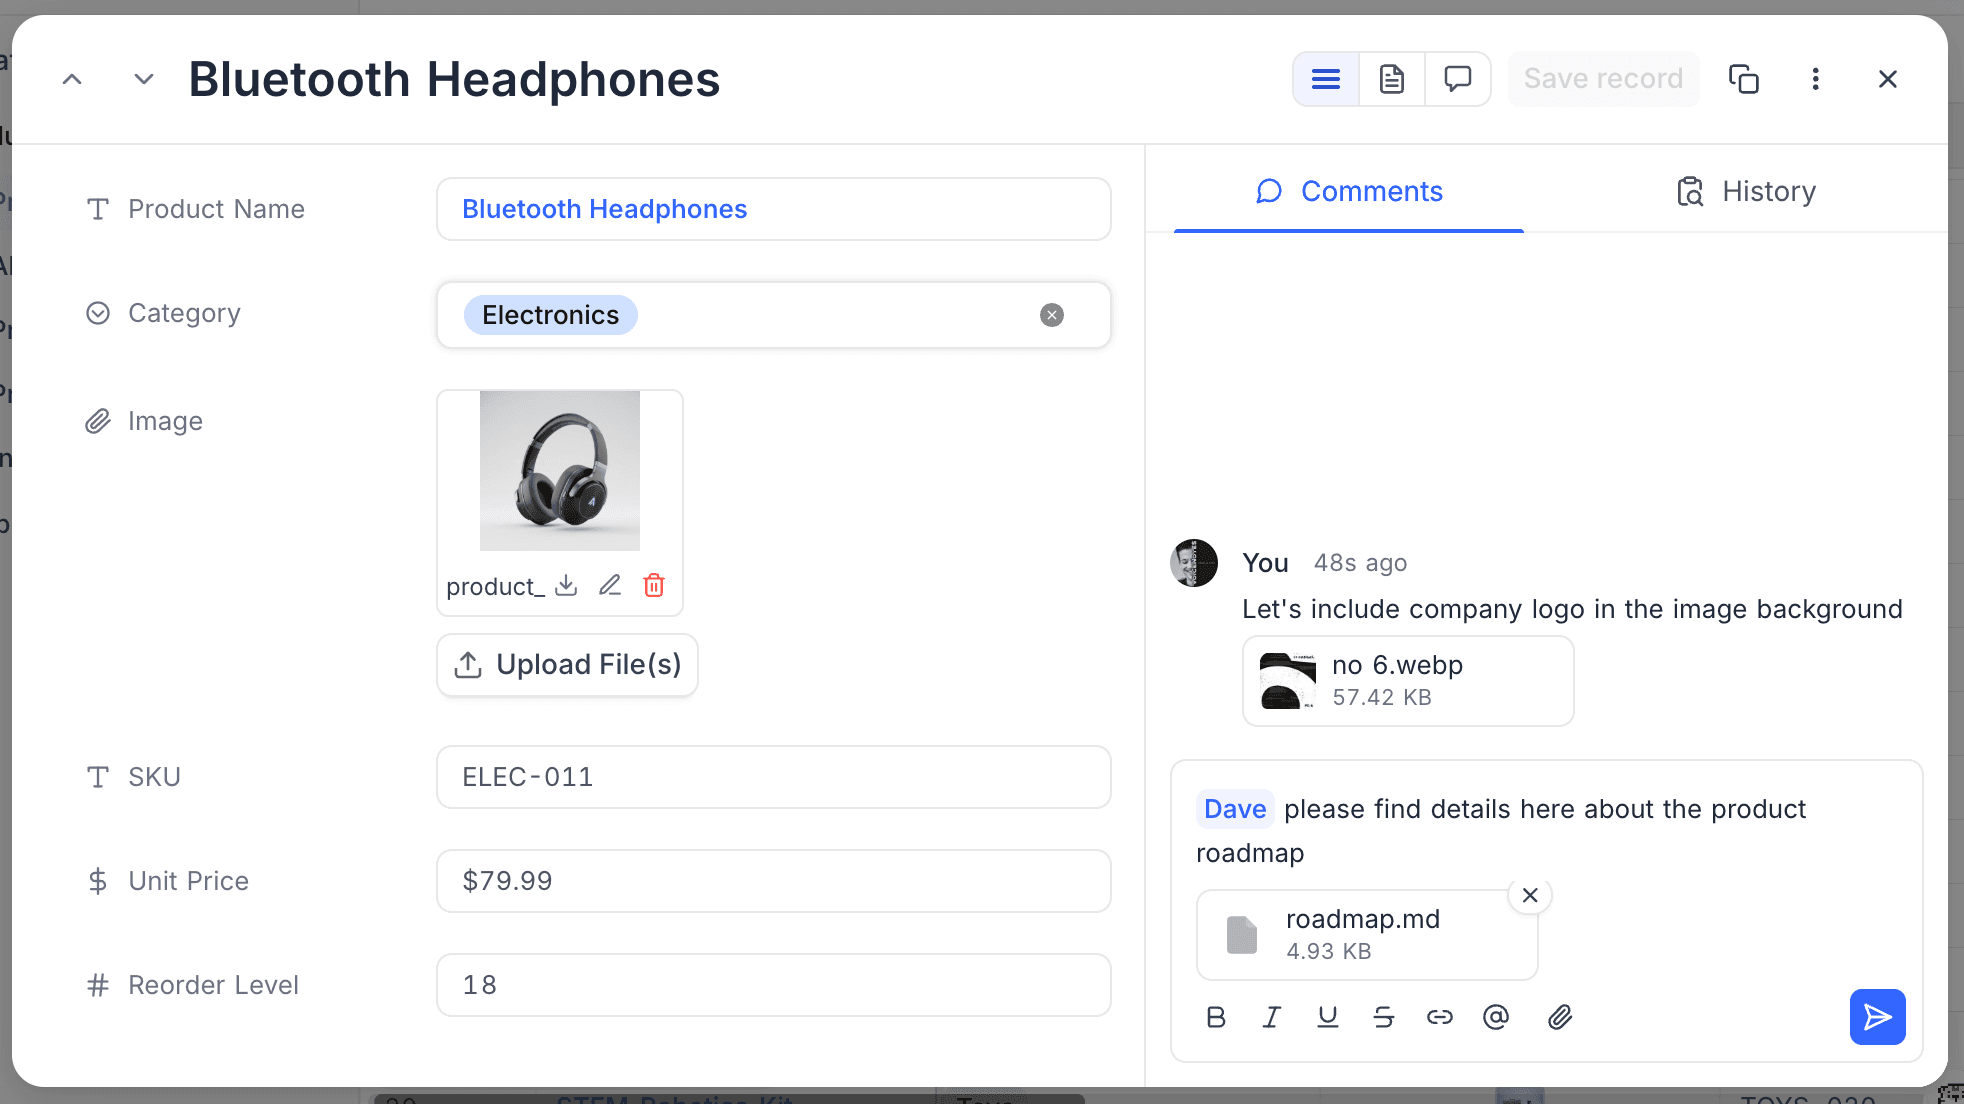
You can attach files to a comment to share screenshots, documents, or other context alongside your message.
- In the comment composer, click the Attach File (paperclip) icon to pick files. You can also paste an image from your clipboard or drag and drop files onto the composer.
- Selected files appear as a strip above the composer, each showing a thumbnail or file-type icon and its size. Click the remove icon on a file to drop it before sending.
- Post the comment to upload and attach the files.
Comment attachments are served through an authenticated link and are only visible to members who can read the record's comments.
Annotate an Image ☁
Image annotations let you anchor a comment to an exact point or region on an image attachment, so feedback points to precisely what you mean.
To add an annotation:
- Open an image attachment in the full-screen carousel.
- Click once to drop a pin on a point, or drag to draw a rectangle around a region.
- Type your comment in the box that appears and post it.
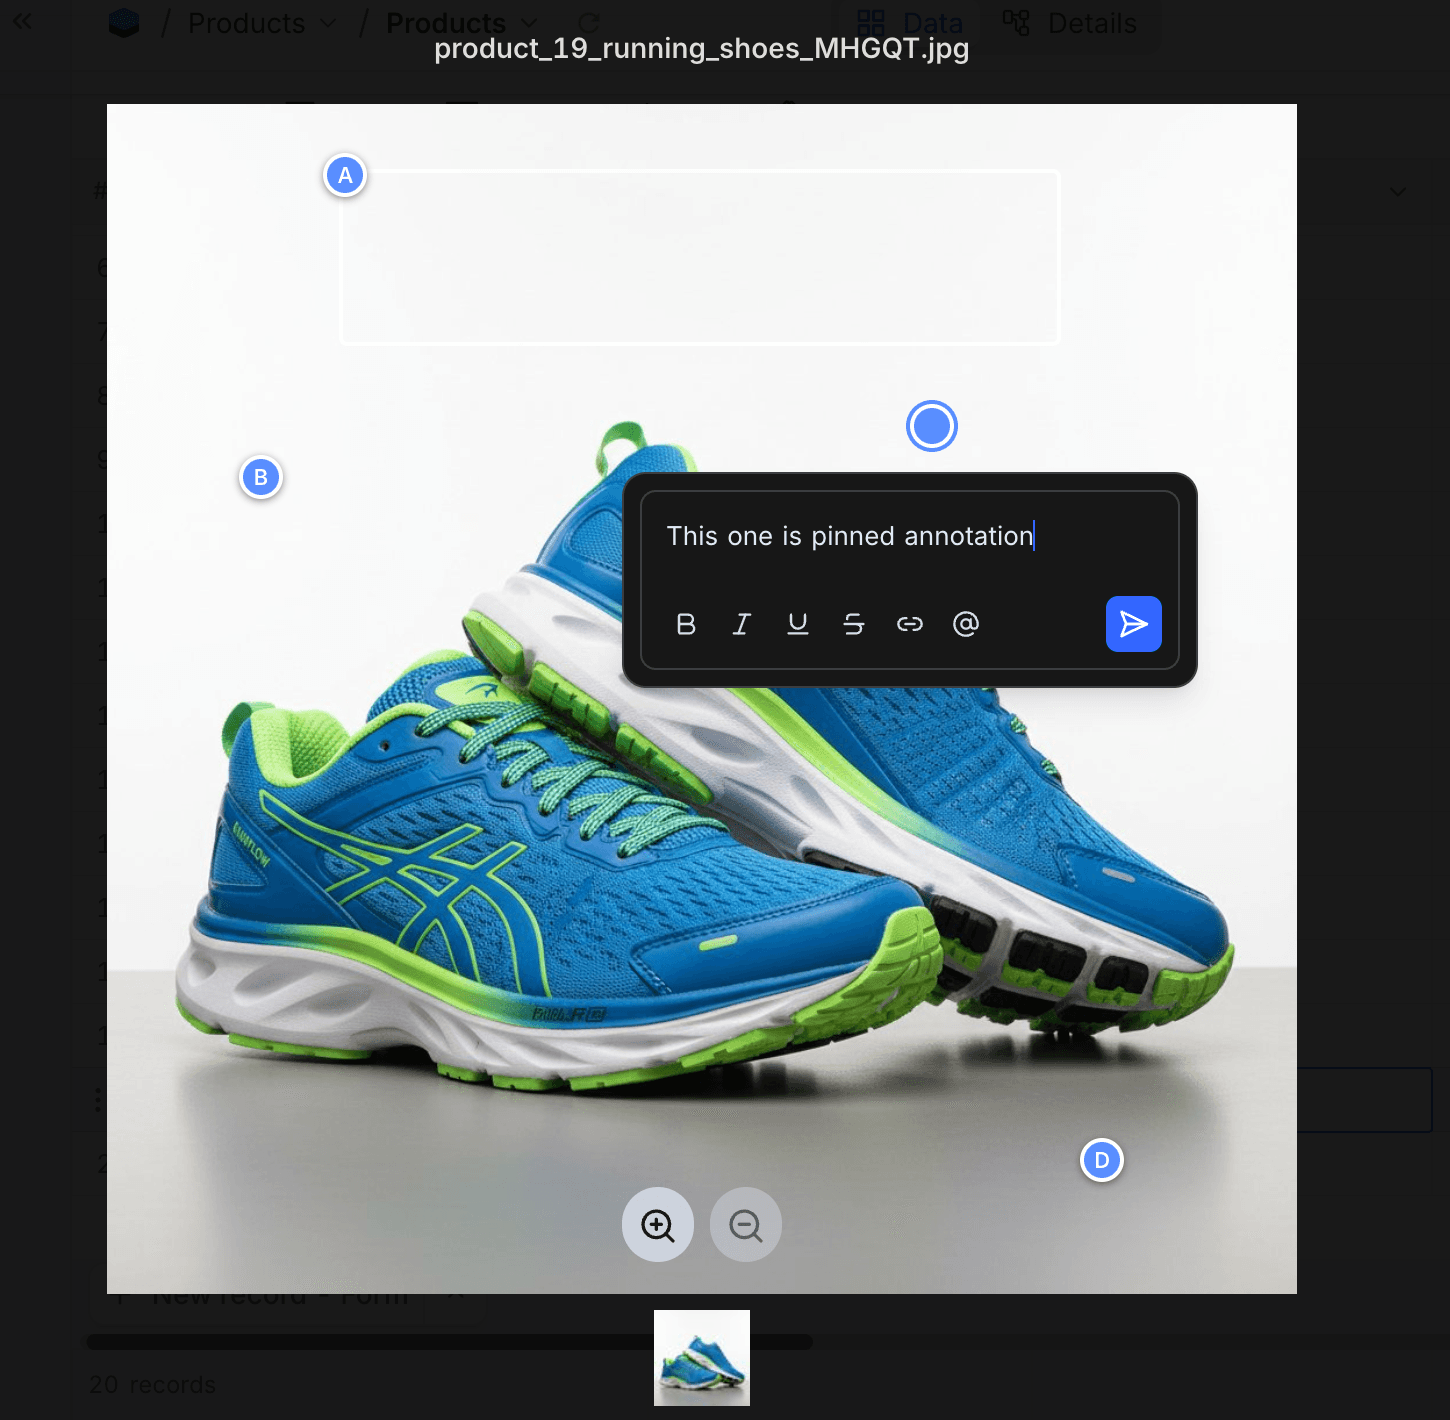
Each annotation is labelled with a letter (A, B, C, ...) in the order it was created on that image, and the pin or rectangle stays anchored to the same spot at any zoom level. Replies you add stay threaded under the original annotation.
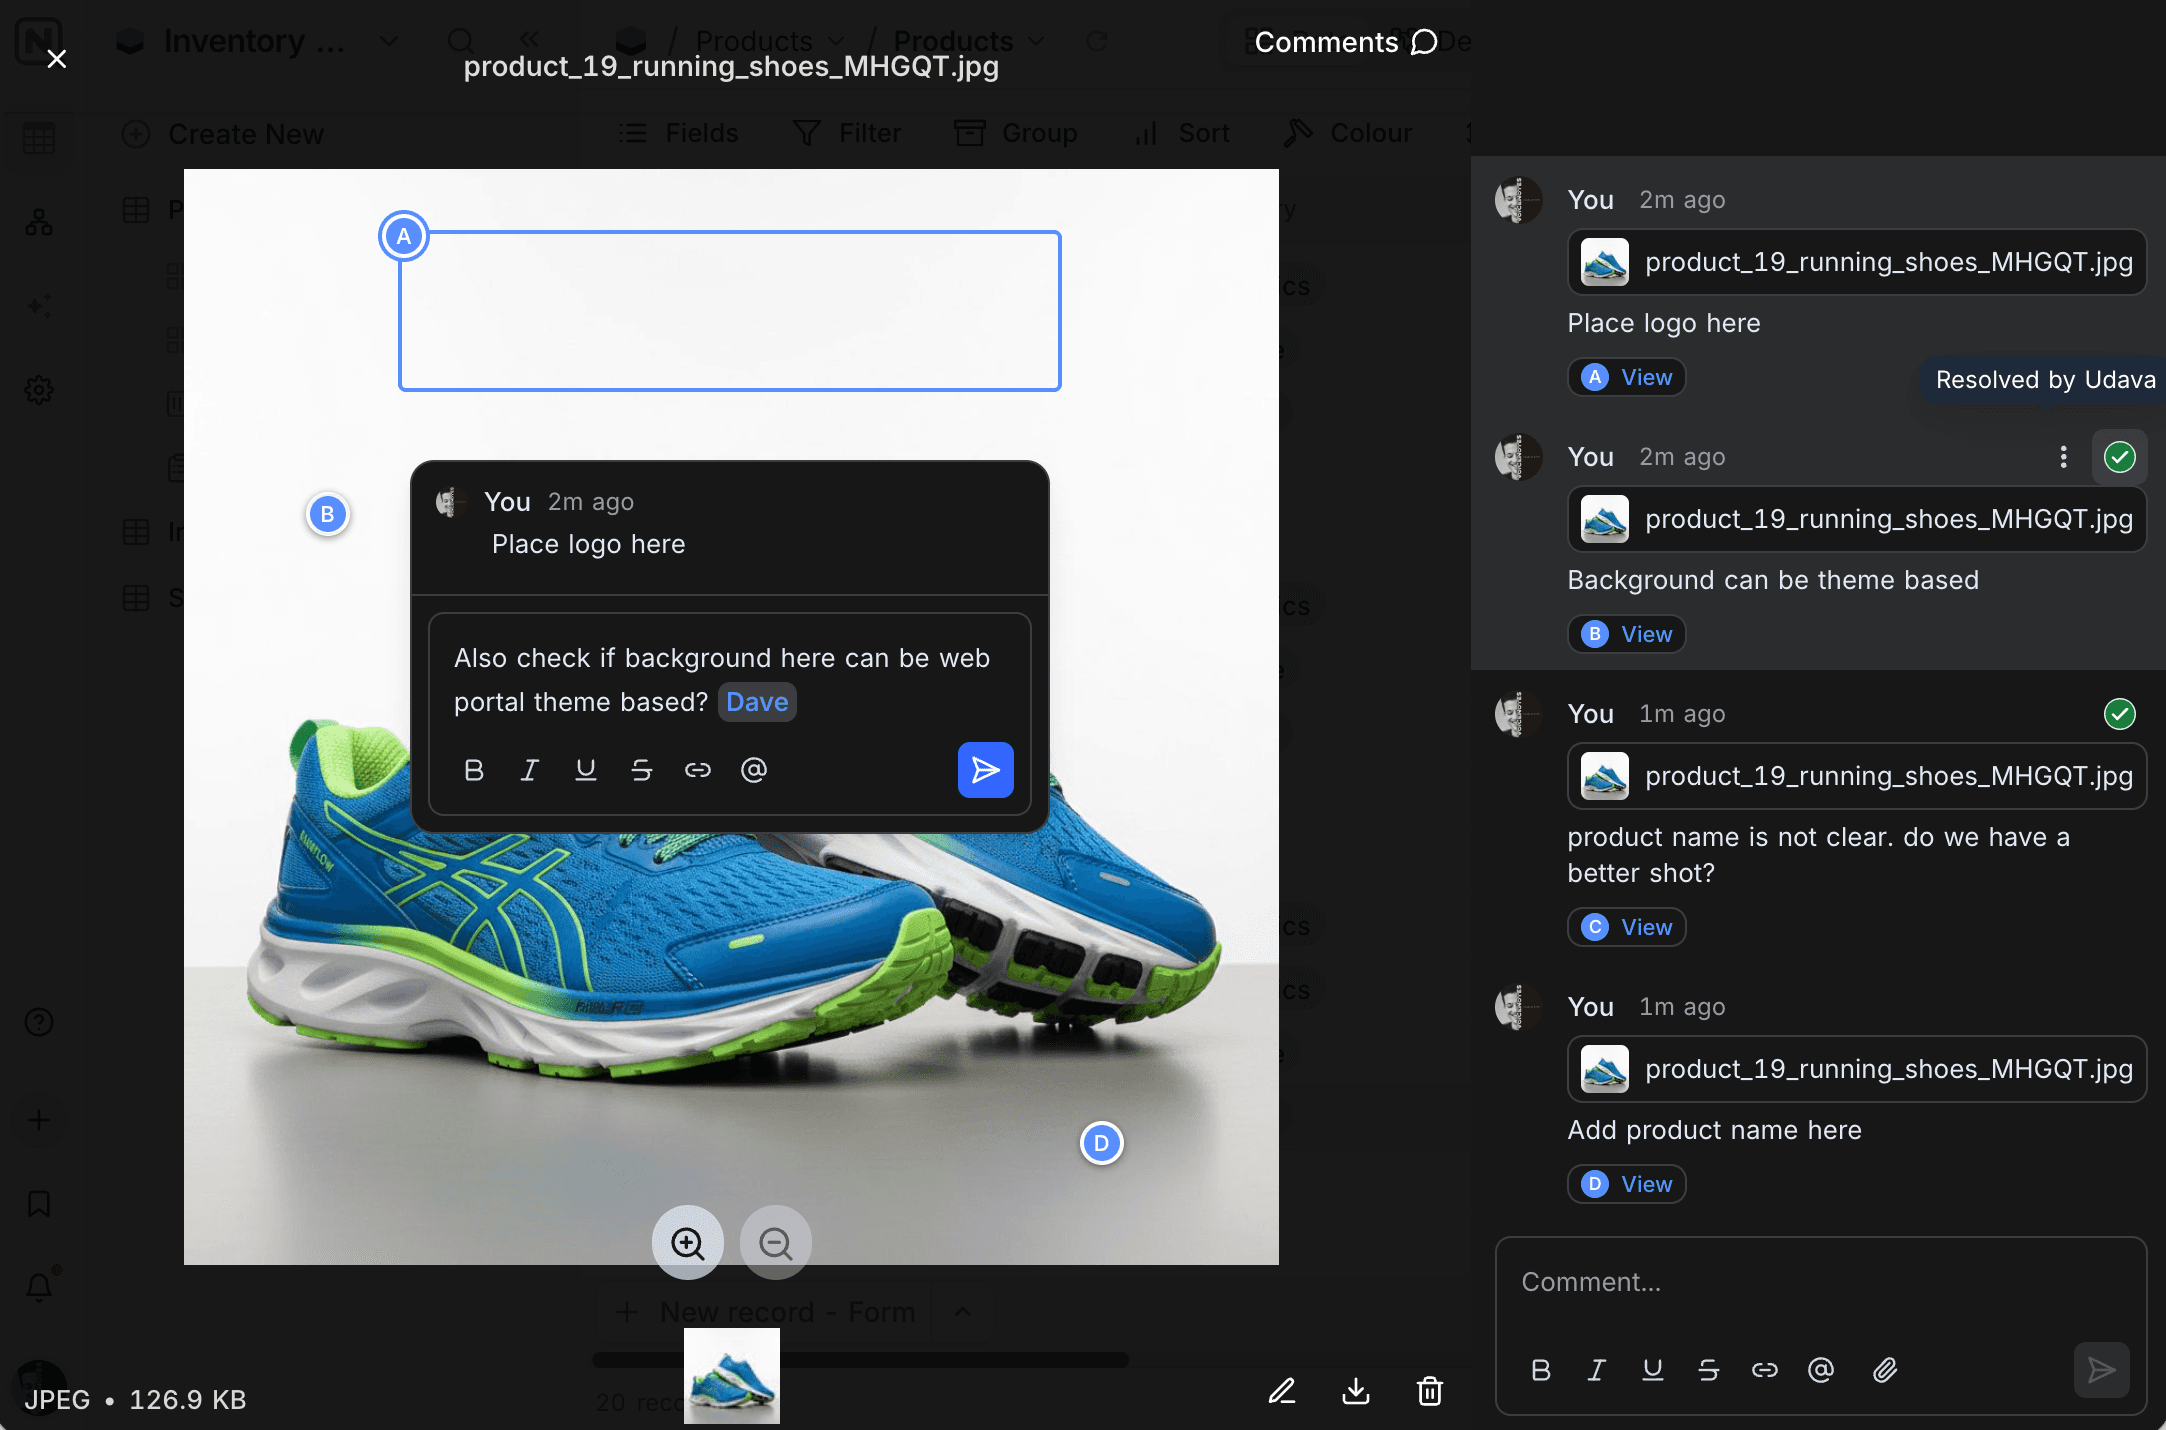
Annotations are ordinary comments, so they also appear in the record's Comments tab with a thumbnail and the file name. Click View on an annotation comment to reopen the carousel focused on that region. You can edit or delete an annotation comment like any other comment; the anchored region itself is set when you create the annotation and cannot be moved or resized afterwards.
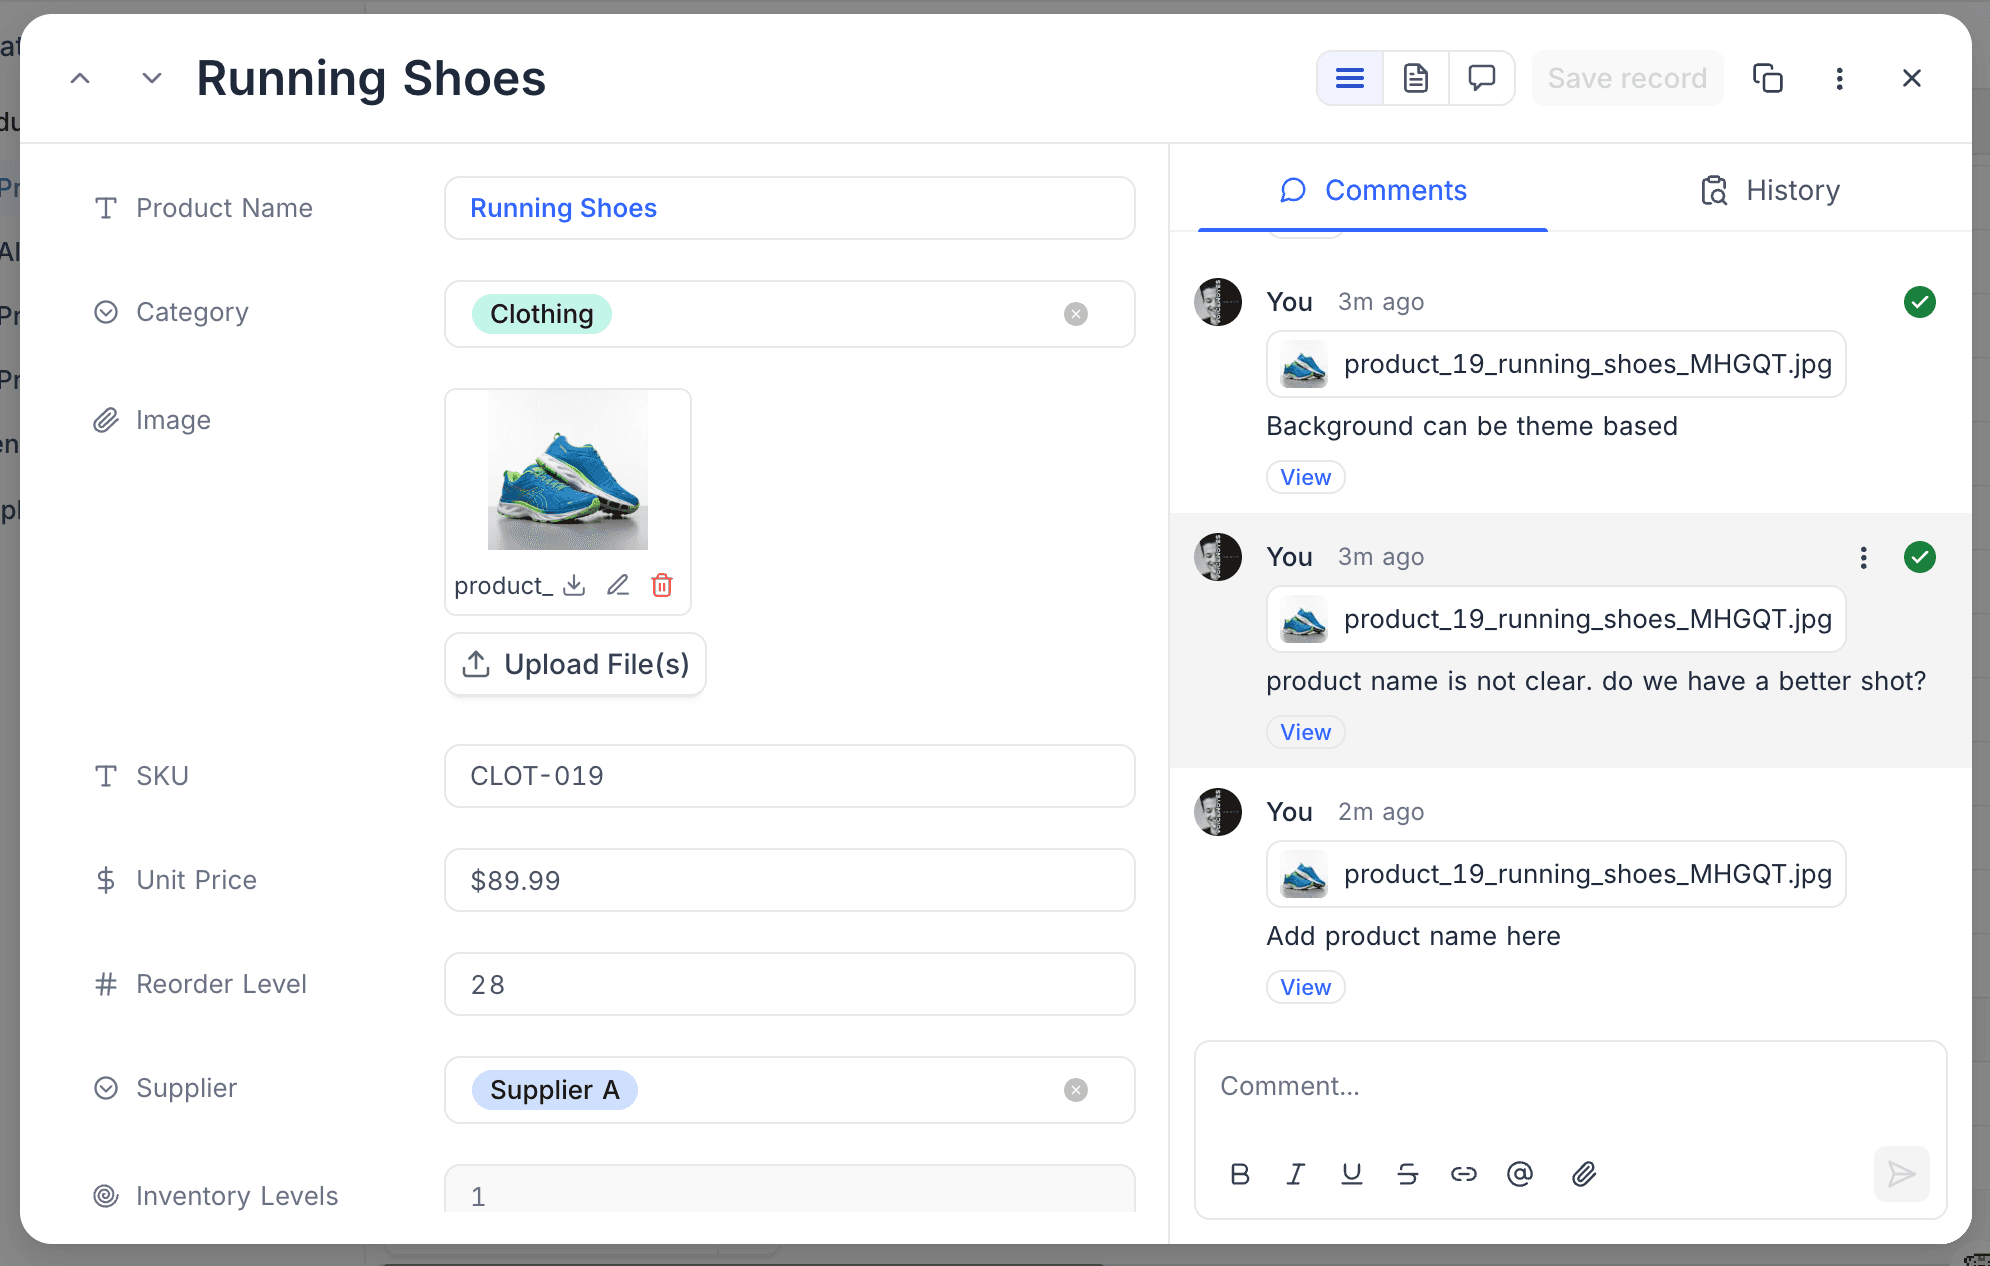
Annotations apply to image attachments only.
Record Actions
Open the More options (...) menu in the header to access per-record actions.
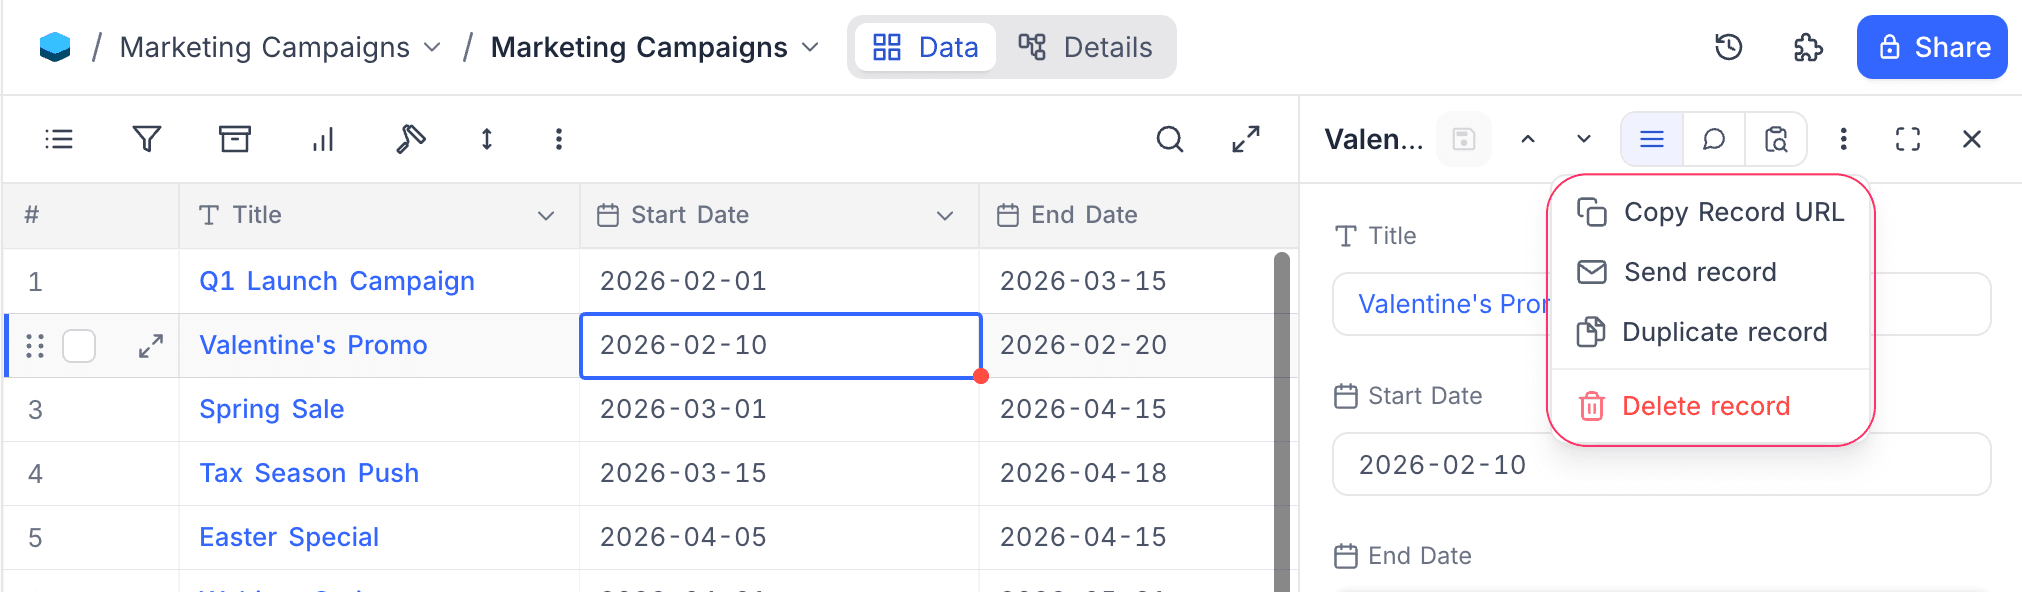
Copy Record URL
Select Copy Record URL to copy a direct link to this record. Opening the link takes other authorised users straight to the same record, with the panel pre-opened.
Send Record ☁
Select Send record to email the record to one or more workspace members. You can pick recipients, optionally override the subject and message, and choose whether to send a copy to yourself.
Duplicate record
Select Duplicate record to create a copy of the current record. The duplicate opens in the panel as an unsaved new record; edit the fields and click Save to persist it.
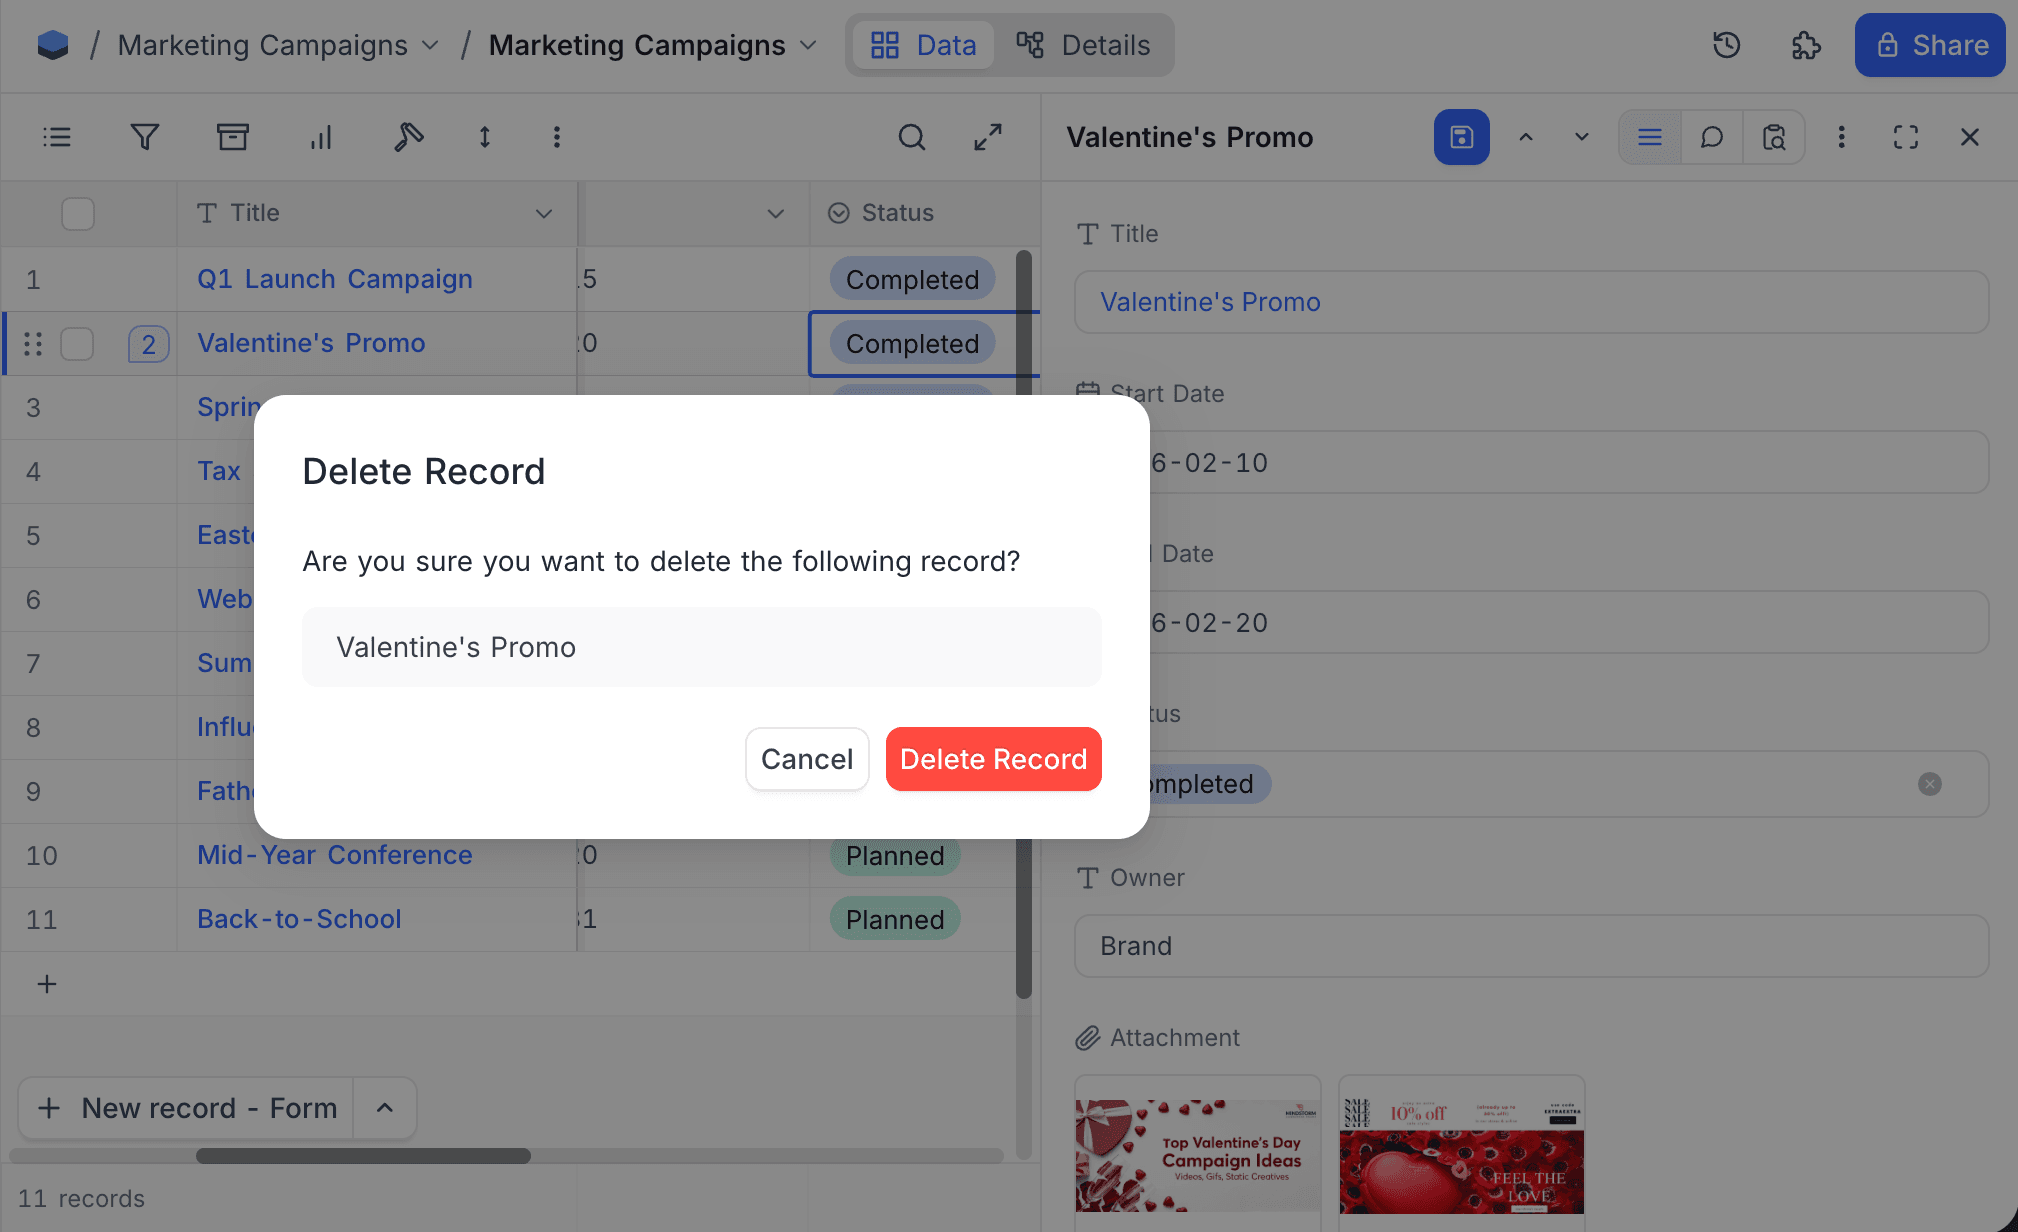
Delete record
Select Delete record and confirm the prompt to delete the record.
Record view modes
When you open a record in fullscreen, the side panel's segmented switch is replaced by the view mode selector, which exposes three layouts tailored to different tasks:
- Field Mode for structured data entry and editing
- File Preview Mode for visually inspecting attachments
- Discussion Mode for seamless collaboration and context-rich conversations
Each mode is purpose-built to help you focus on what matters most, ensuring your workflows remain efficient, intuitive, and collaborative.
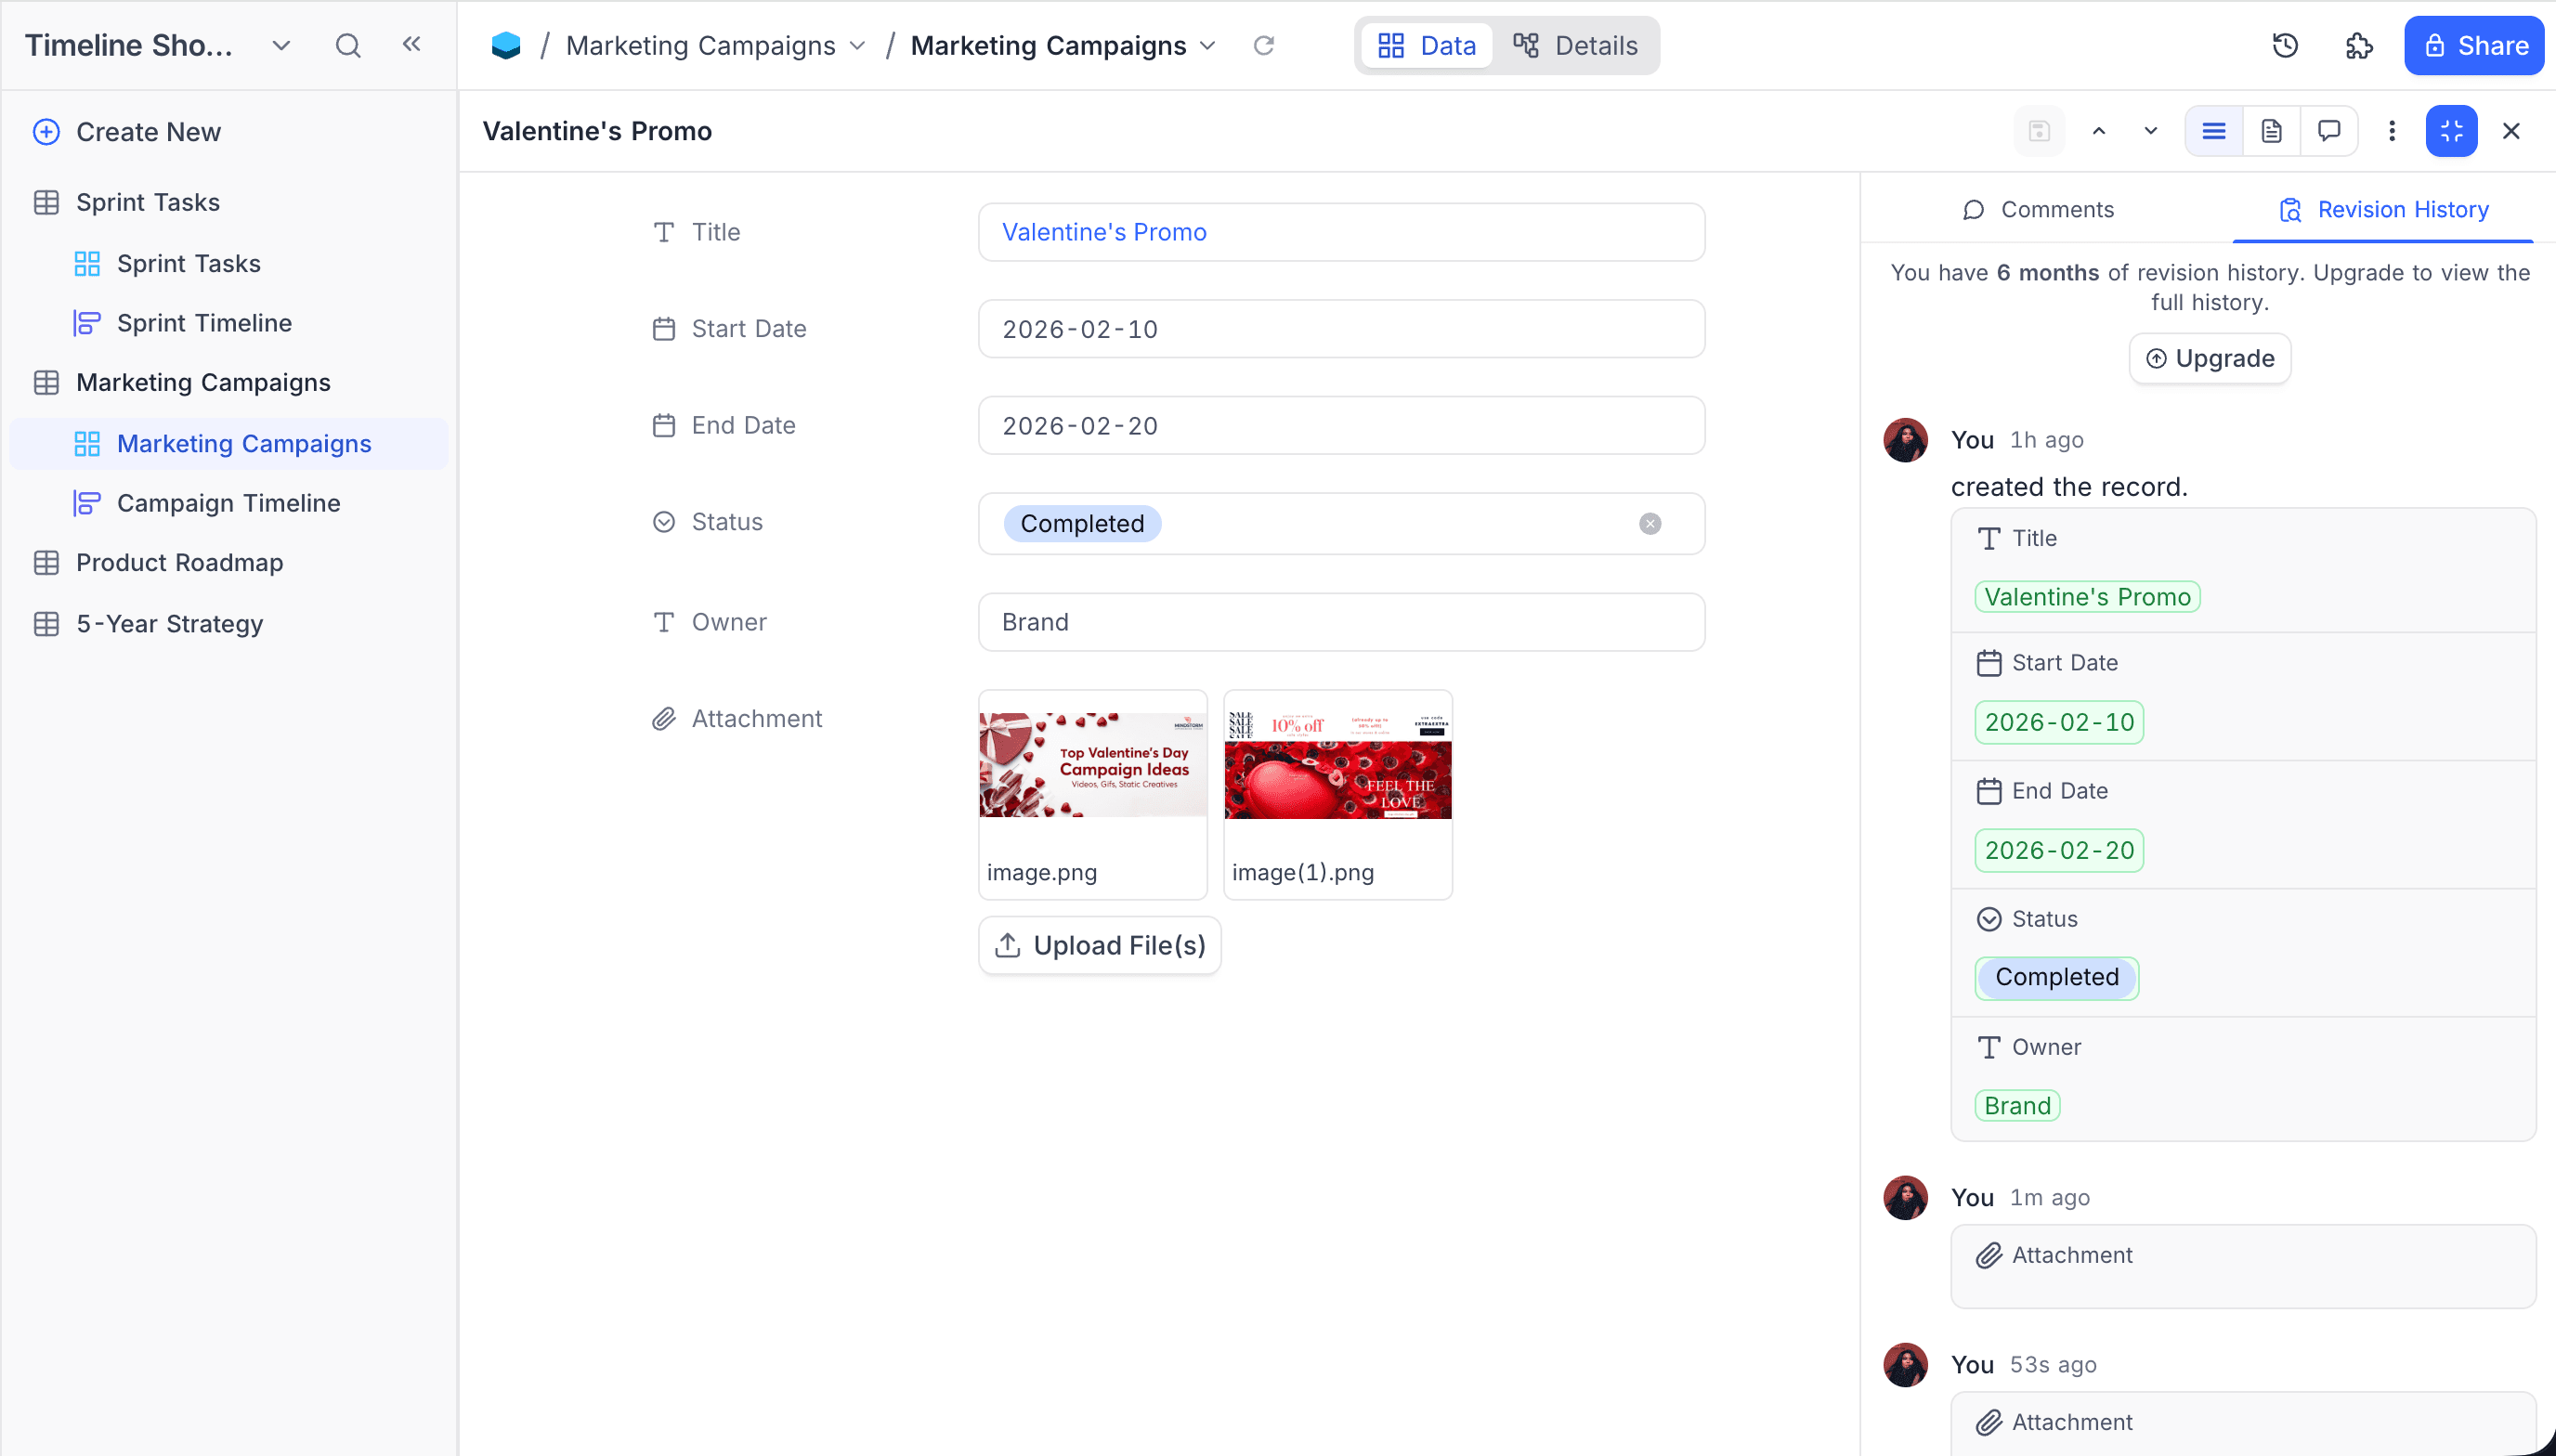
Field Mode
Field Mode is the default fullscreen layout — every field of the record is listed with its label and editor in the main area. The right-side drawer carries the Comments and Revision History tabs so you can review activity while editing.
File Preview Mode ☁
File Preview Mode prioritises visual file content by displaying attachments front and center. It's perfect for image-heavy or document-centric records.
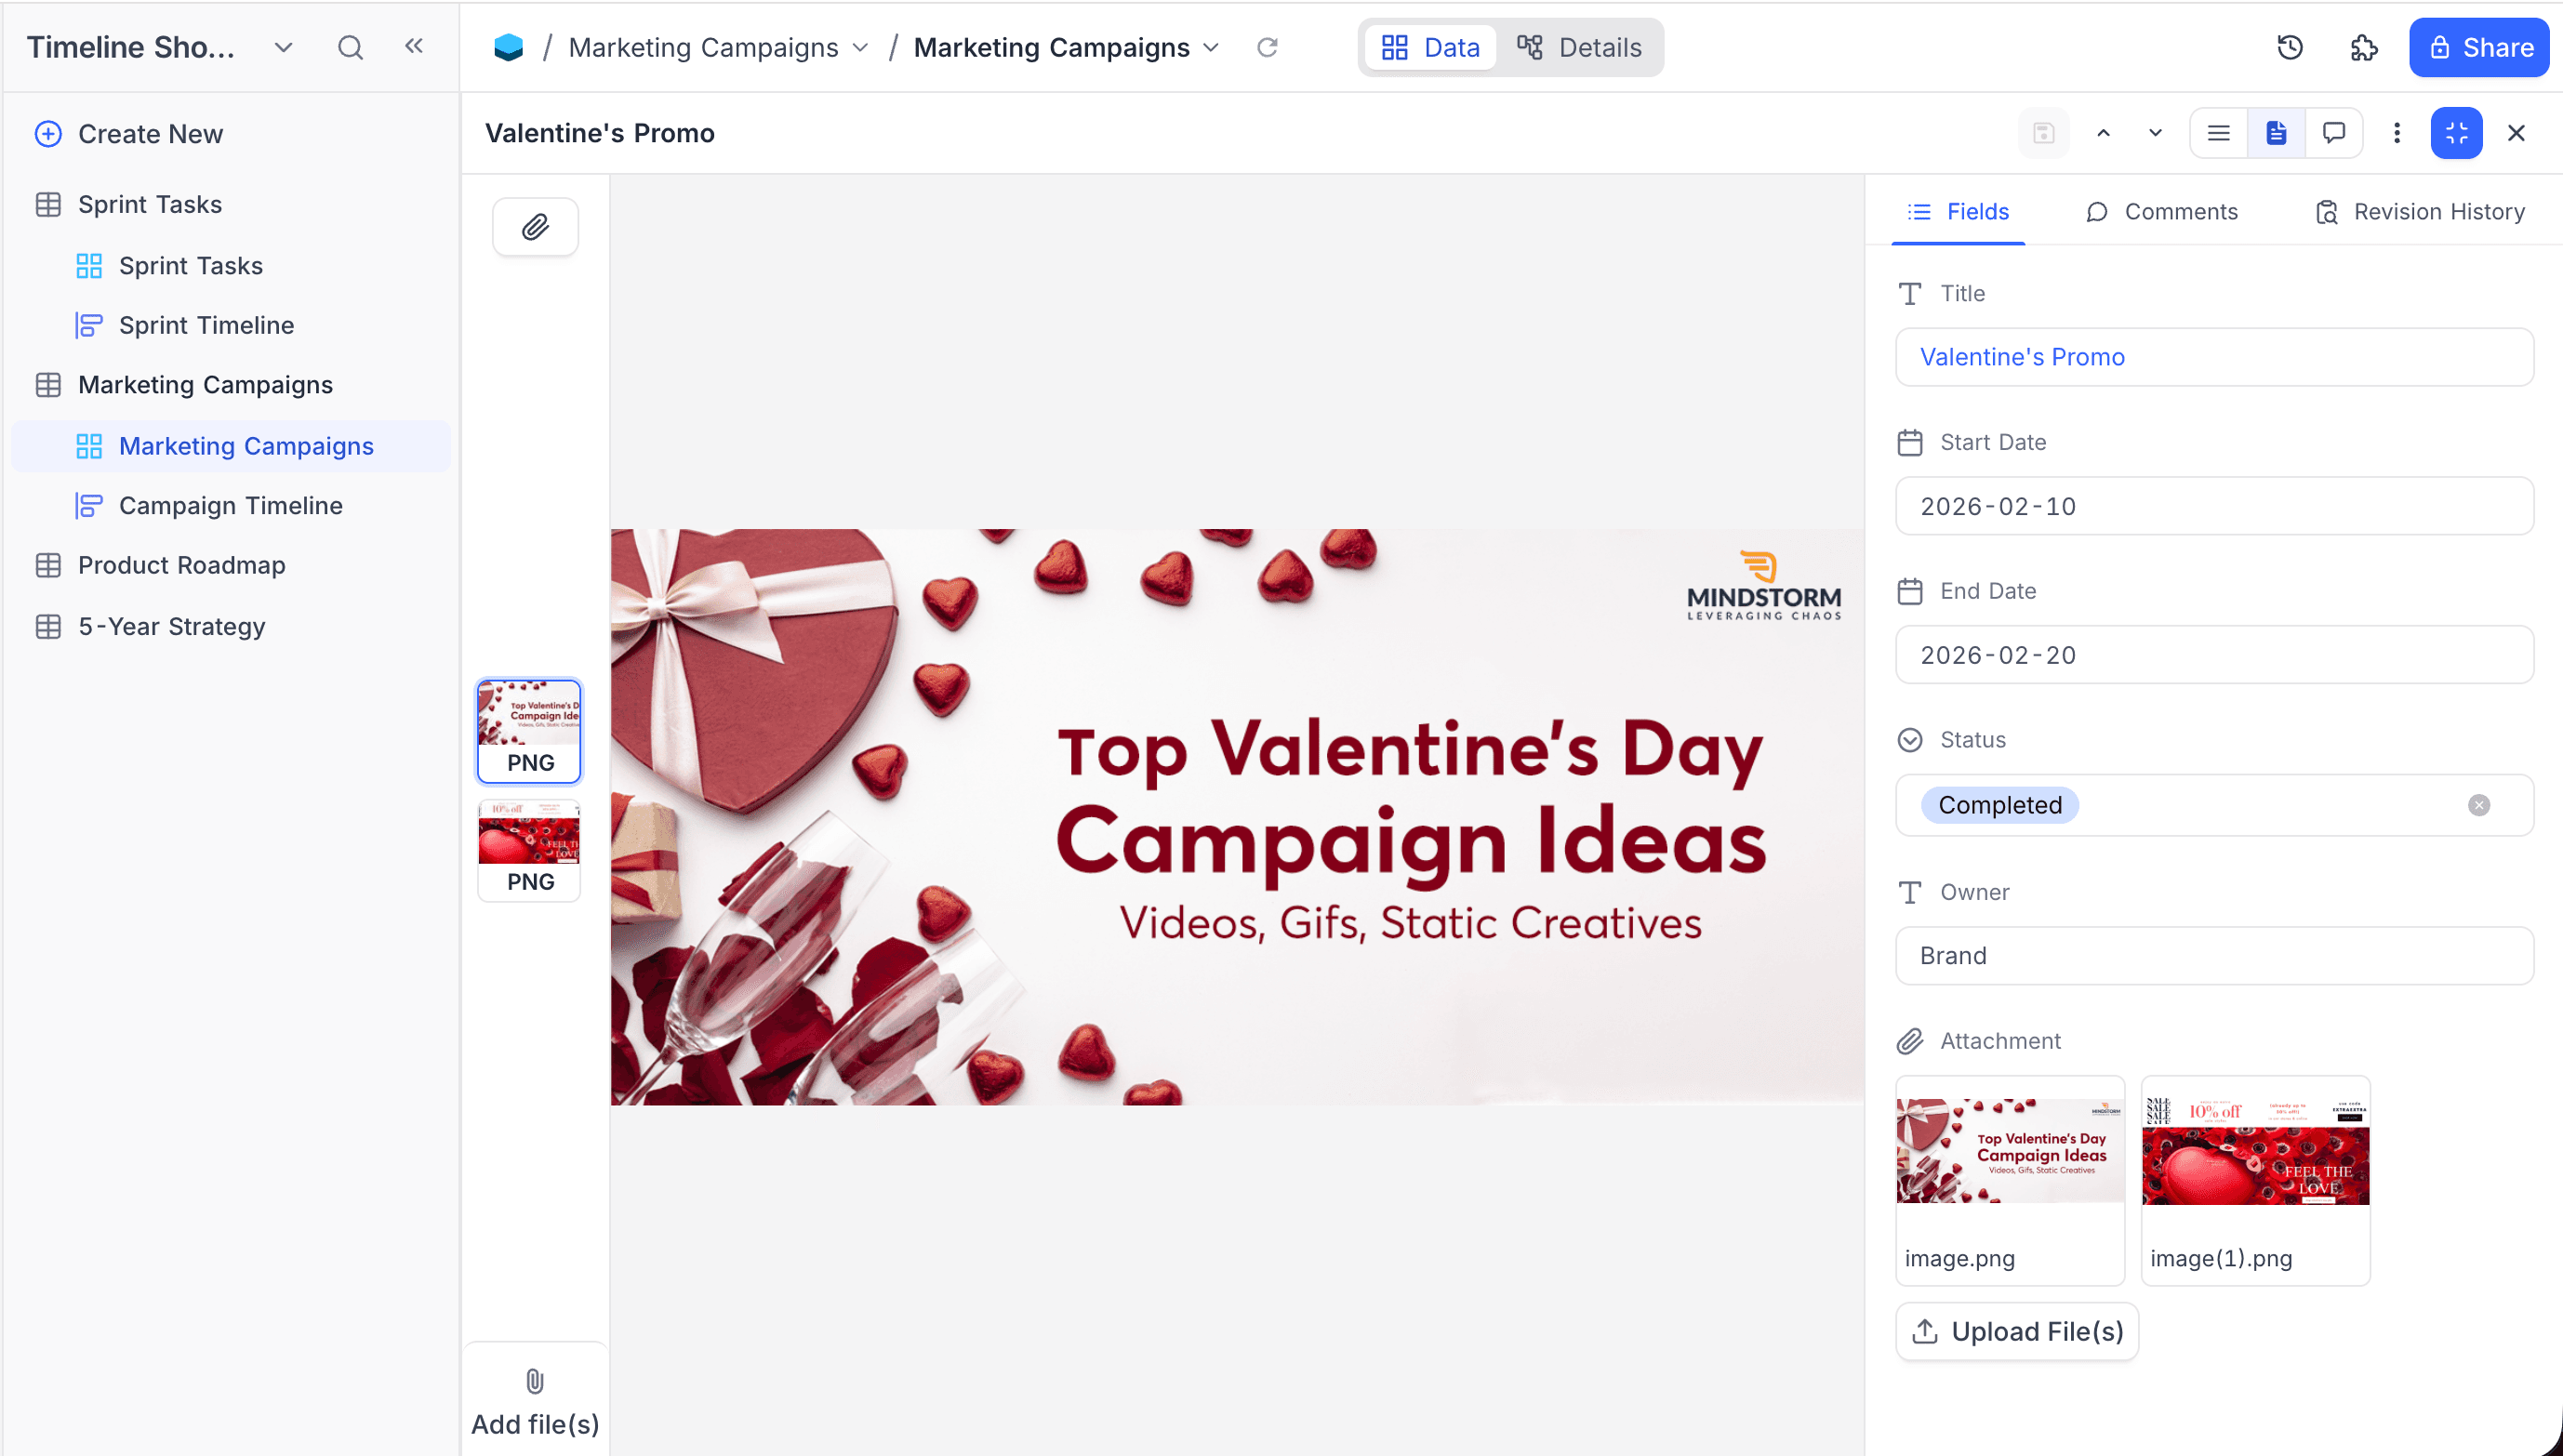
- Configure attachment field — by default the first attachment field is shown. If the record has multiple attachment fields, pick which one to display from the dropdown in the top-left of the preview panel.
- Navigate through files — the first attachment is shown by default. The thumbnails on the left list every file on the record; click a thumbnail to open it.
- Add files — click Add file(s) at the bottom of the thumbnail list to upload new attachments directly from the preview.
Supported files
File Preview Mode supports a wide range of media types:
Image Files
.jpeg, .jpg, .png, .gif, .svg, .bmp, .ico, .webp, .avif, .heif, .heifs, .heic, .heic-sequenceAudio Files
.mp3, .flac, .wav, .m4aVideo Files
.webm, .mpg, .mp2, .mpeg, .ogg, .mp4, .m4v, .avi, .wmv, .mov, .qt, .flv, .mkv, .3gp, .3g2, .vob, .ts, .mp4aDiscussion mode ☁
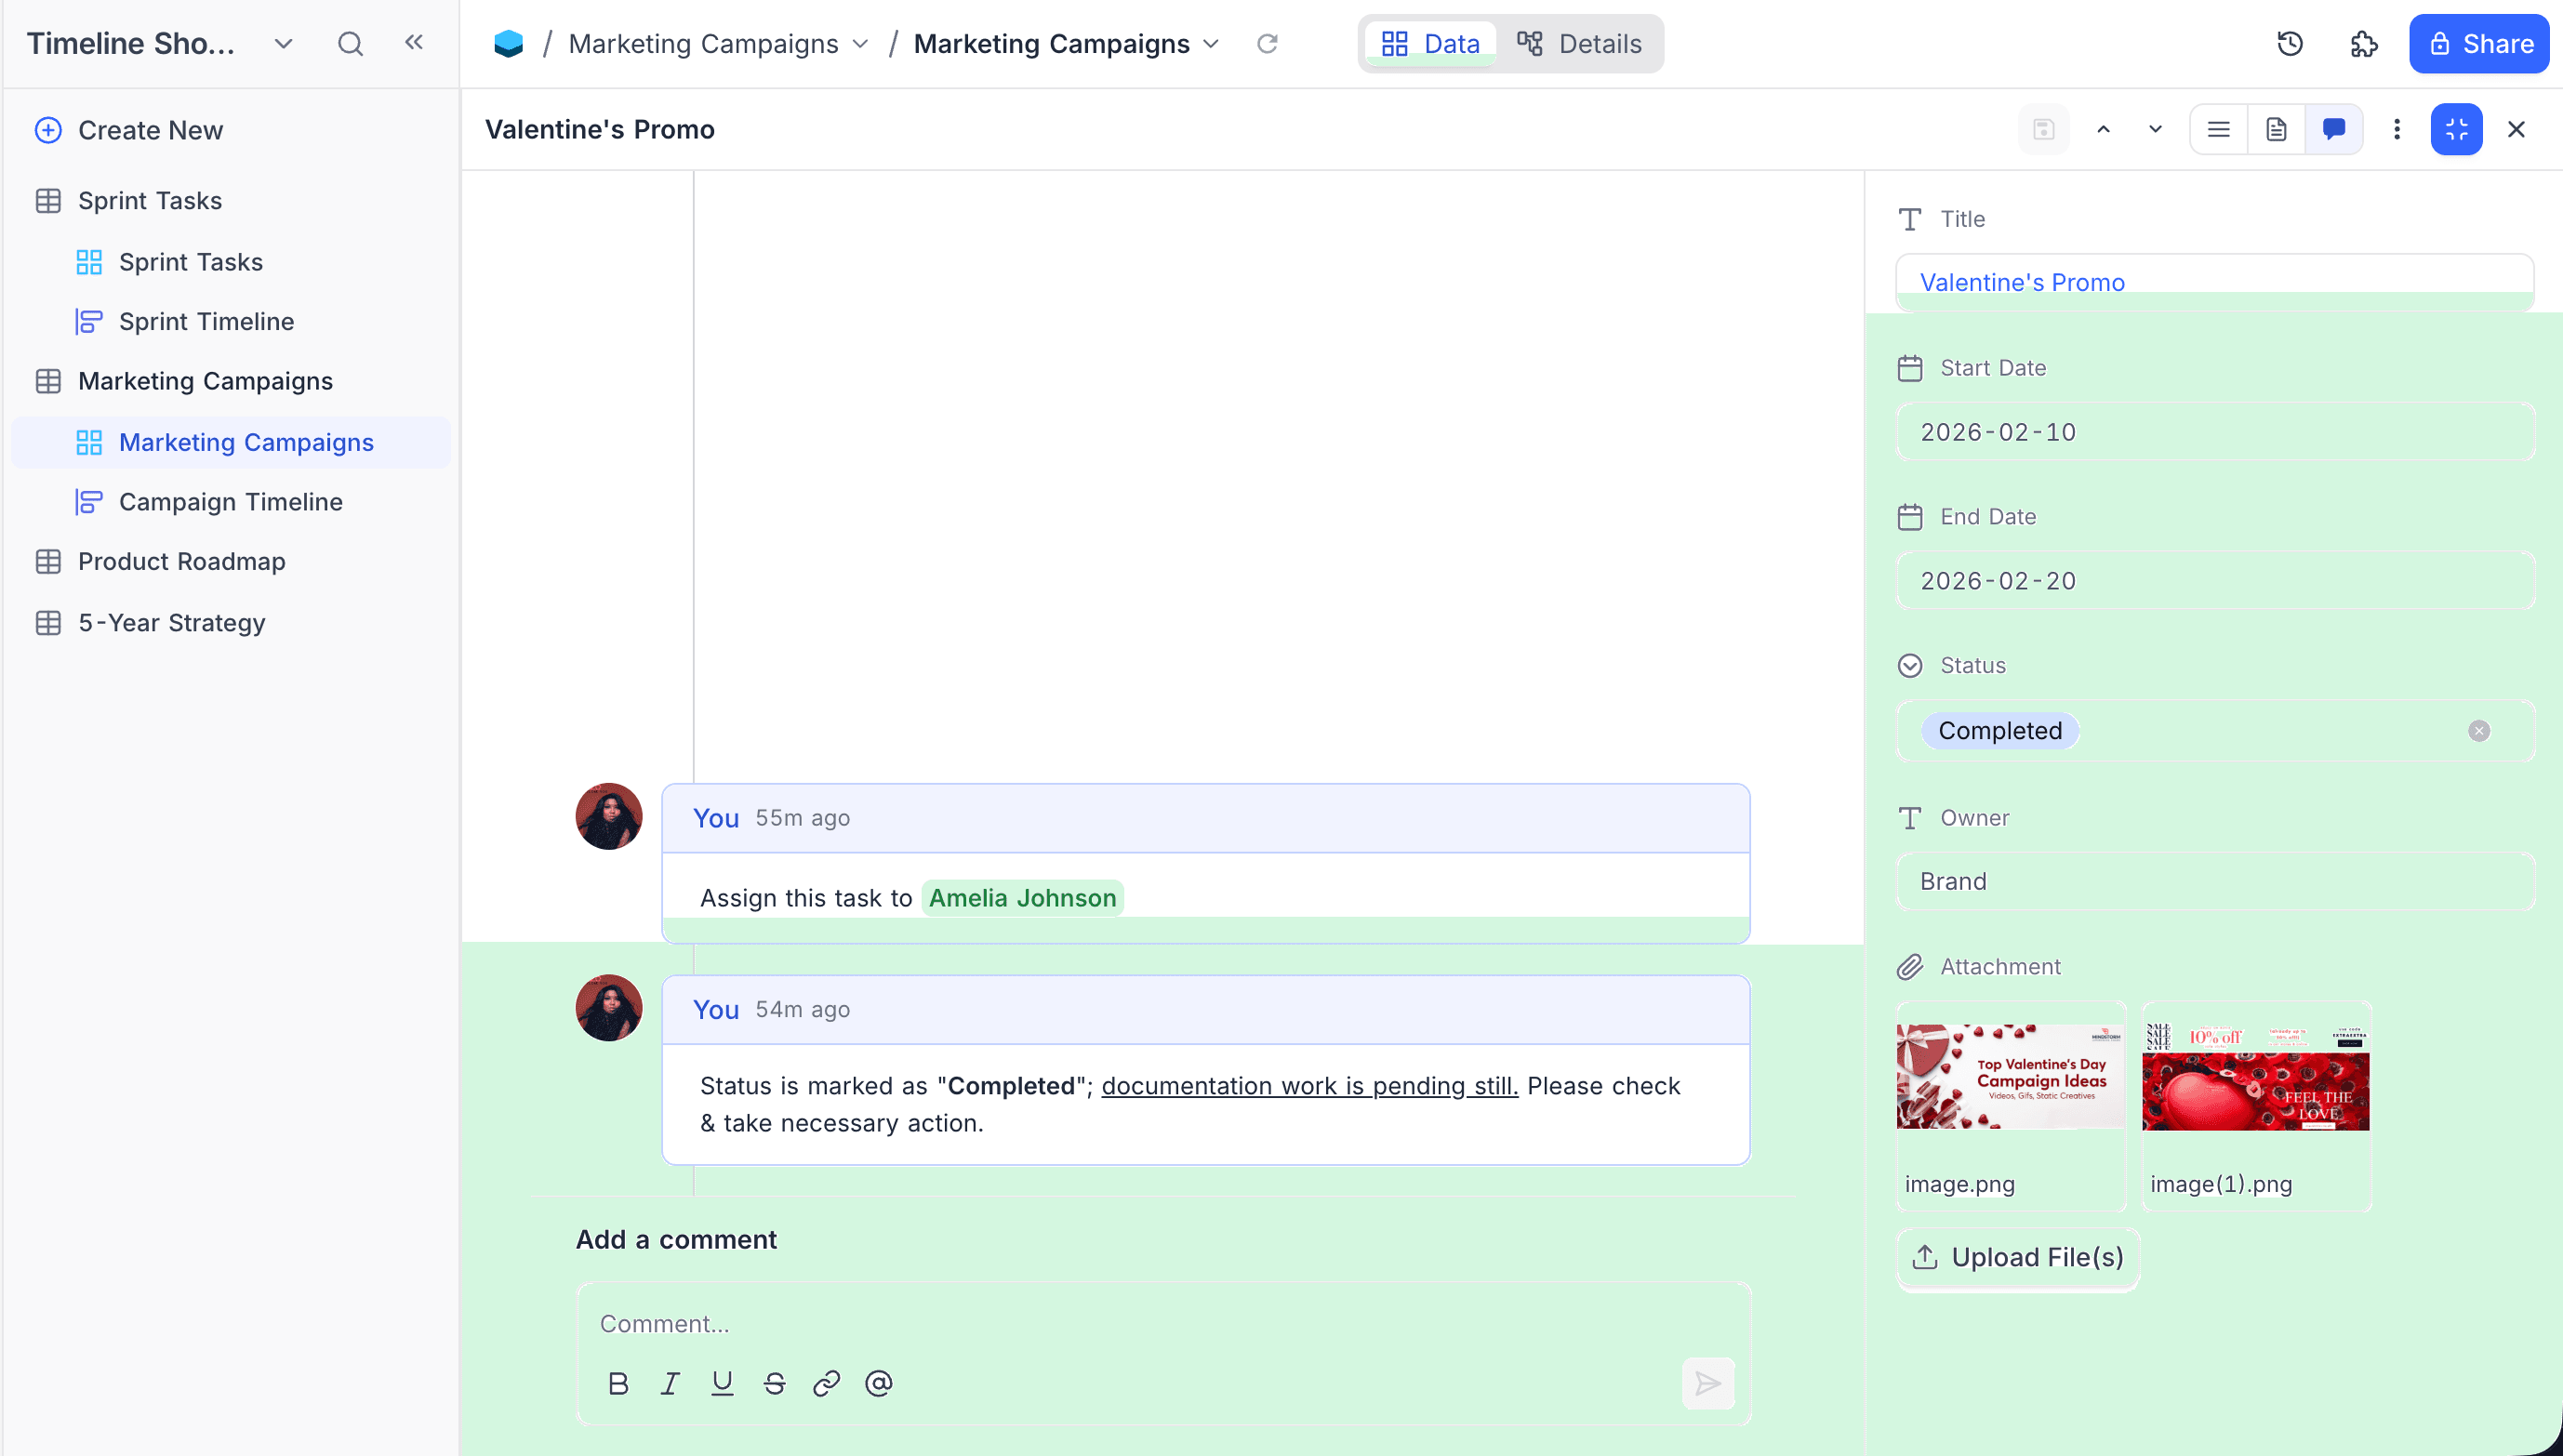
Discussion Mode brings the conversation to the centre of the screen. The full comment thread and revision history fill the main area, with a compact, read-only summary of the record's field values pinned to the right so context stays in view while you discuss.
Switching between modes
Open a record and click Enter fullscreen in the side panel header to reveal the view mode selector. Click the icons to toggle between Field, File Preview, and Discussion layouts. Click Exit fullscreen to return to the side panel without losing your place; closing the record from fullscreen returns you to the grid.
Preferences
The side panel is enabled by default through the Expanded record side panel experimental feature. If you prefer the legacy centered modal, you can switch it off from Account settings → Experimental features. Disabling the flag affects only your account; teammates continue to see whichever layout they have enabled.